Advertisement
®
OFFICE FURNITUR E
1 1
Cam Lock
17 Pcs
1
Line up Cam Lock,
IMPORTANT !!
IMPORTANT !!
Place all wooden parts on a clean and smooth surface such as a rug or carpet to avoid the parts from
Place all wooden parts on a clean and smooth surface such as a rug or carpet to avoid the parts from
being scratched.
being scratched.
Check that you have all parts and hardware.
Check that you have all parts and hardware.
Remove all wrapping materials, including staples & packing straps before you start to assemble.
Remove all wrapping materials, including staples & packing straps before you start to assemble.
Do not tighten any screws or bolts until the unit is completely assembled.
Do not tighten any screws or bolts until the unit is completely assembled.
Keep all hardware parts out of reach of children.
Keep all hardware parts out of reach of children.
Last Updated: 7/2022
Please follow these instructions for easy assembly.
Please follow these instructions for easy assembly.
2
3
Cap(Long)
Klix Cam
17 Pcs
A
B
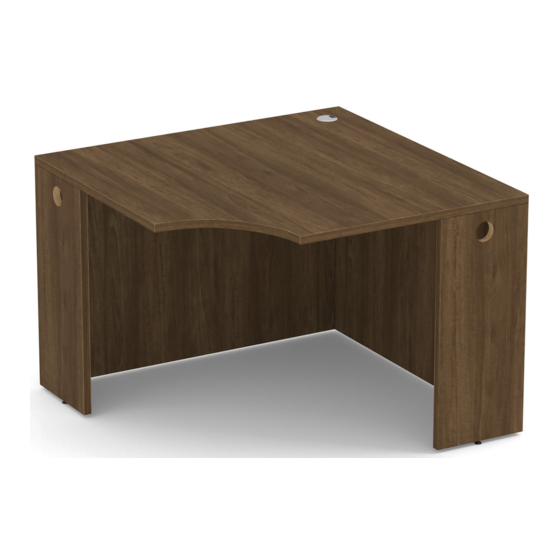
Top Panel
KLIX CAM INSTRUCTIONS
KLIX CAM INSTRUCTIONS
2
Insert the cam with the arrow
pointing towards the hole in the
turn clockwise.
4
5
Housing
Housing
Cap(Short)
2 Pcs
15 Pcs
C
Side Panel
Back Panel #1
edge.
ASSEMBLY INSTRUCTIONS
MODEL NO. PL163
PL 163GG-A1
CORNER UNIT
6
M4 x 65
Adjustable
Allen-Key
Glide
1 Pc
6 Pcs
D
Back Panel #2
3
Insert the Cam Lock into Klix
Cam. Turn Klix Cam to lock.
PAGE 1 OF 3
OFFICESOURCE.COM
Advertisement
Table of Contents

Related Manuals for OfficeSource PL163


Summary of Contents for OfficeSource PL163
- Page 1 ® ASSEMBLY INSTRUCTIONS MODEL NO. PL163 OFFICE FURNITUR E PL 163GG-A1 CORNER UNIT Please follow these instructions for easy assembly. Please follow these instructions for easy assembly. M4 x 65 Adjustable Housing Housing Allen-Key Glide Cap(Long) Cap(Short) Cam Lock Klix Cam...
- Page 2 ® ASSEMBLY INSTRUCTIONS MODEL NO. PL163 OFFICE FURNITUR E PL 163GG-A1 CORNER UNIT Attach the Back Panel (C) to Back Panel (D) by using Cam Lock (1) and Klix Cam (2). Attach the Side Panel (B) to Back Panel by using Cam Lock (1) and Klix Cam (2).
- Page 3 ® ASSEMBLY INSTRUCTIONS MODEL NO. PL163 OFFICE FURNITUR E PL 163GG-A1 CORNER UNIT Screw Adjustable Glide(5) into bottom of the Coner Unit. Turn over the Coner Unit to place the Adjustable Glide (5) to the bottom of the unit. Attach the Top Panel (A) to Back Panel and Side Panel by using Cam Lock (1) and Klix Cam (2).
Need help?
Do you have a question about the PL163 and is the answer not in the manual?
Questions and answers