eitan medical Sapphire User Manual
Multi-therapy & epidural infusion pumps
Hide thumbs
Also See for Sapphire:
- Manual configuration instructions (25 pages) ,
- Patient manual (16 pages) ,
- Manual (8 pages)
Table of Contents
Advertisement
Quick Links
Advertisement
Table of Contents
Troubleshooting

Related Manuals for eitan medical Sapphire


Summary of Contents for eitan medical Sapphire
- Page 2 Federal United States law restricts this device for sale by or on the order of a physician only {21 CFR 801.109(b) (1)}. The Sapphire pump is for use at the direction of, or under the supervision of, licensed physicians and/or licensed healthcare professionals who are trained in the use of the pump and in the administration of blood, medication and parenteral nutrition.
- Page 3 Alternatively, administration sets from different manufacturers that are regulatory cleared and labeled for use with the Sapphire infusion system, can be used as well. The list of regulatory cleared sets needs to be obtained from the official manufacturer’s publication such as manufacturer’s website, catalog or any other formally published...
- Page 4 Technical Assistance For technical questions, troubleshooting assistance and reporting of unexpected events, please contact your local agent/distributor, and refer to Technical Support on page 330. You may also contact Eitan Medical Ltd. support via email to the Contacts following address: support@eitanmedical.com...
-
Page 5: Table Of Contents
Contents ............10 NTRODUCTION Product Overview and Indications ............. 10 Clinical Benefits...................11 Contraindications................11 Dedicated Delivery Mode Configurations........11 Features ....................12 Terms and Abbreviations..............14 Document Conventions ..............16 Safety and Compliance Information........... 16 Symbols and Labeling ................17 Compliance and Classification ............23 Biocompatibility ..................24 Sterilization ..................24 Degree of Protection Against Ingress of Water and Dust ....24 Warnings and Safety Precautions ............ - Page 6 Sapphire Connect (Version 1.0)............56 Power Supply..................79 Integrated Power Supply..............79 USB-C Power Supply (Sapphire Connect power supply)....81 External Battery Pack ................83 Multi-Pump Mounting System ............90 Administration Sets................95 ....98 UNDAMENTAL ONCEPTS AND PERATIONS Working with the Main Display ............98 Using the Keypad................98 Overview of Toolbar Function Keys..........100...
- Page 7 Continuous Mode: Mid-infusion Actions........141 Multi-step Mode ................156 Infusion Parameters: Multi-step Mode ........... 157 Starting a Multi-step Infusion ............157 Multi-step Mode: Mid-infusion Actions.......... 163 Total Parenteral Nutrition (TPN) Mode ..........165 Infusion Parameters: TPN Mode ............. 166 Starting a TPN Infusion ..............167 Intermittent Mode ................
- Page 8 Monitoring the Accumulated Volume Infused (Shift's Total) .... 264 Viewing Accumulated VI..............264 Clearing Accumulated VI..............265 ............266 IBRARY Overview ..................266 Clinical Care Area (CCA) ..............267 Changing a CCA ................267 Programming a New Infusion with the Drug Library ......271 Drug Name ..................271 Sapphire Infusion Pump User Manual...
- Page 9 Cleaning and Disinfection Procedure ..........292 Reprocessing the pump when used by a single patient multiple times ............294 Cleaning Sapphire Connect and Electric Connectors of Sapphire Accessories ..........295 Preventive Maintenance ..............298 Routine Inspection and Maintenance Tasks ........298 Alarm Testing ..................299 Certification..................
- Page 10 Pump Specifications ................. 314 Average Bolus Volume After Occlusion ........... 316 Environmental Specifications ............317 Operating Conditions...............317 Environmental Conditions for Transport and Storage ....317 Electromagnetic Compatibility Statement ........319 Electromagnetic Emission ..............319 Electromagnetic Immunity ...............320 ..........328 IMITED ARRANTY Sapphire Infusion Pump User Manual...
-
Page 11: Introduction
The dedicated Eitan Medical Sapphire administration sets for the Sapphire Infusion Pump are intended for single-patient use and single-use only. This user manual supports the use of Sapphire software version r16.10. Verify that the software version that appears on the Sapphire turn-on screen is r16.10. The version... -
Page 12: Clinical Benefits
The pump has no contraindications. Dedicated Delivery Mode Configurations To promote safety and convenience of use in different environments, the Sapphire Infusion pump can be preconfigured to support only certain delivery modes. The different types of configurations available on various pump types, are described in the following table. -
Page 13: Features
(Figure 3.1 page 105). Features The features of the Sapphire pump are designed to simplify treatment and ensure patient safety. Treatment-Related Features • Single platform device: The delivery mode of the pump can be changed, according to the required type of infusion. - Page 14 Easy alarm troubleshooting: Alarm screens display specific instructions about how to manage the alarm or resolve the problem. • Drug Library: Enables safer practice according to clinical care area. Programming is done with drug specific name, profile, hard limits and recommended (soft) limits. Sapphire Infusion Pump User Manual...
-
Page 15: Terms And Abbreviations
External Battery Pack Electrocardiogram Eitan Medical Sapphire Sapphire administration set administration set Electromagnetic compatibility Electromagnetic interference Epi. Int Epidural Intermittent Hour Kilograms Keep Vein Open Micrograms Milliequivalents Minutes Milligrams Milliliters mmol Millimoles Mounting System Sapphire Multi-Pump Mounting System Magnetic Resonance Imaging Introduction... - Page 16 PIEB Programmed Intermittent Epidural Bolus Prim. Primary RFID Radio Frequency Identification Sec. Secondary Total Parenteral Nutrition Volume Infused VTBI Volume To Be Infused Eitan Medical Eitan Medical Ltd. Sapphire pump Eitan Sapphire infusion pump family Sapphire Infusion Pump User Manual...
-
Page 17: Document Conventions
Document Conventions The following messages in this manual prompt readers to pay special attention to specific points: Warnings indicate instructions for serious adverse reactions and potential safety hazards which, if not followed, may result in personal injury. Cautions indicate instructions which, if not followed, may result in damage to the equipment or to the quality of treatment. -
Page 18: Symbols And Labeling
Symbols and Labeling The following table describes the labels and symbols that may appear on the Sapphire pumps or pump accessories and their components, and identifies their locations on the equipment. Symbol Description Location Serial number. Back of the pump casing,... - Page 19 Consult instructions for use. EBP, on the back of the mini cradle, and PCA Lockbox 500mL. Follow instructions for use. Back of the pump casing, on the back of Sapphire Connect, PCA Lockbox 250mL, and Mounting System. Introduction...
- Page 20 Date of manufacture (year). Back of the pump casing. Name and address of the Back of the pump casing, manufacturer. on the back of Sapphire Connect, on the back of the mini cradle, EBP, PCA Lockboxes 100, 250 and 500mL, and Mounting System.
- Page 21 Rx Only US federal law restricts this Back of the pump casing, device to prescription only. on the back of the Sapphire Connect, on the back of the mini cradle, PCA Lockboxes 100, 250, and 500mL. Waste Electrical and Back of the pump casing...
- Page 22 Front casing of the pump, and Off. below the touch screen. MR Unsafe (Do not use in Back of the pump casing, MR environment) and the back of Sapphire Connect. Connectivity — LED, Side of Sapphire Connect, indicates the communication below the connectivity status of the Sapphire LED.
- Page 23 Symbol Description Location Output current Front of Sapphire Connect Direct current Front of Sapphire Connect Indicates a carrier that Back of the pump casing, contains unique device all Sapphire accessories. identifier information. Do not use if package is On the products label or...
-
Page 24: Compliance And Classification
• IEC 60601-1-2: Electromagnetic compatibility. • IEC 60601-2-24: Infusion pumps and controllers, which classifies the Sapphire pump as a Type 4 pump (continuous infusion flow, combined with bolus delivery). • IEC 60601-1-11: Requirements for medical electrical equipment and medical electrical systems used in the home healthcare environment. -
Page 25: Biocompatibility
ISO 10993-1 for biocompatibility. Sterilization Administration sets that are manufactured by Eitan Medical for the Sapphire pump, are sterilized with ethylene oxide (EO), according to the sterilization requirements of ISO 11135. -
Page 26: Warnings And Safety Precautions
If the pump is dropped or appears to be damaged, it should be taken out of service and inspected by Eitan Medical Ltd. trained, qualified personnel only. Sapphire Infusion Pump User Manual... - Page 27 Detailed instructions are available in the service manual. Eitan Medical Ltd. does not approve any changes or modifications to this device by the user. Any changes or modifications could void the user's authority to operate the equipment.
- Page 28 To promote safety, always adhere to the warnings listed below. Electrical Safety Warnings • Access to any internal part of the Sapphire pump and the performance of any service procedures should be carried out only by a qualified service technician, fully trained in the operation of the infusion pump.
- Page 29 Do not touch the pump to cradle (P2C) connection in the back on the pump. Electromagnetic Compatibility The Sapphire infusion system is designed to conform with electromagnetic compatibility (EMC) standard IEC 60601-1-2 and to operate accurately in conjunction with other medical equipment which also meets the requirements of this standard. To...
- Page 30 Increase the distance separating between the equipment parts • Connect the equipment to an outlet on a circuit different from that to which the other device(s) is connected • Consult the manufacturer or field service technician for help Sapphire Infusion Pump User Manual...
-
Page 31: Proper Use Of The Pump
Using the pump not according to its labeling or intended use might result in the following side effects: pain, exacerbation of illness, injury or harm, stroke, electrocution, exsanguination trauma and death. Although the Sapphire pump has been designed and manufactured to exacting specifications, it is not intended to replace trained personnel in the monitoring of infusions. - Page 32 Membrane Oxygenation (ECMO) systems. • Use only Sapphire dedicated accessories and cables. The use of accessories and cables other than those specified in this manual, with the exception of cables sold by Eitan Medical Ltd. as replacement parts for internal components, may result in increased emissions or decreased immunity of the pump.
- Page 33 Do not use a damaged administration set or damaged set components or packaging. Always refer to the instructions for use that are included. • Sapphire administration sets are for single patient use only, and should not be sterilized or cleaned for re-use. •...
- Page 34 • The administration set must be replaced according to the hospital policy of infection control and treatment protocol. Sapphire sets allow accurate delivery up to 96 hours. If you program rate, dose or bolus combinations which exceed a 96-hour schedule, make sure that you replace the administration set on time.
- Page 35 • Air Detection: • Air detection is an important safety feature of the Sapphire pump. If the air detection is disabled (OFF), use a set with an air-eliminating filter to prevent injury to the patient due to an air embolus.
- Page 36 The demand bolus option should be used only by the patient. Administration of a demand bolus by anyone other than the patient (especially if the patient is sleeping or sedated) incurs the risk of potentially fatal overdose. Sapphire Infusion Pump User Manual...
- Page 37 Epidural Delivery Mode Epidural administration of anesthetics is limited to short term infusion (not to exceed 96 hours) with indwelling catheters specifically identified for short term anesthetic epidural drug delivery. Epidural Delivery: Safety Warnings • Epidural administration of drugs other than those indicated for epidural use could result in serious injury to the patient.
- Page 38 This page is left intentionally blank Sapphire Infusion Pump User Manual...
-
Page 39: Components, Accessories, And Administration Sets
..............Hardware and Software Components ..................Using Pump Accessories Unpacking the Pump When unpacking the Sapphire pump, inspect each item to ensure that it is undamaged. The following items should be included: • Sapphire pump (with Li-Ion Battery enclosed) •... -
Page 40: Hardware And Software Components
• Green: The pump is running. On/Off button Enables the user to turn the pump On and Off. Stop button Enables the user to temporarily stop an infusion. Sapphire Infusion Pump User Manual... -
Page 41: Touch Screen
The touch screen is used to configure and operate the pump. The main areas of the screen are listed and described in the table following the figure. Touch Screen Areas Figure 2.2. Sapphire without Drug Library Sapphire with Drug Library Components, Accessories, and Administration Sets... - Page 42 Toolbar Contains function keys that enable you to perform common operations, such as confirming settings, pausing infusions, locking the screen, etc. Sapphire Infusion Pump User Manual...
-
Page 43: Using Pump Accessories
Administration Sets Mini Cradle The small, easy to use bedside mini cradle offers flexible positioning of the pump at any angle or height. Eitan Medical’s Mini Cradles are provided in one of the following configurations: • With an optional connection splitter at the base (Figure 2.3, #3). - Page 44 IV pole. To unlock the knob, use the supplied key or pin. Connection splitter Located on the base of the mini cradle. Used for (optional) the RS-232 communication cable (optional) and power-supply connections. Sapphire Infusion Pump User Manual...
- Page 45 Figure 2.4. Mini-Cradle with Integrated Power Supply Number Component Description/Notes Integrated Power Located on the base of the mini cradle. Used for Supply (optional) power-supply connection. Cord retainer Located at the bottom of the integrated power supply. It holds the AC power cord in the IPS power socket. AC Power Cord Medical Grade AC Power Cord that connected the IPS to the wall socket.
- Page 46 Ensure that the pump is seated on both hooks. To release the pump, press the pump hook located on the top of the pump holder (Figure 2.5, #2). To open and release the mini cradle, rotate the knob. Mini cradle Hooks Figure 2.5. Sapphire Infusion Pump User Manual...
-
Page 47: Pca Lockboxes
PCA Lockboxes PCA Lockboxes are designed to secure the IV bag, primarily for treatments involving narcotics or opioids, without interrupting the treatment workflow. PCA Lockbox 500mL This Lockbox can accommodate IV bags of up to 500 mL. PCA Lockbox 500mL and Mini cradle Figure 2.6. - Page 48 Verify that there are no kinks in the administration set, so the infusion can run smoothly. Unclamp the administration set. Then, close both locks of the Lockbox and lock it, using the supplied key (Figure 2.7, #6). Sapphire Infusion Pump User Manual...
- Page 49 PCA Lockbox 100mL This Lockbox can accommodate IV bags of up to 100 mL. PCA Lockbox 100mL Figure 2.8. The following steps explain the workflow of using the PCA Lockbox 100mL: Using the key supplied with the Lockbox (Figure 2.8, #1), open the box and remove the plastic cover.
- Page 50 Close the box by sliding back the plastic cover (Figure 2.9, #3). Place the pump on the plastic cover (Figure 2.9, # ), and secure it by locking the box with the supplied key (Figure 2.9, #5). Sapphire Infusion Pump User Manual...
-
Page 51: Pca Lockbox 250Ml
(Figure 2.10B). Make sure the Lockbox is secured to the mini cradle. When using the Lockbox with Sapphire Connect, attach the entire unit via Sapphire Connect with the same bottom-to-top action. For more information about using Sapphire Connect, see Sapphire Connect (Version 1.0) - Page 52 Attaching the Lockbox to the Mini Cradle Figure 2.10. Attaching the Lockbox Sapphire Connect to the Mini Figure 2.11. Cradle Sapphire Infusion Pump User Manual...
- Page 53 Unlock the Lockbox, and open the door. To lock and unlock the Lockbox the key must be first pressed inwards before turned. Insert the pump onto the bottom hooks of the Lockbox, and then click it into the top hook. Make sure the organizer is aligned with the inner Lockbox wall (Figure 2.12, #1);...
- Page 54 2.13). The shoulder strap can be used with a pouch for storing the power supply when it is not plugged in. Do not grab the Lockbox by the handle when attached to an IV pole. Sapphire Infusion Pump User Manual...
- Page 55 Removing the Lockbox from the IV pole when using Sapphire Connect When using with Sapphire Connect, remove the lockbox from the cradle by pulling the top hook of the mini cradle — secure the Lockbox by holding it while releasing.
-
Page 56: Pca/Pcea/Pieb Bolus Handle
When using a gray-buttoned bolus handle, it may be connected to any port; but the Sapphire Connect or communication cable should not be connected simultaneously. If a blue-buttoned bolus handle is switched to a gray-buttoned bolus handle the treatment must be re-started. -
Page 57: Sapphire Connect (Version 1.0)
Sapphire Connect (Version 1.0) Sapphire Connect is an accessory for the Sapphire infusion pump. It is intended for use in clinical, ambulatory, and home environments. The Sapphire Connect snaps onto the Sapphire infusion pump to enable connectivity. Sapphire Connect's secure connection and wireless capabilities allow Sapphire... - Page 58 Before using, make sure that Sapphire Connect and its power supply and cord are dry. • While the Sapphire pump is attached to Sapphire Connect, do not connect the pump to a PC tool or a gray-buttoned bolus handle. •...
- Page 59 Components Sapphire Connect Components Figure 2.16. Name Description Bottom hooks Attaches to the Sapphire pump. Top hook when pressed, releases the pump. Power button When pressed, turns Sapphire Connect ON/OFF. Communication LED Indicates the communication status. Charging LED Indicates charging status.
- Page 60 Self-test is in progress. Steady Sapphire Connect is ON and communication is established. Flashing every second Sapphire Connect is ON and in idle mode. Sapphire Connect enters idle mode when it is operating on a battery, and not sending data or acquiring location.
- Page 61 Charging Sapphire Connect Figure 2.17. To preserve battery life, connect Sapphire Connect to a power supply whenever possible. Sapphire Connect can also be charged via a power supply connected to a mini cradle with splitter or mini cradle with IPS (Figure 2.18).
- Page 62 Turn Sapphire Connect ON by pressing the power button once. The power-up sound is heard. The Sapphire Connect will run a self-test and establish cellular communication. During this time, the communication LED should blink blue. When cellular communication is available, this process should take up to three minutes.
- Page 63 Attach Sapphire Connect to the pump by inserting the bottom of the pump onto the Sapphire Connect bottom hooks (Figure 2.19, A). Press the top of the pump back until it clicks into place on the top hook (Figure 2.19, B).
- Page 64 Sapphire Connect Over-The-Air Software Update Sapphire Connect checks for updates to its own software every time it is turned On, and every 24 hours. If a Sapphire Connect Software update is available and Sapphire Connect has been configured accordingly (through the Insights Tool), Sapphire Connect will perform a Software update.
- Page 65 Releasing Sapphire Connect from Sapphire Pump Figure 2.21. To turn off Sapphire Connect, press and hold the power button for 5 seconds. The communication LED turns off, and the power-down sound is heard. Sapphire Connect needs to be turned On to allow data transmission.
- Page 66 Sapphire Connect is designed to work with multiple Sapphire accessories such as Mini-cradle, Bolus Handle, and Lockbox 250mL, by supporting the same connection mechanisms. Sapphire Connect cannot be used with the PCA Lockbox 100mL, External Battery Pack, or gray buttoned bolus handle. Using Sapphire Connect with a Mini-Cradle When the pump is connected to Sapphire Connect, it can still be charged via a power enabled Mini-Cradle.
- Page 67 Figure 2.22. > To re m ov e f ro m t h e mini c ra dle: Hold the pump securely. Push back on the top hook of the mini cradle until the combined pump-Sapphire Connect unit is released (Figure 2.23).
- Page 68 Make sure that the Lockbox is seated securely on both hooks of Sapphire Connect. Attaching Sapphire Connect to Lockbox Figure 2.24. If using with a mini cradle, attach the entire unit to the mini cradle via Sapphire Connect. For more information about using the lockbox, see on page 46.
- Page 69 Opening the Lockbox Figure 2.25. Hold Sapphire Connect and the Lockbox securely. From the inside of the Lockbox, press the top hook up and back to release Sapphire Connect (Figure 2.26). Components, Accessories, and Administration Sets...
- Page 70 Releasing Sapphire Connect from Lockbox Figure 2.26. Sapphire Infusion Pump User Manual...
- Page 71 Demand Bolus Handle (Blue Buttoned) Sapphire Connect can be used with the blue buttoned bolus handle. When using a bolus handle, connect the bolus handle by attaching it to the socket at the bottom of the pump. Make sure that the white arrow or red dot on the cable connector is facing up.
- Page 72 Troubleshooting Problem / Probable Indication Meaning Cause Action • Communication Sapphire Reset the Sapphire Connect by Temporary LED is steady Connect has pressing the on/off button for internal red. encountered an 11 seconds. Then press the on/ communication error. off button again to turn on the error.
- Page 73 • The power connected to the mains plugged in. supply has power supply. • become Try charging the Sapphire disconnected Connect unit with another from the mains power supply. power supply. • Try charging the Sapphire • The power...
- Page 74 50 kPa to 106 kPa 50 kPa to 106 kPa 70 kPa to 106 kPa (kPa) * These are the same environmental conditions as for the Sapphire infusion pump. • Storage at low temperatures may affect initial battery performance. •...
- Page 75 Includes a 'do not track me' and a cellular communication disable function. Read Privacy policy at eitanmedical.com/privacy-policy/. Power Inputs USB-C; can also be charged using Sapphire mini cradle with splitter or IPS Battery Type Rechargeable Lithium-Ion battery (1 cell) Battery Capacity...
- Page 76 • Reorient or relocate the receiving antenna. • Increase the separation between the equipment and receiver. • Connect the equipment to an outlet on a circuit different from that to which the receiver is connected. Sapphire Infusion Pump User Manual...
- Page 77 • Consult the dealer or an experienced radio/TV technician. CAN ICES-003 (B) This Class B digital apparatus complies with Canadian ICES-003. In order to maintain compliance with FCC regulations, shielded cables must be used with this equipment. Operation with non-approved equipment or unshielded cables is likely to result in interference to radio and TV reception.
- Page 78 2A3JW-SAPPHIRE To ensure that RF exposure levels remain at or below the tested levels, use a belt-clip, holster, or similar accessory that maintains a minimum separation distance of 5mm between your body and the device. Sapphire Infusion Pump User Manual...
- Page 79 RF Exposure Information (SAR)- IC The radiated output power of the Wireless Device is below the Industry Canada (IC) radio frequency exposure limits. The Wireless Device should be used in such a manner such that the potential for human contact during normal operation is minimized. This device has been evaluated for and shown compliant with the IC Specific Absorption Rate ("SAR") limits when operated in portable exposure conditions.
-
Page 80: Power Supply
Plug the Sapphire power supply cord into the main power supply source. With the white arrows or red dot facing up, slide the power cord into the Sapphire pump power socket or into the splitter connector without rotating the connector. - Page 81 > To c harg e t he ba tter y: Plug the Sapphire AC Power Cord into the main power supply source. On the back of the IPS, verify that the Power LED status indicator is On (blue light).
-
Page 82: Usb-C Power Supply (Sapphire Connect Power Supply)
USB-C Power Supply (Sapphire Connect power supply) The Sapphire Connect power supply is used to charge both the Sapphire Connect and the Sapphire pump. Specifications of the power supply contain the following options: • Input voltage: 5 VDC • Output voltage: 10 VDC The USB-C power supply is intended for use in the home environment. - Page 83 > To d is c o nn ec t the USB - C Po wer Su p p l y fro m t h e Sa p ph i re C o nn ec t: Unplug the USB-C power cord from the Sapphire Connect, by pulling the USB-C connector.
-
Page 84: External Battery Pack
Avoid any contact of the AA batteries with water. • Use only valid (none-expired) AA batteries in the EBP. It is recommended to use in the EBP fresh AA alkaline batteries manufactured by the brands listed below: • Energizer • Duracell Sapphire Infusion Pump User Manual... - Page 85 General information • The duration of operation time provided by the EBP, varies according to the pump's Internal Battery power status, infusion rate, backlight settings and AA batteries power status. Operation time of the pump with the EBP is presented in the following table: Operation time duration (with fresh AA batteries of the Pump Settings...
- Page 86 > To i n s er t A A ba tt eries into the E BP: Make sure that the pump is detached from the EBP. Open the AA batteries compartment lid, by pushing the latch up (Figure 2.29, #3). Sapphire Infusion Pump User Manual...
- Page 87 Opening EBP Lid Figure 2.30. Place the batteries in their slots by pressing the flat end (negative pole) of each battery to the flat metal plates (marked with "-"), and then fix the other end (positive pole) in place (marked with "+"). After all six batteries are in place, insert the protrusion at the bottom of the lid (Figure 2.31, #A1) to its slot in the EBP, and press the latch...
- Page 88 Thread each end through the buckle and stretch to adjust the length. Attach the pump to the EBP, and hang on an IV pole (Figure 2.32, #C2). For attaching instructions, refer to the next section. Attaching EBP Straps Figure 2.32. Sapphire Infusion Pump User Manual...
- Page 89 Attaching the Pump to the EBP > To at t ac h t he p ump to the EB P: Insert the bottom of the pump onto the two small hooks (Figure 2.29, #1) at the bottom of the EBP, and then push it to click into the large hook (Figure 2.29, #2) at the top of the EBP.
- Page 90 EBP before connecting the pump to a power supply. EBP storage It is recommended to remove the AA batteries from the EBP when not in use. Cleaning the EBP Clean only exterior surfaces of the EBP. Sapphire Infusion Pump User Manual...
-
Page 91: Multi-Pump Mounting System
Multi-Pump Mounting System The Mounting System is designed to facilitate the use of multiple pumps while saving valuable bed-side space and providing power consolidation. The Mounting System is designed to accommodate three mini cradles, and charge three pumps via a single power outlet, all attached to an IV pole via a single clamp. - Page 92 • Use only Sapphire dedicated AC input cord and power supply with the Mounting System. • To avoid entanglement of lines and cords, do not mount more than 4 Mounting Systems on a single IV pole. • Do not use the Mounting System power supply with Sapphire Connect.
- Page 93 Mounting System on IV Pole Figure 2.33. To prevent detaching from the IV pole, the Mounting System can be locked to the pole by removing the knob cap or knob key from the clamp knob. > To at t ac h a m ini c ra dle to the Mo u nt i ng Sy s te m : Rotate the mini cradle to a vertical position with the mini cradle knob pointing downward and the top hook pointing upward.
- Page 94 Fasten the DC output cables to the clips located on the bottom of the Mounting System. Plug the AC input cord to the power outlet. Verify that the Mounting System power supply LED is ON. Sapphire Infusion Pump User Manual...
- Page 95 Fully Assembled Mounting System Figure 2.36. > To tr a ns p o rt t he Mo unting Sy ste m, d et a c h it f ro m the I V p o l e: Unplug the AC input cord from the power outlet. Firmly hold the Mounting System and rotate the clamp knob counter-clockwise, until the Mounting System is loose.
-
Page 96: Administration Sets
Sapphire administration cassette. Alternatively, administration sets from different manufacturers that are regulatory cleared and labeled for use with the Sapphire infusion system, can be used as well. The list of regulatory cleared sets needs to be obtained from the official manufacturer’s publication such as manufacturer’s website, catalog or any other formally published document. - Page 97 Inserting the Administration Cassette page 117. Sapphire Approved Administration Sets The Eitan Medical Ltd. approved list of administration sets to be used with the Sapphire pump is listed in the Eitan Medical Official Website at https://eitanmedical.com. Use Sapphire standard administration sets listed here or in Eitan Medical’s approved list of products:...
- Page 98 This page is left intentionally blank Sapphire Infusion Pump User Manual...
-
Page 99: Fundamental Concepts And Operations
Chapter 3: Fundamental Concepts and Operations The following sections explain the structure and function of the Main Display and the toolbar, provide an overview of the delivery modes, and describe special features that can be enabled and disabled, according to user requirements: Working with the Main Display ................ - Page 100 Uppercase letters and numbers are the default state. Switch the default keypad from uppercase and numbers to lowercase and symbols by pressing the 'abc sym' key on the toolbar and back to default by pressing 'ABC 123' key. Sapphire Infusion Pump User Manual...
-
Page 101: Overview Of Toolbar Function Keys
Overview of Toolbar Function Keys The function keys are located in the toolbar, and enable user actions. The function keys that appear vary according to the screen or program that is currently selected. Function keys enabling basic actions are described in the following table. Name of Key Action Notes... -
Page 102: Overview Of Icons
To initiate the update, touch the box in which parameter immediately the icon appears. adjacent to the icon can be viewed and updated directly from the Main Display. Rate of the infusion. Volume to be infused. Sapphire Infusion Pump User Manual... - Page 103 Icon Meaning Notes Time remaining until the end of the infusion. Indicates that an infusion is currently running. Indicates status of battery For more information, refer to Battery Care charge. on page 301. Information Indicates that the current infusion is above the upper For more information, refer to Soft Limit soft limit range in at least...
- Page 104 "0", and the current relative downstream pressure is represented by the darker gray end of the bar. Sapphire Infusion Pump User Manual...
-
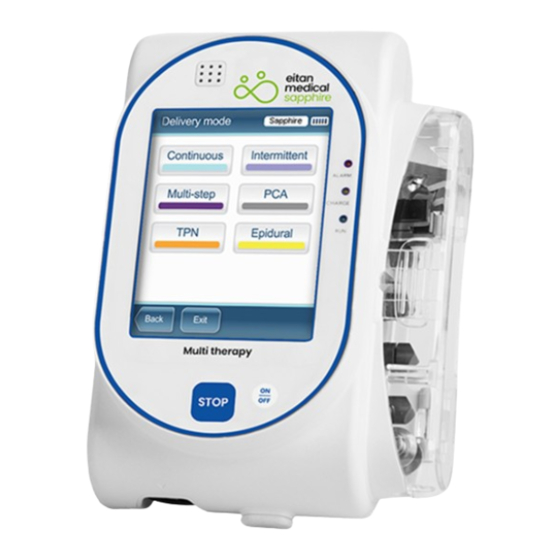
Page 105: Selecting Delivery Mode
Selecting Delivery Mode The Sapphire pump is a multi-platform device that has the ability to operate in several different delivery modes. The delivery modes availability can be set by a technician Possible delivery modes include: Mode Description/Notes Continuous Delivers an infusion at a constant, programmed rate. This mode includes the option to add a Secondary (Piggyback) line. - Page 106 Each delivery mode features its own unique options. The current mode is displayed at the right side of the Indicators Bar on some of the screens. On screens that are not mode related, such as Delivery mode selections screen below, the name "Sapphire" is displayed instead.
-
Page 107: Enabling Special Features
Enabling Special Features Depending on the needs of a specific clinical care area or institution, the Sapphire pump can be enabled to perform special functions. An authorization code is required to enable/disable these functions. Local configuration made after the Drug Library is loaded, will be valid until the user selects a CCA or turns the pump Off. - Page 108 For more information about enabling the feature, refer Intermittent) on page 251. Epidural Mode Options Menu Advanced Bolus Continuous Allows users to program a bolus by entering rate, amount and time. For more information, refer to Administering a Bolus page 143. Sapphire Infusion Pump User Manual...
- Page 109 Delivery Feature Mode(s) Description/Notes Bolus Reminder Enables a reminder for the user to connect the bolus Epidural handle before starting a PCA, or PCEA or PIEB infusion (PCEA and that includes patient boluses. The reminder (i) instructs Epidural to connect the bolus handle directly to the pump (ii) intermittent) Checks functionality –...
- Page 110 When air detection is disabled (OFF), the user is prompted to use the set with an air-eliminating filter. Sapphire Infusion Pump User Manual...
-
Page 111: Setting Kvo Rate
Setting KVO Rate Allows users to set the default rate of fluid that is delivered when the infusion program is completed. The permitted range for the KVO rate parameter is 0-20 mL/h (for all delivery modes). Fundamental Concepts and Operations... - Page 112 This page is left intentionally blank Sapphire Infusion Pump User Manual...
-
Page 113: Getting Started
Chapter 4: Getting Started The following sections explain the sequence of actions necessary to prepare the pump and the administration set for an infusion: Typical Workflow ............................ Connecting the Infusion Container to the Administration Set ..................Opening the Safety Door Inserting the Administration Cassette .............. - Page 114 The workflow sequence is illustrated in the following figure: Recommended Workflow Figure 4.1. Sapphire Infusion Pump User Manual...
-
Page 115: Turning The Pump On
Turning the Pump On The pump is turned On by pressing the On/Off hard key, at the lower right corner of the pump. When a Drug Library is loaded, a message is displayed asking to accept or change the current CCA. For more information about CCA, refer to Clinical Care Area (CCA) page 267. -
Page 116: Connecting The Infusion Container To The Administration Set
(from the container to the patient). • When using a filter, maintain the filter level below the vascular access site. Sapphire Infusion Pump User Manual... -
Page 117: Opening The Safety Door
Opening the Safety Door Opening the safety door involves pressing it down while simultaneously pulling the safety door open. > To o pe n t he sa f ety do o r : Using your thumb, press the door outwards. If gray latch is present, press the latch itself outwards. -
Page 118: Inserting The Administration Cassette
4.3, #1) on the round metal anchor (#2) in the cassette's housing. Make sure that the arrow on the cassette (#3) is pointing toward the bottom of the pump, and the bottom flange is inside the cassette housing. Sapphire Infusion Pump User Manual... - Page 119 Insertion of Cassette Figure 4.3. Clip the upper end of the administration cassette into the metal lock (Figure 4.3, #4). Close the safety door over the administration cassette. Ensure that the safety door clicks upon closure. Getting Started...
-
Page 120: Removing The Administration Cassette
Open the safety door (Opening the Safety Door on page 116). Loosen the cassette by raising the metal lock that secures it to the pump (#4 in Figure 4.3). Pull out the cassette, and close the safety door. Sapphire Infusion Pump User Manual... -
Page 121: Automatic Priming Using The Pump
Automatic Priming Using the Pump Before commencing infusion setup, the administration set needs to be primed. Priming expels all the air from the administration set, and fills it with the infusion liquid. A fully primed administration set is a set filled with infusion liquid (from which all the air was removed). - Page 122 The Sapphire administration cassette is properly connected to the pump. Before priming, verify that the administration set is disconnected from the patient. When priming a set with a filter – if the filter has an arrow drawn on it, make sure the arrow points up.
- Page 123 The pump automatically indicates when priming is finished. If priming is completed before the default priming time has elapsed, automatic priming can be discontinued. > To d is c o nt inu e p riming: From the toolbar, press Finish Prime. Alternatively, at the bottom of the pump, press the Stop hard key.
-
Page 124: Priming Manually
Priming Manually The Sapphire administration set can also be used as a gravity set, and the Anti-Free-Flow Valve (AFFV) can be used manually. Before commencing infusion setup, the administration set needs to be primed. Priming expels all the air from the administration set, and fills it with the infusion liquid. A fully primed set is a set filled with infusion liquid (from which all the air was removed). - Page 125 Opening and Closing the AFFV Figure 4.4. Closed AFFV Opened AFFV Closed AFFV Although the AFFV offers automatic free flow protection, a small amount of fluid (up to 0.12 mL) may be expelled when the administration cassette is attached. In order to ensure full protection, insert the administration cassette to the pump housing before connecting the set to the patient.
- Page 126 This page is left intentionally blank Sapphire Infusion Pump User Manual...
-
Page 127: Using The Delivery Modes
Chapter 5: Using the Delivery Modes The following sections explain how to operate the pump in the different delivery modes. After setting up the pump and the infusion, always check the battery status to ensure it is sufficient for the desired infusion program.................... - Page 128 The Sapphire pump can also be configured to support Secondary (Piggyback) infusions. The Secondary option is used when two medications are administered from two different bags; The user may either alternate between the bags or administer them sequentially. To use the Secondary option, the option must be enabled (requires Technician authorization code).
- Page 129 148). Piggyback Option: Safety Warnings When working with Secondary infusions, adhere to the following instructions and guidelines: • Use only Sapphire administration sets designed for Piggyback infusions. (For more information, refer to on page 96.) Sapphire Approved Administration Sets •...
-
Page 130: Infusion Parameters: Continuous Mode
> To b eg i n a new Co ntinuo us inf us io n w i t ho u t Dru g L i b rary : From the Indicators Bar, verify that the pump is in Continuous mode. For more information about changing delivery modes, refer to on page 104. Selecting Delivery Mode Sapphire Infusion Pump User Manual... - Page 131 From the Start Up screen, select New Infusion. If a warning that air detection is set to Off appears, ensure that a set with an air-eliminating filter is used, and press OK. If the Dosing method screen appears, select the appropriate option: •...
- Page 132 Drug Name: The name of the selected drug. Displayed on the indicators bar, when working with a Drug Library. • Drug Concentration: Drug concentration as entered by the user (Final concentration or Drug Amount / Diluent Volume). Displayed when applicable. Sapphire Infusion Pump User Manual...
- Page 133 • Rate: Current infusion rate. For all dose units other than mL/h, the calculated rate will be displayed in mL/h, both in the View system menu and in the Running screen. • VTBI: Total volume left to be infused during the current infusion. As the infusion progresses, this value decreases.
- Page 134 From the Diluent Volume screen, using the keypad, enter the Diluent Volume OK. From the Attention screen, confirm the concentration and press OK. Proceed to Step on page 130 (To begin a new Continuous infusion without Drug Library), and continue programming from there. Sapphire Infusion Pump User Manual...
- Page 135 • Full concentration: Proceed to Step on page 130 (To begin a new Continuous infusion without Drug Library), and continue programming from there. If a list of available drug profiles does not appear, continue to Step on page 130 (To begin a new Continuous infusion without Drug Library), and continue programming from there.
- Page 136 Dose calculation: Continue to Step 5. Weight based units are available for both Dosing methods. Otherwise, continue to Step 11. From the Concentration units screen, select the appropriate drug units. Next To display additional concentration units press Sapphire Infusion Pump User Manual...
- Page 137 According to pump configuration one of the following screens will appear: • Concentration: From the Concentration screen, using the keypad, enter the Concentration OK. Then, continue to Step 8. • Drug amount: Using the keypad, enter the Drug Amount OK. Then, using the keypad, enter the Diluent Volume ...
- Page 138 VI / Total: Total volume that has been infused during the current infusion (including KVO if applied during a delayed start period) / the VTBI value programmed. As the infusion progresses, the VI increases, and the Total remains constant. Sapphire Infusion Pump User Manual...
- Page 139 • Time left: Time remaining until the end of the current infusion. You can switch between the two infusions at any time. For more information, refer to Switching between Primary and Secondary on page 152. Infusions To view all programmed parameters of the current infusion, View/ including the rate in mL/h, from the Running screen, press Edit ...
- Page 140 The screen/s of the missing value/s will appear: • From the Drug Amount screen, using the keypad, enter the Drug Amount OK. • From the Diluent Volume screen, using the keypad, enter the Diluent Volume OK. Sapphire Infusion Pump User Manual...
- Page 141 From the Attention screen, confirm the concentration and press OK. Proceed to Step on page 136 (To begin a new Continuous infusion using the Library), and continue programming from there. Secondary option without Drug • Full concentration: Proceed to Step on page 136 (To begin a new Continuous infusion using the Secondary option without Drug...
-
Page 142: Continuous Mode: Mid-Infusion Actions
Select the box of the parameter to be updated. Using the keypad, enter the new value of the parameter OK. To update other parameters, repeat Steps 2-3. In addition to parameter changes, the following actions are also available: Sapphire Infusion Pump User Manual... - Page 143 • Clear Accum. VI: Resets the total volume infused via all infusions associated with the current patient to 0 mL. For more information, refer to Clearing on page 265. Accumulated VI • View system: Displays various system and pump parameters. (Refer to View Menu on page 243.)
- Page 144 Enter one of the following parameters, by selecting the relevant box: • Rate (Bolus): Using the keypad, enter the Bolus Rate OK. • Time (Bolus): Using the keypad, enter the Bolus Time OK. Sapphire Infusion Pump User Manual...
- Page 145 The third (unprogrammed) parameter is then automatically calculated by the pump and displayed in the relevant box. Continue to Step 4. • Bolus Amount: Using the keypad, enter the Bolus Amount OK (the acceptable range varies according to the current VTBI). Then, continue to Step 5.
- Page 146 / the total bolus amount programmed. As the infusion progresses, the Bolus VI increases, and the Total remains constant. • Time left: Time remaining until the end of the bolus. When the bolus is complete, a message appears on the Main Display. Sapphire Infusion Pump User Manual...
- Page 147 Mid-bolus Actions The following actions can be performed during bolus delivery: Updating Bolus Infusion Parameters ..................................Pausing a Bolus ....................Aborting a Bolus Updating Bolus Infusion Parameters Bolus infusion parameters are updated directly from the Bolus delivery screen. > To u p d a t e p a ra met ers f ro m t he B o l us d e l iv e ry sc ree n: On the Main Display, select the relevant frame (Bolus Rate, Bolus VTBI or Time Left).
- Page 148 Press the Stop hard key. Alternatively, press the Pause Bolus, then press OK. The bolus is paused. From the toolbar, press Quit Bolus. From the toolbar of the Paused screen, press Switch or Continue. From the Start screen, press Primary or Secondary. From the Attention screen, press OK. Sapphire Infusion Pump User Manual...
- Page 149 Before programming a Secondary infusion, verify that the administration set you are using is appropriate for Secondary (Piggyback) infusions. For more information, refer to Sapphire Approved Administration Sets on page 96. > To ad d a S ec o nda r y line while a Pri ma r y l i ne i s ru nn i ng , w i th o ut D ru g L ib rar y : From the toolbar, press View/Edit.
- Page 150 (when selecting dose calculation, the equivalent change to 0.1mL/h applies). Review the parameters displayed on the Confirm screen. Verify that the parameters reflect the correct treatment according to the prescription. Then, press OK. Sapphire Infusion Pump User Manual...
- Page 151 From the Start screen, select one of the following: • Start secondary: The Attention screen appears. After verifying that the clamps on the Secondary administration set are open, press OK. The Secondary screen appears, and the Secondary infusion begins. When the Secondary infusion is complete, the pump automatically continues with the Primary infusion.
- Page 152 (To add a Secondary line while a Primary line is running, without Drug Library), and continue programming from there. For more information about the Drug Library, refer to Chapter 9: Drug Library page 266. Sapphire Infusion Pump User Manual...
- Page 153 Switching between Primary and Secondary Infusions Switching between infusions involves pausing the infusion that is currently running, and then starting or continuing the other infusion. > To s wi t c h f ro m the Prima ry to th e S ec o n d a r y in fu si o n : Pause the Primary infusion: From the toolbar of the Primary screen, press Request Pause.
- Page 154 From the toolbar of the paused Primary screen, select Request Continue. Then, from the Attention screen, press OK. If you want to program a new Secondary line, refer to Adding a Secondary Line on page 148. Sapphire Infusion Pump User Manual...
- Page 155 Before programming a Secondary infusion, verify that the administration set you are using is appropriate for Secondary (Piggyback) infusions. For more information, refer to Sapphire on page 96. Approved Administration Sets > To re p la c e t he r unning sec o nd ar y l i n e wi t h a d i ffere nt sec o n da ry l i ne w i th-...
- Page 156 From the Attention screen press OK to delete the current secondary line and to program a different secondary infusion. Proceed to Step on page 150 (To add a Secondary line while a Primary line is running, with a Drug Library). Sapphire Infusion Pump User Manual...
-
Page 157: Multi-Step Mode
Multi-step Mode The following sections will be reviewed: ..............Infusion Parameters: Multi-step Mode ................Starting a Multi-step Infusion Multi-step Mode: Mid-infusion Actions ..............This mode allows the pump to deliver a series of up to 25 consecutive infusion Steps from the same infusion container. Each Step is delivered as a Continuous infusion, at its own pre-programmed parameters. -
Page 158: Infusion Parameters: Multi-Step Mode
From the Indicators Bar, verify that the pump is in Multi-step mode. For more information about changing delivery modes, refer to on page 104. Selecting Delivery Mode From the Start Up screen, select New Infusion. Sapphire Infusion Pump User Manual... - Page 159 If a warning that the air detection is disabled (OFF) appears, ensure that a set with an air-eliminating filter is used, and press OK. If the Dosing method screen appears, select the appropriate option: • mL: Continue to Step 8. •...
- Page 160 The transition between steps is accompanied by a beep. In addition, the following information appears on the screen: • Drug Name: The name of the selected drug. Displayed on the indicators bar, instead of the step number, when working with a Drug Library. Sapphire Infusion Pump User Manual...
- Page 161 • Drug Concentration: Drug concentration as entered by the user (Final concentration or Drug Amount / Diluent Volume). Displayed when applicable. • Rate: Current infusion rate. For all dose units other than mL/h, the calculated rate will be displayed in mL/h, both in the View System menu and in the Running screen.
- Page 162 From the Drug Amount screen, using the keypad, enter the Drug Amount OK. • From the Diluent Volume screen, using the keypad, enter the Diluent Volume OK. From the Attention screen, confirm the concentration and press OK. Sapphire Infusion Pump User Manual...
- Page 163 Proceed to Step on page 158 (To begin a new Multi-step infusion without Drug Library), and continue programming from there. • Full concentration: Proceed to Step on page 158 (To begin a new Multi-step infusion without Drug Library), and continue programming from there. If a list of available drug profiles does not appear, continue to Step on page (To begin a new Multi-step infusion without Drug...
-
Page 164: Multi-Step Mode: Mid-Infusion Actions
Using the keypad, enter the new rate, VTBI (during the Step), or time remaining until the end of the Step OK. To confirm and save changes, press OK. To return to the original infusion screen without saving changes, press Back. Sapphire Infusion Pump User Manual... - Page 165 > To up d a t e p ar a met ers o f t he c ur ren t o r ne x t S te p usi n g th e V i ew /Edi t f un c - t io n k ey : From the toolbar, press View/Edit.
-
Page 166: Total Parenteral Nutrition (Tpn) Mode
(tapered-up/tapered-down) at the beginning and end of the infusion profile. TPN Flow Profile Figure 5.4. When not using tapers, the TPN infusion starts and ends at the Plateau Rate. In such cases, the Continuous delivery mode can be applied and is recommended. Sapphire Infusion Pump User Manual... -
Page 167: Infusion Parameters: Tpn Mode
Infusion Parameters: TPN Mode The infusion parameters that need to be set for a TPN infusion are listed in the following table. Based on the values that are programmed, the pump automatically calculates the rate (and the gradual increase and decrease) necessary to deliver the infusion. -
Page 168: Starting A Tpn Infusion
Taper Up time OK. The Taper Up time can be set to 0. On the Taper Down screen, use the keypad to enter the Taper Down time OK. The Taper Down time can be set to 0. Sapphire Infusion Pump User Manual... - Page 169 Using the keypad, enter the infusion period OK. Review the parameters displayed on the Confirm screen. Verify that the parameters reflect the correct treatment according to the prescription. Then, press OK. To begin the infusion, make sure that the clamps on the administration set are open;...
- Page 170 During the plateau rate of a TPN infusion, the Taper down function key is replaced with the key. Pausing the infusion remains available using the Taper down key (for more information, refer to on page 171). Immediate Taper Down Sapphire Infusion Pump User Manual...
- Page 171 > To p a us e a n infusio n d uring t he p l a t ea u ra t e us i n g th e Ta pe r D o wn fu nc ti o n ke y : From the toolbar, press Taper Down.
- Page 172 Taper Down time using the keypad OK. Entering 00:00 hh:mm to Taper Down time frame will stop the infusion without tapering. From the Attention screen, press OK to begin the Taper Down. The Taper Down running screen appears. Sapphire Infusion Pump User Manual...
-
Page 173: Intermittent Mode
Intermittent Mode The following sections will be reviewed: ..............Infusion Parameters: Intermittent Mode ................Starting an Intermittent Infusion Intermittent Mode: Mid-infusion Actions ............... This mode enables you to program a dose time and volume infusion to be repeated at regular intervals or cycles. The Dose Interval is the time frequency at which the dose is delivered. -
Page 174: Infusion Parameters: Intermittent Mode
The following procedure explains how to program the pump to start a new Intermittent infusion. If relevant, you may skip programming by using the Repeat Last Infusion or PreSet programs procedures to begin the infusion. For more information, refer to Starting New Infusions: Shortcuts page 220. Sapphire Infusion Pump User Manual... - Page 175 > To b eg in a new Int er mitt ent infu si o n w i th o ut D rug L i bra ry : From the Indicators Bar, verify that the pump is in Intermittent mode. For more information about changing delivery modes, refer to on page 104.
- Page 176 Rate: Current infusion rate. For all dose units other than mL/h, the calculated rate will be displayed in mL/h, both in the View system menu and in the Running screen. • VTBI: Total volume left to be infused. As the infusion progresses, this value decreases. Sapphire Infusion Pump User Manual...
- Page 177 • VI / Total: Total volume delivered in the current infusion (including KVO if applied during a delayed start period) / the total VTBI value programmed. As the infusion progresses, the VI increases, and the Total remains constant. • Time to Dose: Time remaining before the next dose starts (until the end of the current interval;...
- Page 178 To view all programmed parameters of the current infusion, View/ including the rate in mL/h, from the Running screen, press Edit View system Infusion values For more information, refer to Viewing System Parameters page 244. Sapphire Infusion Pump User Manual...
- Page 179 > To b eg in a new Int er mitt ent infu si o n w i th a D r u g L i bra ry : From the Indicators Bar, verify that the pump is in Intermittent mode. For more information about changing delivery modes, refer to on page 104.
- Page 180 If a list of available drug profiles does not appear, continue to Step on page (To begin a new Intermittent infusion without Drug Library), and continue programming from there. For more information about the Drug Library, refer to Chapter 9: Drug Library page 266. Sapphire Infusion Pump User Manual...
-
Page 181: Intermittent Mode: Mid-Infusion Actions
Intermittent Mode: Mid-infusion Actions The following actions can be performed during Intermittent infusions: Updating Infusion Parameters ....................................Pausing Infusions ....................Aborting Infusions Locking the Screen ....................................Activating Patient Lockout Updating Infusion Parameters Infusion parameters can be modified by using the View/Edit function key. In addition, the VTBI for the current phase (Intermittent Dose or KVO) can be modified directly from the Main Display. - Page 182 View system: Displays various system and pump parameters. (Refer to View on page 243.) Menu To confirm and save changes, press OK. To return to the original infusion screen without saving changes, press Back. Then, from the Attention screen, press OK. Sapphire Infusion Pump User Manual...
-
Page 183: Patient Controlled Analgesia (Pca) Mode
Patient Controlled Analgesia (PCA) Mode The following sections will be reviewed: ................Infusion Parameters: PCA Mode ..................Starting a PCA Infusion PCA Mode: Mid-infusion Actions ................The Patient Controlled Analgesia (PCA) mode allows the pump to deliver medication through the intravascular, subcutaneous, or perineural routes continuously, and or with boluses activated by the patient using the bolus handle or the on-screen key. -
Page 184: Infusion Parameters: Pca Mode
The option to choose if patient boluses are limited by number or by volume. When choosing No Limits, the patient boluses are set to the maximum allowed volume, according to the other parameters defined for the infusion, including lockout time and demand bolus. Sapphire Infusion Pump User Manual... -
Page 185: Starting A Pca Infusion
Parameter Description/Notes Boluses per 1h (or 4hrs) The maximum number of boluses OR the maximum dose that can be delivered during a 1 hour (or 4 hours) period. (Auser with High Total dose per 1h (or 4 authorization codes can set the 1 hour or 4 hours parameters.) hrs) The Total dose limit takes into account medication delivered via: Continuous rate... - Page 186 Using the keypad, enter the Continuous Rate value OK. The Continuous Rate can be set to zero. Using the keypad, enter the value for the Demand Bolus OK. Using the keypad, enter the value for the Bolus Lockout OK. Sapphire Infusion Pump User Manual...
- Page 187 From the Dose Limit Type screen, specify whether the boluses available for the patient should be limited: • Yes: Continue to Step 16. • No: Continue to Step 17. Choosing on the Dose limit screen will set patient boluses to the maximum allowed, according to the other parameters defined for the infusion, including Lockout Time and Demand Bolus.
- Page 188 To view all programmed parameters of the current infusion, View/ including the rate in mL/h, from the Running screen, press Edit View system Infusion values For more information, refer to Viewing System Parameters page 244. Sapphire Infusion Pump User Manual...
- Page 189 > To b eg in a new PCA infusio n wit h a D r u g L i b r a ry: From the Indicators Bar, verify that the pump is in PCA mode. For more information about changing delivery modes, refer to Selecting Delivery Mode on page 104.
- Page 190 If a list of available drug profiles does not appear, continue to Step on page (To begin a new PCA infusion without Drug Library), and continue programming from there. For more information about the Drug Library, refer to Chapter 9: Drug Library page 266. Sapphire Infusion Pump User Manual...
-
Page 191: Pca Mode: Mid-Infusion Actions
PCA Mode: Mid-infusion Actions The following actions can be performed during PCA infusions: ................Updating Infusion Parameters ................Administering a Clinician Bolus Pausing Infusions ........................................ Aborting Infusions ....................Locking the Screen Activating Patient Lockout ................................... Viewing Delivery History Updating Infusion Parameters In PCA mode, the infusion must be paused before parameters can be updated. - Page 192 Delivery history: Displays a summary of medication delivery events. For more information, refer to on page 248. Viewing Delivery History To confirm and save changes, press OK. To return to the Paused screen without saving changes, press Back. Then, from the Attention screen, press OK. Sapphire Infusion Pump User Manual...
- Page 193 Administering a Clinician Bolus During PCEA or PIEB infusions, a bolus of any amount (within the predefined range) can be delivered by clinicians who have a High authorization level code. A Clinician Bolus can be given only while the infusion is running. The lockout time is reset after delivering a clinician bolus.
-
Page 194: Epidural Mode
Epidural administration of drugs other than those intended/labeled for epidural use could result in serious injury to the patient. • Do not infuse non-epidural drugs in Epidural Delivery mode. • Epidural drugs must be infused in Epidural Delivery mode. Sapphire Infusion Pump User Manual... -
Page 195: Patient Controlled Epidural Analgesia (Pcea) Mode
Patient Controlled Epidural Analgesia (PCEA) Mode The following sections will be reviewed: Infusion Parameters: PCEA Mode ................................. Starting a PCEA Infusion ................. PCEA Mode: Mid-infusion Actions The PCEA mode allows the pump to deliver medication at a continuous rate (optional) and limited boluses activated by the patient (via screen key or bolus handle). - Page 196 The option to choose if patient boluses are limited by number or volume. When choosing No Limits, the patient boluses are set to the maximum allowed volume, according to the other parameters defined for the infusion, including Lockout Time and Demand Bolus. Sapphire Infusion Pump User Manual...
- Page 197 Parameter Description/Notes Boluses per 1 h (or The maximum number of boluses OR the maximum dose that can 4 hrs) be delivered during a 1 hour (or 4 hours) period. (Auser with High authorization codes can set the 1 hour or 4 hours parameters.) Total dose per 1 h (or The Total dose limit takes into account medication delivered via: 4 hrs)
- Page 198 Concentration OK. Then, continue to Step 7. • Drug amount: Using the keypad, enter the Drug Amount OK. Then, using the keypad, enter the Diluent Volume OK. Then, continue to Step 6. Sapphire Infusion Pump User Manual...
- Page 199 From the Attention screen, confirm the concentration and press OK. If the selected drug unit is Million Units, continue to Step 9. If the Patient Weight screen appears, specify whether the infusion is weight based: • Yes: Continue to Step 8. •...
- Page 200 VI / Total: Total volume that has been infused during the current infusion (including KVO if applied during a delayed start period) / the total VTBI value programmed. As the infusion progresses, the VI increases, and the Total remains constant. Sapphire Infusion Pump User Manual...
- Page 201 • Lockout time: Time remaining until the next bolus is available. After the lockout time elapses, this parameter changes to Bolus available. When a bolus is being given (loading dose, clinician bolus or patient bolus), this parameter does not appear. •...
- Page 202 198 (To begin a new PCEA infusion without Drug Library), and continue programming from there • Full concentration: Proceed to Step on page 198 (To begin a new PCEA infusion without Drug Library), and continue programming from there. Sapphire Infusion Pump User Manual...
- Page 203 If a list of available drug profiles does not appear, continue to Step on page (To begin a new PCEA infusion without Drug Library), and continue programming from there. For more information about the Drug Library, refer to Chapter 9: Drug Library page 266.
- Page 204 Delivery history: Displays a summary of medication delivery events. For more information, refer to Viewing Delivery History on page 248. To confirm and save changes, press OK. To return to the Paused screen without saving changes, press Back. Then, from the Attention screen, press OK. Sapphire Infusion Pump User Manual...
- Page 205 Administering a Clinician Bolus A bolus of any amount (within the predefined safe range) can be delivered by clinicians who have High authorization level code. A clinician bolus can be given only while the infusion is running. The lockout time is reset after delivering a clinician bolus. >...
-
Page 206: Epidural Intermittent Mode
, 300 mL/h, 400 mL/h or 500 mL/h intervals or cycles. The dose interval is the frequency at which the intermittent dose is delivered. A continuous rate can be programmed to run between intermittent doses. Epidural Intermittent Flow Profile Figure 5.8. Sapphire Infusion Pump User Manual... - Page 207 The Sapphire pump can also be configured to support PIEB (Programmed Intermittent Epidural Boluses). When enabled, the option to add PCEA is available on the Start screen. Note that in any case, an Epidural Intermittent infusion will start with an intermittent dose.
- Page 208 The minimum time that must pass between the end of one Bolus Lockout Demand Bolus to the start of the next Demand Bolus. After a bolus delivery ends, the next Demand Bolus becomes available following the lockout time. Sapphire Infusion Pump User Manual...
- Page 209 Parameter Description/Notes Boluses per 1 h (or 4 hrs) The maximum number of boluses OR the maximum dose that can be delivered during a 1 hour (or 4 hours) period. (A user with Total dose per 1 h (or High authorization codes can set the 1 hour or 4 hours parameters.) The Total dose limit takes into account medication 4 hrs) delivered via:...
- Page 210 Diluent Volume OK. Then, continue to Step 6. From the Attention screen, confirm the concentration and press OK. If the selected drug unit is Million Units, continue to Step 9. Sapphire Infusion Pump User Manual...
- Page 211 If the Patient Weight screen appears, specify whether the infusion is weight based: • Yes: Continue to Step 8. • No: Continue to Step 9. From the Patient Weight screen, using the keypad, enter the patient weight From the Dose Rate units screen, select the appropriate dose rate units. Using the keypad, enter the VTBI value ...
- Page 212 Intermittent Dose is paused and not displayed. To view all programmed parameters of the current infusion, View/ including the rate in mL/h, from the Running screen, press Edit View system Infusion values Sapphire Infusion Pump User Manual...
- Page 213 > To b eg in a new Epidura l Inter mit t en t i nfu s io n wi th a D ru g L ib ra ry : From the Indicators Bar, verify that the pump is in Epidural mode. For more information about changing delivery modes, refer to on page 104.
- Page 214 If a list of available drug profiles does not appear, continue to Step on page (To begin a new Epidural Intermittent infusion without Drug Library), and continue programming from there. For more information about the Drug Library, refer to Chapter 9: Drug Library page 266 Sapphire Infusion Pump User Manual...
- Page 215 Starting a PIEB Infusion The following procedure explains how to program an Epidural Intermittent with PCEA. If relevant, you may skip programming by using the Repeat Last Infusion or PreSet programs procedures to begin the infusion. For more information, refer to Starting New Infusions: Shortcuts page 220.
- Page 216 / the total VTBI value programmed. As the infusion progresses, the VI increases, and the Total remains constant. • Lockout time: Time remaining until the next bolus is available. After the lockout time elapses, this parameter changes to Bolus available. Sapphire Infusion Pump User Manual...
- Page 217 • Time to Dose: Time remaining before the next dose starts (until the end of the interval time: Dose Time left + Continuous Rate time). When the infusion is paused (Intermittent Dose or Continuous Rate), the time to the next Intermittent Dose is paused and not displayed. To view all programmed parameters of the current infusion, View/ including the rate in mL/h, from the Running screen, press...
- Page 218 > To up d a t e pa r am ete rs using the V i e w/ Ed i t f u nc t io n k e y: Pause the infusion (Pausing Infusions on page 224). From the toolbar, press View/Edit. Sapphire Infusion Pump User Manual...
- Page 219 Select the box of the parameter to be modified. Using the keypad, enter the new value of the parameter OK. When changing the Intermittent Dose or Dose Rate, you will be prompted to confirm or adjust the dose interval. When modifying demand bolus limitations (volume or lockout) the pump will prompt you to confirm or adjust the other bolus limitations.
- Page 220 It can be set to 125 mL/h, 200 mL/h, 300 mL/h, 400 mL/h or 500 mL/h (for more information, refer to Epidural Mode Options Menu on page 251). Sapphire Infusion Pump User Manual...
-
Page 221: Basic Infusion Operations
Chapter 6: Basic Infusion Operations The following sections explain procedures and actions that are commonly performed in all delivery modes to start and manage infusions: Starting New Infusions: Shortcuts ............................Resuming Infusions After Pump Shutdown .................... Mid-infusion Actions Starting New Infusions: Shortcuts The following shortcut operations allow you to begin an infusion without the need to enter required parameters: .................. - Page 222 For example: CCA, and PCA/PCEA infusion type. Repeat Last Infusion is not available (grayed out) when the pump time and date settings are updated by Sapphire Connect. These include the following delivery modes: PCA, PCEA, Intermittent, and Epidural intermittent.
-
Page 223: Using A Preset Program
Using a PreSet Program The PreSet Programs function allows you to select an infusion with predefined parameters. Each delivery mode can support up to 25 PreSet programs. PreSet programs are available only in the delivery mode in which they were saved. For the PreSet Programs option to appear on the Start Up screen, the PreSet programs need to be enabled on the pump. -
Page 224: Resuming Infusions After Pump Shutdown
When a Drug Library is loaded on the pump, the Clinical Care Area screen appears. The user can either accept or change the current CCA. For more information, refer to Clinical Care Area (CCA) page 267. Sapphire Infusion Pump User Manual... -
Page 225: Mid-Infusion Actions
Mid-infusion Actions The following sections describe procedures that are commonly performed during an infusion: Pausing Infusions ........................................ Aborting Infusions ....................Locking the Screen Activating Patient Lockout ..................Pausing Infusions The Pause function allows you to temporarily stop an infusion. Infusions can be paused using either the Request Pause function key, or, in an emergency, the Stop hard key. -
Page 226: Aborting Infusions
Off, bypassing the need to confirm the action. > To p a us e a nd t hen q uit an inf usi on : At the bottom of the pump, press the Stop hard key. From the toolbar, press Quit. Sapphire Infusion Pump User Manual... -
Page 227: Locking The Screen
From the toolbar of the Attention screen, press Quit Infusion. Resuming infusion after quitting will not be possible. When a Drug Library is loaded on the pump, the Clinical Care Area screen appears. The user can either accept or change the current CCA. -
Page 228: Activating Patient Lockout
• VI - volume infused (VI for the current completed infusion. If the Accumulated VI has been cleared during this infusion, VI presents the volume infused from that time on). Sapphire Infusion Pump User Manual... - Page 229 • Rate – the rate at which the infusion was delivered • Total time – the total time of the infusion The default KVO can be set by an authorized technician. When the remaining VTBI is 0.1 mL or less, the time left displayed on the screen may deviate up to a few minutes from the actual time remaining.
- Page 230 This page is left intentionally blank Sapphire Infusion Pump User Manual...
-
Page 231: Options Menu : Configuring
The screen is displayed by pressing the Options function key, on the toolbar of the Start Up screen. The Options screen allows access to all configurations and settings of the Sapphire pump (as opposed to settings relevant to a specific infusion). The screen also provides access to testing components and viewing pump (as opposed to infusion) parameters (e.g., System parameters, Event logs, and Delivery History). -
Page 232: Setting Delivery Mode
Setting Delivery Mode The Sapphire pump is a multi-platform device that has the ability to operate in several different modes. Each delivery mode features its own unique options. The current mode is displayed at the right side of the Indicators Bar. -
Page 233: Managing Configuration Settings
Managing Configuration Settings The following sections describe how to view and update pump configuration settings: ..................Managing Alarm Settings ................... Configuring Audio Settings Configuring General Settings ................................Defining Regional Parameters ..................Testing System Function View Menu ......................When a drug library is loaded to the pump, local configurations made on the pump remain valid until the user selects a CCA or turns the pump Off. - Page 234 Messages sound level is 59 dB. Minimum: Errors and alarms sound level is 65 dB, Messages sound level is 45 dB.For more information about messages and alarms, refer to Chapter 10: Alarms and on page 276. Troubleshooting Sapphire Infusion Pump User Manual...
- Page 235 Occlusion Auto-restart option exists and is available for configuration by authorized technicians only. This option allows the pump to restart the infusion automatically provided the occlusion was cleared. If the occlusion is not cleared within 40 seconds, or the user chooses to exit the process, the downstream occlusion alarm is activated (appears within a few seconds).
-
Page 236: Configuring Audio Settings
When the option is set to Always On, an When Bolusing auditory signal is generated each time the bolus handle is pressed. When set to When Bolusing, an auditory signal is generated, when the bolus handle is pressed and bolus is available. Sapphire Infusion Pump User Manual... -
Page 237: Configuring General Settings
Configuring General Settings The General settings menu allows you to view basic pump settings, and modify them according to clinical requirements. Only users with authorization levels of High or Technician have access to this menu. > To ac c e s s t he Genera l setting s m en u: •... - Page 238 The option is available only when Allow Bolus is enabled (by a Technician authorization code). Applicable only for the Continuous delivery mode. For more information, refer to Administering a Bolus on page 143. Sapphire Infusion Pump User Manual...
- Page 239 To Modify Parameter (from the General Option Descriptions/Notes settings screen) Bolus Reminder Enables a reminder for the user to connect Bolus Select the the bolus handle before starting a PCA, Reminder row, to toggle PCEA or PIEB infusion that includes patient the option between boluses.
- Page 240 • Alarm – screen will revert to the alarm screen • Touching the screen – screen will revert to the Running screen • Infusion is paused – screen will revert to the Paused screen. Sapphire Infusion Pump User Manual...
-
Page 241: Defining Regional Parameters
High or Technician have access to this menu. When the Sapphire pump is connected to Sapphire Connect, the date and time are set automatically by the Sapphire Connect server. Date and/or time updates made manually on the pump remain valid until the next Sapphire Connect time update. - Page 242 AM/PM function key. (This step is relevant only when U.S. format is set.) To confirm the new settings, press OK. When using Sapphire Connect, date and/or time updates made manually on the pump remain valid until the next Sapphire Connect time update. > To s et t he la ng uage: Select the Language frame.
-
Page 243: Testing System Function
> To s et t he U S f or ma t : Select the US format frame. Toggle the settings between On and Off To confirm the new settings, press OK. The date will appear in month/day/year format and time will appear 12 hour format (am/pm) when this setting is toggled On. -
Page 244: View Menu
> To a c c es s the V iew syst em sc ree n f ro m t h e R un n i ng sc ree n: From the toolbar of the Running screen, select View/Edit. From the toolbar of the View/Edit screen, select View system. Sapphire Infusion Pump User Manual... - Page 245 Viewing System Parameters The View system screen allows you to view current system settings and infusion parameters, and update selected settings. You can navigate through the pages of settings, by pressing the Next and the Back function keys. The following settings appear in all delivery modes: Setting Description/Notes Infusion Values...
- Page 246 Date Current date and time. For more information, refer to Defining Regional Parameters on page 240. Time Software version The software version loaded on the pump. Sapphire Infusion Pump User Manual...
- Page 247 Setting Description/Notes Drug Library name The Drug Library name appears only if the pump is loaded with a Drug Library. For more information about the Drug Library, refer Chapter 9: Drug Library on page 266. Drug Library published The Drug Library published date appears only if the pump is date loaded with a Drug Library.
- Page 248 The Event log is sorted according to time, with the most recent event listed first. Each event is assigned a specific code. (For example, the code for the Pump Unattended alarm is 18.) The code appears in the Event log next to the time of the event. Sapphire Infusion Pump User Manual...
- Page 249 When the row of an event is selected, the Event details frame displays the complete timestamp of the event (date and exact time), and a brief description of the event. When the pump is turned Off, or a power failure occurs, the pump shut-down is registered as an event (with a time stamp), and the event log is saved.
- Page 250 Appears only when Epidural Intermittent with PCEA is programmed. Repeat Last Infusion When using the option (for the same patient), the Delivery History, the accumulated VI, and the lockout time are not cleared; they continue counting from the previous infusion. Sapphire Infusion Pump User Manual...
-
Page 251: Using Special Mode Options
Using Special Mode Options The following sections describe options that are available only in PCA and Epidural delivery modes: PCA Options Menu ..................................... Epidural Mode Options Menu PCA Options Menu The PCA options screen is accessed from the main Options menu, when the pump is in PCA delivery mode. -
Page 252: Epidural Mode Options Menu
Specifies the time period to which the dose limit type is applied (during the selected time, the delivered boluses are limited by either maximum number, or by maximum volume). PIEB Enables the user to program a PIEB infusion. (Epi. Int mode only) Sapphire Infusion Pump User Manual... -
Page 253: Using Advanced Features
Using the New Patient Feature Managing Authorization Levels To help ensure patient safety, the Sapphire pump can be set to one of four authorization levels. Authorization levels control access to the programming options available in the pump. Each level allows users to access a different set of pump actions and programming options. - Page 254 Start infusions using the New Infusion feature View/Edit parameters Use the Pump Configuration menu Create/Edit PreSet programs (requires a unique password) Use of all PCA, PCEA and PIEB options Changing delivery mode (requires password re-entry) Clinician bolus Technician Sapphire Infusion Pump User Manual...
-
Page 255: Setting Authorization Lock Levels
When the pump is turned Off, the authorization lock level setting is saved. Therefore, the lock level set most recently is maintained when the pump is turned back On. If the pump is turned Off in Technician mode, the pump turns back On in a Low authorization level. -
Page 256: Password Re-Entry
Password Re-entry The Sapphire pump is designed to prevent inadvertent parameter changes, or actions other than those permitted by the currently set authorization level. As a safety measure, the pump will prompt the user to re-enter the High level password before performing the following actions: •... -
Page 257: Creating And Editing Preset Programs
Creating and Editing PreSet Programs The PreSet Programs feature allows users to start infusions using predefined infusion parameters, thus eliminating the need for programming. Each delivery mode can support its own set (of up to 25) predefined infusion programs. Only the infusion programs set for the currently selected delivery mode are displayed (a preset program is available for use and edit only when the pump is set to the delivery mode in which the program was saved). - Page 258 > To ed i t a p reset p ro g ra m: From the Indicators Bar, verify that the pump is in the desired delivery mode. From the Start Up screen, select PreSet Programs. Sapphire Infusion Pump User Manual...
- Page 259 From the toolbar of the PreSet Programs screen, press Edit. Using the keypad, enter the appropriate password; then, press OK. From the list, select the program that you want to update. Select the box of the parameter that you want to change. Using the keypad, enter the new parameter, and then press OK.
-
Page 260: Using The Set Delay Feature
Starting a PCA Infusion Epidural Starting a PCEA Infusion on page Starting an Epidural Intermittent Infusion on page From the Start screen, select Set Delay. From the Delayed Start screen, select Standby. The Standby screen is displayed. Sapphire Infusion Pump User Manual... - Page 261 Throughout the Standby period, the following information appears on the screen: • Drug Name: The name of the selected drug. Displayed on the indicators bar, when working with a Drug Library. • Concentration: Drug concentration as entered by the user (Final concentration or Drug Amount / Diluent Volume).
- Page 262 Starting a PCEA Infusion Starting an Epidural on page Intermittent Infusion From the Start screen, select Set Delay. From the Delayed Start screen, select Delay Period. Using the keypad, enter the desired delay period (h:min); then, press OK. Sapphire Infusion Pump User Manual...
- Page 263 Specify whether or not to run the infusion in a KVO, during the delay period: If KVO rate is pre-configured to 0 mL/h for the delivery mode, from the Start screen, select Start with Delay. (Refer to Do not use KVO: below) •...
-
Page 264: Using The New Patient Feature
Using the New Patient Feature The Sapphire pump allows you to associate infusions to a specific patient. When the New Patient feature is enabled, and either a New Infusion or a PreSet program is selected, the pump prompts you to indicate whether the infusion to be programmed is for a new patient or not. -
Page 265: Monitoring The Accumulated Volume Infused (Shift's Total)
The date and time in which the Accumulated VI was cleared is also captured. The Sapphire pump also provides the volume infused in the current running infusion (VI), including KVO if applied, during a delayed start period. This VI is presented on the running screen as well as in the message given at the end of the infusion. -
Page 266: Clearing Accumulated Vi
> To c l ea r th e Ac c umula ted VI va lu e d u ri n g i n fu sio n : From the toolbar of the Running screen, press View/Edit. From the View/Edit screen, press Clear Accum. VI. From the Clear Accum. VI screen, press Yes to clear the Accumulated VI. Sapphire Infusion Pump User Manual... -
Page 267: Drug Library
Eitan Medical Drug Library Editor. The Drug Library is identified by a Drug Library name and publish date, both displayed on the View system menu. The Drug Library name is also displayed on the Sapphire when the pump turns On. -
Page 268: Clinical Care Area (Cca)
> To a c c ep t or c ha nge a CCA : Turn the pump On. From the Clinical Care Area screen select whether to Accept or Change the current clinical care area: Sapphire Infusion Pump User Manual... - Page 269 • To accept the current CCA, press Accept. The Start Up screen appears. • To change the current CCA, press Change. From the Choose CCA screen, select the relevant CCA. Next To display additional CCAs press From the Attention screen, press OK. In case the current delivery mode is unavailable in the selected CCA, the pump will prompt the user to change the delivery mode.
- Page 270 From the View/Edit screen, select View system Select the Current CCA row. From the Choose CCA screen, select the row of the relevant CCA. Next To display additional CCAs press From the Attention screen, confirm the selected CCA, and press OK. Sapphire Infusion Pump User Manual...
- Page 271 The View/Edit screen is displayed. To view or change the Next CCA: • View System From the View/Edit screen, press • Next CCA Press • Select CCA from list. Next Note: To display additional CCAs press • From the Attention screen, press The Repeat Last Infusion option will be unavailable (grayed out) after the CCA is changed.
-
Page 272: Programming A New Infusion With The Drug Library
Programming a New Infusion with the Drug Library When the Sapphire pump is loaded with a Drug Library, the programming flow includes additional related steps: Drug name entry, Drug list and Drug profile. Following the drug profile selection, the user is required to enter the infusion parameters according to the delivery mode. -
Page 273: Drug Profiles
Drug Profiles The pump displays the available profiles for the selected drug. The drug profile includes concentration and defines hard limits and soft limits. Each available drug is defined by the CCA and the delivery mode to which it was assigned; a drug profile may be available in more than one delivery mode. -
Page 274: Soft Limit
When a soft limit has been exceeded, an applicable Soft Limits icon will be shown on the Sapphire pump indicators bar during infusion. > To ent er a new v al ue instea d o f th e en t ere d v al ue : From the Attention screen, press Back. -
Page 275: Update A New Drug Library Version
Update a New Drug Library Version Following a Drug Library update, when the pump is turned On, the user is prompted to specify whether or not to update the Drug Library with the new available version. Updating Drug Library should be conducted according to local facility procedures. - Page 276 This page is left intentionally blank Sapphire Infusion Pump User Manual...
-
Page 277: Alarms And Troubleshooting
....................Alarms Overview The Sapphire pump generates three different types of alarms. The alarm types are categorized according to the urgency of the needed response (“Immediate response” or “Awareness needed"). In all alarm types, instructions about how to proceed (and, if relevant, to solve the problem) are displayed on the touch screen. -
Page 278: Error - Level 1, High Priority Alarms
Screen Header Displayed Text Battery Depleted Error Pump will automatically shut down in 3 minutes. Please connect pump to power. Internal Error Error Pump will automatically shut down in 3 minutes. Please contact an authorized technician. Sapphire Infusion Pump User Manual... -
Page 279: Alarm - Level 2, High Priority Alarms
Alarm – Level 2, High Priority Alarms This alarm type requires immediate user response. When triggered, an auditory alarm sounds, the alarm LED blinks, and the condition that triggered the alarm (and recommended actions, if relevant) is displayed on the screen. If the alarm occurs during an infusion, the infusion automatically stops. - Page 280 To clear occlusions verify: 1. Clamps are open; 2. Administration Occlusion cassette is properly positioned; 3. Line is not kinked; 4. No occlusion at the output connection. If all occlusions were cleared press OK to continue. Sapphire Infusion Pump User Manual...
- Page 281 Screen Alarm Title Header Displayed Text Flow Error Alarm 1. Remove and reinsert administration cassette; 2. Connect pump to a power supply. If alarm reoccurs contact authorized technician. Occlusion Alarm To clear occlusions verify: 1. Clamps are open; 2. Administration cassette is properly positioned;...
-
Page 282: Messages - Level 3, Low Priority Alarms
OK: Confirms the message, and returns the display to the previous screen. If the infusion is complete, the pump returns to the Start Up screen. This soft key is enabled after Mute is pressed. The Message (Level 3- low priority alarm) display includes the following fields: Sapphire Infusion Pump User Manual... - Page 283 Screen Alarm Title Header Displayed Text Low Battery Message 30 minutes left to battery depletion. Connect pump to power supply Battery Reminder Message End of battery life. Please contact authorized technician to replace battery. Battery life expires Message Battery life will expire in 2 weeks, Please contact in 2 weeks authorized technician.
-
Page 284: Troubleshooting
High is required. Pump becomes locked The Auto Patient Lockout Disable the Auto P. Lockout option whenever an infusion feature is enabled. (Configuring General Settings, starts. page 238). High Authorization level is required. Sapphire Infusion Pump User Manual... - Page 285 Disconnect the communication pump cable from the mini cradle, or • The gray-buttoned bolus the Sapphire Connect from the handle is connected to Sapphire pump. the mini cradle together with a communication cable, or with Sapphire Connect.
- Page 286 The power supply was Disconnect and reconnect the connected to the pump power supply to the pump. during pump turn-off. • If a Sapphire Connect is used for • The power supply is not charging, disconnect and working. reconnect the power supply from the Sapphire Connect USB-C port.
- Page 287 Problem Probable Cause Solution Screen saver does not • • Screen saver option was Enable the Screen Saver option appear. not enabled. (refer to Configuring General on page 236) Settings • • Pump is not in an The screen saver will not appear applicable state.
- Page 288 (refer to Removing attached to Sapphire on page Sapphire Connect Connect. Attaching Sapphire Connect to the on page 61). Pump • • The electrical connectors Clean the Sapphire Connect are not clean.
- Page 289 Sapphire Connect. www.eitanmedical.com in order Connect (Cont’d). to upgrade the pump software to Rev16 or later. Sapphire Connect is compatible for use only with Sapphire Rev16 (or above) pumps manufactured in 2017 or later. • • Sapphire Connect is Wait for the Sapphire Connect...
- Page 290 This page is left intentionally blank Sapphire Infusion Pump User Manual...
-
Page 291: Maintenance And Storage
..................Transport and Storage Cleaning and Disinfecting the Pump Between use on different patients, the Sapphire pump and all of its components need to be first thoroughly cleaned, and then disinfected, per hospital/medical provider protocol for multiple patient use. ®... - Page 292 Before using materials other than the products listed above for cleaning and disinfecting the Sapphire Infusion pump, make sure they are listed in Eitan Medical’s official approved list of materials (published at www.eitanmedical.com). The pump must be completely dried out before connecting it to a power supply.
-
Page 293: Cleaning And Disinfection Procedure
The following procedure explains how to thoroughly clean the pump using the approved agents (listed above): > To c lea n t h e p um p: Turn the pump Off and unplug the power cord from the Sapphire pump power socket. Use the appropriate dilution ratio per the manufacturer's instructions. - Page 294 After the disinfection process is completed, the pump should be dried out for 15 minutes. Wipe the pump with a clean dry cloth. The pump must be completely dried out before connecting it to a power supply. Sapphire Infusion Pump User Manual...
-
Page 295: Reprocessing The Pump When Used By A Single Patient Multiple Times
Reprocessing the pump when used by a single patient multiple times When the Sapphire pump is used by a single patient for multiple times, the pump and all of its components need to be cleaned first, and then disinfected using 70% Isopropyl alcohol. -
Page 296: Cleaning Sapphire Connect And Electric Connectors Of Sapphire Accessories
Cleaning Sapphire Connect and the electrical connectors of all accessories is restricted to the use of 70% Isopropyl alcohol (IPA) ONLY. Between use on different patients, the Sapphire Connect and accessories need to be first thoroughly cleaned, and then disinfected, per hospital/medical provider protocol for multiple patient use. - Page 297 Take caution and avoid dripping the reagent into the pins or pores of the electrical connector. Allow the IPA to air dry for at least 3 minutes before connecting to power. The user is required to clean and disinfect the Sapphire Connect in the following conditions (the earlier of the three): •...
- Page 298 > To d i s in fe c t the Sa pp hire C o nnec t a nd a c c es s o ri e s : To disinfect the Sapphire Connect or accessory, replace cloth or sponge and repeat steps 2-6 in the cleaning process above five more times (a total of six cycles).
-
Page 299: Preventive Maintenance
Preliminary Inspection Before using the Sapphire pump and its accessories, check the pump for signs of any mechanical damage. Do not use the pump if you identify anything which may indicate impaired functioning of the system. -
Page 300: Alarm Testing
It is recommended to perform manual testing of the following alarms at least once a year. Alarm testing can be conducted as part of the yearly certification. For the Sapphire Epidural pump manual alarm testing, refer to the testing protocols available for authorized technicians (for more information refer to the Service Manual). -
Page 301: Certification
To ensure proper fluid delivery, the pump should be checked by an authorized service provider at least once a year, to perform yearly certification. For more information on yearly maintenance procedures to be performed by technicians or certified service providers, refer to the Sapphire Infusion Pump Service Manual. Maintenance and Storage... -
Page 302: Battery Care Information
Battery Care Information The Sapphire pump can operate on battery power, enabling operation of the pump during an electrical power failure, during patient transport or during ambulatory care. When working on battery power (disconnected from the main power supply) the battery charge level icon, at the upper right corner of the Indicators Bar, indicates remaining battery capacity. -
Page 303: Battery Classification
Battery Safety Guidelines • Ensure that only Eitan Medical's rechargeable Lithium Ion (Li-Ion) battery is used. • In case of rust, bad odor, overheating, and/or other irregularities when using the battery pack for the first time, return it to your local representative. - Page 304 Storage temperature should be between -20ºC (-4ºF) to +35ºC (+95ºF). The recommended temperature is 23º ±3ºC (73º ±5ºF). Storage at low temperatures may affect initial battery performance. Storage at high temperatures may degrade battery performance. Sapphire Infusion Pump User Manual...
-
Page 305: Charging The Battery
Charging the Battery Before initial use of the Sapphire pump, the battery must be charged for at least 6 hours. The battery must also be charged if it has been disconnected from the pump unit for more than 6 months. While the pump is in storage, recharge the battery at least once every 12 months. -
Page 306: Battery Maintenance
(Charging the Battery on page 304). For any storage period, make sure that the Sapphire administration cassette is disconnected from the pump, and that the safety door over the pump mechanism is closed. Specific recommendations for long term storage conditions are listed in the following table. -
Page 307: Technical Specifications
Chapter 12: Technical Specifications The following sections present technical specifications for the pump and its components: Pump Accuracy ......................................... Pump Specifications ..............Average Bolus Volume After Occlusion Environmental Specifications .............................. Electromagnetic Compatibility Statement Pump Accuracy The following graphs and curves were derived from the pump accuracy testing procedures described in the IEC60601-2-24 standard. -
Page 308: Tiered Flow Rate Accuracy Specifications
* Testing is reported only for the 2 and 96 hours Rate: 10 mL/h Rate:125mL/h Rate: 600mL/h Rate: 999mL/h Volume: 0.1mL Volume: 1mL Volume: 20mL Volume: 30 mL Boluses Accuracy ±2.5% for all three ranges Sapphire Infusion Pump User Manual... - Page 309 Impact of External/Environmental Parameters on Flow Rate Accuracy 5-15 15-30 30-40 Temperature (°C) Accuracy Up to -3.6% ±2.5% Up to +3.5% 3600 - 10,000 -978 (Dead Sea) up † Altitude (Ft) Sea level to 3600 (e.g., some cities in to sea level Colorado state) Accuracy Within 2.5% for all three ranges...
-
Page 310: Start-Up And Trumpet Graphs
Start-up graphs were performed according to the IEC 60601-2-24 standard. In the Sapphire pump, as in all infusion systems, the action of the pumping mechanism and variations or external factors may cause fluctuations in rate accuracy. Conditions that can cause flow fluctuations include: •... - Page 311 Trumpet curves are named for their characteristic /shape, and are developed in accordance with IEC 60601-2-24. They display the percent flow rate deviation from the programmed rate over time. The horizontal axis represents the observation time intervals. Over long observation windows, short-term fluctuation has little effect on accuracy, as represented by the flat part of the curve.
- Page 312 Trumpet Graph, Second Hour of Delivery, 1 mL/h Figure 12.2. Trumpet Graph, 24th (Last) Hour of Delivery, 1 mL/h Figure 12.3. Sapphire Infusion Pump User Manual...
- Page 313 Delivery Startup Graph, First 2 Hours of Test Period, Figure 12.4. 25 mL/h Technical Specifications...
- Page 314 Trumpet Graph, Second Hour of Delivery, 25 mL/h Figure 12.5. Trumpet Graph, 24th (Last) Hour of Delivery, 25 mL/h Figure 12.6. Sapphire Infusion Pump User Manual...
-
Page 315: Pump Specifications
Pump Specifications The following table lists and describes pump specifications. Parameter Description Dimensions 143 x 96 x 49 mm (5.63 x 3.78 x 1.93 in.) (H x W x D) Weight (excluding batteries) 418 g (14.7 oz.) Pumping mechanism Single channel volumetric, with integral pressure sensor Infusion delivery modes Continuous (with and without a Secondary line), PCA, Intermittent, Multi-step, TPN, Epidural (PCEA, Epidural... - Page 316 At Rate of 800 mL/h – operational time will decrease to 18 hours • At Temperature of 5ºC – no reduction below 24 hours will occur • At Viscosity of 10.8 Cp – no reduction below 24 hours will occur Sapphire Infusion Pump User Manual...
-
Page 317: Average Bolus Volume After Occlusion
Average Bolus Volume After Occlusion The following table presents the average time to a downstream occlusion alarm, and the bolus volume after occlusion, at a rate of 25 mL/h. Parameter Pressure 0.1 bar 1.2 bar Average bolus volume 0.133 mL 0.75 mL following downstream occlusion... -
Page 318: Environmental Specifications
15% to 95% Temperature -40°C to +70°C (-40°F to 158°F) Do not disassemble the portion of the Sapphire pump that houses the pump mechanism and the electronics. This should be done by authorized personnel only; Eitan Medical Ltd. will not be obligated to provide technical service in such a case. - Page 319 When storing batteries separately from the pump, maintain the following storage temperature ranges: Type of Storage Temperature Range Short term <40ºC (<95ºF) Long term -20ºC (-4ºF) to +35ºC (+95ºF) Recommended: 23º ±3ºC (73º ±5ºF) Storage at low temperatures may affect initial battery performance. Storage at high temperatures may degrade battery performance.
-
Page 320: Electromagnetic Compatibility Statement
Harmonic emissions Class B establishments and those directly IEC 610003-3-2 connected to the public low-voltage Voltage fluctuations /and Complies power supply network that supplies Flicker emissions buildings used for domestic purposes. IEC 61000-3-3:2013 Sapphire Infusion Pump User Manual... -
Page 321: Electromagnetic Immunity
Electromagnetic Immunity The infusion system is intended for use in the electromagnetic environment specified below. The customer or the user of the infusion system should ensure that it is used in such an environment. Declaration - Electromagnetic Immunity Table 12.1. IEC 60601 Test Compliance Electromagnetic Environment... - Page 322 Field strengths from fixed RF transmitters, as determined by an electromagnetic site survey, should be less than the compliance level in each frequency range. Interference may occur in the vicinity of equipment marked with the symbol. Sapphire Infusion Pump User Manual...
- Page 323 Declaration - Electromagnetic Immunity Table 12.2. Electromagnetic Environment Immunity IEC 60601 Compliance Test Test Level Level Guidance Portable and mobile RF communications equipment should be used no closer to any part of the infusion system, including cables, than the recommended separation distance calculated from the equation applicable to the frequency of the 3 Vrms...
- Page 324 9 kHz to 13,56 MHz. pulse pulse modulation modulation 50 kHz) 50 kHz) * These guidelines may not apply in all situations. Electromagnetic propagation is affected by absorption and reflection from structures, objects and people. Sapphire Infusion Pump User Manual...
- Page 325 RF transmitters, an electromagnetic site survey should be considered. If the measured field strength in the location in which the Sapphire infusion system is used exceeds the applicable RF compliance level above, the infusion system should be observed to verify normal operation.
- Page 326 80 MHz in 800 MHz 2.5 GHz Power of outside ISM ISM Bands Transmitter (W) Bands - - - - - - ------ ------ ------ 0.01 0.12 0.20 0.40 0.37 1.64 1.30 1.17 2.00 13.0 11.7 20.00 Sapphire Infusion Pump User Manual...
- Page 327 Test Specifications for ENCLOSURE PORT Table 12.4. IMMUNITY to RF Wireless Communications Equipment Test Freq. Band Immunity Test Level (MHz) (MHz) Service Modulation (V/m) Pulse modulation 380 -390 TETRA 400 18 Hz GMRS 460, FM ±5 kHz 430 - 470 FRS 460 deviation 1 kHz sine LTE Band 13,...
- Page 328 ISM frequency bands between 150 kHz and 80 MHz and in the frequency range 80 MHz to 2.5 GHz. This decreases the likelihood that mobile/portable communications equipment could cause interference if it is inadvertently brought into patient areas. Sapphire Infusion Pump User Manual...
-
Page 329: Limited Warranty
AUTHORIZATION MUST BE OBTAINED PRIOR TO RETURNING THE SAPPHIRE OR SAPPHIRE CONNECT, as the case may be. If authorized, the Sapphire or Sapphire Connect, as the case may be, must be properly and carefully cleaned, packaged and returned to the Manufacturer. - Page 330 SAPPHIRE OR SAPPHIRE CONNECT, as the case may be, FOR ANY PARTICULAR PURPOSE. 3. The Sapphire or Sapphire Connect, as the case may be, can only be used under the instruction of medical personnel whose skill and judgment determine the suitability of the Sapphire for any particular medical treatment.
- Page 331 Eitan Medical Ltd. will not be responsible for unauthorized returns or for pumps damaged in shipment due to improper packing. The Sapphire pump service life is 7 years from the date of manufacture.
- Page 332 This page is left intentionally blank Sapphire Infusion Pump User Manual...
Need help?
Do you have a question about the Sapphire and is the answer not in the manual?
Questions and answers
how to clean the sapphire epidural pum[