Table of Contents
Advertisement
Available languages
Available languages
Quick Links
MODEL / MODELO / MODÈLE :
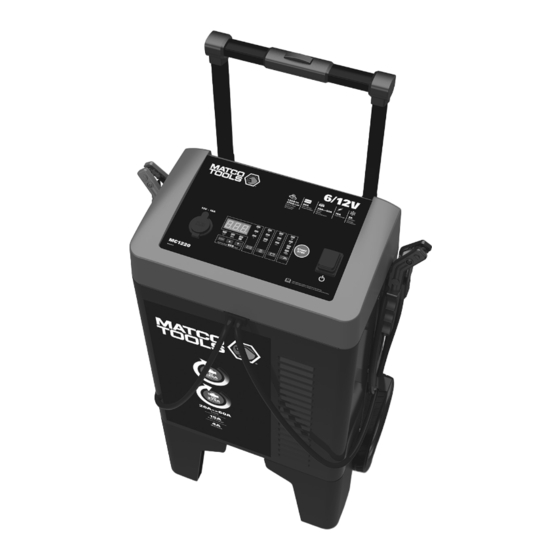
MC1220
Professional Wheel Charger
Cargador profesional con ruedas
Chargeur professionnel sur roues
OWNERS MANUAL / MANUAL DEL USUARIO / MANUEL D'UTILISATION
PLEASE SAVE THIS OWNERS MANUAL AND READ BEFORE EACH USE.
This manual will explain how to use the battery charger safely and effectively.
Please read and follow these instructions and precautions carefully.
POR FAVOR CONSERVE ESTE MANUAL DEL USUARIO Y LEALO ANTES
DE CADA USO. En este manual le explica cómo utilizar el cargador de batería
de manera segura y confiable. Por favor, lea y siga las siguientes instrucciones
y precauciones.
GARDER LE MANUEL D'INSTRUCTION ET LISEZ LE AVANT CHAQUE
UTILISATION. Ce manuel explique comment utiliser le chargeur de batterie
d'une façon securitaire et efficace. S'il vous plaît lisez et suivez ces instructions
et precautions.
0099002057-00
Advertisement
Table of Contents
Troubleshooting

Subscribe to Our Youtube Channel
Related Manuals for Matco Tools MC1220


Summary of Contents for Matco Tools MC1220
- Page 1 MODEL / MODELO / MODÈLE : MC1220 Professional Wheel Charger Cargador profesional con ruedas Chargeur professionnel sur roues OWNERS MANUAL / MANUAL DEL USUARIO / MANUEL D’UTILISATION PLEASE SAVE THIS OWNERS MANUAL AND READ BEFORE EACH USE. This manual will explain how to use the battery charger safely and effectively.
-
Page 2: Important Safety Instructions
1. IMPORTANT SAFETY INSTRUCTIONS SAVE THESE INSTRUCTIONS. 1.1 SAVE THESE INSTRUCTIONS – 1.8 Do not operate charger if it has received This manual contains important safety a sharp blow, been dropped, or otherwise and operating instructions. damaged in any way; take it to a qualified serviceman. -
Page 3: Preparing To Charge
3. PREPARING TO CHARGE 3.1 If necessary to remove battery from battery without removable cell caps, such vehicle to charge, always remove as valve regulated lead acid batteries, grounded terminal from battery first. Make carefully follow manufacturer’s recharging sure all accessories in the vehicle are off, instructions. -
Page 4: Follow These Steps When Battery Is Outside Vehicle
7. FOLLOW THESE STEPS WHEN BATTERY IS OUTSIDE VEHICLE WARNING: A SPARK NEAR THE connect NEGATIVE (BLACK) charger clip BATTERY MAY CAUSE A BATTERY to free end of cable. EXPLOSION. TO REDUCE THE RISK OF 7.5 Do not face battery when making final A SPARK NEAR THE BATTERY: connection. -
Page 5: Control Panel
10. CONTROL PANEL 12V MEMORY SAVER PORT BATTERY TYPE BUTTON Use this button to select the battery type. DIGITAL DISPLAY STD (Standard) – Used in cars, trucks The digital display indicates voltage, % of and motorcycles, these batteries have charge, or amperage, depending on the vent caps and are often marked “low Display Mode chosen. - Page 6 OUTPUT RATE BUTTON MAIN POWER SWITCH Select one of the following rates: This switch supplies power to the charger. Maintain (4A) REPROGRAMMING For charging small batteries and THE DEFAULT SETTINGS maintaining fully charged large batteries. If you are satisfied with the default settings, Fast Charge (15A) skip to Operating Instructions.
- Page 7 8. Charging will start when the START/ it will go into Abort Mode (see Aborted STOP button is pressed and finish Charge section). This is usually caused by automatically. a drain on the battery, or the battery could be bad. Make sure there are no loads on 9.
- Page 8 1. With the charger unplugged from the or damage to the ECU and/or vehicle’s AC outlet, connect the charger to the electrical system may occur. Failure to battery, following the instructions given follow these instructions may also damage in sections 6 and 7. the service center’s flash reprogram equipment.
-
Page 9: Maintenance And Care
WARNING: 5. Press the button until the When working with the vehicle’s battery, Memory Saver LED is lit. review all of the battery manufacturer’s 6. Connect the memory saver’s OBD safety instructions, warnings and connector to the vehicle’s OBD plug. directives regarding battery disconnection, Make sure the connector is fully removal and replacement. -
Page 10: Troubleshooting
Troubleshooting PROBLEM POSSIBLE CAUSE SOLUTION No reading or 0.0V Clamps are not making a Check for poor connection at shown on the display. good connection. battery and frame. Make sure connecting points are clean. AC cord and/or extension Check power cord and extension cord is loose. -
Page 11: Specifications
PROBLEM POSSIBLE CAUSE SOLUTION Clicking noise from Circuit breaker is cycling. Under certain conditions, this unit charger. has a high capacity and the circuit breaker protects the unit under these conditions. If the circuit breaker is cycling often, stop the operation by pressing the START/ STOP button and wait until the unit has cooled, to return to operation. -
Page 12: Limited Warranty
15. LIMITED WARRANTY WARRANTY NOT VALID IN MEXICO. SCHUMACHER ELECTRIC CORPORATION, 801 BUSINESS CENTER DRIVE, MOUNT PROSPECT, IL 60056-2179, MAKES THIS LIMITED WARRANTY TO THE ORIGINAL RETAIL PURCHASER OF THIS PRODUCT. THIS LIMITED WARRANTY IS NOT TRANSFERABLE OR ASSIGNABLE. Schumacher Electric Corporation (the “Manufacturer”) warrants this battery charger for two (2) years from the date of purchase at retail against defective material or workmanship that may occur under normal use and care. -
Page 13: Instrucciones Importantes De Seguridad
1. INSTRUCCIONES IMPORTANTES DE SEGURIDAD GUARDE ESTAS INSTRUCCIONES. 1.1 GUARDE ESTAS INSTRUCCIONES – 1.8 No utilice el cargador si el mismo recibió Este manual contiene instrucciones un golpe fuerte, si se cayó o si sufrió operativas y de seguridad de importancia. daños de cualquier otra forma;... -
Page 14: Preparación Para La Carga
una corriente de cortocircuito lo no está destinado a suministrar energía suficientemente elevada como para a sistemas eléctricos de baja tensión soldar un anillo o provocar efectos más que en una aplicación de un motor similares sobre el metal, causando una de arranque. - Page 15 6. SIGA ESTOS PASOS CUANDO LA BATERÍA ESTÉ COLOCADA EN EL VEHÍCULO ADVERTENCIA: batería al borne POSITIVO (POS, P, +) sin UNA CHISPA PROVOCADA CERCA descarga a tierra de la batería. Conecte DE LA BATERÍA PUEDE CAUSAR LA el gancho NEGATIVO (NEGRO) al chasis EXPLOSIÓN DE LA BATERÍA.
-
Page 16: Conexiones A Tierra Y Energía De Ca
8. CONEXIONES A TIERRA Y ENERGÍA DE CA 8.1 Este cargador de batería está destinado a 8.3 USO DE UN CABLE DE EXTENSIÓN un uso en un circuito con tensión nominal El uso de una extensión no se de 120 V. El enchufe se debe conectar recomienda. -
Page 17: Panel De Control
10. PANEL DE CONTROL PUERTO SALVAMEMORIA DE 12V BOTÓN FLASH Pulse para entrar en el modo de PANTALLA DIGITAL Reprogramación Flash. Brinda indicaciones digitales del voltaje, el % de carga o el amperaje, de BOTONES DE FLECHA acuerdo con el modo de visualización ARRIBA / ABAJO seleccionado. -
Page 18: Instrucciones De Operación
GEL – El electrolito en una celda de gel BOTÓN START / STOP de sílice tiene un aditivo que hace que Comienzo y finalización de la carga, se configura o endurecer. Los voltajes de impulsar de voltaje, funciones de recarga de este tipo de células son más reprogramación Flash y arrancador bajos que los de los otros estilos de la batería del motor, y el modo de Protector de... - Page 19 12. Cuando la carga se haya completado, TIEMPOS DE CARGA DE LA BATERÍA se encenderá la luz LED de Cargado/ TAMAÑO DE TIEMPO DE CARGA (Horas) Mantenimiento (verde) y el LA BATERÍA APLICACIÓN cargador mantendrá la batería. POWERSPORTS 1,75 1, 5 13.
- Page 20 MANTENIENDO UNA BATERÍA 1. Con el cargador desenchufado El cargador carga y mantiene las baterías del tomacorriente de CA, conecte de 6 y 12 voltios, mantenerlos a carga el cargador a la batería siguiendo completa. las instrucciones que figuran en la secciónes 6 y 7.
- Page 21 El cargador está diseñado para ¡IMPORTANTE! suministrar hasta 100 Amperios en el Algunos fabricantes de vehículos no modo de “Reprogramación Flash”. permiten el uso del salvamemoria a través del OBDII. Consulte al fabricante Algunos modelos de vehículos más del vehículo antes de usar este producto, recientes pueden requerir más de 100 para determinar si un salvamemoria es amperios, durante la “Reprogramación...
-
Page 22: Mantenimiento Y Cuidado
12. MANTENIMIENTO Y CUIDADO Con cuidados mínimos puede mantener • Enrolle los cables de entrada y salida el cargador de baterías funcionando cuidadosamente cuando almacene el correctamente durante años. cargador. Esto ayudará a evitar daños accidentales a los cables y el cargador. •... - Page 23 Localización y resolución de problemas PROBLEMA CAUSA POSIBLE SOLUCIÓN No hay lectura o se Las pinzas no hacen buena Verifique conexiones deficientes en muestra 0.0 V en la conexión. la batería o la carcasa. Confirme pantalla. el buen estado de los puntos de conexión.
- Page 24 PROBLEMA CAUSA POSIBLE SOLUCIÓN El porcentaje de la La batería está muy Realice una carga continua por dos batería desciende descargada. horas más. Si el problema continúa, durante la carga. compruebe la batería y reemplazar si es necesario. Se seleccionó un voltaje de Asegúrese de que el botón batería erróneo.
-
Page 25: Especificaciones
PROBLEMA CAUSA POSIBLE SOLUCIÓN Arrancador de motor no Consumo mayor a índice de El tiempo de arranque varía funciona. arranque. según la cantidad de corriente consumida. Si el arranque consume más de índice de arranque, el tiempo de arranque se puede reducir. -
Page 26: Garantía Limitada
15. GARANTÍA LIMITADA GARANTIA LIMITADA NO VALIDA EN MEXICO. SCHUMACHER ELECTRIC CORPORATION, 801 BUSINESS CENTER DRIVE, MOUNT PROSPECT, IL 60056-2179, REALIZA LA PRESENTE GARANTÍA LIMITADA AL COMPRADOR MINORISTA ORIGINAL DE ESTE PRODUCTO. LA PRESENTE GARANTÍA LIMITADA NO PUEDE TRANSFERIRSE NI CEDERSE. Schumacher Electric Corporation (el “Fabricante”) otorga garantía por este cargador de batería por un plazo de dos (2) años contados a partir de la fecha de compra por menor por la existencia de cualquier material o de mano de obra defectuosos... -
Page 27: Consignes De Sécurité Importantes
1. CONSIGNES DE SÉCURITÉ IMPORTANTES CONSERVER CES INSTRUCTIONS. 1.1 CONSERVER CES INSTRUCTIONS – 1.7 Ne pas faire fonctionner le chargeur avec Ce manuel contient des instructions un cordon ou une prise endommagé – importantes concernant la sécurité et le remplacer immédiatement. fonctionnement. -
Page 28: Préparation Pour Le Chargement
petites que 22Ah. Il n’est pas conçu des piles sèches qui sont utilisées en pour alimenter un système électrique électroménager. Ces piles peuvent à basse tension autre que dans une exploser et causer des blessures et des application d’un démarreur. Ne pas utiliser dommages matériels. -
Page 29: Étapes À Suivre Quand La Batterie Est Installée Hors Du Véhicule
du chargeur à la borne POSITIVE (POS, châssis du véhicule ou au moteur, loin de P, +) non mise à la masse de la batterie. la batterie. Ne pas raccorder la pince au Raccorder la pince NÉGATIVE (NOIRE) carburateur, aux canalisations d’essence au châssis du véhicule ou au moteur, ni aux pièces de la carrosserie en tôle. -
Page 30: Directives D'assemblage
9. DIRECTIVES D’ASSEMBLAGE 9.1 Enlever tous les cordons dérouler sur 2. Pour fixer le support de câble en place, les câbles avant d’utiliser le chargeur de insérer une vis nº 8 dans l’ouverture batterie. en-dessous de chaque fente. REMARQUE : Les têtes de vis sont à 9.2 Tirez la poignée vers le haut pour emprise # 8-18. - Page 31 BOUTONS DE DÉPLACEMENT BOUTON DE TAUX DE SORTIE VERS LE HAUT/VERS LE BAS Utilisez cette touche pour sélectionner un Utilisées pour modifier le réglage de des débits suivants : n’importe quelle variable de l’affichage. Maintenir (4 A) Pour recharger les petites batteries, BOUTON DE SAUVEGARDE et pour maintenir de grandes batteries MÉMOIRE / TENSION...
-
Page 32: Consignes D'utilisation
11. CONSIGNES D’UTILISATION AVERTISSEMENT : Une étincelle près de CHARGE D’UNE BATTERIE la batterie peut provoquer une explosion. A L’EXTÉRIEUR DU VÉHICULE IMPORTANT : Ne pas démarrer le 1. Mettez la batterie dans un endroit véhicule avec le chargeur branché à bien ventilé. - Page 33 DÉSULFATATION UTILISATION DU MODE BOOST Si la batterie demeure déchargée pour une 1. Réglez la Tension de la batterie à 6 V longue période de temps, celle-ci pourrait ou 12 V. devenir sulfatée et ne pas permettre ATTENTION : le chargement normal. Si le chargeur Toujours confirmer visuellement la tension détecte une batterie sulfatée, il passera de la batterie à...
- Page 34 4. Appuyez sur le bouton START/STOP. Certains nouveau véhicules peuvent L’afficheur numérique indiquera « On » prendre plus de 100 A lors du flash durant deux (2) minutes. reprogrammation de l’ECU. Consultez les spécifications du fabricant du véhicule 5. Actionner le démarreur du véhicule achargeur «...
-
Page 35: Maintenance Et Entretien
IMPORTANT! 8. Débrancher les câbles de la batterie Certains véhicules ne permettent pas du véhicule et de couvrir les câbles l’utilisation de l économiseur de mémoire le positif et négatif avec un isolant, OBDII. Consultez le fabricant du véhicule comme du scotch électricien. Cela avant de l’utiliser, afin de déterminer si un empêche les connecteurs de métal garde de mémoire est acceptable pour une... -
Page 36: Dépannage
13. CODES D’ÉCHEC ET DÉPANNAGE Codes d’échec CODE DESCRIPTION RAISON / SOLUTION La tension de batterie est toujours La batterie pourrait être mauvaise; faites-la vérifier en dessous de 10 V (pour une ou remplacer. batterie de 12V) or 5V (pour une batterie de 6V) après 2 heures de chargement. - Page 37 PROBLÈME CAUSE POSSIBLE SOLUTION Le voyant DEL Boost / Le chargeur est encore en Ceci est normal. Sur le mode Boost, Charge ne s’éteint mode de Boost. le voyant DEL ne s’éteindra pas. pas jusqu’à ce que la batterie soit débranchée du chargeur.
- Page 38 PROBLÈME CAUSE POSSIBLE SOLUTION Le chargeur fait Le disjoncteur fonctionne. Le disjoncteur sert à protéger entendre un cliquetis. l’appareil lorsqu’il se trouve sous les conditions qui lui donnent une haute capacité. Si le disjoncteur défile souvent, arrêtez l’opération en appuyant sur le bouton START/ STOP et attendez que le dispositif refroidisse avant de redémarrer l’opération.
-
Page 39: Spécifications
14. SPÉCIFICATIONS Entrée ..................120V CA 60Hz, 12,5A cont., 49A int. Sortie ......................6/12V DC, 4/15A cont. 60A int. (60 sec. max. ON, 120 sec. min. OFF) 275A int. (5 sec. max. ON, 180 sec. min. OFF) 15. GARANTIE LIMITÉE SCHUMACHER ELECTRIC CORPORATION, 801 BUSINESS CENTER DRIVE, MOUNT PROSPECT, IL 60056-2179, DONNE CETTE GARANTIE LIMITÉE POUR PREMIER ACHETEUR DE CE PRODUIT.
Need help?
Do you have a question about the MC1220 and is the answer not in the manual?
Questions and answers