Table of Contents
Advertisement
Quick Links
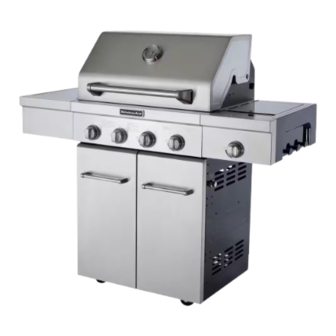
FREESTANDING OUTDOOR GRILL
Installation Instructions and Use & Care Guide
For questions about features, operation/performance, parts, accessories or service, call: 1-877-373-2301
or visit our website at www.Kitchenaidgrills.com
ASADOR AUTÓNOMO PARA EXTERIOR
Instrucciones de instalación y Manual de uso y cuidado
Para consultas respecto a características, funcionamiento, rendimiento, piezas, accesorios o servicio técnico, llame al: 1-877-373-2301
o visite nuestro sitio de internet en www.Kitchenaidgrills.com
COMPTOIR POUR GRIL D'EXTÉRIEUR
AUTOPORTANT
Instructions d'installation et Guide d'utilisation et d'entretien
Pour des questions à propos des caractéristiques, du fonctionnement/rendement, des pièces, des accessoires ou du service,
composer le : 1-877-373-2301
ou visitez notre site web www.Kitchenaidgrills.com
Table of Contents/Índice/Table des matières.................................................................. 2
720-0745B (LP) 730-0745B (NG)
19000358A4
Advertisement
Table of Contents

Related Manuals for KitchenAid 730-0745B


Summary of Contents for KitchenAid 730-0745B
- Page 1 Instructions d’installation et Guide d’utilisation et d’entretien Pour des questions à propos des caractéristiques, du fonctionnement/rendement, des pièces, des accessoires ou du service, composer le : 1-877-373-2301 ou visitez notre site web www.Kitchenaidgrills.com Table of Contents/Índice/Table des matières..............2 720-0745B (LP) 730-0745B (NG) 19000358A4...
-
Page 2: Table Of Contents
TABLE OF CONTENTS OUTDOOR GRILL USE …………………………………………23 ………………………………3 OUTDOOR GRILL SAFETY Using Your Outdoor Grill ………………………………..….…23 INSTALLATION REQUIREMENTS………………………..5 Using Your Side Burner…………………………………..……25 Tools and Parts……………...…………………………………5 TIPS FOR OUTDOOR GRILLING ……………………….…..26 Location requirements…………………………………..…….5 Cooking Methods ………………….………………………...….27 Product Dimensions……………………………….………….6 Grilling Chart ………………………….……………………..….27 Gas Supply Requirements……………………………………7 OUTDOOR GRILL CARE …………………………………..…29 Gas Connection Requirements………………………………7... -
Page 3: Outdoor Grill Safety
OUTDOOR GRILL SAFETY Your safety and the safety of others are very important. We have provided many important safety messages in this manual and on your appliance. Always read and obey all safety messages. This is the safety alert symbol. This symbol alerts you to potential hazards that can kill or hurt you and others. - Page 4 IMPORTANT SAFETY INSTRUCTIONS WARNING: To reduce the risk of fire, electrical shock, ■ The LP gas supply cylinder to be used must be: injury to persons, or damage when using the outdoor cooking - constructed and marked in accordance with the gas appliance, follow basic precautions, including the Specification for LP Gas Cylinders of the U.S.
-
Page 5: Installation Requirements
INSTALLATION REQUIREMENTS Tools and Parts Location Requirements Gather the required tools and parts before starting installation. WARNING Read and follow the instructions provided with any tools listed here. Tools Needed Scissors or cutting pliers ■ Phillips screwdriver ■ (to remove tiedowns) ■... -
Page 6: Product Dimensions
Product Dimensions 55" 31" (1405cm) (78.74cm) 12 5/8" (32cm) 12 5/8" (32cm) 48 5/8" (123.5cm) 23" (58.42cm) -
Page 7: Gas Supply Requirements
Burner Requirements for High Altitude Gas Supply Requirements Input ratings shown on the model/serial rating plate are for WARNING elevations up to 2,000 ft (609.6 m). For elevations above 2,000 ft (609.6 m), ratings are reduced at a rate of 4% for each 1,000 ft (304.8 m) above sea level. Orifice conversion is required. - Page 8 3. Place the 20 lb LP gas fuel tank bottom collar into the Natural Gas Conversion mounting hole in the tank tray. 4. Tighten the locking screw against the bottom collar of the Conversion must be made by a qualified gas technician. The 20 lb LP gas fuel tank to secure.
-
Page 9: Replacement Parts
REPLACEMENT PARTS... - Page 10 Part Part (description) Warranty Quantity Part Part (description Warranty Quantity Number Coverage Number Coverage Main lid Gas tank tray slide bracket, left Main lid screw Tank tray Temperature gauge housing Gas tank tray slide bracket, right Temperature gauge Electric igniter module Main lid handle seat, left Bottom panel...
-
Page 11: All Pre-Assembly List
All Pre-Assembled Screws List Sort Description Size Quantity ¹⁄₄ Screw (with washer) ¹⁄₄*12mm ⁵⁄₃₂ Screw (with washer) ⁵⁄₃₂*12mm M4 Screw (with washer) M4*8mm ⁵⁄₃₂ Screw ⁵⁄₃₂*12mm ⁵⁄₃₂ Flat washer ⁵⁄₃₂ Lock nut... -
Page 12: Package Contents List
Package Content List Side Burner Assembly Side Shelf Assembly Side Burner Ignitor Warming Rack Bezel Control Knob... -
Page 13: Installation Instructions
INSTALLATION INSTRUCTIONS Freestanding Outdoor Grill Installation 4. Remove 2 screws on grill side panel and 1 screw on grill control panel. WARNING Excessive Weight Hazard Use two or more people to move and install grill. Failure to do so can result in back or other injury. Unpack Grill 1. - Page 14 8. Remove the 2 screws from the side burner valve assembly. 11. Attach side burner orifice bracket with side burner tube See illustration in Step 10. with preassembled brass screw, then tighten by wrench. Push the valve stem out through the opening in the front of the side burner shelf, lining up the holes in the side burner valve assembly with the openings on the side burner shelf.
- Page 15 13. Insert the valve stem into the knob and push knob into place. 5. Attach the top of the side shelf to the grill (B) by inserting the 2 screws removed in Step 3 into the side shelf from inside the grill hood and tighten.
-
Page 16: Make Gas Connection
Complete Assembly Make Gas Connection NOTE: If grill is to be converted to Natural gas, follow instructions 1. Replace the grill grates. in the “Gas Conversions” section. 2. Place warming shelf on brackets as shown.. 20 lb LP Gas Fuel Tank WARNING Explosion Hazard Securely tighten all gas connections. - Page 17 3. Place the 20 lb LP gas fuel tank bottom collar into the 5. Using your hand, turn the gas pressure regulator/hose mounting hole in the tank tray. assembly clockwise to connect to the 20 lb LP gas fuel tank as shown.
- Page 18 To Disconnect the 20 lb LP Gas Fuel Tank: 1. Check that the burner control knobs are in the “Off” position and the grill is cool. 2. Check that the 20 lb LP gas fuel tank is in the “Off” position. If not, turn the valve clockwise until it stops.
-
Page 19: Gas Conversion
GAS CONVERSIONS 5. Use an adjustable wrench to remove the LP regulator from the manifold. Tools and Parts for Gas Conversion Gather the required tools and parts before starting installation. Read and follow the instructions provided with any tools listed here. - Page 20 3. Connect the quick connector on the other end of the 3. Use a 6 mm socket and wrench or 6 mm nut driver to remove 10 ft (3.0 m) PVC flexible gas supply hose to the rigid Natural the brass orifice from the end of gas valve. The main burner gas supply pipe.
- Page 21 Change the side burner orifice Record Conversion 1. The appliance nameplate is located inside the grill cabinet on 1. Locate the Liquid propane orifice at the end of the valve. the left-hand cabinet side. With a permanent marker, check 2. Use 6 mm socket wrench or 6 mm nut driver to remove the the box next to “Natural gas”...
-
Page 22: Check And Adjust The Burners
Check and Adjust the Burners The burners are tested and factory-set for most efficient 6. If flame is yellow (not enough air), turn air shutter adjustment operation. However, variations in gas supply and other conditions screw counterclockwise. may make minor adjustments to air shutter or low flame setting If flame is noisy or lifts away from burner (too much air), turn necessary. -
Page 23: Outdoor Grill Use
OUTDOOR GRILL USE This manual covers several different models. The grill you have purchased may have some or all of the features listed. The locations and appearances of the features shown here may not match those of your model. Control Panel A. - Page 24 4. You will hear the “snapping” sound of the spark. When burner Prepare the Grill for Lighting is lit, release the knob. Turn knob to desired setting. 5. Repeat for each of the other burners as needed. 1. Open the hood completely. Do not light burners with the hood closed.
-
Page 25: Using Your Side Burner
Using Your Side Burner Lighting the side burner Manually Lighting the Side Burner 1. Open the side burner lid. Do not light burners with the lid on. 1. Open the side burner cover. Do not light burners with the cover on. 2. -
Page 26: Tips For Outdoor Grilling
TIPS FOR OUTDOOR GRILLING WARNING Food Poisoning Hazard Do not let food sit for more than one hour before or after cooking. Doing so can result in food poisoning or sickness. Before Grilling ■ Thaw food items before grilling. ■ Preheat grill on high (use all grill burners) 10 minutes. -
Page 27: Cooking Methods
Cooking Methods Direct Heat Indirect Heat Cooking by direct heat means the food is placed on grill grates For best results, do not select the indirect heat cooking method directly above lighted burners. Hood position can be up or down. when it is windy. - Page 28 FOOD COOKING METHOD/ INTERNAL TEMP. TIME SPECIAL INSTRUCTIONS BURNER SETTING (total minutes) Lamb Chops and Steaks, Loin, Rib, Sirloin Med-rare (145°F/63°C) 1" (2.5 cm) thick DIRECT 10-20 Medium to Medium (160°F/71°C) Med-rare (145°F/63°C) 1½" (3.8 cm) thick DIRECT...
-
Page 29: Outdoor Grill Care
OUTDOOR GRILL CARE GRILL GRATES Replacing the Igniter Battery If igniters stop sparking, the battery should be replaced. IMPORTANT: To avoid damage to grill grates, do not use a steel 1. The igniter button cap is located on the outside of the grill’s or fiber scraper. - Page 30 BURNERS SIDE BURNER Cleaning Method: Cleaning Method: ■ Clean the exterior of the burner with a wire brush. ■ Clean the exterior of the side burner with a wire brush. ■ Clear any clogged burner ports with a straightened paper clip.
-
Page 31: Troubleshooting
Excessive flare-ups TROUBLESHOOTING ■ Is there excessive fat in the food being grilled? Keep flame on low or turn one burner off. Grill will not light Keep the hood up when grilling to avoid excessive flare-ups. ■ Is the 20 lb LP gas fuel tank valve turned off? Move food to the warming rack until flames subside. -
Page 32: Warranty
LIMITED WARRANTY Nexgrill warrants to the original consumer-purchaser only that this product (Model #720/730-0745B) shall be free from defects in workmanship and materials after correct assembly and under normal and reasonable home use for the periods indicated below beginning on the date of purchase. The manufacturer reserves the right to require photographic evidence of damage, or that defective parts be returned, postage and or freight pre-paid by the consumer, for review and examination.... - Page 33 DISCLAIMER OF IMPLIED WARRANTIES; LIMITATION OF REMEDIES Repair or replacement of defective parts is your exclusive remedy under the terms of this limited warranty. Manufacturer will not be responsible for any consequential or incidental damages arising from the breach of either this limited warranty or any applicable implied warranty, or for failure or damage resulting from acts of God, improper care and maintenance, grease fire, accident, alteration, replacement of parts by anyone other than Manufacturer, misuse, transportation, commercial use, abuse, hostile environments (inclement weather, acts of nature, animal tampering), improper installation or installation not in accordance with local codes or printed...
Need help?
Do you have a question about the 730-0745B and is the answer not in the manual?
Questions and answers