
Subscribe to Our Youtube Channel
Related Manuals for jcb 210X


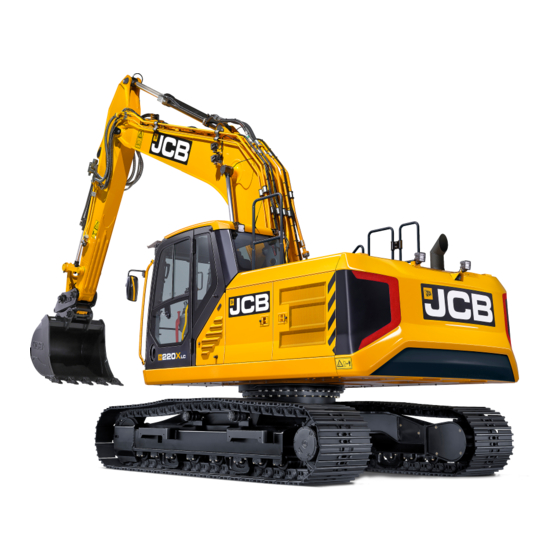
Summary of Contents for jcb 210X
- Page 1 OPERATOR'S MANUAL EXCAVATOR 210X, 220X EN - 9831/3750 ISSUE 3 - 03/2018 THIS MANUAL SHOULD ALWAYS STAY WITH THE MACHINE...
- Page 2 Operator's Manual. You must understand and follow the instructions in the Operator's Manual. If you do not understand anything, ask your employer or JCB dealer to explain it. OPERATOR'S Do not operate the machine without an Operator's...
- Page 3 Notes: 9831/3750-3 Find manuals at https://best-manuals.com...
-
Page 4: Table Of Contents
Table of Contents Contents Page No. Acronyms Glossary ............................viii Introduction About this Manual Model and Serial Number ........................1 Using the Manual ..........................1 Left-Hand Side, Right-Hand Side ......................1 Cross References ..........................1 Safety Safety - Yours and Others ........................2 Safety Warnings ............................ - Page 5 Table of Contents Walk-Around Inspection General ..............................29 Entering and Leaving the Operator Station General ..............................30 Emergency Exit ........................... 31 Doors Operator Door ............................. 32 Windows Front Window ............................34 Sun Visor/Sunblind Sunblind .............................. 36 Battery Isolator General ..............................40 Before Starting the Engine General ..............................
- Page 6 Table of Contents Driving the Machine General ..............................84 Towing Other Equipment ........................84 Operating Levers/Pedals General ..............................85 Control Layouts ........................... 85 Excavator End Controls ........................85 Dozer Blade Controls ......................... 93 Auxiliary Circuit Controls ........................93 Lifting and Loading General ..............................
- Page 7 Table of Contents Refuelling General .............................. 132 Low Fuel Levels ..........................132 Filling the Tank ..........................132 Attachments Working with Attachments Introduction ............................137 Attachments for your Machine ......................137 Connecting/Disconnecting Hydraulic Hoses ..................140 Impact Protection ..........................144 Direct-Mounted Attachments General ..............................
- Page 8 Table of Contents Maintenance Positions General .............................. 177 Maintenance Position (Excavator End Lowered) ................177 Service Points General .............................. 178 Access Apertures General .............................. 185 Battery Cover ............................ 185 Engine Compartment Cover ......................186 Hydraulic Compartment Cover ......................188 Radiator Cover ..........................189 Tools General ..............................
- Page 9 Table of Contents Tracks General ............................. 218 Steel ..............................219 Idler Wheels ............................220 Rollers ............................... 220 Track Gearbox Oil ..............................221 Slew Gearbox Oil ..............................222 Hydraulic System General ............................. 223 Services ............................224 Oil ..............................224 Cylinders / Rams ..........................225 Hammer Filter ...........................
- Page 10 Table of Contents Engine General .............................. 272 Exhaust After Treatment (EAT) ......................272 Tracks General .............................. 276 Declaration of Conformity General .............................. 277 Data ..............................277 Warranty Information Service Record Sheet ........................279 9831/3750-3 Find manuals at https://best-manuals.com...
-
Page 11: Acronyms Glossary
Table of Contents Acronyms Glossary Auxiliary Relief Valve Controller Area Network CESAR Construction Equipment Security and Registration Direct Current Diesel Exhaust Fluid Engine Control Module Electronic Control Unit Exhaust Gas Recirculation FEAD Front End Accessory Drive FOGS Falling Object Guard System FOPS Falling Object Protective Structure HVAC... -
Page 12: Introduction
Particular attention must be given to all the safety aspects of operating and maintaining the machine. If there is anything you are not sure about, ask your JCB dealer or employer. Do not guess, you or others could be killed or seriously injured. -
Page 13: Safety
If you do not fully understand the warning messages, ask your employer or JCB dealer to explain them. Safety is not just a matter of responding to the warnings. All the time you are working on or with the machine you must be thinking of what hazards there might be and how to avoid them. -
Page 14: General Safety
Lightning can kill you. Do not use the machine if there is lightning in your area. Machine Modifications This machine is manufactured in compliance with prevailing legislative requirements. It must not be altered in any way which could affect or invalidate its compliance. For advice consult your JCB dealer. 9831/3750-3... -
Page 15: Clothing And Personal Protective Equipment (Ppe)
Introduction Safety Clothing and Personal Protective Equipment (PPE) Do not wear loose clothing or jewellery that can get caught on controls or moving parts. Wear protective clothing and personal safety equipment issued or called for by the job conditions, local regulations or as specified by your employer. -
Page 16: About The Product
Product Compliance Your JCB product was designed to comply with the laws and regulations applicable at the time of its manufacture for the market in which it was first sold. In many markets, laws and regulations exist that require the owner to maintain the product at a level of compliance relevant to the product when first produced. -
Page 17: Description
Description General The JCB Tracked Excavator is a self propelled machine with a tracked undercarriage and a revolving upper structure which has a boom, dipper, bucket and swing mechanism. The excavator is mainly used to dig below ground level with bucket motions towards the machine. The upper structure can slew 360°... -
Page 18: Optional Equipment And Attachments
Description Optional Equipment and Attachments A wide range of optional attachments are available to increase the versatility of your machine. Only the JCB approved attachments are recommended for use with your machine. Contact your JCB dealer for the full list of approved attachments available. -
Page 19: Product And Component Identification
Table 2. Explanation of the PIN Digit Description 1 to 3 World manufacturer identification. For example, JCB = UK Build. 4 to 8 Machine type and model. Random check letter. The check letter is used to verify the authenticity of a machine's PIN. -
Page 20: Operator Protective Structure
TOPS. Do not attempt to repair the ROPS or TOPS. If the ROPS or TOPS has been in an accident, do not use the machine until the structure has been examined and repaired. This must be done by a qualified person. For assistance, contact your JCB dealer. Failure to take precautions could result in death or injury to the operator. - Page 21 Any damage or modification to the structure may invalidate the ROPS certification. If damage has occurred then an authorised JCB dealer should be consulted. An excavator with a ROPS (Roll-Over Protective Structure) can be identified by referring to the identification plate.
- Page 22 About the Product Product and Component Identification Figure 7. XD Cage An excavator with a XD can be identified by referring to the identification plate. Work place (work site, job site) risk assessment should facilitate the machine selection and the need for an excavator with a XD cage. Figure 8.
-
Page 23: Safety Labels
Keep all of the safety labels clean and readable. Replace a lost or damaged safety label. Make sure the replacement parts include the safety labels where necessary. Each safety label has a part number printed on it, use this number to order a new safety label from your JCB dealer. Safety Label Identification Figure 9. - Page 24 About the Product Safety Labels Figure 10. Table 6. Safety Labels Item Part No. Description Qty. 817/70024 Warning. Do not use as a step. 332/F5860 Warning. Hot fluid under pressure. Read the Operator's Manual. 332/P4679 Warning. Severing of hands and fingers. Keep clear of/do not reach into rotating parts.
- Page 25 About the Product Safety Labels Item Part No. Description Qty. 400/F8445 Warning. Strike. Keep clear of the reversing machine. 400/F8139 Warning. Crushing of whole body. Keep a safe distance. 9831/3750-3...
-
Page 26: Operator Station
About the Product Operator Station Operator Station Component Locations Figure 11. A Track controls Refer to: Track Controls B Display unit Refer to: Instrument Panel (Page 60). (Page 64). C Switch panel Refer to: General (Page 19). D Dozer control (option) Refer to: Dozer Blade Controls (Page 93). - Page 27 About the Product Operator Station G Display control panel Refer to: General H Auxiliary power socket/media socket Refer to: (Page 19). Auxiliary Power Socket (Page 115). J Switch panel (option) Refer to: General K Ignition switch Refer to: Ignition Switch (Page 19).
-
Page 28: Interior Switches
About the Product Interior Switches Interior Switches General The installed switches and their positions can change according to the specification of the machine. Each switch has a graphic symbol to show the function of the switch. Before you operate a switch, make sure that you understand its function. -
Page 29: Cab Interior Light
About the Product Interior Switches Table 7. Switch Positions Position Function Off/Stop the Engine: Turn the ignition key to this position to stop the engine. Make sure the controls are in neutral and the excavator and dozer are lowered before you stop the engine. On: Turn the ignition key to this position to connect the battery to all of the elec- trical circuits. -
Page 30: Console Switches
About the Product Console Switches Console Switches General Figure 15. A Rotary media volume control. Rotate clockwise B Rotary media track/source control. Rotate to increase, anti-clockwise to decrease. Push to clockwise to skip forward, anti-clockwise to skip mute. backwards. Push to select source. C Engine start/stop button. - Page 31 This as a preview PDF file from best-manuals.com Download full PDF manual at best-manuals.com...
Need help?
Do you have a question about the 210X and is the answer not in the manual?
Questions and answers