Table of Contents
Advertisement
Quick Links
Advertisement
Table of Contents

Related Manuals for Esse-ti GSM300FXS


Summary of Contents for Esse-ti GSM300FXS
- Page 1 User’s manual...
- Page 2 Member States on the liability for damages arising from defective products under art. 15 of Law no. 183 of 16 April 1987). Esse-ti reserves the right to modify the product characteristics at any time without prior notice.
-
Page 3: Table Of Contents
TABLE OF CONTENTS GENERAL INSTALLATION INSTRUCTIONS ..5 General Notes............5 Making the installation.......... 5 DESCRIPTION ............6 Features ............... 6 Optional............... 6 INSTALLATION............7 Inserting the SIM card ..........8 Inserting the antenna ........... 8 JP1 Jumper ..............9 Connection to the telephone line ........ - Page 4 Call signals............26 LED..............26 Status indicator LED (RED) ........26 GSM Signal indicator LED (GREEN) ..... 26...
-
Page 5: General Installation Instructions
• The product must be EXCLUSIVELY used for the purpose it was designed for. Esse-ti shall not be responsible for damages arising from improper use. • The product has been designed in compliance with the regulations in force and must be installed in systems that comply with the provisions of law. -
Page 6: Description
DESCRIPTION GSM300 is a device that, connected to a fixed telephone or to the PSTN input terminals of a PABX or autodialer, allows you to make and receive calls over the GSM network. For correct operation, a normal SIM card is required. Features •... -
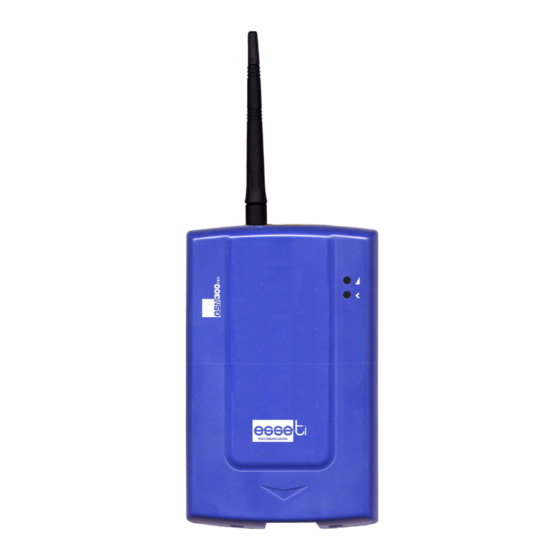
Page 7: Installation
INSTALLATION ANTENNA connector SIM CARD housing with front panel LED indicating signal strength (green) and LED indicating device operation status (red) 12Vdc power supply terminal Telephone line output (terminal block) 230Vac external adapter input Telephone line output (RJ11 connector) JP1 Jumper Page 7... -
Page 8: Inserting The Sim Card
Inserting the SIM card Before inserting or replacing the SIM card, always make sure that the module has been disconnected from the mains and that no electrostatic discharge is present in order to avoid damaging it. Take all necessary measures to avoid electrostatic discharge. Shift the SIM card housing cover upward and lift Carefully slide the SIM card in its housing cover. -
Page 9: Jp1 Jumper
JP1 Jumper The JP1 jumper (H in the picture at page 7) allows the variation of the voltage in the TEL terminal and in the RJ-11 connector (E and G respectively in the picture at page 7). A higher voltage may be required for the proper functioning of specific devices. -
Page 10: Turning The Gsm300 Module On
12 Vdc power supply Connect the power supply cable to the terminal (D in the picture at page 7) taking care to respect the polarity. Close the module cover, paying attention to the power supply cable. Note: a protection cut-out switch must be installed upstream interrupt... -
Page 11: Module Mounting Operations
Module mounting operations Verify the intensity of the GSM signal through the signal strength (green) LED (see “SIGNALS”) and identify an area where the signal is strong enough. Note: the signal strength may vary according to the telephone provider. Drill two holes with 5 mm diameter on the wall at a distance of 50 mm. -
Page 12: Gsm300 Installation Recommendations
GSM300 installation recommendations • The GSM300 module must be installed in a location where the radio signal allows for using the GSM system; • It is advisable to leave plenty of space around the module for maintenance operations; • Do not install the GSM300 module outdoors, since it lacks protection devices against weather conditions that can damage the module (water, humidity, etc.);... -
Page 13: Programming
PROGRAMMING Allows you to customise the module according to your requirements. Programming can be carried out locally via a MF telephone. You can programme: • Use mode; • Interdigit dialling time; • Country calling code ans International call prefix; • CLIP/CLIR settings;... -
Page 14: Use Mode
SE MODE It allows to indicate whether the device is connected to the input terminals of an autodialer or a PABX or directly to a fixed telephone (factory default). (mode) (confirm) Lift the handset and dial: **2; Enter: telephone or PABX mode; autodialer mode;... -
Page 15: Dialling Codes
(interdigit time) (confirm) Lift the handset and dial: **8*; Dial the interdigit dialling time: • interdigit time: 10 seconds; • interdigit time from 1to 9 seconds. Dial # to confirm. After the confirmation tone hang up or carry on with other programmings. E.g.: to set an interdigit dialling time of two seconds, dial: ** 8 * 2 # (confirmation tone). -
Page 16: Country Calling Code
Lift the handset and dial: **08*; Dial the international call prefix (max. 5 digits) Dial # to confirm. After the confirmation tone hang up or carry on with other programmings. Country calling code country calling code is the second part of a country’s code. - Page 17 Activation (day/month/year) (hh/mm) (confirm) Lift the handset and dial: **7*1*. Dial the day (two digits), the month (two digits) and the year (two digits). Dial *. Dial the hour (two digits); dial the minutes (two digits). Dial # to confirm. After the confirmation tone hang up or carry on with other programmings.
-
Page 18: Clir Setting
CLIR SETTING Permanent setting Thanks to this programming you can decide whether to send out your telephone number during outgoing calls. (option) (confirm) Lift the handset and dial: **6*. Enter: Behaviour based on the service provided by your provider; Restriction active; Restriction not active. -
Page 19: Roaming Setting
This programming allows you to activate the CLIR restriction for the immediately subsequent call. (confirm) Lift the handset and dial:**16. Dial # to confirm. After the confirmation tone hang up or carry on with other programmings. Disabling restriction for one call Initial situation: CLIR restriction active. -
Page 20: Adjustments
Enabling: (option) (acknowledgement) Lift the handset and digit code : **5*. Press: to disable the roaming function to enable the roaming function Digit # to confirm. Once the confirmation tone is received, hang up and go on with further programming. Note: the roaming service is enabled by factory default. -
Page 21: Reception
Enter the value (1 ~ 7) according to the table below: -6dB -4dB -2dB +2dB +4dB +6dB Dial # to confirm. After the confirmation tone hang up or carry on with other programmings. By default the value is 4. Reception (value) (confirm) Lift the handset and dial:**11*. -
Page 22: Reset
(confirm) Lift the handset and dial:**99#; After the confirmation tone hang up or carry on with other programmings. The default values are: Use mode PABX or telephone Interdigit dialling time International call prefix Country calling code CLIP disabled CLIR depends on the provider Roaming enabled Transmitter gain... -
Page 23: Services
SERVICES EASURING THE SIGNAL LEVEL This procedure allows you to check the RF signal level through your telephone. (tones) Lift the handset; Dial: **30#; Wait for the signal reading. The system will send a number of short tones corresponding to the signal level: Tones RF signal Quality... -
Page 24: Incoming Calls
provider. We recommend trying again after a few moments, and in case of no result, make sure that the SIM Card is working correctly. NCOMING CALLS Allows you to answer incoming calls. The telephone rings; Pick up the handset; conversation with a remote party starts. -
Page 25: Signals
SIGNALS ONES Dialling Indicates that the GSM300 is ready for dialing. Dissuasion Indicates: delay in dialing, end of conversation, access to services not permitted. Busy Indicates that the called party is busy. Confirmation Indicates that the requested service or programming has been accepted. - Page 26 No signal. ALL SIGNALS Indicates an incoming call. Status indicator LED (RED) Normal operation. GSM Signal indicator LED (GREEN) No signal. Low signal level. Medium signal level. High signal level. Page 26...
- Page 27 GSM300 Release 26/04/2010...
Need help?
Do you have a question about the GSM300FXS and is the answer not in the manual?
Questions and answers