Table of Contents
Advertisement
Available languages
Available languages
Quick Links
Advertisement
Chapters
Table of Contents
Troubleshooting

Related Manuals for Glacier bay VT3322TA0ACC


Summary of Contents for Glacier bay VT3322TA0ACC
- Page 1 SKU# Model #, Please refer page 4~7...
-
Page 2: Table Of Contents
Table of Contents Hardware Included Safety Information Package Contents Warranty Topmount Installation Pre-Installation Undermount Installation Planning Installation Care and Cleaning Tools Required Troubleshooting-Sink Troubleshooting-Faucet HOMEDEPOT.COM/GLACIERBAY... -
Page 3: Hardware Included
www.homedepot.com/glacierbay.com. NOTE: Under mount clips not included. If you are installing this sink as an under mount, please contact a professional installer or contact us at 1-855-HD-GLACIER to determine the type of clip needed. HOMEDEPOT.COM/GLACIERBAY... -
Page 4: Package Contents
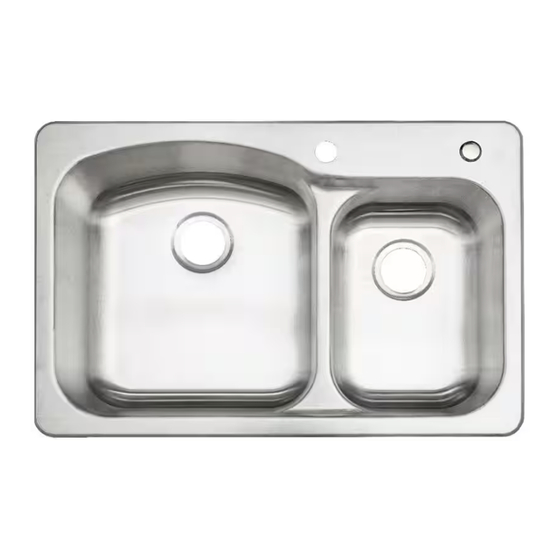
NOTE: Single bowl will be with 1 grid, 1 strainer, 1 strainer cover NOTE: Please matching your purchased product for below list. and double bowl will be with 2 grids, 2 strainers. SKU# Model# Bowls Picture Grid Strainers VT3322TA2PA1 Double VT3322TA1PA1 Single VT2522TA1PA1... - Page 5 NOTE: Single bowl will be with 1 grid, 1 strainer, 1 strainer cover NOTE: Please matching your purchased product for below list. and double bowl will be with 2 grids, 2 strainers. SKU# Model# Bowls Picture Grid Strainers VT3322TA0ACC Double VT3322TA1ACC Single VT2522TA1ACC Single HOMEDEPOT.COM/GLACIERBAY...
-
Page 6: Topmount Installation
Topmount Installation HOMEDEPOT.COM/GLACIERBAY... - Page 7 Top Mount Installation (Continued) Installing the faucet assembly Securing the faucet assembly CAUTION: Always shut off the water supply before From underneath the sink, secure the faucet removing an existing faucet or replacing any part of a assembly to the sink with the FastMount™ faucet.
- Page 8 Top Mount Installation (Continued) Attaching the quick connector to Installing the weight the receiving block Installing th Installing th Installing th Installing th Installing th Installing th Installing th Installing th Install the weight clip (R) at the point of the hose marking “weight here”.
- Page 9 Top Mount Installation (Continued) Installing the sink Making the water supply connections Cómo montar el conector rápido al Instalar la peso weight weight weight weight weight weight weight weight Apply silicone sealant (not included) around the underside and lip of the sink (A). bloque receptor Carefully lower the sink (A) into the counter.
-
Page 10: Undermount Installation
Undermount Installation WARNING: When you choose undermount style installation, please do not pull out the installation rail shown here as pulling this rail out will permanently damage the sink. It is strongly recommended that you have a professional installer install this sink for the undermount style. punta punta punta... - Page 11 Undermount Installation (Continued) NOTE: Under mount clips not included. If you are installing this sink as an under mount, please contact a professional installer or contact us at 1-855-HD-GLACIER to determine the type of clip needed. NOTE: Under mount clips not included. If you are installing this sink as an under mount, please contact a professional installer or contact us at 1-855-HD-GLACIER to determine the type of clip needed.
- Page 12 Undermount Installation (Continued) steps steps HOMEDEPOT.COM/GLACIERBAY HOMEDEPOT.COM/GLACIERBAY...
-
Page 13: Care And Cleaning
HOMEDEPOT.COM/GLACIERBAY... -
Page 14: Troubleshooting-Sink
Troubleshooting-Sink Problem Possible Cause Solution There are small rust spots Iron particles introduced by water,cookware recommend using a non-abrasive cleaner, Bar or discoloration and steel wood pad react with water to Keepers Friend is our favorite, and gently create rust sports. polishing the affected areas with the grain of the stainless steel –... -
Page 15: Troubleshooting-Faucet
Troubleshooting-faucet Problem Possible Cause Solution There are leaks The bonnet nut has come loose and the Use wrench to retighten the bonnet nut sufficiently. underneath the handle. o-ring on the cartridge is dirty or damaged. Clean or replace the o-ring. Remove the aerator and check for debris in the The aerator leaks or has The aerator is dirty or misfitted. - Page 17 ¿Tiene preguntas o problemas, o le faltan piezas? Antes de devolver a la tienda, llame al servicio de atención al cliente de Glacier Bay Lunes a viernes de 8:00 a.m. a 7:00 p.m., EST y los sábados de 9:00 a.m. a 6:00 p.m., EST 1-855-HD-GLACIER HOMEDEPOT.COM/GLACIERBAY...
-
Page 18: Índice
Los productos de Glacier Bay se fabrican con estándares y mano de obra de calidad superior y están respaldados por nuestra garantía limitada de por vida. Los productos de Glacier Bay están garantizados al comprador original de estar libre de defectos en materiales o mano de obra. -
Page 19: Herramientas Requeridas
Antes de la instalación PLANIFICACIÓN DE LA INSTALACIÓN Antes de la instalación, compruebe el espacio libre del armario: presenta cualquier defecto o daño, incluyendo abolladuras, combaduras, irregularidades o marcas de rozaduras. Si nota algún daño o hay www.homedepot.com/glacierbay.com. www.homedepot.com/glacierbay.com. www.homedepot.com/glacierbay.com. www.homedepot.com/glacierbay.com. -
Page 20: Contenido Del Paquete
Antes de la instalación (continuación) CONTENIDO DEL PAQUETE NOTA: el recipiente simple tendrá 1 parrilla y 1 filtro, y el recipiente NOTA: Haga coincidir el producto que compró con la siguiente lista. doble tendrá 2 parrillas y 2 filtros. Pieza Descripción Cantidad SKU# Modelo#... - Page 21 2 parrillas y 2 filtros. Pieza Descripción Cantidad SKU# Modelo# Recipientes Foto Cuadrícula Filtros Fregadero Plantilla para el montaje por arriba VT3322TA0ACC Doble Rejilla Cuba Anillo de drenaje Soltero Arandela de caucho VT3322TA1ACC Arandela de papel Contratuerca Junta plástica...
-
Page 22: Instalación
Tipos de instalación Usted puede optar por instalar este fregadero sobre su encimera (tipo 1: montaje por arriba) o por debajo de su encimera Cómo hacer las conexiones Cómo hacer las conexiones Cómo hacer las conexion Cómo hacer las conexion Cómo hacer las conexion Cómo hacer las conexion Cómo hacer las conexion... - Page 23 the rec the rec the rec the rec the rec the rec the rec the rec the r the r the r the r the r the r the r the r attach it to t attach it to t attach it to t attach it to t attach it to t...
- Page 24 Installing the weight eiving block eiving block eiving block eiving block eiving block eiving block eiving block eiving block ving block ving block ving block ving block ving block ving block ving block ving block bloque rec bloque rec bloque rec bloque rec bloque rec bloque rec...
- Page 25 ptor ptor ptor ptor ptor ptor ptor ptor Instalación por arriba (continuación) bloque receptor (1). bloque receptor (1). bloque receptor (1). bloque receptor (1). bloque receptor (1). bloque receptor (1). bloque receptor (1). bloque receptor (1). ue receptor (1). ue receptor (1). ue receptor (1).
- Page 26 Instalación por abajo ADVERTENCIA: WARNING: WARNING: Cuando elija la instalación de estilo de montaje por abajo, no quite el riel de instalación ilustrado ya que hacerlo dañará When you choose undermount style installation, please do not pull out the installation rail shown here as pulling this rail out When you choose undermount style installation, please do not pull out the installation rail shown here as pulling this rail out WARNING: de forma permanente el fregadero.
- Page 27 Instalación por abajo (continuación) Preparación del fregadero n here as pulling this rail out s sink for the u s sink for the u s sink for the u s sink for the undermount style. Colocar el fregadero debajo del hueco cortado de la encimera; y comprobar que el hueco es apropiado para el fregadero; ajustar el corte si es necesario. Coloque un soporte debajo del fregadero para facilitar la instalación y evitar que se caiga.
- Page 28 Instalación por abajo (continuación) Instalación del grifo steps Consulte los pasos 10 al 12 en la página 8. steps Instalación de la rejilla Cuando termine, coloque la rejilla del fregadero (K) en el fregadero. HOMEDEPOT.COM/GLACIERBAY HOMEDEPOT.COM/GLACIERBAY Póngase en contacto con 1-855-HD-GLACIER para obtener más ayuda. HOMEDEPOT.COM/GLACIERBAY...
-
Page 29: Cuidado Y Limpieza
Cuidado y limpieza Se recomienda una limpieza diaria y regular para eliminar la suciedad y evitar manchas. Utilice detergente líquido para vajilla, agua y una esponja suave de uso doméstico. de acero inoxidable del fregadero, enjuague con agua y limpie el fregadero con un paño suave y seco. Secar el fregadero evitará las manchas de agua causadas por el contacto con el agua. -
Page 30: Solución De Problemas: Fregadero
Solución de problemas: fregadero Problema Causa posible Solución Hay pequeñas manchas Las partículas de hierro introducidas por el Recomendamos usar un limpiador no abrasivo, de óxido o decoloración. agua, los utensilios de cocina y la Bar Keepers Friend es nuestro favorito, y pulir almohadilla de madera de acero reaccionan suavemente las áreas afectadas con la veta del con el agua para crear óxido. -
Page 31: Solución De Problemas-Grifo
Solución de problemas-grifo Problema Posible causa Solución Hay filtraciones debajo de La tuerca ciega se aflojó y el aro tórico del Usa la llave para volver a apretar lo suficiente la la manija. cartucho está sucio o dañado. tuerca ciega. Limpiao reemplaza el aro tórico. Quita el aireador y comprueba que no haya El aireador tiene El aireador está... - Page 32 ¿Tiene preguntas o problemas, o le faltan piezas? Antes de devolver a la tienda, Questions, problems, missing parts? Before returning to the store, llame al servicio de atención al cliente de Glacier Bay call Glacier Bay Customer Service Lunes a viernes de 8:00 a.m. a 7:00 p.m., EST y los sábados de 9:00 a.m. a 6:00 p.m., EST 8 a.m.
Need help?
Do you have a question about the VT3322TA0ACC and is the answer not in the manual?
Questions and answers