Table of Contents
Advertisement
Available languages
Available languages
Internet#
Model#
SKU#
303783504
HD834X-0001
1002910935
INSTALLATION AND CARE GUIDE
ARAGON 3-HANDLE 1-SPRAY TUB AND
SHOWER FAUCET
Questions, problems, missing parts?
Before returning to the store, call Glacier Bay Customer Service
8 a.m. - 7 p.m., EST, Monday - Friday
9 a.m. - 6 p.m., EST, Saturday
1-855-HD-GLACIER (1-855-434-5224)
HOMEDEPOT.COM/GLACIERBAY
THANK YOU
We appreciate the trust and con dence you have placed in Glacier Bay through the purchase of this tub and
shower faucet. We strive to continually create quality products designed to enhance your home. Visit us online
to see our full line of products available for your home improvement needs. Thank you for choosing Glacier Bay!
THD
3/2023 REV.04
Advertisement
Chapters
Table of Contents

Subscribe to Our Youtube Channel
Related Manuals for Glacier bay ARAGON HD834X-0001


Summary of Contents for Glacier bay ARAGON HD834X-0001
- Page 1 HOMEDEPOT.COM/GLACIERBAY THANK YOU We appreciate the trust and con dence you have placed in Glacier Bay through the purchase of this tub and shower faucet. We strive to continually create quality products designed to enhance your home. Visit us online to see our full line of products available for your home improvement needs.
-
Page 2: Table Of Contents
Glacier Bay products are manufactured with superior quality standards and workmanship and are backed by our limited lifetime warranty. Glacier Bay products are warranted to the original consumer purchaser to be free of defects in materials or workmanship. We will replace FREE OF CHARGE any product or parts that proves defective. -
Page 3: Pre-Installation
Pre-Installation PLANNING INSTALLATION ADVANCED INSTALLATION: Consult a plumber or professional before installing this product. Before beginning the installation of this product, ensure all parts are present. Compare parts with the Package Contents list. If any part is missing or damaged, do not attempt to install the product. Contact Customer Service for replacement parts. - Page 4 Pre-Installation (continued) B. IPS Safety Measuring Tube Thread Pipe goggles tape cutter hole saw sealant tape wrench Phillips Silicone Adjustable Flashlight Strap wrench screwdriver sealant wrench C. PEX+COPPER COPPER COPPER Safety Measuring Tube Thread Full circle goggles tape cutter hole saw sealant tape crimping tool Phillips...
- Page 5 Pre-Installation (continued) D. CPVC+COPPER COPPER COPPER Safety Measuring Tube Thread Flashlight goggles tape cutter hole saw sealant tape Phillips Silicone CPVC CPVC Adjustable Strap wrench screwdriver sealant cement cleaner wrench HOMEDEPOT.COM/GLACIERBAY Please contact 1-855-HD-GLACIER for further assistance.
-
Page 6: Package Contents
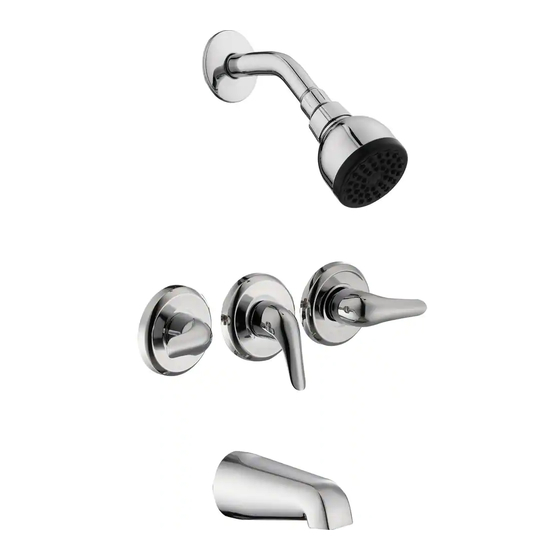
Pre-Installation (continued) PACKAGE CONTENTS Part Description Quantity Shower ange Shower arm Shower head Valve body Flange Handle Set screw Plug Tub spout 2.5mm hex wrench... -
Page 7: Installation
Installation Installing the supply Preparing for installation connections CAUTION: Always shut off the water supply before NOTE: Hot water supply lines go into the “H” inlet; removing an existing faucet or replacing any part of a cold water supply lines go into the “C” inlet. faucet. - Page 8 Installation (continued) Installing the tub and shower Flushing the water outlets and outlet connections checking for leaks □ Attach the handle (F) onto the valve body (D) NOTE: Do not use PEX or CPVC between the valve body (D) and turn the handle to the full on mixed position. and tub spout (I).
- Page 9 Installation (continued) Installing the shower flange, Installing the tub spout shower arm, and shower head □ Insert the long end of the shower arm (B) □ Wrap thread sealant tape around the pipe through the shower ange (A), then wrap thread threads of the tub spout outlet (1, not included) sealant tape around the long end of the shower respectively in a direction the same to the pipe...
-
Page 10: Care And Cleaning
Installation (continued) Installing the handle NOTE: Before proceeding, ensure the valves are closed. □ Position the anges (E) on the valve body (D). □ Place the handles (F) onto the valve body (D) and tighten the set screw (G) with the Hex wrench (Hex: 2.5 mm, J) provided. -
Page 11: Troubleshooting
Troubleshooting NOTE: Refer to the Service Parts section in this manual for a detailed drawing showing the location of the parts listed below. Problem Possible Cause Solution □ □ There is leaking or dripping The grommets are not sealing properly. Replace the cartridge. -
Page 12: Service Parts
Service Parts Faucet ID tags can be found on the hot side of the valve body Part Description Part Number Part Description Part Number Shower ange RP38046* Handle assembly RP13871* Shower arm RP38408* RP70848 Diverter RP20136 Shower head RP38301* Cartridge C RP20135 RP70770 Cartridge H... - Page 13 Questions, problems, missing parts? Before returning to the store, call Glacier Bay Customer Service 8 a.m. - 7 p.m., EST, Monday - Friday 9 a.m. - 6 p.m., EST, Saturday 1-855-HD-GLACIER (1-855-434-5224) HOMEDEPOT.COM/GLACIERBAY Retain this manual for future use.
- Page 14 HOMEDEPOT.COM/GLACIERBAY GRACIAS Apreciamos la con anza que has depositado en Glacier Bay al comprar este grifo para bañera y ducha. Nos esforzamos por crear continuamente productos de calidad diseñados para mejorar tu hogar. Visítanos en Internet para ver nuestra línea completa de productos disponibles para las necesidades de mejoras de tu hogar.
-
Page 15: Información Importante
GARANTÍA DE POR VIDA LIMITADA Los productos de Glacier Bay están fabricados con normas y mano de obra de calidad superior y están respaldados por nuestra garantía de por vida limitada. Los productos de Glacier Bay están garantizados al comprador consumidor original de estar libres de defectos en materiales o mano de obra. -
Page 16: Pre-Instalación
Pre-instalación PLANIFICACIÓN DE LA INSTALACIÓN INSTALACIÓN AVANZADA: Consulta a un plomero o profesional antes de instalar este producto. Antes de comenzar la instalación de este producto, asegúrate de que no falta ninguna pieza. Compara las piezas con la lista de Contenido del paquete. Si falta alguna pieza o está dañada, no intentes instalar el producto. Comunícate con el servicio al cliente para piezas de repuesto. - Page 17 Pre-instalación (continuación) B. IPS Gafas de Cinta Cortador de Serrucho Cinta selladora Llave para seguridad métrica tuberías de punta para roscas tubería Destornillador Sellador de Llave Linterna Llave de correa Phillips silicona ajustable C. PEX+COBRE COPPER COPPER Gafas de Cinta Cortador de Serrucho Cinta selladora...
- Page 18 Pre-instalación (continuación) D. CPVC+COBRE COPPER COPPER Gafas de Cinta Cortador de Serrucho Cinta selladora Linterna seguridad métrica tuberías de punta para roscas Destornillador Sellador de Cemento Limpiador Llave Llave de correa Phillips silicona CPVC CPVC ajustable HOMEDEPOT.COM/GLACIERBAY Para obtener asistencia, llama al 1-855-HD-GLACIER.
-
Page 19: Contenido Del Paquete
Pre-instalación (continuación) CONTENIDO DEL PAQUETE Pieza Descripción Cantidad Brida de la ducha Brazo de la ducha Cabezal de la ducha Cuerpo de la válvula Brida Llave Tornillo de jación Tapón Caño de la bañera Llave hexagonal de 2.5 mm... -
Page 20: Instalación
Instalación Cómo instalar las conexiones Cómo prepararse para de suministro la instalación PRECAUCIÓN: Cierra siempre el suministro de agua NOTA: Las líneas de suministro de agua caliente van en antes de retirar un grifo existente o reemplazar alguna la entrada “H”; las de agua fría, en la entrada “C”. parte del mismo. - Page 21 Instalación (continuación) Cómo instalar las conexiones Cómo purgar las salidas de salida de la bañera y la de agua y chequear que no ducha haya fugas □ Coloca la manija (F) en el cuerpo de la válvula (D) NOTA: No uses PEX ni CPVC entre el cuerpo de la y gira la manija a la posición de mezcla al máximo.
- Page 22 Instalación (continuación) Cómo instalar la brida de la Cómo instalar el caño de la ducha, el brazo de la ducha bañera y el cabezal de la ducha □ Coloca cinta selladora para rosca alrededor de las roscas de la tubería de la salida del caño de □...
-
Page 23: Cuidado Y Limpieza
Instalación (continuación) Cómo instalar la llave NOTA: Antes de continuar, asegúrate de que las válvulas estén cerradas. □ Coloca las bridas (E) sobre el cuerpo de la válvula (D). □ Coloca la llaves (F) en el cuerpo de la válvula (D) y aprieta el tornillo de jación (G) con la llave hexagonal (hexagonal de 2.5 mm, J) incluida. -
Page 24: Solución De Problemas
Solución de problemas NOTA: Consulta en la sección de piezas de repuesto de este manual una ilustración detallada sobre la ubicación de las piezas enumeradas más abajo. Problema Posible causa Solución □ Hay una fuga o ltración □ Los remaches no están debidamente Reemplaza el cartucho. -
Page 25: Piezas De Repuesto
Piezas de repuesto Las etiquetas de identi cación del grifo pueden encontrarse en el lado de agua caliente del cuerpo de la válvula Pieza Descripción Número de pieza Pieza Descripción Número de pieza Brida de la ducha RP38046* Ensamblaje de la llave RP13871* Brazo de la ducha RP38408*... - Page 26 ¿Problemas, preguntas o piezas faltantes? Antes de regresar a la tienda, llama al servicio al cliente de Glacier Bay de lunes a viernes entre 8 a.m. y 7 p.m. y los sábados entre 9 a.m. y 6 p.m.(hora estándar del Este) 1-855-HD-GLACIER (1-855-434-5224) HOMEDEPOT.COM/GLACIERBAY...
Need help?
Do you have a question about the ARAGON HD834X-0001 and is the answer not in the manual?
Questions and answers