Advertisement
Quick Links
Advertisement

Related Manuals for Engl E670FE Special Edition


Summary of Contents for Engl E670FE Special Edition
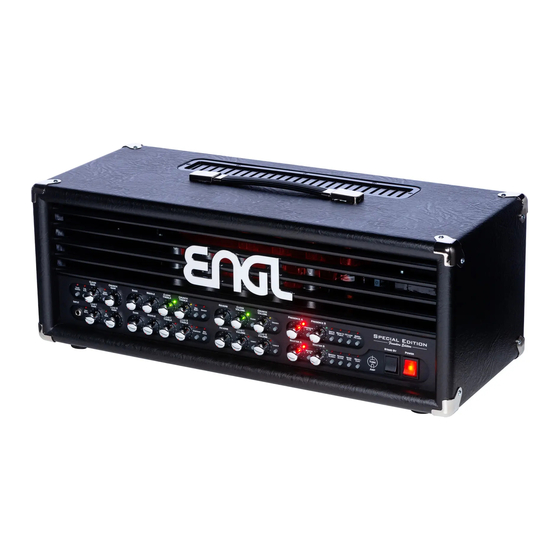
- Page 1 E670FE Special Edition Operator´s Manual...
- Page 2 In consequence this ambitious project meant a sophisticated challenge for the Amp Sound Designer Horst Langer who started his career together with Edmund Engl in the early eighties. The resulting product is a highly advanced and versatile tube amp head that stands out in today's market.
- Page 3 Tube Driver switch Pressing this button activates the Tube Driver, a circuit similar to a very simple preamp channel. Think of it as an active, tube-driven preamp defeat circuit. Note that this circuit can be selected in reciprocation with the four channels, whereby reciprocation means that you can activate the Tube Driver irrespective of the currently active channel and vice versa.
- Page 4 Middle Mid-range voicing control of the preamps passive EQ for the Clean Channel and the Crunch Channel. Clean Treble Upper range voicing control of the preamps passive EQ for Clean Channel. Crunch Treble Upper range voicing control of the preamps passive EQ for Crunch Channel. Mid Shift switch This voicing function works on the channels Clean and Crunch and affects both channels by boosting and/or cutting certain mid-range frequencies of the signal when activated.
- Page 5 » This feature can be controlled by the Z9 footswitch (optional available accessory) via the Serial Amp Control (S.A.C.) Port. » This feature can be controlled via the ENGL Z4 Footswitch (optional available accessory; conventional 6.3mm / ¼” TRS – dual footswitch).
- Page 6 Depth Boost switch Push this push button to beef up the bottom end in the poweramp stage only. The red LED above this button lights up to indicate the Depth Boost is activated. » This feature can be controlled via MIDI (MIDI program change and/or control change CC#26). »...
- Page 7 Lead I Gain Gain control for the Lead I channel. Hi Gain switch Pressing this button ups the gain factor, thereby increasing the amount of distortion in both Lead Channels. The red LED above this button lights up to indicate Hi Gain is active. »...
- Page 8 » This feature can be controlled by the Z9 footswitch (optional available accessory) via the Serial Amp Control (S.A.C.) Port. » This feature can be controlled via the ENGL Z4 Footswitch (optional available accessory; conventional 6.3mm / ¼” TRS – dual footswitch).
- Page 9 Master A Master volume knob, located post FX Loop. It controls the poweramp output level. The red LED top right to the knob lights up to indicate Master A is active. Master A/B switch Push this button to switch between Master A and Master B. The LED top right to the respective Master control lights up to indicate which one is activated.
- Page 10 Noise Gate switch Push this button to activate / deactivate the Noise Gate function and suppress excess noise in the Crunch, Lead I and Lead II Channels. Control the Noise Gate threshold using the Noise Gate Threshold knob located on the back panel of the amp.
- Page 11 How to store a setting with programmable features to a MIDI memory slot (generally called a preset) This is how it works: 1. Send a PC # message to the amp. 2. Select the desired channel and functions for the preset you want to create. 3.
- Page 12 MIDI cable. NOTE: In order to be able to supply an ENGL MIDI footswitch with power, a 5-pin MIDI cable (all 5 pins must be connected through) must be used.
- Page 13 Midi Channel, Control Change CC#, Amp Mute Use this DIP switch to assign the MIDI channel by which the amp‘ s MIDI system will receive program change commands and specific MIDI controller commands assigned to certain amp functions. Your choices are the standard 16 MIDI channels numbered from 00 to 15, as well as OMNI mode, whereby all MIDI data is received regardless of the MIDI send channel MIDI controller access permission set with the small switch labeled '6' on the larger piano DIP switch:...
- Page 14 It is an ENGL proprietary data protocol which allows you to control various functions of the amplifier via an S.A.C. capable footswitch like the ENGL Z9. To learn if a given feature or function may be controlled remotely, refer to its description herein.
- Page 15 (conventional 6,3mm / ¼” TS). Another option is to connect this output through an outboard filter to emulate a speaker or for example into the ENGL CABLOADER (IR-Loader with an integrated microphone and poweramp simulation), and feed this externally processed signal to a recording device or PA system.
- Page 16 (conventional 6,3mm / ¼” TS). Another option is to connect this output through an outboard filter to emulate a speaker, or for example into the ENGL CABLOADER (IR-Loader with an integrated microphone and poweramp simulation), and feed this externally processed signal to a recording device or PA system.
- Page 17 You can feed this signal to another linear power amp. Another option is to patch it through an outboard filter to emulate a speaker, or for example into the ENGL CABLOADER (IR-Loader with an integrated microphone and poweramp simulation), and feed this externally processed signal to a recording device or PA system.
- Page 18 4. Two 16 Ohm cabinets: Two 16 Ohm cabinets connected to both 8 Ohm Poweramp Outputs. 5. One 16 Ohm Cabinet: One 16 Ohm Cabinet connected to the 16 Ohm Poweramp Output. 6. One 8 Ohm Cabinet and one 16 Ohm Cabinet: The 8 Ohm Cabinet connected to the left 4 Ohm Poweramp Output in combination and the 16 Ohm Cabinet connected to the left 8 Ohm Poweramp Output.
- Page 19 Configuration of the Z9 Footswitch Function 1 and Function 2 buttons Assignment of a sound-shaping and special function to button Function 1 via the respective setup routine: 1. Simultaneously press and hold the buttons Channel 1 and Function 1 until the LED above the Function 1 button flashes.
- Page 20 Z9 Footswitch S.A.C. configuration table for the amps sound-shaping and special functions to Function 1 and Function 2: Comments: 1st column: This indicates which function button of the Z9 footswitch can be assigned to the sound functions listed in column 2. 2nd column: Sound functions of the amp that can be controlled via the Z9 footswitch.
-
Page 21: Wiring Of Principal Connectors
WIRING OF PRINCIPAL CONNECTORS MIDI In, Din Connector Z4 Footswitch (Dual Footswitch) and Z9 Footswitch (Serial Amp Control Port) cable assignment Serial Amp Control Port Dual Footswitch Stereo Stereo 6.3 mm (¼") plug 6.3 mm (¼") plug ring: Data ring: Sub I / II tip: + 5 Volts tip: CHI / CHII Use a stereo... -
Page 22: Technical Data
ENGL ECC83 First Quality (FQ) V2 / V3 / V4 / V5 ENGL ECC83 Selected V6 / V7 / V8 / V9 ENGL EL34 Hand-Matched Quartet (EL34 Version) ENGL 6L6 Hand-Matched Quartet (6L6 Version) System interfaces: MIDI: Asynchronous data protocol according to the MIDI standard MIDI program changes 0 –... - Page 23 Serial Amp Control (S.A.C.): Proprietary ENGL asynchronous data protocol Dimension 71cm x 28cm x 29cm / 27,95in x 11,02in x 11,42in Weight approx. 23,5 kg / 51,8lbs...
- Page 24 A FEW COMMENTS ON TUBE AMPLIFIERS Be sure to read this section before powering the amp up! This amp´s input is extremely sensitive due to its high gain factor. In combination with inherent microphonics of tubes at certain settings this can elicit powerful feedback from the speakers – even without a guitar being connected! This occurs primarily when Crunch and Lead channels (meaning all channels whose preamp is easily overdriven) are activated and the following settings are dialed in:...
-
Page 25: Troubleshooting
TROUBLESHOOTING The output volume fluctuates or drops: • Take all effect devices (in front of the preamp and FX Loop) out of the signal chain. • Check all used cables. • Check the used guitar or use another guitar. • Use a patch or guitar cable to patch he FX Send with the FX Return jack. - Page 26 Whilst the information contained herein is correct at the time of publication, due to our policy of constant improvement and development, ENGL AMPLIFICATION reserves the right to alter specifications without prior notice.
- Page 28 www.engl-amps.com...
Need help?
Do you have a question about the E670FE Special Edition and is the answer not in the manual?
Questions and answers