Table of Contents
Advertisement
Quick Links
Advertisement
Table of Contents

Related Manuals for Engl Steve Morse E656


Summary of Contents for Engl Steve Morse E656
-
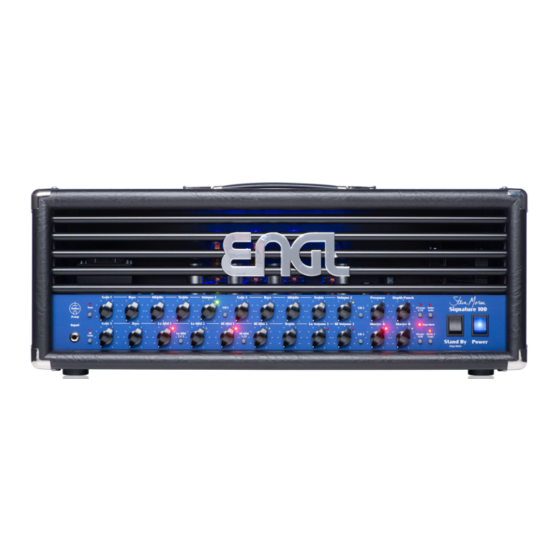
Page 1: Channel 2: Gain 2, Bass, Middle, Treble, Volume 2, Ch
E656 Steve Morse Operator´s Manual... -
Page 2: Table Of Contents
Table of Contents page Introduction Features and Functionality at a Glance Impotant remarks, some comments, Contents Front Panel Features: Tone 7, 8 Channel 1: Gain 1, Bass, Middle, Treble, Volume 1, CH 1 8, 9 Channel 2: Gain 2, Bass, Middle, Treble, Volume 2, CH 2 Power Amp EQ: Presence, Depth Punch 9, 10 FX Loop I/II, Noise Gate... - Page 3 MIDI even greater sonic flexibility Steve: "It's an ENGL: clear, fat, screaming sustain. This one allows the most control over the midrange where the electric guitar really lives for me." The Steve Morse Signature Head is a textbook example of teamwork at its best .
-
Page 4: Features And Functionality At A Glance
This affords you: 1. a logical control feature array, utmost ease of use remarkably intuitive handling excellent sound-shaping options greatest flexibility courtesy of the many voicing options and special features, and 128 MIDI presets offering a bevy of programming options; fundamental sounds excellent tube quality Clean Crunch... -
Page 5: Impotant Remarks, Some Comments, Contents
Simply plug in, play and be inspired by the tone of your new ENGL amp! A few words of wisdom from the designer: Though this amp head is relatively easy to handle and you're probably raring to give it a go, I recommend that you read the owner's manual thoroughly before you power it up. - Page 6 can activate to conjure sparkling clean sounds with Treble and Presence settings Tone as low as the 12 o'clock position. In Channel 1's Hi Gain range Tone active delivers a rich, pleasing overtone spectrum in finest tube-approved quality. I also matched Tone to Channel 2's tonal structure: Deactivate it for a more pronounced midrange;...
- Page 7 9 and 2 o'clock. Try settings between 8 and 12 o'clock for pickups with high- output humbuckers or active pickups. Bear in mind the Hi Gain function. You can activate it via an ENGL Custom Z-9 Footswitch or a preprogrammed MIDI preset to get an even bigger, beefier crunch tone on the fly.
-
Page 8: Power Amp Eq: Presence, Depth Punch
Channel 2 is active. Channel 2 may also be activated via MIDI program change, the ENGL Custom Z-9 Footswitch, or a dual footswitch. 14 Presence Power amp Presence knob. This knob determines the power amp's high frequency response. 15 Depth Punch This control shapes the lo frequency response in the power amp stage and affects all channels. - Page 9 The LED above the button lights up to indicate the Noise Gate activated. This feature can also be switched via MIDI program change, MIDI Controller or the ENGL Custom Z-9 Footswitch. IMPORTANT note; please read and heed : The Noise Gate...
- Page 10 The LED to the right of each Lo Mid knob lights up to indicate this knob is activated. The Lo Mid 1/2 switching function can also be switched via MIDI program change, MIDI Controller #23, or the ENGL Z-9 Custom Footswitch.
- Page 11 The LED to the right of each Hi Mid knob lights up to indicate this knob is activated. The Hi Mid 1/2 switching function can also be switched via MIDI program change, MIDI Controller #27, or the ENGL Z-9 Custom Footswitch. 27 Hi Mid 2 Mid knob #2 in preamp Channel 3's passive voicing section shapes the high mids.
- Page 12 Press this button to activate preamp Channel 3 directly. The red LED to the right of the Channel 3 Volume knobs (29 or 30) lights up to indicate Channel 3 is active. Channel 3 may also be activated via MIDI program change, the ENGL Custom Z-9 Footswitch, or a dual footswitch.
-
Page 13: Write/Copy, Amp Mute
3 and Low or High Gain (19) settings to different MIDI presets. Then you can conveniently access these configurations on stage using a MIDI footboard (for example, the ENGL Z-9, Z-12 or Z-15). This gives you many variations of the fundamental sounds for different playing techniques and musical situations. - Page 14 must hold it down for about a second until the Status LED flashes three times in rapid succession. This mechanism is designed to prevent inadvertent programming. You can cancel the programming process at any time before the Status LED first illuminates by releasing the Write button.
-
Page 15: Stand By, Power
37 Stand By Power amp standby switch: Use this switch to silence (0 position) the amp when you take longer break. The amp's tubes stay nice and toasty, and the amp is ready to roll immediately when you ramp it back up to full power. Amp Mute activates as soon as you set the Standby switch to the 0 position and the Amp Mute LED (36) shows this status by lighting up. -
Page 16: Rear Panel Features
(43) to any other connected MIDI device. 43 Midi In This 5-pin DIN port accepts data sent by a MIDI sender (for example, the ENGL MIDI Z-12, Z-15, or Z-9 foot controllers) or from or routed through another MIDI device. - Page 17 Switch no. 44 lets you activate the amp's power supply if you have an ENGL MIDI foot controller connected to this port. CAUTION: Before you connect any other MIDI footswitch or effects device, always make sure that switch no. 44 is set to the right to avoid damaging the device.
- Page 18 0x1E 46 Footswitch: Serial Amp Control Port This serial data input accepts the Custom ENGL Z-9 Footswitch (optional), which lets you control various amp functions remotely. Connect the Z-9 Footswitch to the amp port using a cord equipped with stereo ¼" jack plugs. This MIDI-enabled foot board is a...
- Page 19 MIDI OUT (5-pin DIN connector) that selects 10 MIDI patches (or presets, if you prefer). Again, I want to emphasize that you should never connect another foot board to this jack: The Z-9 controls the amp via a proprietary ENGL serial data protocol, and the...
-
Page 20: Fx Loops I: Send, Return, And Balance
The Lo and Hi Gain options generate different levels of noise, and I tuned the SM Signature Amp's Noise Gate accordingly. However, there is some minor matching variance between the two. Hi Gain stands to benefit most from the Noise Gate, so I suggest that you tweak its two knobs for this mode. -
Page 21: Pre Out, Line Out
55 Pre Out This is the SM Signature's preamp auxiliary out. It delivers a signal with almost the same level and frequency response as the signal patched into the amp's input. A low- impedance circuit, Pre Out is great for applications like addressing a guitar tuner. The Pre Out signal is patched out to jack 55 even when Amp Mute is engaged. -
Page 22: Practical Info And Tips
16-ohm cabinet connected to one of the 8-ohm jacks Summary: 8 Z + 16 Z -> connected to 4-ohm + 8-ohm output. A few words from the designer on your ENGL Steve Morse Signature Amp's sounds and settings as well as some practical tips:... - Page 23 though, that as sophisticated as these features may be, they can't relieve you of all responsibility. For example, the system can't detect if a cabinet is connected to the other end of the cord. Please make a habit of checking this before powering the amp up.
-
Page 24: Handling And Care
Running the amp at mains voltages exceeding the nominal mains input voltage over longer periods can also shorten component life. Replace tubes with selected tubes that satisfy ENGL selection criteria to forestall microphonic properties, undesirable noise and unbalanced power amp signals. -
Page 25: Status-Led: Indications
MIDI Channel, the Controller number and the value. A suitable MIDI foot board (e.g. ENGL Z-15) must be able to send MIDI controller data with the appropriate controller numbers. To enable the MIDI controller receive feature at the amp, you must set coding switch number 6 to On. -
Page 26: Troubleshooting
You can set the encoding button (45) to OMNI reception to check if the preamp is actually receiving data. -> Is another foot board (the ENGL Z-9 or a two-way footswitch) connected and therefore blocking MIDI reception? The amp is not providing an output signal / no sound is emanating from the speaker. - Page 27 the Threshold (48) knob set to a high value? Deactivate the (17) Noise Gate for a quick check. -> Are the active Master knob and the Gain and Volume knobs set to a value greater than 0? If any of these knobs is set to 0, no signal is routed to the amp's outputs.
-
Page 28: Technical Data, Detailed Specifications And Ratings
MIDI program changes 0 - 127; HEX: Cn MIDI channels 1 - 16 MIDI controller #7, #14, #22, #23, #24,'#27 #28, #29, #30; value 0-5 and 6 -127; HEX: Bn; Proprietary ENGL asynchronous data protocol Serial Amp Control (S.A.C.): approx. 71 x 28 x 29 cm (l x h x d);... -
Page 29: Tube Map, Tube Exchange Service
Tube Map, ENGL - Steve Morse Signature Amp: E656 chassis Power as viewed transformer from above Output Input Lead FX buffer phase Transformer & driver & & P.A. shift 2.stage 3.stage driver converter Frontpanel Tube replacement report: 1. Replaced on: _ _ _ _ _ _ _ 20 _ _ _ Replaced by: _ _ _ _ _ _ _ _ _ _ _ _ _ _... -
Page 30: Wiring Of Principal Connectors
Pin 2 - power supply page: 17 approx.11 volts AC * *1: AC voltage is routed to pin 1 and 2 only when button 44 is set to ENGL MIDI Footcontroller. Dual Footswitch (47) Serial Amp Control Port (46) Stereo Stereo 1/4"... -
Page 31: Remote Control Options
"3". or quit the mode with "9". 1. MIDI foot board (for example, the ENGL Z-12 or ENGL Z-15 pictured above): Connect the foot board to the amp using a standard 5-pin DIN cable. All 5 terminals of both connectors must be wired in a 1:1 configuration: MIDI data transmission requires two wires, and the ENGL MIDI foot board uses two more wires for purposes of power supply. -
Page 32: Front Panel Diagrams For Noting Settings
Noting Settings: Gain 1 Bass Middle Treble Volume 1 Gain 2 Bass Middle Treble Volume 2 Presence Depth Punch CH 1 CH 2 FX Loop Noise Tone Tube I / II Gate Gain 3 Bass Lo Mid 1 Lo Mid 2 Hi Mid 1 Hi Mid 2 Treble... -
Page 33: Configuration Table For Z-9 Settings
Configuration table for assigning the ENGL Steve Morse Signature Amp's sound-shaping and special functions to the Z-9 Custom Footswitch's Functions 1 Button Functions at the amp Setup Indication S.A.C. Function 1 Master A/B Channel 1 LED 1 lights F1-1 Function 1... -
Page 34: Additional Information, Space For User Notes
Additional information The following refers to section 38 "Power" on page 17 Please note: ensure that the Stand By switch (31) is set to Stand By (0 position) before you switch the amp on. Let the tubes heat up for about 30 seconds before you activate the power amp. - Page 36 www.engl-amps.com...
Need help?
Do you have a question about the Steve Morse E656 and is the answer not in the manual?
Questions and answers