
Related Manuals for Siemens HB272AB 0 Series


Summary of Contents for Siemens HB272AB 0 Series
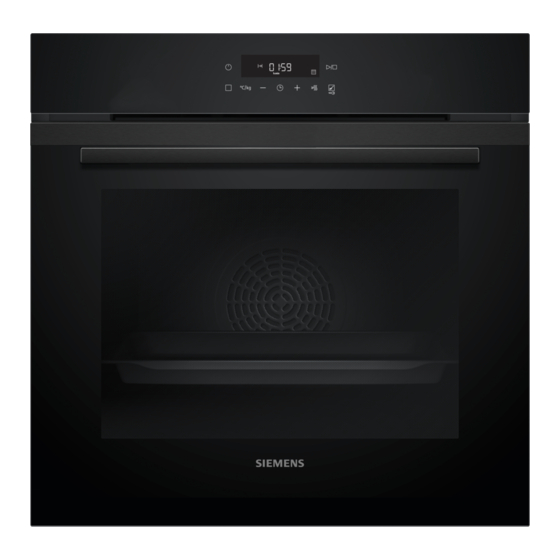
- Page 1 Oven HB272AB.0 User manual and installation instructions Register your product on My Siemens and discover exclusive ser- vices and offers. siemens-home.bsh-group.com/welcome The future moving in. Siemens Home Appliances...
-
Page 2: Table Of Contents
en Safety Futher information and explanations are available online: Table of contents ¡ Keep the instruction manual and the product information safe for future refer- ence or for the next owner. INFORMATION FOR USE ¡ Do not connect the appliance if it has been Safety .............. 2 damaged in transit. - Page 3 Safety en 1.4 Safe use WARNING ‒ Risk of scalding! Always place accessories in the cooking com- The accessible parts of the appliance become partment the right way round. hot during operation. → "Accessories", Page 8 ▶ Never touch these hot parts. ▶ Keep children at a safe distance. WARNING ‒ Risk of fire! Hot steam may escape when you open the Combustible objects that are left in the cook-...
-
Page 4: Safety
en Safety An ingress of moisture can cause an electric 1.6 Cleaning function shock. WARNING ‒ Risk of fire! ▶ Do not use steam- or high-pressure clean- Loose food remnants, fat and meat juices ers to clean the appliance. may catch fire when the cleaning function is in If the appliance or the power cord is dam- progress. -
Page 5: Preventing Material Damage
Preventing material damage en 2 Preventing material damage Leaving the appliance to cool down with the door open 2.1 General will damage the front of neighbouring kitchen units over ATTENTION! time. Alcoholic vapours may catch fire in the hot cooking Always allow the cooking compartment to cool ▶... -
Page 6: Familiarising Yourself With Your Appliance
en Familiarising yourself with your appliance If the cooking time is relatively long, you can switch Allow frozen food to defrost before cooking. the appliance off 10 minutes before the cooking time ¡ This saves the energy that would otherwise be re- ends. -
Page 7: Self-Cleaning
Familiarising yourself with your appliance en 4.3 Types of heating and functions To ensure that you always find the right type of heating to cook your food, we explain the differences and applica- tions below. When you select a type of heating, the appliance suggests a suitable temperature or setting. You can use these val- ues or change them within the specified range. -
Page 8: Shelf Supports
en Accessories Lighting Notes ¡ The heat-up indicator only appears for types of heat- The oven light lights up the cooking compartment. ing for which you can set a temperature. The heat- With most types of heating and functions, the lighting up indicator does not appear for grill settings, for ex- lights up during operation. - Page 9 You will find a comprehensive range of products for your appliance in our brochures and online: siemens-home.bsh-group.com Accessories vary from one appliance to another. When Baking tray Slide the tray, e.g. the universal pan, purchasing accessories, always quote the exact E.g.
- Page 10 en Basic operation Keep the room ventilated while the appliance is Switch off the appliance after the specified cooking heating. time. Set the type of heating and temperature. Wait until the cooking compartment has cooled → "Basic operation", Page 10 down. Clean the smooth surfaces with soapy water and a Type of heat- 3D hot air ...
- Page 11 Time-setting options en 9 Time-setting options Your appliance has different time-setting options, with Use the button to reset the timer duration to zero. ▶ which you can control its operation. a After a few seconds, the appliance applies the change and ...
- Page 12 en Programme Cancelling the end time Requirements ¡ The type of heating and temperature or setting are You can delete the set end at any time. set. is highlighted on the display. Requirement: ¡ A cooking time must be set. Reset the end time to the current time plus the set ▶...
- Page 13 Programme en No. Food Cookware Weight setting Add liquid Shelf Information posi- tion Roasting dish with Turkey breast Cover the Do not sear the meat 02 Turkey breast Whole, seasoned glass lid weight bottom of the beforehand roasting dish, and add up to 250 g ve- getables if re- quired...
- Page 14 en Childproof lock Touch . 10.4 Setting a programme The display shows the calculated cooking time. ‒ The appliance selects the optimal type of heating, tem- You cannot change the cooking time. perature and cooking time. All you need to do is set On some programmes, you can delay the end ‒...
- Page 15 Cleaning and servicing en Display Basic setting Selection Time display = hide the time = display the time Childproof lock can be adjusted = no → "Childproof lock", Page 14 ...
- Page 16 en Cleaning and servicing Appliance front Surface Suitable cleaning agents Information Stainless steel ¡ Hot soapy water To prevent corrosion, remove any patches of limescale, grease, ¡ Special stainless steel starch or albumin (e.g. egg white) on stainless steel surfaces imme- diately.
- Page 17 Self-cleaning en 13.2 Cleaning the appliance WARNING ‒ Risk of fire! Loose food remnants, fat and meat juices may catch In order to avoid damaging the appliance, you must fire. clean your appliance only as specified, and with suit- Before using the appliance, remove the worst of the able cleaning products.
- Page 18 en humidClean When the appliance has cooled down sufficiently, Cleaning set- Cleaning Duration in hours the appliance door is unlocked and goes out. ting level Prepare the appliance for use. → Page 18 Approx. 1:15 Medium Approx. 1:30 14.3 Preparing the appliance for use High Approx.
- Page 19 Shelf supports en 16 Shelf supports To clean the rails and the cooking compartment, or to 16.2 Attaching the shelf supports replace the rails, you can remove these. Notes ¡ The rails only fit on the right or left. 16.1 Detaching the shelf supports ¡...
- Page 20 en Appliance door Note: Ensure that the appliance door slides onto the WARNING ‒ Risk of injury! hinges without any resistance. If you feel any resist- When the hinges are not secured, they can snap ance, check whether you are sliding it in at the cor- shut with great force.
- Page 21 Appliance door en Open the appliance door slightly. Dry the door panes and refit them. Push on the left- and right-hand side of the door → "Fitting the door panes", Page 21 cover from the outside until it is released. Remove the door cover . 17.4 Fitting the door panes WARNING ‒ Risk of injury! The hinges on the appliance door move when the door...
-
Page 22: Troubleshooting
en Troubleshooting Screw both screws back in on the left and right of Close the appliance door. the appliance door. Note: Do not use the cooking compartment again until Put the door cover in position and push down on it the door panes have been correctly fitted. ... -
Page 23: Customer Service
Troubleshooting en Fault Cause and troubleshooting Childproof lock is activated. lights up in the dis- play and no settings Use the button to deactivate the childproof lock. ▶ can be made on the → "Childproof lock", Page 14 appliance. - Page 24 en Disposal 19 Disposal 19.1 Disposing of old appliance This appliance is labelled in accord- ance with European Directive Valuable raw materials can be reused by recycling. 2012/19/EU concerning used elec- Unplug the appliance from the mains. trical and electronic appliances Cut through the power cord. (waste electrical and electronic equip- Dispose of the appliance in an environmentally ment - WEEE).
-
Page 25: How It Works
How it works en ¡ Keep the appliance door closed when using the Notes ¡ When baking on several layers, always use hot air. grill. Baked goods that are placed in the oven at the Never grill with the appliance door open. same time will not necessarily be ready at the same ¡... - Page 26 en How it works Food Accessories/cookware Shelf pos- Type of Temperature Cooking ition heating in °C/grill time in mins setting Swiss roll Baking tray 180-200 10-15 Shortcrust tart with moist topping Universal pan 160-180 55-95 Yeast cake with moist topping Universal pan ...
- Page 27 How it works en ¡ Baking tins/dishes on the wire rack 21.6 Test dishes First wire rack: Level 3 These overviews have been produced for test institutes Second wire rack: Level 1 to facilitate appliance testing in accordance with EN Shelf positions for baking on three levels: 60350-1.
-
Page 28: Installation Instructions
en Installation instructions Recommended settings for grilling Food Accessories/cook- Shelf pos- Type of Temperature in Cooking time in ware ition heating °C/grill setting mins Toasting bread Wire rack 22 Installation instructions Observe this information when installing the appliance. 22.1 General installation instructions Follow these instructions before you start with the installation of the appliance. - Page 29 Installation instructions en ¡ To ventilate the appliance, the intermediate floors 22.2 Appliance dimensions must have a ventilation cut-out. You will find the dimensions of the appliance here ¡ If the tall unit has another back panel in addition to the element back panels, this must be removed. ¡...
- Page 30 en Installation instructions An isolating switch must be integrated into the perman- 22.6 Corner installation ent electrical installation according to the installation Observe the installation dimensions and the installation regulations. instructions when installing in a corner. Identify the phase and neutral conductors in the socket.
- Page 31 Installation instructions en For handleless kitchens with vertical bar handle strips: Attach a suitable filling piece in order to cover ‒ any sharp edges and to guarantee a safe install- ation. Pre-drill aluminium profiles to establish a screw ‒ connection ...
- Page 32 Valid within Great Britain: Imported to Great Britain by BSH Home Appliances Ltd. Grand Union House Old Wolverton Road Wolverton, Milton Keynes MK12 5PT United Kingdom Manufactured by BSH Hausgeräte GmbH under the trademark licence of Siemens AG *9001766305* 9001766305 (021206)
Need help?
Do you have a question about the HB272AB 0 Series and is the answer not in the manual?
Questions and answers