bora XBO Operating And Installation Instructions
Hide thumbs
Also See for XBO:
- Operating and installation instructions (44 pages) ,
- Operating and installation instructions (44 pages)
Table of Contents
Advertisement
Quick Links
Advertisement
Table of Contents

Subscribe to Our Youtube Channel
Related Manuals for bora XBO


Summary of Contents for bora XBO
- Page 1 Operating and installation instructions XBO 090013-10005...
-
Page 2: Table Of Contents
X BO odour filter .........81 Safety instructions – 6.7.1 Filter change ........81 disassembly and disposal ....68 Troubleshooting Technical data Installation X BO steam oven XBO ......69 3.1.1 X BO appliance dimensions....69 Installation information......83 8.1.1 Fitted unit..........83 Appliance description 8.1.2 Fresh water connection....... - Page 3 9.3.2 Disposal of accessories....... 91 9.3.3 Disposal of the old appliance ....91 Warranty, technical service, spare parts, accessories 10.1 BORA manufacturer’s warranty ..92 10.1.1 Warranty extension ......93 10.2 Service ..........93 10.3 Spare parts ......... 93 10.4 Accessories.........
-
Page 4: General Information
Liability Enumeration 1 Enumeration 2 . BORA Holding GmbH, BORA Vertriebs GmbH & Co KG, Information notes point to special features that BORA APAC Pty Ltd and BORA Lüftungstechnik GmbH – must be taken into account. -
Page 5: Figures
Note Indicates a potentially hazard- ous situation which can cause property damage if not respec- ted. Meaning of the warning symbols and signal Tab. 1.1 words 1.4.2 Figures All measurements are provided in millimetres. bora.com... -
Page 6: Safety
Any other use or any use that goes beyond that which is described here is classed as unintended. BORA does not assume any liability for damages caused by incorrect installation, improper use or incorrect operation. -
Page 7: General Safety Instructions
If there are any cracks, fissures or fractures, switch the appliance off immediately. Securely disconnect the appliance from the mains using the circuit breaker, fuses, automatic circuit breakers or contactor. Contact the BORA Service Team. ö DANGER Risk of injury from overloading the open door The maximum load capacity of the open door is 22.5 kg. - Page 8 In the case of faults and errors, follow the instructions on the appliance display and in the “Troubleshooting” chapter. In the event of any faults or errors that are not mentioned, switch the appliance off and contact BORA Service. bora.com...
-
Page 9: Safety Information For Installation
DANGER Risk of electric shock from damaged power supply cable If the power supply cable is damaged (e.g. during installation), this can cause an (lethal) electric shock. Make sure that the connection cable does not become trapped or damaged. bora.com... -
Page 10: Special Safety Instructions For Using The Fresh Water Connection
Dirt in the water pipe can be deposited in the appliance valve. If this affects the functioning of the valve, water can leak out. Rinse out the water pipe before connecting the appliance or when work is carried out on the water pipes. bora.com... -
Page 11: Safety Instructions - Operation
WARNING Risk of burns from hot food Food may spill over when inserting or removing the food support. Touching hot food can cause serious burns. Ensure that no hot food spills over when inserting or removing the food support. bora.com... - Page 12 When the door is open there is a risk of tripping or crushing. Close the door after use. ö WARNING Risk of corrosion Rusting materials (e.g. platters, cutlery) can cause corrosion in the oven chamber. Only use original accessories in the oven chamber. bora.com...
- Page 13 During cooking and cleaning, moisture is released into the ambient air. Ensure a sufficient supply of fresh air, e.g. by opening a window. Ensure a normal and comfortable room climate (humidity of 45–60%), e.g. by opening natural ventilation openings or using domestic ventilation systems. bora.com...
-
Page 14: Safety Instructions - Cleaning And Maintenance
Keep children away from escaping steam. ö WARNING Risk of injury from hot water and cleaning agents Opening the door during the cleaning programme may cause burns or eye irritation. Do not open the door during the cleaning programme. bora.com... -
Page 15: Safety Instructions - Repairs, Servicing And Spare Parts
(door and operating unit). This can scratch the surfaces and damage the glass. Use only original BORA cleaning cartridges, as cartridges from other manufacturers can cause irreparable damage to the appliance. Safety instructions – repairs, servicing and spare parts ö... -
Page 16: Safety Instructions - Disassembly And Disposal
ö DANGER Risk of electric shock from residual charge Electrical components in the appliance can contain residual charge and cause an electric shock. Do not touch any exposed contacts. Use the discharge adapter before starting work on the appliance. bora.com... -
Page 17: Technical Data
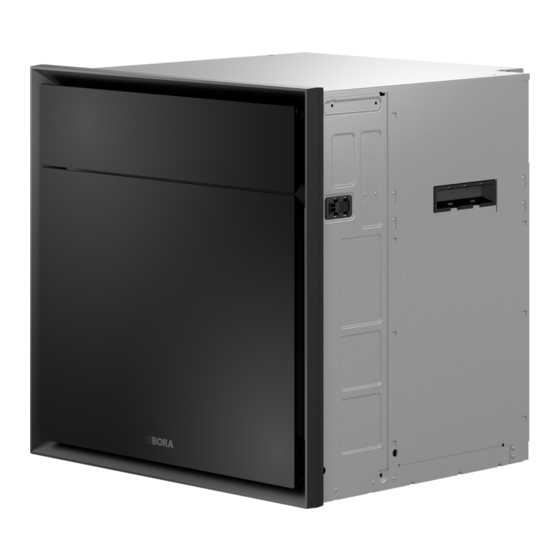
Technical data Technical data X BO steam oven XBO 3.1.1 X BO appliance dimensions Parameter Value Multiphase supply voltage 380–415 V 2N Single-phase supply voltage 220–240 V Frequency 50 Hz Maximum power 6100 W consumption Two-phase power supply/ 2 x 16 A... - Page 18 Technical data Fig. 3.3 XBO side view Fig. 3.4 XBO glass front view bora.com...
-
Page 19: Appliance Description
In comparison, the BORA X BO manages with a little less heat as it circulates hot air at high speed and it is therefore transferred onto the food faster. -
Page 20: How It Works
Once the pre-opening system has been activated, the steam is extracted from the oven chamber. The door will then open. (BORA Clear View – prevents steam from escaping when the door is opened). It is possible to set the steam extraction time (10 to 20 seconds) and the amount of steam to be extracted. -
Page 21: Demo Mode
Preheat the X BO without the food supports. Load the food supports evenly. Use the food supports as instructed. Use a suitable tray or tin for pizzas, round cakes and similar and place this on the oven rack. bora.com... -
Page 22: Functions And Operation
Operating the touch When you press the “Instructions” button, an animation display will explain how to do certain things (e.g. inserting the BORA cleaning cartridge). The touch display reacts to finger contact. It recognises different touch commands: Status messages Status messages are shown on the top edge of the display. -
Page 23: Standard Functions
Favourite automatic programmes Favourites areas in the menu. Classic cooking Classic Global functions Operating the BORA multi-drawer Multi-drawer (function only works if a multi- drawer is connected) Global functions can be used at any time regardless of Maintenance programmes and the operating mode. -
Page 24: Presets
Starting an automatic programme from a Add favourites certain cooking step Go to the desired automatic programme. Swipe upwards from the bottom edge of the display. Long press on the dish. Select the cooking step. Touch Touch “Start programme here” bora.com... -
Page 25: Classic
5.7.8 Multi-drawer Temperature settings Temperature Humidity settings Humidity If the appliance is installed with a BORA multi-drawer and connected by the communication cable (provided Automatic programme with Changed automatic with the BORA multi-drawer), the multi-drawer can be changed cooking parameters programme controlled and operated using the X BO touch display. -
Page 26: Customising The Menu
Before deactivating demo mode, the fresh water supply must be connected and the water supply Using a USB stick checked. The latest software is available on the BORA website free of charge (www.bora.com). Deactivating the video sequence Long press on the touch display. -
Page 27: Cleaning And Maintenance
The appliance should be cleaned before long appliance is restarted and the cleaning cartridge periods of absence (e.g. holiday). must be removed. Remove all food supports from the oven chamber before starting the programme. Remove the drain filter. Clean the oven rack by hand. bora.com... -
Page 28: Bo Cleaning Cartridge
X BO cleaning cartridge Lay the food supports face down in the dishwasher. Ensure that no other objects can rub against the food The BORA X BO cleaning cartridge is characterised by supports. its fantastic ease of use. Its two-chamber system enables cleaning and descaling in a single process. -
Page 29: Cleaning The Oven Chamber Seal
A bar underneath the “Filter change” symbol shows the time remaining until the odour filter is to be changed. You can obtain the X BO odour filter XBOGF from your specialised retailer or the BORA shop via the website www.bora.com. 6.7.1 Filter change Touch “Maintenance”... -
Page 30: Troubleshooting
In the event of a fault, the appliance immediately informs users via its large display. The user can then use a smartphone to scan the QR code on the display and obtain further assistance and suggested solutions. Alternatively, they can consult the Service area at www.bora.com. This makes it possible to resolve most issues quickly. -
Page 31: Installation
Unit mounting plate be no kinks in the hose and it must not be shortened, Installation templates extended or replaced with another hose. Operating and installation instructions The water supply hose must not be flush-mounted. Scope of delivery Tab. 8.1 bora.com... -
Page 32: Tools And Aids
Installation Checking the scope of delivery Make sure the delivery is complete and check it for damage. Immediately inform the BORA Service TeamTeam if parts are missing or damaged. Do not under any circumstances install parts which are damaged. Dispose of transport packaging in the proper manner (see "9 Decommissioning, disassembly and... -
Page 33: Removing The Frame Spacer
Installation depth without frame spacer Fig. 8.5 Installation dimensions with 2 frame spacers 8.5.1 Removing the frame spacer Remove the 4 parts of the frame spacer from the corners of the inlay frame by hand. Fig. 8.3 Installation dimensions without frame spacer bora.com... -
Page 34: Fitting Additional Frame Spacers
Fig. 8.9 Installation recess with unit mounting plates [1] Unit mounting plates Fig. 8.7 2 frame spacers Fit the frame spacers to the inlay frame. bora.com... -
Page 35: Appliance Connections
100 mm lower than the waste water hose in the fitted hook. [1] Power supply [2] RJ45 connection for BORA multi-drawer (no mains Attach the hook to the side of the appliance by fitting connection) the screw provided through the bore hole. -
Page 36: Fresh And Waste Water Connection
Secure the power supply cable with the strain relief sealed. If necessary, check that the washer and clamp. screw connections are firmly in place. Close the power supply housing cover. Check that installation has been carried out correctly. bora.com... -
Page 37: Positioning The Operating Unit
To do this, turn the adjusting screws on the front of the top of the housing. Fig. 8.15 Securing the appliance [1] Oven chamber seal [2] Fixing screw Fig. 8.14 Adjusting the distance between the operating unit and door bora.com... -
Page 38: Fitting The Odour Filter
Explain the main functions to the user. Explain all safety-related aspects of operation and handling to the user. Provide the user with the accessories and operating and installation instructions, which are to be kept in a safe place. Fig. 8.16 Ventilation [1] Return flow aperture > 160 cm² bora.com... -
Page 39: Decommissioning, Disassembly And Disposal
9.3.1 Disposal of transport packaging The packaging protects the appliance from damage during transport. The packaging materials have been selected taking into account the environment and their disposal and are therefore recyclable. bora.com... -
Page 40: Warranty, Technical Service, Spare Parts, Accessories
The manufacturer’s warranty starts as soon as the drainage hose without drinking water certification or BORA product is handed over to the end customer and by extending non-specified pipes with an adapter is valid for 2 years. Registering on www.mybora.com Damage to plastic frames, glass components, metal enables the manufacturer’s warranty to be extended to... -
Page 41: Warranty Extension
“System and updates”. 10.3 Spare parts Only use original spare parts for repairs. Repairs may only be carried out by the BORA Service Team. Spare parts can be obtained from your BORA dealer, the BORA online service website at www.bora.com/service or by calling the service number provided. -
Page 42: 11 Energy Datasheet
Energy datasheet 11 Energy datasheet Product information according to Commission Delegated Regulation (EU) No. 65/2014 and Regulation (EU) No. 66/2014. Manufacturer BORA Model identification Type of oven Flex oven Symbol Value Unit Appliance mass Number of oven chambers – –... -
Page 43: 12 Information For Testing Institutes
Oven rack Middle Small cake 150 °C 25 min Universal tray/ Middle (full load) deep universal tray Spritz cookies 150 °C 20 min Universal tray Middle Test food acc. to EN 50304/EN 60350-1 Tab. 12.2 All times include the preheating time. bora.com... - Page 44 été mises en œuvre et que le contenu n’ait par conséquent pas encore été adapté. Nous vous prions de bien vouloir nous en excuser. Une version à jour peut être obtenue auprès de l’équipe du service technique de BORA. Sous réserve d’erreurs de contenu ou d’impression.
- Page 45 Denne bruks- og monteringsanvisningen er utviklet med største nøyaktighet. Likevel kan det være at tekniske endringer som ble gjort i etterkant, ennå ikke er lagt til, eller at slikt innhold ennå ikke er blitt endret. Vi ber om forståelse for dette. Ta kontakt med BORA service team for å...
- Page 48 AU NZ BORA Lüftungstechnik GmbH BORA Vertriebs GmbH & Co KG BORA Holding GmbH BORA APAC Pty Ltd Rosenheimer Str. 33 Innstraße 1 Innstraße 1 100 Victoria Road 83064 Raubling 6342 Niederndorf 6342 Niederndorf Drummoyne NSW 2047 Deutschland Österreich Austria...
Need help?
Do you have a question about the XBO and is the answer not in the manual?
Questions and answers