Table of Contents
Advertisement
Available languages
Available languages
Quick Links
Advertisement
Chapters
Table of Contents

Subscribe to Our Youtube Channel
Related Manuals for Goldmaster SD-8010 USB


Summary of Contents for Goldmaster SD-8010 USB
- Page 1 SD-8010 USB...
-
Page 2: Güvenlik Uyarýlarý
Güvenlik Uyarýlarý Elektrik kaçaðý ve yangýný önlemek için Bu ürünü tercih ettiðiniz için teþekkür ederiz. bu cihazý, amplifikatörü ve hoparlörleri Ürünü en uygun þekilde kullanmak için lütfen nemden ve sudan uzak tutunuz. kýlavuzu okuyunuz. Okumanýz bittikten sonra kýlavuza tekrar baþvurmak için güvenli bir yerde saklayýnýz. -
Page 3: Table Of Contents
Ýçindekiler Güvenlik Uyarýlarý ..........1 Güvenlik Bilgileri ..........2 Özellikler ............3 Panel Kontrolleri ..........4 Uzaktan Kumanda ...........5 Genel Ýþlemler ..........6 Kontrol Düðmesi Menüsü ......7-9 Radyo ............. 10 RDS (Radyo Bilgi Sistemi) ......11 USB/SD/MMC/MP3 Kullanýmý....12-15 Cihaz Baðlantýlarý ........16-17 Kurulum ............18-20 Anti-Theft Sistem ...........20 Pratik Çözümler ..........21 Teknik Özellikler ..........22... -
Page 4: Özellikler
Özellikler WMA ve MP3 Uyumluluðu Tuþ Kullaným Açýklamalarý Bazý sýk kullanýmlar: WMA ve Mp3 dosyalarýný oynatmak için 1) Hareket Tuþlarý uyumludur. WMA Hakkýnda WMA verilerini bu cihazla oynatabilirsiniz. Windows media ve windows logo microsoft kuruluþunun ticari markasýdýr. Þifreli, sertifikasýz WMA dosyalarýný cihaz düzgün olarak çalýþtýrmayabilir. -
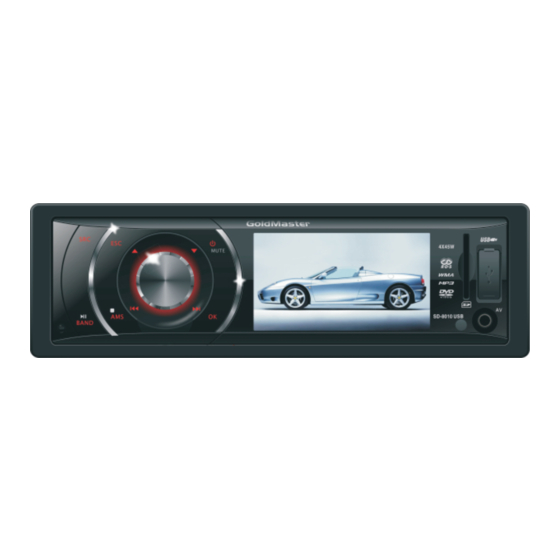
Page 5: Panel Kontrolleri
Panel Kontrolleri tuþuna basýnýz. Açma/Kapatma: Cihazý açmak veya kapatmak için 1. - Oynatma modlarýný seçmek için kýsa basýnýz: 12. - Kayýt arama (Radyo modunda kýsa basýnýz.) • Radyo - Otomatik kayýt (Radyo modunda iken 2 saniyeden fazla basýlý tutunuz.) • USB (USB takýlý iken) •... -
Page 6: Uzaktan Kumanda
Uzaktan Kumanda Cihazý açmak/kapatmak için tuþuna 18. - DISP: Ekranda zamaný/saati gösterir. basýnýz. (Video modunda iken) - ESC: Bir önceki menüye dönme 19. - Video sistemi PAL/NTSC/AUTO - Radyo bandý (Radyo modunda iken) 20. Mute (Sessiz) Uzaktan Kumanda çalýþma aralýðý Uzaktan kumanda 3~5m mesafe aralýðýnda çalýþýr. -
Page 7: Genel Ýþlemler
Genel Ýþlemler Açma/Kapatma 1. Cihazý açmak için düðmesine basýnýz. Cihaz kapatýldýðý zamanda bulunan en son durumlar cihaz açýldýðýnda görüntülenir. 2. Cihazý kapatmak için düðmesine tekrar basýnýz. Sessiz Cihazýn sesini tamamen kapatmak için MUTE tuþuna basýnýz. Not: • Yukarýda belirtilen iþlem gibi ya da ses seviyesini ayarlayarak sesini kapatabilirsiniz. -
Page 8: Kontrol Düðmesi Menüsü
Kontrol Düðmesi Menüsü 1. Ses seviyesini ayarlamak için çeviriniz. 3. Ayarlar menüsüne girmek için düðmeye 2 saniyeden fazla basýlý tutunuz, ayarlar 2 . Ses&Görüntü ayarlar menüsüne girmek seçeneklerini seçmek için için düðmeye kýsa basýnýz. ve OK tuþlarýný kullanýnýz. Genel Ayarlar BEEP(Tuþ... - Page 9 Kontrol Düðmesi Menüsü sürece ekran arka kýsmýný gösterecektir. Modu PARLAKLIK açmak ya da kapatmak için düðmeyi çeviriniz. Ekran görüntüsünün parlaklýðýný 00-16 seviyelerinde ayarlamak için tuþlarýný kullanabilirsiniz. SUBWOOFER: ON/80HZ/120HZ/160HZ Cihazýn arka kýsmýna subwoofer’ý baðladýktan KONTRAST sonra tuþlarýný kullanarak frekanslarýný Ekran görüntüsünün kontrastýný 00-16 seviyelerinde seçebilirsiniz: KAPALI, 80,120 ya da 160Hz ayarlamak için tuþlarýný...
- Page 10 Kontrol Düðmesi Menüsü Radyo Ayarlarý REGIONAL (Bölgesel): ON/OFF Bölgedeki istasyonlarý otomatik olarak ayarlamak için bölgesel kod (Pi’den) uygulanýr ya da uygulanmaz. REG ON: AF fonksiyonu bölgesel kodlara göre çalýþýr ve sadece bulunduðuz bölgedeki istasyonlar otomatik olarak ayarlanýr. REG OFF: AF fonksiyonu bölge kodlarýna bakmaz ve diðer bölgelerdeki istasyonlar da otomatik olarak ayarlanýr.
-
Page 11: Radyo
Radyo Modu Radyo Moduna Eriþim Kumanda ya da panelde bulunan SRC tuþuna bir ya da daha fazla basarak Radyo modu seçilir. 1. Mod Göstergesi 2. Geçerli Kanal 3. Saat 4. AM/FM Bandý 5. RDS Bilgisi 6. Radyo Ýstasyon Frekansý 7. EQ Göstergesi 8. -
Page 12: Rds (Radyo Bilgi Sistemi)
RDS (Radyo Bilgi Sistemi, opsiyonel) PTY (Program Tipi) RDS servis hizmeti bölgelere göre deðiþiklik gösterebilir. Eðer bölgenizde RDS servisi yoksa RDS FM istasyonlarý program tipi tanýmlama aþaðýdaki servis özellileri kullanýlamaz. sinyali saðlar. Ör: haberler, rock, bilgi, spor, vs RDS Temelleri PTY Modu AF(Alternatif Frekans Listesi) yayýn frekanslarýnýn düþük olduðu bölgelerde benzer... -
Page 13: Usb/Sd/Mmc/Mp3 Kullanýmý
USB/SD/MMC/MP3 Kullanýmý 1. SD/MMC Kart Yükleme USB/SD/MMC Notlarý Ön panelin sol tarafýnda bulunan yuvanýn USB fonksiyonlarý (flash bellek tipi) MP3 müzik içerisine SD/MMC kartýný yerleþtiriniz. oynatma Cihaz otomatik olarak müziði oynatacak ve 1. SD/ MMC kart desteði ekranda kart listesi görüntülenecektir. 2. - Page 14 USB/SD/MMC/MP3 Kullanýmý USB/SD Kart Moduna Eriþim USB ya da SD karttan dosya oynatmak için Kart ya da USB modlarýný seçebilirsiniz. Disk oynatma ekraný aþaðýda belirtilmiþtir: 1. Mod Göstergesi 2. Geçerli Parça/Toplam Parça 3. Parça Ýsmi 4. Müzik Klasörü 5. Resim Klasörü 6.
- Page 15 USB/SD/MMC/MP3 Kullanýmý Video Dosyasý için Dosya ve Klasör Ýsimleri Girme 1. Menü listesine dönmek için ESC tuþuna Ýsim kod listesindeki karakterler ile sadece basýnýz. dosya ve klasör isimlerini girebilirsiniz. tuþlarýný kullanarak video Kullanýlan farklý bir karakterin girilmesi klasörünü seçiniz. dosya ya da klasör ismini hatalý gösterilmesine 3.
- Page 16 USB/SD/MMC/MP3 Kullanýmý Elektronik Þok Koruma Not: • Mp3 kayı dı için > 45 saniye 44.1kHz, Eðer REPEAT modunu seçmezseniz oynatma 128kbps tamamlandýðýnda sistem duracaktýr. Eðer • WMA k ayýdý için >90 saniye 44.1kHz, 5 dakika cihaza bir iþlem uygulanmaz ise 128kbps cihaz standby (bekleme) moduna geçecektir.
-
Page 17: Cihaz Baðlantýlarý
Cihaz Baðlantýlarý Baðlantý Notlarý Uygun sigorta takýlmasýna raðmen elektriksel sorun hala devam ediyor ise lütfen en yakýn • Elektrik sisteminde kı sa devreyi önlemek için profesyonel araba bayisine baþvurunuz. negatif batarya kablosunu kurulumdan önce • Bataryanı n aþı rı ı sı... - Page 18 Cihaz Baðlantýlarý Baðlantý Diyagramý...
-
Page 19: Kurulum
Cihaz Baðlantýlarý Kurulum ISO Konnektörü Kullanýmý Hazýrlýk 1. Batarya Baðlantýsýnýn Kesilmesi 1. Aracýnýz ISO konnektöre sahipse, ISO konnektörleri sekildeki gibi birbirine Kuruluma baþlamadan önce, herzaman baglayiniz. bataryanýn negatif ucunun baðlantýsý kesilir. 2. ISO konnektör olmayan baglantilarda, baglantidan önce araçtaki kablolari Not: dikkatlice kontrol ediniz. - Page 20 Kurulum ISO Kurulumu yerleþtiriniz. Kontrol panelini yarým kýzaðýn içine yerleþtirmek için kýzaðýn uç kýsýmlarýný Radyo kontrol paneli montajý için bazý araçlara dýþarýya doðru iyice eðiniz. destek için kullanýlan cihazýn þasi panelinin yan 4. Cihazý kontrol panelinin önünde kýsmýnda bulunan vida delikleri bulunmaktadýr. yerleþtiriniz böylece yarým kýzak sayesinde Bu tip kurulumlar için lütfen yerel araç...
-
Page 21: Anti-Theft Sistem
Kurulum Anti-Theft Sistem Reset Bu cihaz çýkarýlabilir ön panele sahiptir. Ön paneli yanýnýza alýp gidebilirsiniz, hýrsýzlar ön paneli olmayan teybi çalmak istemedigi için teybinizin çalinma riski azalir. Ön Paneli Çýkartma 1. Cihazý kapatmak için düðmesine basýnýz. 2. Panelin dýþa doðru açýlmasý için Reset yuvasý... -
Page 22: Pratik Çözümler
Pratik Çözümler Birþeylerin yanlýþ gittiðinden þüpheleniyorsanýz, hemen cihazýnýzý kapatýnýz, ve hemen satýn aldýðýnýz maðazayý arayýnýz. Cihazý asla kendiniz tamir etmeye çalýþmayýnýz aksi takdirde cihaza zarar verirsiniz. Çözüm Problem Olasý Neden Genel Aracýn kontagi açik degildir. Aracýn kontak anahtarýný çeviriniz. Kablo uygun bir sekilde Kablo baglantilarini kontrol ediniz. -
Page 23: Teknik Özellikler
Teknik Özellikler Genel Güç Kaynaðý 12V DC(11V-16V) Test voltajý 14.4V, negatif toprak Maksimum güç çýkýþý 45Wx4 kanal Sürekli Güç Çýkýþý 25Wx4 kanal 10% T.H.D.) Uygun hoparlör empedansý 4-8 ohm Pre-Amp çýkýþ voltajý 2.0V(oynatma modu: 1KHz, 0 dB, 10K load) Sigorta Dimensions(WxHxD) 178x50x166mm Aðýrlýk... -
Page 24: Safety Precautions
Safety Precautions Never expose this unit, amplifier, and Thank you for purchasing this product. speakers to moisture or water for preventing Pl e a se re a d th r o u g h t h e se o p e ra ti n g electric sparks or fires. -
Page 25: Safety Information
Contents Safety Precautions .........1 Safety Information ..........2 Features ............3 Panel Controls ..........4 Remote Controls ..........5 Basic Operation ..........6 Rotary Knob Menu ........7-9 Radio Mode ..........10 RDS (Radio Data System) ......11 USB/SD/MMC/MP3 Playback ....12-15 Device Connections ........16-17 Installation Guide........18-20 Anti-Theft System .........20 Troubleshooting ..........21 Specifications ..........22... -
Page 26: Features
Features WMA and MP3 Compatibility Button Operation Explanations Some frequent operations It is possible to playback WMA and MP3 files. 1) Move cursor About WMA The unit can playback WMA data. Windows Media and the Windows logo are trade marks or registered trademarks of Microsoft Corporation in the United States and/or other countries. -
Page 27: Panel Controls
Panel Controls Power on/off: Press to turn on/off the unit. 1. - Short press to select playing mode: 12. - Preset scan (press briefly, in Radio mode) • Radio - Auto preset (press more than 2 seconds, • USB (when USB inserted) in Radio mode) •... -
Page 28: Remote Controls
Remote Controls Remote Control Operating Range Press to turn on/off the unit. The remote control can operate within a distance of 3~5m. Replacing the lithium battery When the range of operation of the card remote control becomes short or no function, replace the lithium battery with a new one. -
Page 29: Basic Operation
Basic Operations Turn on/off the Power 1. Press to turn on the unit. The unit goes back to the last status after power on. 2. Press more than two secnonds to power off. Mute Press the button to cut the sound. Note: Note: •... -
Page 30: Rotary Knob Menu
Rotary Knob Menu 1. Rotate the knob to adjust volume level. 3. Press the knob more than 2 seconds to enter Setting mode, then Use 2. Short press to access the Audio & Video and OK key to select setting items. Setting menu. - Page 31 Rotary Knob Menu (sold separately) is connected to the CAMERA BRIGHTNESS IN input on the back of the radio. Turn the Set the brightness of the video output with rotary encoder to select “On” or “Off”. from 00 to 16. SUBWOOFER: ON/80HZ/120HZ/160HZ CONTRAST After connecting a subwoofer to the back of...
- Page 32 Rotary Knob Menu Radio Setting REGIONAL: ON/OFF Choose AF function to implement or ignore the regional code (of the PI) and only stations in the current region can be tuned automatically. REG ON: AF function will implement the regional code (of the PI) and only stations in the current region can be tuned automatically.
-
Page 33: Radio Mode
Radio Mode Accessing Radio Mode Press the SRC button on the front panel or remote control to switch to the Radio source. 1. Source Indicator 2. Current Preset Channels 3. Time/Clock 4. AM/FM Band 5. RDS Information 6. Radio Station Frequency 7. -
Page 34: Rds (Radio Data System)
RDS (Radio Data System, optional) RDS service availability varies with areas. PTY Reception (Program Type) Please understand if RDS service is not RDS FM stations provide a program type available in you area, the following service is identifcation signal. not available. Example: news, rock, info, sport, etc. -
Page 35: Usb/Sd/Mmc/Mp3 Playback
USB/SD/MMC/MP3 Playback 1. Load SD/MMC Card USB/SD/MMC Notes Insert the SD/MMC card into the slot, with USB functions (flash memory type) MP3 the front side at left. music play 1. SD/MMC card support The unit will play the music automatically 2. - Page 36 USB/SD/MMC/MP3 Playback Accessing USB/SD Card Mode To play fles from an SD or USB that is already inserted, choose the CARD or USB source. The playback screen is indicated below: 1. Source Indicator 2. Current Track/T otal Track 3. Name of the Song Display 4.
- Page 37 USB/SD/MMC/MP3 Playback 4. Use to enter file list and use names to be displayed incorrectly. The unit select desired file, press OK, on the recognizes and plays only fles with the MP3/ front panel or ENTER on the remote control WMA extension.
- Page 38 USB/SD/MMC/MP3 Playback Electronic Shock Protection Note: • >45 seconds for MP3 recorded at 44.1kHz, If you do not select RPT on, when the entire 128kbps playback has finished, the system will stop. If • >90 seconds for WMA recorded at 44.1kHz, no other control, after 5 minutes the unit will 128kbps turn into standby mode.
-
Page 39: Device Connections
Device Connections Notes of connection If a proper fuse is installed and electrical problems still occur, please contact with • To avoid short circuit in the electrical any professional car shops for inquiry. system, ensure that the negative battery • D O NOT connect other equipments with the cable is disconnected before installation. - Page 40 Device Connections Wiring Diagram...
-
Page 41: Installation Guide
Installation Guide Device Connections Preparation Using the ISO Connector 1. If your car is equipped with the ISO 1. Disconnect battery connector, then connect the ISO connectors Before you begin, always disconnect the as illustrated. battery negative terminal. 2 . F o r c o n n e c t i o n s w i t h o u t t h e I S O connectors, check the wiring in the vehicle carefully before connecting, incorrect Note:... - Page 42 Installation Guide all connections are secure and insulated ISO Installation with wire nuts or electrical tape. After This unit has threaded holes in the chassis completing the wiring connections, turn the side panels which may be used with the unit on to confirm operation (vehicle ignition original factory mounting brackets of some must be on).
-
Page 43: Anti-Theft System
Installation Guide Anti-Theft System This unit is equipped with a detachable panel. Reset Panel can be detached and taken with you, helping to deter theft. Removing the Panel 1. Switch off the power of the unit. 2. Press button to flip down the panel. 3. -
Page 44: Troubleshooting
Troubleshooting If you suspect something is wrong, immediately switch power off. Immediately stop using it and call the store where you purchased it. Never try to repair the unit yourself because it is dangerous to do so. Problem Possible cause Solution General Car ignition is not on. -
Page 45: Specifications
Specifcations General Power supply: 12VDC (11V-16V), T est voltage 14.4V, negative ground Maximum power output: 40W x 4 channels Continuous power output: 20W x 4 channels (4 10% T .H.D.) Suitable speaker impedance: 4-8ohm Pre-Amp output voltage: 2.0V (Play mode: 1KHz, 0dB, 10K load) Fuse: Dimensions (WxHxD):... - Page 46 GoldMaster...
Need help?
Do you have a question about the SD-8010 USB and is the answer not in the manual?
Questions and answers