
Related Manuals for Giacomini KTD3


Summary of Contents for Giacomini KTD3
- Page 1 Temperature Difference Controller MTDC (Giacomini code: KTD3) Installation and operating instructions Read carefully before installation, commissioning and operation!
-
Page 2: Table Of Contents
Content A. - Safety instructions 6. - Special functions EC declaration of conformity 6.1. - Program selections General instructions 6.2. - Signal V1 Explanation of symbols 6.2.1. - Type of pump Changes to the unit 6.2.2. - Pump Warranty and liability 6.2.3. - Page 3 This manual applies to the hardware MTDC versions 5, January 2015 When you are unsure which version you have, check the type label on the side of the controller. MTDC Version 5 AC 100...240V, 50/60Hz, 460VA If the version is not readable here, open the controller’s “Service values” menu. The version is shown in the first line of the service values.
-
Page 4: Safety Instructions
Safety instructions EC declaration of conformity By affixing the CE mark to the unit the manufacturer declares that the Temperature- Difference-Controller MTDC, conforms to the following relevant safety regulations: EC low voltage directive 2006/95/EC EC electromagnetic compatibility directive 2004/108/EC Conforwithy has been verified and the corresponding documentation and the EC de- claration of conforwithy are kept on file by the manufacturer. -
Page 5: Changes To The Unit
Safety instructions Changes to the unit Changes to the unit can compromise the safety and function of the unit or the entire system. Danger Changes, additions to or conversion of the unit are not permitted without the writ- ten permission from the manufacturer It is likewise forbidden to install additional components that have not been tested together with the unit If it becomes clear that safe operation of the unit is no longer possible, for exam-... -
Page 6: Description Of Controller
Description of controller Specifications Electrical specifications: Mains voltage 100 - 240VAC Mains frequency 50 - 60Hz Power consumption 0,5W - 2,5W Internal fuse 2A/250V slow blow Protection category IP40 Protection class Overvoltage Category Degree of Pollution Category mechanical relay 460VA for AC1 / 460W for AC3= 2 (R1) 2 (R1/R2) 0-10V output, tolerance 10%, 10 k Ω... -
Page 7: About The Controller
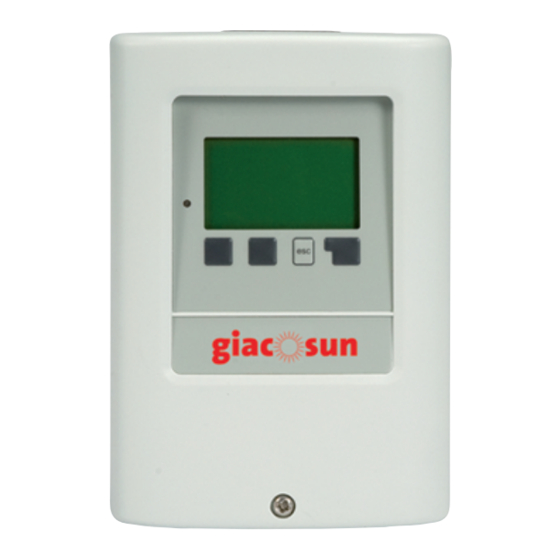
Description of controller About the controller The Temperature Difference Controller MTDC facilitates efficient use and function control of your solar or heating system. The device is impressive most of all for its functionality and simple, almost self-explanatory operation. For each step in the input process the individual entry keys are assigned to appropriate functions and explained. -
Page 8: Installation
Installation Wall installation Install the controller only in dry areas and under the ambient conditions de- scribed under B.1 “Specifications”. Carry out the following steps 1-8. Caution 1. Unscrew cover screw completely C.1.1 2. Carefully pull upper part of housing from lower part. -
Page 9: Electrical Connection
Installation Electrical connection Before working on the unit, switch off the power supply and secure it against being switched on again! Check for the absence of power! Electrical connections may only be made by a specialist and in compliance Danger with the applicable regulations. -
Page 10: Installing The Temperature Sensors
Installation 1.Select necessary program/hydraulics C.2.1 (Resp. D.1 - Hydraulic variants) 2.Strip cables by 55 mm max., insert, fit the strain relief devices, strip the last 8-9mm of the wires (Fig. C.2.1) 3.Open the terminals using a suitable screwdriver (Fig. C.2.1) and make electri- cal connections on the controller (s. -
Page 11: Terminal Connection
Installation D. - Terminal connection diagram Low voltage Main voltage max. 12V 230VAC Danger Caution CAN CAN VFS2 VFS1 PELV On the Controller platine: CAN1 CAN Bus connection CAN2 CAN Bus connection Low voltage Main voltage max. 12V 230VAC Gefahr Achtung Low voltage max. -
Page 12: Hydraulic Variants
Description of controller Hydraulic variants The following illustrations should be viewed only as schematic diagrams showing the respective hydraulic systems, and do not claim to be complete. The controller does not replace safety devices under any circumstances. Depending on the specific application, additional system Caution components and safety components may be mandatory, such as check valves, non-return valves, safety temperature liwithers, scalding protectors, etc., and must therefore be provided. - Page 13 Description of controller Hydraulic variants R1(V1) R1(V1) R1(V1) Solar with 2 collector surfaces and switching Solar with bypass Solar with heat exchanger valve R1(V1) R1(V1) R1(V1) Solar with 2 collector surfaces and 2 pumps Solar with 2 storages and switching valve Solar with 2 storages and 2 pumps R1(V1) R1(V1)
-
Page 14: Operation
Description of controller Hydraulic variants R1(V1) R1(V1) R1(V1) Solar with cooling 3 (collector cooling) Solar with storage and solid-fuel boiler and S4 2x Solar Auxiliary Heat Solid-fuel 3-way valve Collector heating Pump exchanger boiler R2 on Storage Flow Valve Swimming pool Radiator heater Sensor... -
Page 15: Commissioning Help
Parametrisation Commissioning help 1. Set language, time and date 2.a) Start setup wizard (menu 6.8.) The setup wizard guides through the necessary basic settings in the correct order. Every parameter is briefly explained in the display. Pressing the „esc“ key takes you back to the previous setting. -
Page 16: Menu Sequence And Menu Structure
Operation Menu sequence and menu structure The graphics or overview mode appears when no key has been press for 2 minutes, or when the main menu is exited by pressing “esc“. Pressing a key in graphics or overview mode takes you directly to the main menu. The following menu items are then available for selection there: Measurement values 1. -
Page 17: Statistics
Statistics 2. - Statistics The menu “2. Statistics” is used for func- tion control and long-term monitoring of the system. The menu is closed by pressing “esc” or selecting “Exit statistics”. For analysis of the system data it is essential for the time to be set ac- curately on the controller. -
Page 18: Operating Modes
Operating modes 3. - Operating modes In menu “3. Operating modes” the con- troller can either be placed in automatic mode, switched off, or placed in a manual operating mode. The menu is closed by pressing “esc” or selecting “Exit operating modes”. 3.1. -
Page 19: Settings
Settings 4. - Settings The necessary basic settings required for the control function are made in menu “4. Settings”. This does not under any circumstances replace the safety facilities to be provided by the customer! Caution The menu is closed by pressing “esc” or selecting “Exit settings”. -
Page 20: Tmax S2
Settings 4.5. - Tmax S2 Switch-off temperature at sensor 2 If this value is exceeded at sensor 2 and the other conditions are also met, then the controller switches the associated pump and/or valve off. If sensor 2 falls below this value again and the other conditions are also met, then the controller switches the pump and/or valve on again. -
Page 21: Tmax Sb Wt (Pool Heat Exchanger)
Settings 4.14. - Tmax SB WT (pool heat exchanger) Switch-off temperature at heat exchanger sensor If this value is exceeded at the applicable sensor, the controller switches the associat- ed pump and/or valve off. If the temperature falls below this value again and the other conditions are also met, then the controller switches the pump and/or valve on again. -
Page 22: Protective Functions
Protective functions 5. - Protective functions Menu “5. Protective functions” can be used to activate and set various protective functions. This does not under any circumstances replace the safety facilities to be provided by the customer! Caution The menu is closed by pressing “esc” or select- ing “Exit settings”. -
Page 23: Recooling
Protective functions Protective functions 5.3. - Recooling In hydraulic systems with solar when the recooling function is activated excess energy from the storage tank is fed back into the collector. This only takes place if the temperature in the storage tank is higher than the value “Recool Tsetpoint” and the collector is at least 20 °C cooler than the storage tank and before the storage tank temperature has dropped below the value “Recool Tsetpoint”. -
Page 24: Special Functions
Special functions 6. - Special functions Menu “6. Special functions” is used to set basic items and expanded functions. Other than the time all settings may only be made by a specialist. Caution The menu is closed by pressing “esc” or select- ing “Exit special functions”. -
Page 25: 0-10V / Pwm Off
Special functions 6.2.4. - 0-10V / PWM off This voltage is put out when the pump is turned off (Pumps that can detect cable break need a minimum voltage). 6.2.5. - 0-10V / PWM on This voltage is needed to turn the pump on at minimum speed. 6.2.6. -
Page 26: Speed Control
Special functions 6.3. - Speed control With speed control the MTDC makes it possible to vary the speed of connected pumps. This function should only be activated by a specialist. Depending on the pump and pump stage used, the minimum speed should not be set too low, because otherwise the pump or the system may be damaged. -
Page 27: Purging Time
Special functions 6.3.2. - Purging time During this time period, the pump is running with full speed (100%) to ensure trouble- free startup. After this time has passed, the pump is set to speed control and is set to max. speed or min speed, depending on the speed control variant „6.3.1. - Modes“ on page 26 chosen. -
Page 28: Relay Functions
Special functions 6.5. - Relay functions The here explained additional functions can be assigned to unused relays. Every ad- ditional function can only be used once. Pay special attention to the technical data of the relays („B.1. - Specifications“). Example System 1 + System 1 + System 1 +... -
Page 29: Thermostat
Special functions 6.5.2. - Thermostat Thermostat is used for time- and temperature controlled additional heating. Temperature values which are set too high can lead to scalding or damage to the system. Scalding protection must be provided by the Danger! customer! In Energy savings mode, different settings may apply, see e.g. -
Page 30: Cooling
Special functions 6.5.2.8. - Energy saving mode Energy saving mode switches the heating on when T eco is undershot und heats up to T eco + hysteresis when solar charge is active. 6.5.2.9. - Periods Thermostat activity times Set the desired periods of time when the thermostat should be active. 3 periods can be set per day, settings can also be copied to other days. -
Page 31: Field Cooling
Special functions 6.5.4.3. - ∆T return flow Switch-on temperature difference: When this difference is exceeded between return flow sensor and storage sen- sor, the relay is switched on. Switch-off temperature difference: When this difference is exceeded between return flow sensor and storage sen- sor, the relay is switched off. -
Page 32: Anti Legionella
Special functions 6.5.6. - Anti Legionella This function is used to heat up the system during selected periods to eliminate legionella bacteria. 6.5.6.2. - AL T set This temperature has to be detected for the time set in AL residence time at the AL sensors for a successful heat up. -
Page 33: Heat Transfer
Special functions 6.5.7. - Heat transfer This is used to transfer energy from one storage to another with a pump. 6.5.7.2. - Shift Tmin Minimum temperature in source storage to enable the heat transfer. 6.5.7.3. - ∆ T Heat transfer Temperature difference for heat transfer function. -
Page 34: Difference
Special functions 6.5.8. - Difference The relay is switched on when a specific temperature difference (∆ T) is reached. 6.5.8.2. - Diff Tmin Minimum temperature at source sensor to enable the difference relay When the temperature at the source sensor is below this level, the difference function is disabled. -
Page 35: Solid Fuel Boiler
Special functions 6.5.9. - Solid fuel boiler The relay is used to control an additional solid fuel boiler. 6.5.9.2. - SF Tmin Minimum temperature in the solid fuel boiler to switch on the pump. If the tem- perature at the boiler sensor is below this temperature, the relay is disabled. 6.5.9.3. -
Page 36: Parallel Operation R (X)
Special functions 6.5.12. - Parallel operation R (X) The relay is switched on at the same time as the set relay R1 or R2. 6.5.12.2. - Delay This menu determines how long after the start of R1 or R2 the parallel relay is switched on. -
Page 37: Heat Quantity
Special functions 6.6. - Heat quantity 6.6.1. - Constant flow When the heat meter mode „Flow rate“ is selected, an approximated heat quantity is calculated using the values the user has to enter. These are type of glycol/AntiFreeze, glycol portion and flow rate. These values are put into correlation with the temperature data of collector sensor and storage sensor. -
Page 38: Sensor Calibration
Special functions 6.7. - Sensor calibration Deviations in the temperature values displayed, for example due to cables which are to long or sensors which are not positioned optimally, can be compensated for manually here. The settings can be made for each individual sensor in steps of 0.8 °C (tempera- ture) resp. -
Page 39: Time And Date
Special functions 6.11. - Time and date This menu is used to set the current time and date. For analysis of the system data it is essential for the time to be set accu- rately on the controller. Please note that the clock does not continue to run if the mains voltage is interrupted, and must therefore be reset. -
Page 40: Menu Lock
Menu lock 7. - Menu lock Menu “7. Menu lock” can be used to secure the controller against unintentional changing of the set values. The menu is closed by pressing “esc” or selecting “Exit menu lock”. The menus listed below remain completely accessible despite the menu lock being activated, and can be used to make adjustments if necessary: Measurement values Analysis... -
Page 41: Service Values
Service values 8. - Service values The menu “8. Service values” can be used for remote diagnosis by a specialist or the manufac- turer in the event of an error, etc. Enter the values at the time when the error occurs e.g. in the table. Caution The menu can be closed at any time by press- ing “esc”. -
Page 42: Language
Language 9. - Language Menu “9. Language” can be used to select the language for the menu guidance. This is queried automatically during initial commis- sioning. The choice of languages may differ, how- ever, depending on the device design. Language selection is not available in every device design! -
Page 43: Malfunctions
Malfunctions Z.1. Malfunctions with error messages If the controller detects a malfunction, the red light flashes and the warning symbol also appears in the display. If the error (LED flashes + is no longer present, the warning symbol warning symbol) changes to an info symbol and the red light no longer flashes. -
Page 44: Replacing The Fuse
Malfunctions Replacing the fuse Repairs and maintenance may only be performed by a specialist. Before working on the unit, switch off the power supply and secure it against being switched on again! Check for the absence of power! Danger Only use the supplied spare fuse or a fuse of the same design with the following specifications: T2A 250V Danger If the mains voltage is switched on and... -
Page 45: Maintenance
Malfunctions Maintenance In the course of the general annual maintenance of your heating system you should also have the functions of the controller checked by a spe- cialist and have the settings optimised if necessary. Caution Performing maintenance: - Check the date and time (see „6.11. - Time and date“) - Assess/check plausibility of analyses (see „2. -
Page 46: Can-Bus
Additional Information CAN-Bus The CAN bus can be used to connect two or more controllers with each other or with the data logger to exchange data. Controller 1 Controller 2 Controller 3 Datalogger (valgfrit) Controller n 1. The controllers are connected in series with the CAN bus cable (1). 2. - Page 47 Tips & Tricks Instead of setting the flow rate for the system using a flow rate limiter, it is better to adjust the flow rate using the switch on the pump and by means of the “max. speed” setting on the controller (see 6.3.4). This saves electricity! The service values (see 8.) include not only current measurement values and operating states, but also all of the settings for the controller.
- Page 48 The information E-Mail: info@sorel.de described in this technical pamphlet does not exempt the Internet: www.sorel.de user from following carefully the existing regulations and norms on good workmanship. Giacomini S.p.A. Via per Alzo, 39 - 28017 San Maurizio d’Opaglio (NO) Italy...
- Page 49 Temperature Difference Controller LTDC (Giacomini code: KTD5) Installation and operating instructions Read carefully before installation, commissioning and operation!
- Page 50 Table of content A. - Safety instructions 5. - Protections / Protective Z.1. Malfunctions with error A.1. - EC declaration of conformity 4 functions messages Z.2 Replacing the fuse A.2. - General instructions 5.1. - System protection A.3. - Explanation of symbols 5.2.
- Page 51 This manual applies to the following hardware versions: Version 1 Version 2 3 mechanical relays (2 on/off, 1 changeover contact) 2 mechanical relays (1 on/off, 1 change-over contact) 1 PWM / 0-10V for high efficency pumps 1 electronic relay 5 PT1000 temperature sensor inputs for speed control of standard pumps 1 PWM / 0-10V for high efficency pumps 5 PT1000 temperature sensor inputs...
-
Page 52: Safety Instructions
Safety instructions A.1. - EC declaration of conformity By affixing the CE mark to the unit the manufacturer declares that the LTDC conforms to the following relevant safety regulations: EC low voltage directive 2006/95/EC EC electromagnetic compatibility directive 2004/108/EC Conformity has been verified and the corresponding documentation and the EC declaration of conformity are kept on file by the manufacturer. -
Page 53: Changes To The Unit
Description of controller A.4. - Changes to the unit • Changes, additions to or conversion of the unit are not permiddled without the written permission from the manufacturer • It is likewise forbidden to install additional components that have not been tested together with the unit •... -
Page 54: Specifications
Description of controller B.1. - Specifications Electrical specifications: Mains voltage 100 - 240VAC Mains frequency 50 - 60Hz Power consumption 0,5W - 2,5W Internal fuse T2A / 250V slow blow Protection category IP40 Protection class Overvoltage Category Degree of Pollution Category Vers.1 Vers.2 Vers.3... -
Page 55: Temperature Resistance Table For Pt1000 Sensors
Description of controller B.2. - Temperature resistance table for Pt1000 sensors °C Ω 1000 1039 1077 1116 1155 1194 1232 1270 1308 1347 1385 B.3. - About the controller The Temperature Difference Controller LTDC facilitates efficient use and function control of your solar or heating system. -
Page 56: Installation
Installation C.1. - Electrical connection Before working on the unit, switch off the power supply and secure it against being switched on again! Check for the absence of power! Electrical connections may only be made by a specialist and in compliance with the applicable regulations. -
Page 57: Wall Instalion
Installation C.2. - Wall instalion Install the controller only in dry areas and under the ambient conditions described under B.1 “Specifications”. Achtung 1. Unscrew cover screw completely C.2.1. 2. Carefully pull upper part of housing from lower part. 3. Set upper part of housing aside, being sure not to touch the electronics when doing so. - Page 58 Installation Select necessary C.2.3. program/hydraulics (s. „D.2. - Hydraulic variants / systems“ on page 13) Strip cables by 55mmmax., insert, fit the strain relief devices, strip the last 8-9mm of the wires (Fig. „C.2.3.“) Open the terminals using a suitable screwdriver (Fig.
-
Page 59: Installing The Temperature Sensors
Installation C.3. - Installing the temperature sensors The controller operates with Pt1000 temperature sensors which are accurate to the degree, thus ensuring optimal control of system functions. The temperature sensor cables must be routed separately from mains voltage cables, and must not, for example, be routed in the same cable duct! Caution Sensor cables for S1 and S5 can be extended to a maximum of 30m using a cable with a cross-section of at least 0.75mm². -
Page 60: Terminal Connection Diagram
Installation D.1. - Terminal connection diagram mains side max. 12V 100-240VAC Caution Danger CAN CAN VFS2 VFS1 PELV On the circuit board: LTDC Version V3+V4: VFS1 Grundfos Direct Sensor VFS2 Grundfos Direct Sensor CAN1 CAN Bus CAN2 CAN Bus Low voltage max. 12VAC/DC Mains voltage 100-240VAC 50-60Hz Terminal: Connection for:... -
Page 61: Hydraulic Variants / Systems
Installation Installation D.2. - Hydraulic variants / systems The following illustrations should be viewed only as schematic diagrams showing the respective hydraulic systems, and do not claim to be complete. The controller does not replace safety devices under any circumstances. Depending on the specific application, additional system Caution components and safety components may be mandatory, such as check valves, non-return valves, safety temperature liwithers, scalding protectors, etc., and must therefore be provided. - Page 62 Installation Installation Hydraulic variants / systems R1(V1) R1(V1) R1(V1) R2(V2) Solar with 2 collector surfaces and switching Solar with heat exchanger Solar with bypass valve R2(V2) R1(V1) R1(V1) R1(V1) R2(V2) Solar with 2 storages and 2 pumps Solar with 2 collector surfaces and 2 pumps Solar with 2 storages and switching valve R1(V1) R1(V1)
- Page 63 Installation Installation Hydraulic variants / systems R1(V1) R1(V1) R1(V1) R2(V2) R2(V2) R2(V2) Solar with cooling 3 (collector cooling) Solar with heat exchanger 2 zones Solar with heat exchanger 2 storages R1(V1) R1(V1) R1(V1) R2(V2) R2(V2) Solar with swimming pool, storage, heat 2x Solar Solar with storage and solid-fuel boiler and S4 exchanger and valve...
- Page 64 Installation Installation Hydraulic variants / systems R1(V1) R1(V1) R1(V1) R2(V2) R2(V2) Solar with 3 storages and 3 valves Solar with heat exchanger + Solar with heat exchanger and 2 zones storage R1(V1) R1(V1) R1(V1) R2(V2) R2(V2) R2(V2) Solar with 2 collector surfaces, heat exchanger Solar with 2 collector surfaces, heat exchanger Solar with heat exchanger and 2 storages storage, valve and 2 pumps...
-
Page 65: Operation
Operation E.1. - Display and input The display (1), with its extensive text and graphics mode, is almost self-explanatory, allowing easy operation of the controller. To change from the overview to the settings menu, press the „esc“ key. The green status LED (2) lights up when a relay is active, the red LED blinks when an error occurs. -
Page 66: Commissioning Help
Operation E.2. - Commissioning help The first time the controller is turned on and after the language and time are set, a query appears as to whether you want to parametrise the controller using the commissioning help or not. The commissioning help can also be terminated or called up again at any time in the special functions menu. -
Page 67: Menu Sequence And Menu Structure
Operation E.4. - Menu sequence and menu structure The graphics or overview mode appears when no key has been press for 2 minutes, or when the main menu is exited by pressing “esc“. The up and down buttons are used to scroll through the list of sensors and relays . -
Page 68: Measurement Values
Measurement values 1. - Measurement values The menu “1. Measurement values” serves to display the currently measured temperatures. The menu is closed by pressing “esc” or selecting “Exit measurement values”. Selecting “Overview” or “esc” exits the Info mode. If “--” appears on the display instead of the measurement value, then there may be a defective or incorrect temperature sensor. -
Page 69: Operating Modes
Operating modes 3. - Operating modes In menu “3. Operating modes” the controller can either be placed in automatic mode, switched off, or placed in a manual operating mode. The menu is closed by pressing “esc” or selecting “Exit operating modes”. 3.1. -
Page 70: Settings
Settings 4. - Settings The necessary basic settings required for the control function are made in menu “4. Settings”. This does not under any circumstances replace the safety facilities to be provided by the customer! Caution The menu is closed by pressing “esc” or selecting “Exit settings”. -
Page 71: T Solar S3
Settings 4.7. - ∆ T Solar S3 See „4.4. - ∆ T Solar S (X)“ 4.8. - Tmax S3 See „4.5. - Tmax S (X)“ 4.9. - Priority S4 See „4.4. - Priority S (X)“ 4.10. - ∆ T Solar S4 See „4.4. -
Page 72: Increase
Settings 4.17. - Increase Extension of the charging pause due to temperature increase in the collector For precise setting of the charging priorities for systems with multiple storage tanks, the necessary temperature increase of the collector at which the interruption of the charging into the lower-priority storage tank is extended by one minute is set here. -
Page 73: Recooling
Protective functions 5.3. - Recooling In hydraulic systems with solar when the recooling function is activated excess energy from the storage tank is fed back into the collector. This only takes place if the temperature in the storage tank is higher than the value “Recool Tsetpoint”... -
Page 74: Special Functions
Special functions 6. - Special functions Menu “7. Special functions” is used to set basic items and expanded functions. Other than the time all settings may only be made by a specialist. Caution The menu is closed by pressing “esc” or selecting “Exit special functions”. -
Page 75: Speed Control
Special functions 6.3. - Speed control R1 / R2 With speed control the LTDC makes it possible to vary the speed of connected pumps. This function should only be activated by a specialist. Depending on the pump and pump stage used, the minimum speed should not be set too low, because otherwise the pump or the system may be damaged. -
Page 76: Max. Speed
Special functions 6.3.4. - max. speed The maximum speed of the pump is specified here. During the setting the pump runs at the specified speed and the flow rate can be determined. Settings range: 70% to 100% / Default setting: 100% The indicated percentages are guide values that may vary to a greater or lesser extent depending on the system, pump and pump stage. -
Page 77: Solar Bypass
Special functions 6.6. - Relay functions The here explained additional functions can be assigned to unused relays. Every additional function can only be used once. Pay special attention to the technical data of the relays („B.1. - Specifications“ on page 6). The enumeration does not correspond to the controllers menu enumeration. -
Page 78: Thermostat
Special functions 6.6.2. - Thermostat Thermostat is used for time- and temperature controlled additional heating. Settings range: On, Off, Inverted Temperature values which are set too high can lead to scalding or damage to the system. Scalding protection must be provided by the customer! Danger! In Energy savings mode, different settings may apply, see e.g. - Page 79 Special functions 6.6.2.7. - Energy saving mode Energy saving mode switches the heating on when T eco is undershot und heats up to T eco + hysteresis when solar charge is active. Settings range: On, Off / Default setting: Off 6.6.2.8.
-
Page 80: Cooling
Special functions 6.6.4. - Cooling This is used to cool down e.g. storages to a setpoint temperature by radiating heat. Settings range: S1-S8, VFS1-2, active Storage / Default setting: None 6.6.4.1. - Co T set Target temperature at thermostat sensor 1. Cooling is on above this temperature till Co T set + hysteresis is reached. -
Page 81: Return Flow Increase
Special functions 6.6.5. - Return flow increase This function is used to raise the temperature of e.g. the return flow by the storage. Settings range: On, Off 6.6.5.1. - RF Tmax Maximum temperature at the return flow sensor. If this temperature is exceeded, the relay is switched off. -
Page 82: Collector Field Cooling
Special functions 6.6.6. - Collector field cooling This function controls an external coolig unit to cool down the collector. Settings range: On, Off 6.6.6.1. - Tmax field If this temperature is exceeded at the reference sensor, the relay is switched on. Settings range: 100 °C to 180 °C / Default: 120 °C 6.6.6.2. -
Page 83: Anti Legionella
Special functions 6.6.7. - Anti Legionella This function is used to heat up the system during selected periods to eliminate legionella bacteria. Settings range: S1-S8, VFS1-2, Active storage/ Default setting: none 6.6.7.1. - AL T set This temperature has to be detected for the time set in AL residence time at the AL sensors for a successful heat up. -
Page 84: Heat Transfer
Special functions 6.6.8. - Heat transfer This is used to transfer energy from one storage to another with a pump. Settings range: S1-S8, VFS1-2, Active storage/ Default setting: none 6.6.8.1. - ∆ T Heat transfer Temperature difference for heat transfer function. When the temperature difference between HT Source and HT Drain reaches ∆T Heat Transfer On, the relay is switched on. -
Page 85: Difference
Special functions 6.6.9. - Difference The relay is switched on when a specific temperature difference (∆ T) is reached. Settings range: On, Off 6.6.9.1. - ∆ T difference Switch on - difference: When this temperature difference is reached, the relay is switched on. Settings range: 5-20°... -
Page 86: Solid Fuel Boiler
Special functions 6.6.10. - Solid fuel boiler The relay is used to control an additional solid fuel boiler. Settings range: On, Off 6.6.10.1. - SF Tmin Minimum temperature in the solid fuel boiler to switch on the pump. If the temperature at the boiler sensor is below this temperature, the relay is disabled. -
Page 87: Pressure Monitor
Special functions 6.6.12. - Pressure monitor The relay is switched on when the pressure drops below set minimum or exceeds the set maximum pressure. Settings range: On, Off / Default setting: Off 6.6.12.1. - Pressure monitor This menu is used to configure the system pressure montoring via direct sensor. As soon as the set limits are exceeded, the relay is switched on. -
Page 88: Parallel Operation R (X)
Special functions 6.6.14. - Parallel operation R (X) The relay is switched on at the same time as the set relay R1 or R2. Settings range: On, Off, Inverted 6.6.14.1. - Delay This menu determines how long after the start of R1 or R2 the parallel relay is switched on. Settings range: 0-120 seconds / Default setting: 30 seconds 6.6.14.2. -
Page 89: Heat Quantity
Special functions 6.9. - Heat quantity 6.9.1. - Constant flow When the heat meter mode „Flow rate“ is selected, an approximated heat quantity is calculated using the values the user has to enter. These are type of glycol/AntiFreeze, glycol portion and flow rate. These values are put into correlation with the temperature data of collector sensor and storage sensor. -
Page 90: Vfs (X)
Special functions 6.9.2. - VFS (X) Select a VFS sensor for flow measurement. 6.9.2.1. - VFS Typ The VFS type is set here. Settings range: Off; 1-12; 1-20; 2-40; 5-100; 10-200; 20-400 / Default setting: Off 6.9.2.2. - VFS - Position This setting determines the position of the VFS sensor. -
Page 91: Sensor Calibration
Special functions 6.11. - Sensor calibration Deviations in the temperature values displayed, for example due to cables which are to long or sensors which are not positioned optimally, can be compensated for manually here. The settings can be made for each individual sensor in steps of 0.8°C (temperature) resp. -
Page 92: Time And Date
Special functions 6.15. - Time and date This menu is used to set the current time and date. For analysis of the system data it is essential for the time to be set accurately on the controller. Please note that the clock does not continue to run if the mains voltage is interrupted, and must therefore be reset. -
Page 93: Menu Lock
Menu lock, Service values, languages 7. - Menu lock Menu “7. Menu lock” can be used to secure the controller against unintentional changing of the set values. The menu is closed by pressing “esc” or selecting “Exit menu lock”. The menus listed below remain completely accessible despite the menu lock being activated, and can be used to make adjustments if necessary: Measurement values Statistics... -
Page 94: Malfunctions With Error Messages
Malfunctions Z.1. Malfunctions with error messages If the controller detects a malfunction, the red light flashes and the warning symbol also appears in the display. If the error is no longer present, the warning symbol changes to an info symbol and the red light no Led blinks + warning symbol) longer flashes. -
Page 95: Replacing The Fuse
Malfunctions Replacing the fuse Repairs and maintenance may only be performed by a specialist. Before working on the unit, switch off the power supply and secure it against being switched on again! Check for the absence of power! Danger Only use the supplied spare fuse or fuses of the same design with the following specifications: T2A / 250V . -
Page 96: Maintenance
Maintenance Maintenance In the course of the general annual maintenance of your heating system you should also have the functions of the controller checked by a specialist and have the settings optimised if necessary. Caution Performing maintenance: - Check the date and time (see „6.11. - Time and date“ on page 44) - Assess/check plausibility of analyses (see „2. -
Page 97: Appendix
Appendix Manual pump settings J. - Appendix Manual pump settings (see „6.2. - Pump menu“ on page 26) J.19.1. - Pump In this menu, preconfigured profiles for various pumps can be selected. Please note that individual settings are still possible even when a profile has been selected. J.19.2. - Page 98 Appendix Manual pump settings J.2.3a Example for pump settings Speed Max rpm Min rpm 0-5% Cable break detection Stop 5-20% Stop 25% Start Start 25-90% Area of control PWM-Signal (%) 20% 25% 100% PWM on >=25% PWM max <= 90% PWM off 5% - 20% J.2.3b Technical data...
- Page 99 Useful notes/tips and tricks Instead of setting the flow rate for the system using a flow rate limiter, it is better to adjust the flow rate using the switch on the pump and by means of the “max. speed” setting on the controller (see.
- Page 100 The information E-Mail: info@sorel.de described in this technical pamphlet does not exempt the Internet: www.sorel.de user from following carefully the existing regulations and norms on good workmanship. Giacomini S.p.A. Via per Alzo, 39 - 28017 San Maurizio d’Opaglio (NO) Italy...
Need help?
Do you have a question about the KTD3 and is the answer not in the manual?
Questions and answers