
Subscribe to Our Youtube Channel
Summary of Contents for Lamp BNX Series
- Page 1 BNX Series User Manual BN1.5/1.9/2.6/2.9/3.9X BNX Series REV:A0 18/11/2019 This Manual is applicable to the LAMP Tech series of BNX products. DISPLAY A BETTER WORLD FOR ALL...
-
Page 2: Table Of Contents
1.3.7 Circuit breaker equipment ......................5 1.3.8 Power system ..........................5 1.3.9 Power cord ........................... 5 1.4 Proper Use .............................. 6 2. About BNX Series Products ..........................9 2.1 Product Introduction ..........................9 2.2 Product Parameters ..........................10 2.3 Product Components ..........................11 2.4 Installation Structure Section ....................... - Page 3 3.6 Quick operation with Nova Studio……………………….…………………………………...........37 4、Installation precautions of product ......................42 4.1 Installation of Display Cabinet ......................42 4.2 Testing of the Screen Power Supply System (the power supply in the power distribution cabinet and the cabinet needs to be tested by the inspectors with electrician knowledge) ..........42 4.3 Precautions for Display Installation .....................
-
Page 4: Foreword
LAMP Tech BNX series displays include B N 1 . 5 X , B N 1 . 9 X , B N 2 . 6 X , B N 2 . 9 X , B N 3 . 9 X 。... -
Page 5: Safety
Do not modify or copy any components. LAMP Tech uses special materials and manufacturing processes to achieve the required part strength. For help with custom apps, please consult LAMP Tech. Be sure to follow the installation instructions provided by LAMP Tech. If you have any questions about the safety of an app, please contact LAMP Tech. -
Page 6: Important Safety Instructions
Construction and assembly components should be kept dry, clean, lubricated or otherwise maintained in a manner consistent with the design features of the components. LAMP Tech products must be used in a manner that meets the design characteristics of the product. The product must be regularly inspected for safety and reliability, and for wear, deformation, corrosion, and other conditions that may affect the load handling capacity of the parts. - Page 7 Safety • The power supply must meet the requirements: ① LED display’s power supply voltage: 110V ~ 220V ± 10%; Frequency: 50HZ ~ 60HZ ± 5% ② When the total power of the LED display is less than 5KW, it can be powered by a single-phase voltage;...
-
Page 8: Important Warnings
(such as damage to the power cord or plug, equipment is not working properly, or the equipment is dropped), contact the LAMP Tech’s maintenance personnel for repair. • This equipment may only be used in conjunction with systems or peripherals specified by the manufacturer or included with the equipment. -
Page 9: Electric Shock Hazard / Fire Hazard
4. Please keep the inside of the flight case dry and clean. Prevent the LED lamp beads from getting damp or the cabinet from rusting due to the heavy moisture inside the flight case. -
Page 10: Proper Use
Therefore, the cabinet must be handled with care at all times. • Do not place the cabinet or module on the surface of the LED lamp to prevent damage to the LED lamp. - Page 11 • In order to disassemble the module, you need to gently push the module from the back to avoid forced unraveling. • In addition to LAMP Tech's flight case or unit packaging box, other shipping tools should not be used to transport the cabinet. In addition, even if transported using LAMP Tech's flight case or packaging materials, there is no guarantee that the cabinet will not be damaged by excessive force.
- Page 12 Safety brightness for 8 hours. Shut down for 1 hour, then turn it on again and run according to this setting. Execute this program for 2 cycles. D. After completing Step 3 above, set the screen brightness to 70% and keep 70% of the screen brightness for 8 hours.
-
Page 13: About Bnx Series Products
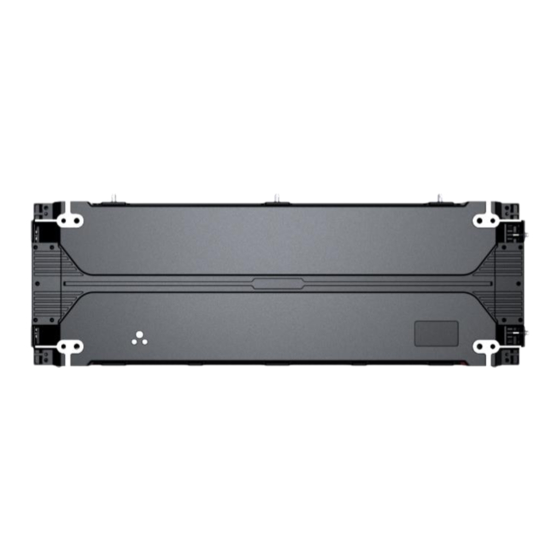
Product Composition 2. About BNX Series Products 2.1 Product Introduction BNX series includes spaces of five points 1.5, 1.9, 2.6, 2.9 and 3.9, meeting space demands among indoors fixed installation mainstream points. Cabinet size: 500*250mm, 750*250mm , 1,000*250mm and 500*1000 。... -
Page 14: Product Parameters
Product Composition 2.2 Product Parameters Product specification parameters: P a r a m e t e r V a l u e P i x e l C o n f i g u r a t i o n S M D 1 0 1 0 S M D 1 0 1 0 S M D 2 0 2 0... -
Page 15: Product Components
2. The ambient humidity for storage in the specification refers to the unopened. 3. The viewing angle here refers to the angle between sight line and normal line. 4. Shenzhen LAMP Technology Co.,Ltd. reserves the right to modify specifications and parameters without prior notice. - Page 16 Product Composition 1000×250mm Cabinet Module Section Cable Section Cascade signal cable between cabinets (CAT5 OR CAT6) Cascade power cord between cabinets Main power cord DISPLAY A BETTER WORLD FOR ALL 第 页...
-
Page 17: Installation Structure Section
Product Composition 2.4 Installation Structure 2.4.1 Structure-free Installation This wall-mount product can be directly fixed by self-tapping screws without steel structure. The specific steps are as follows: 1. Drill the mounting holes; 2. Remove the modules at the left and right ends of the cabinet. 3. -
Page 18: Structure Installation
Product Composition 2.4.2 Structured Installation Shenzhen Lamp Technology Co., Ltd will provide clients with steel-structured installation drawings and steel structures based on the specific situation of each project. The installation of steel structure is shown as follows(the following steel structure and screen dimension are only used for demonstration): 1. -
Page 19: Hoisting
Product Composition 2.4.3 Hoisting BNX series are designed with matched hoisting beam for hoisting. Hanging beam for 500*250mm cabinet (unit: mm) Hanging beam for 750*250mm cabinet (unit: mm) Hanging beam for 1000*250mm cabinet (unit: mm) DISPLAY A BETTER WORLD FOR ALL 第... -
Page 20: Screen Assembly
Product Composition 2.5 Screen assembly BNX series cabinet support a variety of splicing methods: horizontal and vertical splicing of cabinet with same/different dimensions, stagger splicing of cabinets with same/different dimensions, and also creative splicing. 2.5.1 Conventional assembly of cabinet Vertical and horizontal assembling of cabinets with same/different dimensions... -
Page 21: Creative Assembly Of Cabinet
Product Composition 2.5.2 Creative assembly of cabinet LAMP BNX series of cabinets are designed with several screw hole at the bottom so that cabinets with same/different sizes can be spliced staggerly in the unit of 125mm. Stagger splicing of cabinets with same dimension... - Page 22 Product Composition GN-PLUS C a b i n e t s c a n b e m i x e d c o m b i n e d w i t h G N - P L U S t o m a k e m o r e m u l t i p l e a p p e a r a n c e DISPLAY A BETTER WORLD FOR ALL...
-
Page 23: Wiring
2.6 Wiring The power supplies between BNX series cabinets are connected with triangular butt joint, one is for input and the other is for output; the signals are connected with RJ45 butt joints (Cat.5e or Cat.6e). One is for input and the other is for output (any port can be taken as input or output). -
Page 24: Product Packaging
Product Composition 2.7 Product Packaging Regarding this series of products, the modules and cabinets are packed separately. The cabinets are packed and transported in wooden cabinets or heavy-duty cartons. One wooden cabinet or heavy-duty carton can be filled with five cabinets. Dimensions of wooden boxes and heavy-duty cartons can be customized. The modules are packed in pearl cotton boxes, and then packed in module cartons. - Page 25 Product Composition Module Carton and Wooden Box (unit: mm) Pearl cotton box (unit: mm) DISPLAY A BETTER WORLD FOR ALL 第 页...
-
Page 26: Accessories
Product Composition 2.8 Accessories Front maintenance magnetic tool Negative pressure tool for front maintenance Arc connection strap DISPLAY A BETTER WORLD FOR ALL 第 页... -
Page 27: System Installation
Product Composition 3. System installation 3.1 System hardware The main controller for this controlling system includes sending card, receiving card, and HUB board. Details are as following: 3.1.1 Sending card 5V power cord Two RJ45 ports Standard USB connection DVI connector PCI connector NO. -
Page 28: Receiving Card
Product Composition 1.receiving card NO. Name Description Receiving card NOVA A5S receiving card Output connector Connect to modules by flat cable RJ45 Signal connector ,connect to sending card or reciving card by CAT5 cable 3.2 System hardware installation 1. Install the DVI graphic card in the computer, and then install the driver for DISPLAY A BETTER WORLD FOR ALL 第... - Page 29 Product Composition the graphic card. Graphic card- rear view Graphic card- front view 2. Install the sending card in the computer Sending card 3. After installing these, the computer shows like this: Graphic card Sending card 4. Then we can connect the cables within computer and cards. First connect USB cable from computer USB port to sending card USB port.
-
Page 30: Control Software Installation
Product Composition card 1 port to first cabinet. USB cable DVI cable CAT-5 cable port 3.3 Control software installation 1. Double clicks the setup file. DISPLAY A BETTER WORLD FOR ALL 第 页... - Page 31 Product Composition 2. Select the English language. Then click “ ” 3. Click “Next” four times. 4. Click “Install”. DISPLAY A BETTER WORLD FOR ALL 第 页...
- Page 32 Product Composition 5. Click “Finish” and then the “NovaLCT” will be installed. 3.4 How to set up copy modes DISPLAY A BETTER WORLD FOR ALL 第 页...
-
Page 33: How To Set Up Multiple Monitors
Product Composition Please choose one suitable for you from three graphic cards setups, as follows: 3.4.1 Intel HD graphics To configure the monitors' positions, 1. Right-click the desktop, and then choose Personalize from the menu. 2. In the resulting window, click the Display, and then click Change Display Settings 3. - Page 34 Product Composition 1. We recommend pointing your browser to AMD.com, and downloading and installing the latest drivers from the company's site. 2. The subsequent setup process for a basic multi-monitor configuration is identical to the one for Intel's integrated graphics. 3.
- Page 35 Product Composition 1. We recommend pointing your browser to AMD.com, and downloading and installing the latest drivers from the company's site. 2. The subsequent setup process for a basic multi-monitor configuration is identical to the one for Intel's integrated graphics. 3.
-
Page 36: Nvidia Graphics
Product Composition 3.4.3 NVIDIA Graphics 1. Download those drivers and install them. 2. Open the NVIDIA Control Panel by right-clicking the desktop and choosing NVIDIA Control Panel 3. Click the Set up multiple displays link in the left pane and follow the procedure outlined above to mimic the monitors' positioning. -
Page 37: System Software Configuration
Product Composition 3.5 System software configuration 1. Connect the data cable from sending card to the cabinet, clone the graphic card, power on the panel, then every cabinets should be working and showing the same image—or showing one part of the desktop in disorder. If the cabinet is not working, first please check if power is turn on and power cable are connect well. - Page 38 Product Composition 4. Then input the password “666” 5. Click “Screen Config” 6. Click “Next”, Come to the window of “Screen Config”, including “Sending Card”, “Receiving Card” and “Screen Connection”. Click “Sending Card”, set “Resolution” and “Refresh Rate” the same with your graphic card. Then click “Save”...
- Page 39 Product Composition 7. Click “Receiving Card” -> “Load File”, load the right *rcfg file, then click “Send to Receiving Card” DISPLAY A BETTER WORLD FOR ALL 第 页...
- Page 40 Product Composition 8. Then select “All Receiving Cards” -> “Send” 9. Click “Screen Connection” ->Screen Number : select “1”.Then select “Standard Screen” .If we have 5 screens for example, then we need to change the “Receiving Card Columns” number to 5. And then connect them in the order they are installed DISPLAY A BETTER WORLD FOR ALL 第...
-
Page 41: Quick Operation With Nova Studio
Product Composition 10. Click “Send to HW”->“Save" 3.6 Quick operation with Nova studio 1. Install the Nova Studio by click the icon 2. Select the English language. Then click” ” DISPLAY A BETTER WORLD FOR ALL 第 页... - Page 42 Product Composition 3. Click “Next” four times 4. Click “Install” 5. Click “Finish” and then the “Nova Studio” will be installed DISPLAY A BETTER WORLD FOR ALL 第 页...
- Page 43 Product Composition 6. Click the icon , we will get two windows as below: 7. Click “Settings” -> “Display Settings”, come to the following window: Count of Display Screen: 1 Start X: 0, Width: set according to the field installation Start Y: 0, Height: set according to the field installation Click “Ok”...
- Page 44 Product Composition 8. Click “Add Programs”, then select “Empty Page” DISPLAY A BETTER WORLD FOR ALL 第 页...
- Page 45 Product Composition 9. Select “Single window”, then click “Add” 10. Click “page 1.1”, then click “Add media”, select “file”, open the right video file. 11. Then you can control you display with button DISPLAY A BETTER WORLD FOR ALL 第 页...
-
Page 46: 4、Installation Precautions Of Product
Installation 4、Product Installation Warning: Safety first. Create an installation area before starting to install the display. Make sure that you read, understand and follow all of the "safety" tips or instructions in this Manual. In addition, all installation requirements for the display must be met. See the “Installation Requirements”. -
Page 47: Precautions For Display Installation
Installation D. Test the receiving board GND, ground wire (FG), L wire, and N wire for short circuit, and the resistance should be ∞. E. Test each power supply output +4.2V and GND for short circuit, and the resistance should be 30~50Ω. - Page 48 Installation further questions, please contact us. The above considerations are not comprehensive, and will be supplemented later in the course of use. We also hope that you can make more suggestions to jointly maintain and use the display. Warning: The fixed objects (such as screws) and quantities are for reference only. The installer should determine the appropriate fixtures and quantities based on the actual installation environment.
-
Page 49: Product Maintenance
Module disassembly: 1. Place the maintenance tool close to the module lamp surface that needs to be removed. 2. Hold the handle of the maintenance tool and move the maintenance tool vertically with the module surface,move backward to suck the module out. -
Page 50: Disassembly And Assembly Of Power Supply And Receiving Card
Maintenance 5.2 Disassembly and assembly of power supply and receiving card Power supply, receiving card and HUB board can be maintained from front. Power maintenance: the power supply is fixed with screws. First, remove the fixing screws of the power wire, then remove the power batten screws and take down the power batten to maintain the power supply;... -
Page 51: Precautions For Daily Maintenance Of The Display
It is strictly forbidden to let water, iron powder and other easily conductive metal objects into the LED display screen. LAMP Tech also recommends using LED displays in a low-dust environment. Dust will have a great impact on the display effect, and will cause damage to the circuit. In case of water ingress for various reasons, immediately disconnect the power and ask for maintenance personnel. - Page 52 Maintenance Necessary Tools 1. Air compressor. 2. Isopropanol. 3. Antistatic damp cloth. 4. Vacuum cleaner. 5. Mild detergent. Clean the exterior of the display fixing plate 1、Turn off the display Use compressed air to blow off dust from one side of the display (LED indicator). A safe distance of 10cm is maintained between the nozzle of the compressor and the LED indicator.
- Page 53 Maintenance Tip: Use a soft brush nozzle to avoid scratching. 4. Clean the casing of the rental frame and control cabinet with a damp cloth. You can use a slightly damp cloth and a mild detergent to remove stubborn stains. Clean all display panels of the LED display each time to avoid the difference in brightness between the cleaned and uncleaned display panels.
- Page 54 Maintenance •Operating ambient temperature: 0 ℃ ≤ T ≤ 4 0 ℃ 。 • Storage ambient temperature: - 4 0 ℃ ≤ T ≤ 6 0 ℃ 。 • The power supply must meet the requirements: ① LED display’s power supply voltage: 110V ~ 220V ± 10%; Frequency: 50HZ ~ 60HZ ± 5% ②...
-
Page 55: Daily Maintenance Of The Screen
• Do not modify and/or copy any components. LAMP Tech uses special materials and manufacturing processes to achieve the required part strength. Any parts other than LAMP Tech parts are not allowed. - Page 56 Maintenance Common maintenance tools Electric screwdrivers: Used to install and remove screws of various specifications. Screwdriver: Used to install and remove the screws and nuts. Multimeter: Used for testing during repair or maintenance. DISPLAY A BETTER WORLD FOR ALL 第 52 页...
-
Page 57: Common Troubleshooting
Maintenance 5.6 Common Troubleshooting 5.6.1 Method for problem determination The problems must be determined on a priority basis. Deal with the obvious and serious problems first, and the minor ones later. Short circuit shall be of highest priority. 1. Resistance detection method: Adjust the multimeter to the resistance level. Detect the resistance at a point on a normal circuit board. - Page 58 Maintenance C: Check whether the communication cable is connected, and check for errors and synchronizing panel. Please follow the connection diagram to connect and check. D: Check if the green signal indicator of the sending card is flashing. E: Check if the graphics card settings are normal and the FPD is turned on. F: Check if the signal indicator on the receiving card is flashing normally.
- Page 59 Maintenance the computer. Turn off the sound controller in the computer. The operation is as follows: Open the "Attributes" of My Computer, find the "Device Manager" in "Hardware", select the sound controller, and then disable "Realtek high definition Audio". 7. Fail to play DVD or video files A: The computer does not have a video file player installed.
- Page 60 Maintenance C: Check if there is a short circuit between the signals of A, B, C, and D or a short circuit between a signal and ground. Note: The ABCD line signal is mainly detected. 12. Display lack of color A: Check if the data terminal of the color of 245 has an input and output.
-
Page 61: Description On After-Sales Services
1. Send to repair: The repair service shall be performed within 24 hours after receipt of the repaired product and sent back to the repairer or to a trained third party authorized by LAMP Tech for repair. 2. Telephone or network: Contact the user within 2 hours and provide a solution within 8 hours. - Page 62 After-sale Service 五、 Product exchange and return Our company supplies strictly according to the contract list. If the quantity or specification does not match the actual situation, the buyer may file an objection within 3 days after receiving the goods, and the equivalent value will be exchanged or supplemented after validation by our company.
- Page 63 十、 Under one of the following circumstances, no one can enjoy free repair or replacement: A. Unable to provide valid proof that it is LAMP Tech’s product. B. The serial number on the product is damaged or has traces of alteration.
Need help?
Do you have a question about the BNX Series and is the answer not in the manual?
Questions and answers