
Related Manuals for Schumacher STORM ST2


Summary of Contents for Schumacher STORM ST2
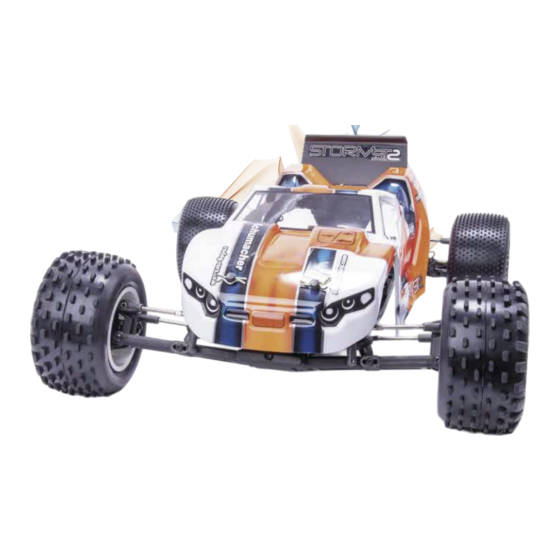
- Page 1 S1648 PRO 1/10th 2WD Off-Road Stadium Truck Instruction Manual ISS01 71-73 Tenter Road Moulton Park Northampton NN3 6AX www.racing-cars.com...
-
Page 2: Important Safety Notes
PRO 1/10th 2WD Off-Road Stadium Truck IMPORTANT SAFETY NOTES We strongly recommend that anyone driving RC cars, or organising events, should obtain third party liability insurance. In the UK this can be done by joining the BRCA. www.brca.org This product is not suitable for children under the age of 14, without the direct supervision of a responsible adult. ... - Page 3 PRO 1/10th 2WD Off-Road Stadium Truck Front Shock Assembly NOTE location of ‘O’ Ring BAG A - Step 01 ‘O’ Ring 7.0mm x 1.0mm ‘O’ Ring Red Remove parts cleanly from sprue. File parts if necessary. Ensure the bush is not a tight fit in shock body. BAG A - Step 02 M2.5 x 8mm Csk Screw Piston...
- Page 4 PRO 1/10th 2WD Off-Road Stadium Truck BAG A - Step 03b M2.5 x 4 Button Hd Screw ‘O’ Ring Ø15.1mm x 1.6mm ‘O’ Ring Ø12mm x 1.6mm Slowly move piston up and down. Let the air bubbles rise to the top before next step.
-
Page 5: Rear Shock Assembly
PRO 1/10th 2WD Off-Road Stadium Truck Rear Shock Assembly NOTE location of ‘O’ Ring BAG A - Step 04 ‘O’ Ring 7.0mm x 1.0mm ‘O’ Ring Red Remove parts cleanly from sprue. File parts if necessary. Ensure the bush BAG A - Step 05 is not a tight fit in shock body. - Page 6 PRO 1/10th 2WD Off-Road Stadium Truck BAG A - Step 06b M2.5 x 4 Button Hd Screw ‘O’ Ring Ø15.1mm x 1.6mm ‘O’ Ring Ø12mm x 1.6mm Slowly move piston up and down. Let the air bubbles rise to the top before next step.
- Page 7 PRO 1/10th 2WD Off-Road Stadium Truck BAG A - Step 07 Ø5 x Ø7 x 0.1mm Shim Ø4 x Ø13 x 0.1mm Shim Ø1.5 x 7.8 Pin M2.5x 8 Cap Hd Screw Use to pre-tap the 4 holes in the diff body.
- Page 8 PRO 1/10th 2WD Off-Road Stadium Truck BAG A - Step 09 Ø3 x Ø9 x 0.1mm Shim M2.5 x 10 Csk Hd Screw RACE TIP ‘O’ Ring Ø21 x 1.0mm Assemble the diff without any oil first to check gear mesh. If the gear mesh is correct, add oil.
- Page 9 PRO 1/10th 2WD Off-Road Stadium Truck Longer BAG A - Step 10a Thread Front Camber Link Shorter 47.9mm Thread Note the shape of the turnbuckle. This side of the turnbuckle is the left hand thread. 71mm Thread Thread 1:1 Scale RACE TIP Greasing the threads will make adjusting the...
- Page 10 PRO 1/10th 2WD Off-Road Stadium Truck Use a small amount. Use a small amount. BAG B - Step 11 Black Alloy Washer 0.75mm Pivot Block M3 x 12 Button Hd Screw Ø4 x Ø8 x 3mm Bearing Steering Spacer BAG B - Step 12 M3 Steel Washer M3 x 12 Button Hd Screw Ø4 x Ø8 x 3mm Bearing...
- Page 11 PRO 1/10th 2WD Off-Road Stadium Truck BAG B - Step 14a Sanwa Futaba Core RC Highest Power HD M3 x 8 Button Hd Screw Savox Low Short Ball Stud BAG B - Step 14b M3 Steel Washer Use this guide to space MANUFACTURER SPACER the servo each side.
- Page 12 PRO 1/10th 2WD Off-Road Stadium Truck BAG B - Step 15 Fasten Grub Screw to give a minimum of clearance to the anti-roll bar wire, while allowing M3 x 4 Cone Grub Screw the wire to pivot freely. Use the washers and cap head M3 x 4 Grub Screw screw to pull brass inserts into the camber plate.
- Page 13 PRO 1/10th 2WD Off-Road Stadium Truck BAG B - Step 16 M3 x 20 Button Hd Screw M3 x 12 Button Hd Screw M3 Steel Washer M3 Nyloc Nut Pro Ball Stud Long BAG B - Step 17 M3 x 12 Csk Hd Screw HT M3 x 14 Button Hd Screw HT www.racing-cars.com...
- Page 14 Black Spacer Sprue Front Camber Link (Loose in box) PRO 1/10th 2WD Off-Road Stadium Truck 4.0mm BAG B - Step 18 3.0mm 2.0mm 1.5mm M3 x 20 Cap Hd Screw 1.0mm M3 x 12 Button Hd Screw 1.5mm M3 x 10 Button Hd Screw Black Spacer Pre-tap the Yokes using screw M3 x 14 Button Hd Screw HT...
- Page 15 PRO 1/10th 2WD Off-Road Stadium Truck BAG B - Step 20 Ø5 x Ø10 x 4mm Bearing Ø5 x Ø10 x 3mm Bearing ‘O’ ring holds the drive pin in place. M3 Black Plated Nyloc Nut Ø1.5 x 9.8 Pin Cross section M3 Steel Washer ‘O’...
- Page 16 PRO 1/10th 2WD Off-Road Stadium Truck BAG C - Step 22 M3 x 20 Button Hd Screw Pro Ball Stud Ultra Short BAG C - Step 23 M3 x 10 Csk Hd Screw Pro Ball Stud Ultra Short Chassis Insert. We strongly recommend using the kit Chassis Insert +5mm standard +5mm insert.
- Page 17 PRO 1/10th 2WD Off-Road Stadium Truck BAG C - Step 24 M3 x 10 Csk Hd Screw M3 x 20 Csk Hd Screw Low Roll Centre Shim BAG C - Step 25 M3 x 10 Csk Hd Screw RACE TIP Check these screws M3 x 8 Csk Hd Screw regularly to make...
- Page 18 PRO 1/10th 2WD Off-Road Stadium Truck BAG C - Step 26 Ø5 x Ø10 x 4mm Bearing FL BAG C - Step 27 IMPORTANT! Align the flat on the idler shaft with the flat on the transmission housing. Ø5 x Ø10 x 4mm Bearing FL BAG C - Step 28 M2.5 x 16 Cap Hd Screw HT M3 x 16 Button Hd Screw...
- Page 19 PRO 1/10th 2WD Off-Road Stadium Truck BAG C - Step 29 M2.5 x 8 Csk Hd Screw BAG C - Step 30 M3 x 10 Csk Hd Screw M3 x 8 Csk Hd Screw www.racing-cars.com...
- Page 20 PRO 1/10th 2WD Off-Road Stadium Truck BAG D - Step 31 Black Alloy Washer 2.0mm M3 x 12 Button Hd Screw Pro Ball Stud Extra Long BAG D - Step 32 Start with 2 shims either side, and Ø10 x Ø12.5 x 0.2mm Shim then add or remove to achieve a small amount of end float.
- Page 21 PRO 1/10th 2WD Off-Road Stadium Truck BAG D - Step 33 M3 x 12 Button Hd Screw M3 x 20 Button Hd Screw M3 Black Plated Nyloc Nut Black Alloy Washer 3.0mm M3 Steel Washer Pro Ball Stud Extra Long BAG D - Step 34 M3 x 12 Button Hd Screw BAG D - Step 35...
- Page 22 PRO 1/10th 2WD Off-Road Stadium Truck BAG D - Step 36 M4 Flanged Wheel Nut Note. The deep recess is this side. Ø5 x Ø8 x 2.5mm Bearing 4.0mm BAG D - Step 37 M3 x 10 Button Hd Screw Pro Ball Stud Long Inboard Hub Plate...
- Page 23 PRO 1/10th 2WD Off-Road Stadium Truck BAG D - Step 40 M3 x 16 Button Hd Screw 1˚ Strap Spacer RACE TIP Ensure that both wishbone assemblies pivot freely. Strap spacers are for fine tuning the car for different tracks. The number on the spacer gives the amount of anti-squat in degrees.
- Page 24 PRO 1/10th 2WD Off-Road Stadium Truck Step 41b BAG E - Step 42 M3x 8 Cap Hd Screw M3 Steel Washer Pinion and grub screw not included in the kit. www.racing-cars.com...
- Page 25 PRO 1/10th 2WD Off-Road Stadium Truck BAG E - Step 43 M3 Nyloc Nut M3 Steel Washer LiPo Position 1 2 3 4 5 6 7 8 LIPO POSITIONS See page 34 for more information. Three LiPo spacers are included in the kit.
- Page 26 PRO 1/10th 2WD Off-Road Stadium Truck BAG E - Step 45 Radio Tray 1 M3x 6 Csk Hd Screw M2.5x 6 Csk Hd Screw M3 x 4 C/P Grub Screw M2.5 Alloy Insert Speed Controller Not Included Power Capacitor Not Included Receiver Not Included Transponder...
- Page 27 PRO 1/10th 2WD Off-Road Stadium Truck BAG E - Step 46 Ø1.5 x 11.8 Pin M3 x 8 Button Hd Screw M3 Black Plated Nyloc Nut M3 Steel Washer 1 dot low 2 dots mid 3 dots high position. position. position.
- Page 28 PRO 1/10th 2WD Off-Road Stadium Truck Cut Body and Wing as shown. BAG E - Step 46b Use a 6mm drill for the body mount holes and a 3mm drill for the wing mounting. Ø1.5 x 11.8 Pin M3 x 8 Button Hd Screw M3 Black Plated Nyloc Nut M3 Steel Washer Cross section of wing fitting.
- Page 29 PRO 1/10th 2WD Off-Road Stadium Truck REAR SHOCKS, OPTION POSITION - Build Instructions Use Existing Hardware Black Alloy Washer 3.0mm M3 x 12 Button Hd Screw Use Existing Hardware Pro Ball Stud Extra Long RACE TIP Rearward shocks work best on a slippery, bumpy track, and when conditions are inconsistant or...
- Page 30 PRO 1/10th 2WD Off-Road Stadium Truck Move the ball stud from the front of the wishbone to the rear, as shown. Move the ball stud from the front of the wishbone to the rear, as shown. www.racing-cars.com...
-
Page 31: Track Settings
PRO 1/10th 2WD Off-Road Stadium Truck TRACK SETTINGS RIDE HEIGHT Use the spring adjusters on the shock absorbers to adjust the front and rear ride heights. With the car level, we recommend setting the ride height to around 19mm on astro, 23mm on dirt and 14-16mm on carpet. (16mm if there are large jumps in the track). - Page 32 PRO 1/10th 2WD Off-Road Stadium Truck FRONT TOE See Page 08 Bag A - Step 10b Front toe should be set to 0° (both front wheels pointing Toe Out Toe In straight ahead) this will be the best setting for most track conditions.
- Page 33 REAR WHEELBASE OPTIONS See Page 21 Bag D - Step 37 The Storm ST2 has 3 wheelbase options at the rear, short, med and long. The adjustment is provided by re positioning the quick clips on the outer wishbone pin.
-
Page 34: Front Shock Mount
PRO 1/10th 2WD Off-Road Stadium Truck FRONT SHOCK MOUNT See Page 12 Bag B - Step 16 Hole 3 on the front shock mount is the most widely used position. Moving the shock to the outer position will make the car react faster and increase the initial steering response, it will however stiffen the suspension which may require an oil and spring change so that the cars suspension feels the same. - Page 35 FRONT YOKE See Page 13 Bag B - Step 18 The Storm ST2 has a rake angle (kick up) of 25°. This should be added to the castor block angle to get the total castor 5˚...
- Page 36 PRO 1/10th 2WD Off-Road Stadium Truck REAR HINGE PIN HEIGHT See Page 16 Bag C - Step 25 The kit is built in the high setting, this offers the highest roll stiffness Remove this strap which gives the feeling of forward drive. We find it makes the car more Add this spacer responsive and you gain initial steering in this kit position.
- Page 37 PRO 1/10th 2WD Off-Road Stadium Truck VARIABLE LENGTH REAR WISHBONES See Page 21 Bag D - Step 37 Short The base setting is long wishbone. This setting gives the most Wishbone on power steering and is the most stable on landing from jumps.
- Page 38 PRO 1/10th 2WD Off-Road Stadium Truck TYRES, INSERTS & WHEELS Mini Spike Mini Pin Stagger Rib U6508 - Blue Compound (pr) U6525 - Blue Compound (pr) U6814 - Blue Compound (pr) U6706 - Yellow Compound (pr) U6708 - Yellow Compound (pr) U6815 - Silver Compound (pr) U6785 - Silver Compound (pr) U6798 - Silver Compound (pr)
- Page 39 Schumacher Decal Sheet - Black - pk2 U8014 Rear Driveshaft Assembly (CV) - Storm ST (pr) U8587 Schumacher Decal Sheet - Neon Blue - pk2 U8399 Outer Slipper Plate - L1R U8588 Schumacher Decal Sheet - Neon Green - pk2 U8543 Alloy Wheel Hex 7.5mm (+1.5) Black pr - ST2...
-
Page 40: Option Parts
PRO 1/10th 2WD Off-Road Stadium Truck SPARES LISTS Big Bore Shocks & Springs Cont; U4673 Slipper Spring - Off Road U4701 Big Bore Piston - 3 Hole Black 1.6 Rounded (pr) U8040 Front Springs Green 3.4lb/in - Storm ST (pr) U4725 Pro Ball Bearing - 5x10x4 Shield - (pr) U8041... - Page 41 PRO 1/10th 2WD Off-Road Stadium Truck OPTIONS PARTS U4800 - Rear Roll Bar Ball (pk2) U8212 - Brass Pivot Block (41g) U7031 - Socket Grey 8mm (pk4) U7658 - Rear Roll Bar Conversion U8211 - Alloy Pivot Block (17g) U7659 - ARB Mounting Collar U7660 - Rear Roll Bar Set (5pcs) AX009 - AEROX Alloy Servo Arm - Short 25t Futaba AX010 - AEROX Alloy Servo Arm - Short 23t KO/SANWA...
- Page 43 Weather Shock Mount KEY: P = Plastic, A = Alloy, B = Brass, CF = Carbon Fibre, S2 = Schumacher Composite, FRONT SUSPENSION M = Medium, S = Stiff, Sh = Short, H = High, L = Low, F = Front, R = Rear, Y = Yes, N = No...
- Page 44 Weather Shock Mount KEY: P = Plastic, A = Alloy, B = Brass, CF = Carbon Fibre, S2 = Schumacher Composite, FRONT SUSPENSION M = Medium, S = Stiff, Sh = Short, H = High, L = Low, F = Front, R = Rear, Y = Yes, N = No...
- Page 45 Weather Shock Mount KEY: P = Plastic, A = Alloy, B = Brass, CF = Carbon Fibre, S2 = Schumacher Composite, FRONT SUSPENSION M = Medium, S = Stiff, Sh = Short, H = High, L = Low, F = Front, R = Rear, Y = Yes, N = No...
- Page 46 Weather Shock Mount KEY: P = Plastic, A = Alloy, B = Brass, CF = Carbon Fibre, S2 = Schumacher Composite, FRONT SUSPENSION M = Medium, S = Stiff, Sh = Short, H = High, L = Low, F = Front, R = Rear, Y = Yes, N = No...
Need help?
Do you have a question about the STORM ST2 and is the answer not in the manual?
Questions and answers