Table of Contents
Advertisement
Available languages
Available languages
Quick Links
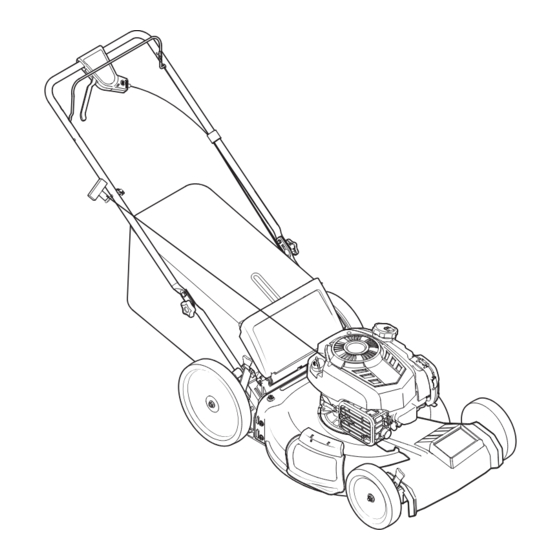
Operator's Manual
21" LAWN MOWER
Model No. 247.374411
CAUTION: Before using this product,
read this manual and follow all safety
rules and operating instructions.
Sears Brands Management Corporation, Hoffman Estates, IL 60179, U.S.A.
Visit our website: www.craftsman.com
• SAFETY
• UNPACKING P. 8
• ASSEMBLY
• OPERATION
• MAINTENANCE
• ESPAÑOL
Form No. 769-12128
(January 23, 2017)
Advertisement
Chapters
Table of Contents

Related Manuals for Sears CRAFTSMAN 247.374411


Summary of Contents for Sears CRAFTSMAN 247.374411
- Page 1 • OPERATION CAUTION: Before using this product, • MAINTENANCE read this manual and follow all safety • ESPAÑOL rules and operating instructions. Sears Brands Management Corporation, Hoffman Estates, IL 60179, U.S.A. Visit our website: www.craftsman.com Form No. 769-12128 (January 23, 2017)
-
Page 2: Table Of Contents
This warranty is void if this product is ever used while providing commercial services or if rented to another person. This warranty gives you specific legal rights, and you may also have other rights which vary from state to state. Sears Brands Management Corporation, Hoffman Estates, IL 60179 PRODUCT SPECIFICATIONS... -
Page 3: Safety Instructions
SAFETY INSTRUCTIONS WARNING DANGER This symbol points out important safety instructions which, if not This machine was built to be operated according to the safe operation followed, could endanger the personal safety and/or property of practices in this manual. As with any type of power equipment, yourself and others. -
Page 4: Slope Guide
SAFETY INSTRUCTIONS CHILDREN • If the equipment should start to vibrate abnormally, stop the engine and check immediately for the cause. Vibration is generally a warning of trouble. Tragic accidents can occur if the operator is not alert to the presence of children. Children are often attracted to the mower and the mowing activity. - Page 5 Life of seven (7) years, or 140 hours of operation. At the end of the Average Useful Life have the machine inspected annually by a Sears or other qualified • To reduce fire hazard, keep machine free of grass, leaves, or other debris service dealer to ensure that all mechanical and safety systems are working build-up.
- Page 6 SAFETY INSTRUCTIONS SAFETY SYMBOLS This page depicts and describes safety symbols that may appear on this product. Read, understand, and follow all instructions on the machine before attempting to assemble and operate. Symbol Description READ THE OPERATOR’S MANUAL(S) Read, understand, and follow all instructions in the manual(s) before attempting to assemble and operate DANGER —...
- Page 7 SLOPE GAUGE...
-
Page 8: Assembly
ASSEMBLY IMPORTANT: This unit is shipped without gasoline or oil in the engine. Be certain to service engine with gasoline and oil as instructed in the Operation section of the Engine Manual before starting or running your machine. NOTE: Reference to right and left hand side of the Lawn Mower is observed from the operating position. - Page 9 ASSEMBLY NOTE: When pulling upward on handle, make sure to not pull handle all the way out. Insert the T-bolts removed in Step 2 through the handle brackets and lower handle and tighten securely to secure the handle in place. See Figure 4.
-
Page 10: Adjustments
ADJUSTMENTS Attaching Side Discharge Cover Your mower is shipped as a mulcher. To convert to side discharge, make sure grass catcher is off of the unit and rear discharge door is closed. Higher On the side of the mower, lift the mulch cover. See Figure 9. Slide two hooks of side discharge cover under hinge pin on mulching cover assembly. -
Page 11: Operation
OPERATION Blade Control Drive Control Electric Starter Push Key Recoil Starter Side Discharge Deck Wash Chute Cutting Height Adjustment Lever Cutting Height Trail Shield Adjustment (Not Shown) Lever Oil Fill Cap/Dipstick Mulch Cover Figure 13 Blade Control Mulch Cover The blade control is attached to the upper handle of the mower. Depress and The mulch cover is used for mulching purposes. - Page 12 OPERATION GAS AND OIL FILL-UP IMPORTANT: This unit is shipped without gasoline or oil in the engine. Be certain to service engine with gasoline and oil as instructed in this section before starting or running your machine. (one 18 ounce bottle shipped with unit) First Time Use Remove oil fill dipstick (G).
- Page 13 OPERATION TO START ENGINE Standing behind the mower, squeeze the blade control handle against upper handle. Holding these two handles together firmly, grasp recoil starter handle and pull rope slowly until resistance is felt, then pull with a rapid, continuous, full arm stroke.
-
Page 14: Service And Maintenance
Use the Service Log column to keep track of completed Before performing any type of maintenance/service, disengage all controls maintenance tasks. To locate the nearest Sears Service Center or to schedule service, and stop the engine. Wait until all moving parts have come to a complete call the following toll free number:1-888-331-4569. - Page 15 SERVICE AND MAINTENANCE Engine Maintenance Refer to the Engine Operator’s Manual packed with your mower for a detailed description of all engine-related service specifications. Clean Engine • Daily or before every use, clean grass, chaff or accumulated debris from engine. Keep linkage, spring, and controls clean. Keep area around and behind muffler free of any combustible debris.
- Page 16 To ensure safe operation of your mower, periodically check the blade bolt for correct torque. Belt Care NOTE: Several components must be removed in order to change the mower’s self-propulsion drive belt. See an authorized Sears Service Center to have your belt replaced.
-
Page 17: Off-Season Storage
OFF-SEASON STORAGE WARNING Never store lawn mower with fuel in tank indoors or in poorly ventilated areas where fuel fumes may reach an open flame, spark, or pilot light as on a furnace, water heater, clothes dryer, or gas appliance. Preparing The Engine Preparing The Lawn Mower For engines stored over 30 days:... -
Page 18: Troubleshooting
Always wear safety glasses during operation or while performing any adjustments or repairs. This section addresses minor service issues. To locate the nearest Sears Service Center or to schedule service, call the following toll free number: 1-888-331-4569. - Page 19 2. Debris clogging drive operation. 2. Stop engine, disconnect spark plug boot, and clean out debris. 3. Damaged or worn belt. 3. Inspect and, if necessary, see your Sears Parts & Repair Center to have belt replaced. 4. Drive control out of adjustment.
- Page 20 NOTES...
- Page 21 USED ELSEWHERE IN THE UNITED STATES (AND AFTER JANUARY 1, 2001 IN CANADA). California and United States Emission Control Defects Warranty Statement The California Air Resources Board (CARB), U.S. EPA and Sears are pleased to explain the control system on your engine for the periods of time listed below, provided there has Emission Control System Warranty on your model year 2000 and later small off-road been no abuse, neglect or improper maintenance of your small off-road engine.
- Page 22 Or, a prorated refund anytime after the product warranty period expires. Purchase your Repair Protection Agreement today! Some limitations and exclusions apply. For prices and additional information call 1-800-827-6655. Sears Installation Service For Sears professional installation of home appliances, garage door openers, water heaters, and other major home items, call 1-888-331-4569.
-
Page 23: Español
La presente garantía se anula si se utiliza este producto alguna vez para prestar servicios comerciales o si se lo alquila a otra persona. Esta garantía le otorga derechos legales específicos, pero usted podría gozar de otros derechos en razón de su lugar de residencia. Sears Brands Management Corporation, Hoffman Estates, IL 60179 ESPECIFICACIONES DEL PRODUCTO NÚMERO DE MODELO... -
Page 24: Instrucciones De Seguridad
INSTRUCCIONES DE SEGURIDAD ADVERTENCIA PELIGRO La presencia de este símbolo indica que se trata de instrucciones Esta máquina fue construida para ser operada de acuerdo con las reglas importantes de seguridad que se deben respetar para evitar poner en de seguridad contenidas en este manual. Al igual que con cualquier tipo peligro su seguridad personal y/o material y la de otras personas. - Page 25 INSTRUCCIONES DE SEGURIDAD No haga lo siguiente: • Nunca opere la podadora en césped húmedo. Siempre esté seguro de su equilibrio. Si tropieza y cae puede lesionarse gravemente. Si siente que • No corte el césped cerca de pozos, hundimientos, bancos, podría perder el pierde el equilibrio, suelte inmediatamente la manija de control de la equilibrio.
- Page 26 Deje que la máquina se enfríe 5 minutos por lo menos antes de almacenarla. ó 140 horas de funcionamiento. Al finalizar la vida útil media, adquiera una máquina nueva o haga inspeccionar anualmente ésta Sears por uno Funcionamiento general: u otro distribuidor de servicios para cerciorarse de que todos los sistemas •...
- Page 27 INSTRUCCIONES DE SEGURIDAD SÍMBOLOS DE SEGURIDAD Esta página representa y describe la seguridad los símbolos que pueden parecer en este producto. Lea, comprenda, y siga todas instrucciones en la máquina antes procurar para reunir y operar. Símbolo Descripción LEA EL MANUAL(S) DEL OPERADOR Lea, comprenda, y siga todas instrucciones en el manual (manuales) antes procurar para reunir y operar.
-
Page 28: Pendiente De Calibre
PENDIENTE DE CALIBRE... -
Page 29: Montaje
MONTAJE IMPORTANTE: Esta unidad se envía sin gasolina ni aceite en el motor. Antes de comenzar o correr la máquina cargue el motor con gasolina y aceite como se indica en la sección de operación de del manual de motor. NOTA: Las referencias a los lados derecho e izquierdo de la cortadora de césped se hacen observando la máquina desde la posición de operación. - Page 30 MONTAJE Tire hacia arriba en el asa hasta agujeros en la manija (que se muestra en la Figura 3 corte de la cubierta) se alinean con los agujeros en el mango soporte. Vea la Figura 4. NOTA: Al tirar hacia arriba la palanca, asegúrese de que no tire de manejar todo el camino.
- Page 31 MONTAJE Conexión de la colectora de césped Para ensamblar el colector de césped (de ser necesario), Haga el cierto bolso es dio vuelta a la derecha el lado antes de reunir (la advertencia de la etiqueta será por fuera): Coloque la bolsa sobre el marco con el lado negro de plástico en el fondo.
-
Page 32: Ajustes
AJUSTES Ajustes Altura de corte Hay una palanca de ajuste de altura de corte, situado encima de la rueda delantera derecha y trasera. Presione la palanca hacia la rueda (unidad tenderá a caer cuando se suelta la palanca). Muévala a cualquier de las posiciones para la altura de corte deseado. Vea la Figura 10. -
Page 33: Operación
OPERACIÓN Control de cuchilla Control de la transmisión Arrancador de retroceso Lavado de la Canal de Plataforma Descarga Lateral Palanca de ajuste de altura Palanca de de corte ajuste de altura Escudo de Ruta� de corte (No mostrada) Tapón de aceite/varilla de medición del nivel Clavija para abono de aceite... - Page 34 OPERACIÓN LLENADO DE GASOLINA Y ACEITE Aceite (se envía una botella junto con la unidad) Primer uso Saque la varilla del nivel de aceite (G). Vea la Figura 14. Con la cortadora de césped ubicada en suelo nivelado, vierta el aceite lentamente por dentro del tubo de llenado de aceite del motor (H).
- Page 35 OPERACIÓN ADVERTENCIA Asegúrese de que ninguna persona aparte del operador permanezca cerca de la cortadora mientras arranca el motor u opera la misma. Nunca encienda el motor en espacios cerrados o en una zona con poca ventilación. El escape del motor contiene monóxido de carbono, un gas inodoro y letal. Mantenga las manos, los pies, el cabello y la ropa suelta alejados de las partes móviles del motor y de la cortadora.
-
Page 36: Servicio Y Mantenimiento
Para ubicar el Centro de todos los controles y detenga el motor. Espere a que se detengan Servicio Sears más cercano o para programar un servicio, simplemente comuníquese completamente todas las piezas móviles. Desconecte el cable de la bujía con Sears al teléfono 1-888-331-4569. - Page 37 SERVICIO Y MANTENIMIENTO transmisión al menos una vez cada estación. Estos controles debe funcionar libremente en ambas direcciones. Vea la Figura 16. Mantenimiento Del Motor Consulte el manual del motor entregado con su bordeadora para obtener una descripción detallada de todas las especificaciones de servicio relacionadas con el motor.
- Page 38 Cuidado de la correa NOTA: Para cambiar la correa de paseo de la cortadora de césped es necesario extraer varios componentes. Solicite a un centro autorizado de servicio Sears que realice el reemplazo de la correa.
-
Page 39: Almacenamiento Fuera De Temporada
ALMACENAMIENTO FUERA DE TEMPORADA ADVERTENCIA Nunca almacene la cortadora de césped con combustible en el tanque en un espacio cerrado o en áreas con poca ventilación, donde los gases del combustible puedan alcanzar el fuego, chispas o una luz piloto como la que tienen algunos hornos, calentadores de agua, secadores de ropa o algún otro dispositivo a gas. -
Page 40: Solución De Problemas
Siempre lleve puestos cristales inastillables durante la operación o realizando cualquier ajuste o reparaciones. Esta sección se ocupa de cuestiones de menor importancia del servicio. Para localizar el más cercano Centro de Servicio Sears, o para programar un servicio, simplemente póngase en contacto con Sears al 1-888-331-4569. - Page 41 3. Correa dañada o desgastada. 3. Inspeccione y, si es necesario, consulte sus piezas centro de servico Sears tener cinturón sustituido. 4. Unidad de control de ajuste. 4. Ajuste la unidad de control. (Ver sección de Montaje y Configuración).
- Page 42 Las siguientes son disposiciones específicas relacionadas con la cobertura de la garantía para Sin cargo defectos en el control de emisiones. Es un añadido a la garantía de motor Sears para motores no La reparación o reemplazo de cualquier parte con garantía se realizará sin cargo alguno regulados que se encuentra en las instrucciones de funcionamiento y mantenimiento.
- Page 43 Se aplican determinadas limitaciones y exclusiones. Para precios e información adicional llame al 1-800-827- 6655. Servicio de instalación de Sears Para la instalación profesional de Sears de electrodomésticos, abridores de puertas de garaje, calentadores de agua y otros importantes, llame 1-888-331-4569.
- Page 44 ® Registered Trademark / Trademark of KCD IP, LLC in the United States, or Sears Brands, LLC in other countries ® Marca Registrada / Marca de Fábrica de KCD IP, LLC en Estados Unidos, o Sears Brands, LLC in otros países...
Need help?
Do you have a question about the CRAFTSMAN 247.374411 and is the answer not in the manual?
Questions and answers