Table of Contents
Advertisement
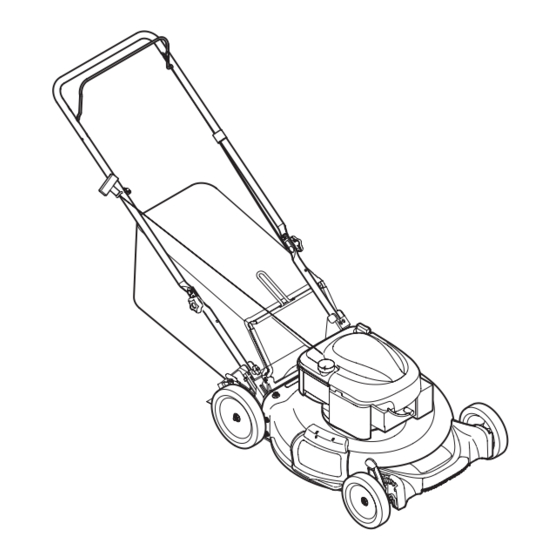
Operator's Manual
21" LAWN MOWER
Model Nos. C459-36405
CAUTION: Before using this
product, read this manual
and follow all safety rules
and operating instructions.
Sears Canada Inc., 290 Yonge Street, Toronto, On M5B 2C3
®
& C459-36413
Visit our web: sears.ca
• SAFETY
• ASSEMBLY
• OPERATION
• MAINTENANCE
• PARTS LIST
769-09682
1/21/14
Advertisement
Table of Contents

Related Manuals for Sears CRAFTSMAN C459-36405


Summary of Contents for Sears CRAFTSMAN C459-36405
- Page 1 • ASSEMBLY • OPERATION • MAINTENANCE • PARTS LIST CAUTION: Before using this product, read this manual and follow all safety rules and operating instructions. Sears Canada Inc., 290 Yonge Street, Toronto, On M5B 2C3 769-09682 Visit our web: sears.ca 1/21/14...
-
Page 2: Table Of Contents
TABLE OF CONTENTS Safety Instructions ........3 Off-Season Storage . -
Page 3: Safety Instructions
SAFETY INSTRUCTIONS WARNING DANGER This symbol points out important safety instructions which, if not This machine was built to be operated according to the safe operation followed, could endanger the personal safety and/or property of practices in this manual. As with any type of power equipment, yourself and others. -
Page 4: Safe Handling Of Gasoline
SAFETY INSTRUCTIONS • If the equipment should start to vibrate abnormally, stop the engine and • Keep children out of the mowing area and under watchful care of a check immediately for the cause. Vibration is generally a warning of trouble. responsible adult other than the operator. • Shut the engine off and wait until the blade comes to a complete stop before • Be alert and turn mower off if a child enters the area. removing the grass catcher or unclogging the chute. The cutting blade • Before and while moving backwards, look behind and down for small continues to rotate for a few seconds after the blade control is released. children. Never place any part of the body in the blade area until you are sure the • Use extreme care when approaching blind corners, doorways, shrubs, trees, blade has stopped rotating. or other objects that may obscure your vision of a child who may run into the • Never operate mower without proper trail shield, discharge cover, grass mower. catcher, blade control handle or other safety protective devices in place and • Keep children away from hot or running engines. They can suffer burns from working. Never operate mower with damaged safety devices. Failure to do a hot muffler. so can result in personal injury. • Never allow children under 14 years of age to operate this machine. Children • Muffler and engine become hot and can cause a burn. Do not touch. 14 and over should read and understand the instructions and safe operation • Never attempt to make a wheel or cutting height adjustment while the practices in this manual and on the machine and be trained and supervised engine is running. by an adult. -
Page 5: Spark Arrestor
A spark arrester for the muffler is available through your nearest engine • Never attempt to make a wheel or cutting height adjustment while the authorized service dealer. engine is running. • Grass catcher components, discharge cover, and trail shield are subject to wear and damage which could expose moving parts or allow objects to be thrown. For safety protection, frequently check components and replace immediately with original equipment manufacturer’s (O.E.M.) parts only, listed in the Parts pages of this manual. Use of parts which do not meet the original equipment specifications may lead to improper performance and compromise safety! • Do not change the engine’s governor setting or over-speed the engine. The governor controls the maximum safe operating speed of the engine. • Check fuel line, tank, cap, and fittings frequently for cracks or leaks. Replace if necessary. • Do not crank engine with spark plug removed. • Maintain or replace safety and instruction labels, as necessary. • Observe proper disposal laws and regulations. Improper disposal of fluids and materials can harm the environment. • According to the Consumer Products Safety Commission (CPSC) and the U.S. Environmental Protection Agency (EPA), this product has an Average Useful Life of seven (7) years, or 140 hours of operation. At the end of the Average Useful Life have the machine inspected annually by a Sears or other qualified service dealer to ensure that all mechanical and safety systems are working properly and not worn excessively. Failure to do so can result in accidents, injuries or death. -
Page 6: Safety Symbols
SAFETY INSTRUCTIONS SAFETY SYMBOLS This page depicts and describes safety symbols that may appear on this product. Read, understand, and follow all instructions on the machine before attempting to assemble and operate. Symbol Description READ THE OPERATOR’S MANUAL(S) Read, understand, and follow all instructions in the manual(s) before attempting to assemble and operate DANGER —... - Page 7 SLOPE GAUGE...
-
Page 8: Assembly
ASSEMBLY NOTE: Please be aware that this Operator’s Manual covers both the low and high wheel models of this mower. While this manual illustrates the low wheel model, the instructions and features are equally applicable to the high wheel model as well, unless otherwise noted. NOTE: This unit is shipped without gasoline or oil in the engine. Fill up with gasoline and oil as instructed in the accompanying engine manual BEFORE operating your mower. NOTE: Reference to right, left, rear and front of the lawn mower is in relation to the operating position. Assembly Handle Remove any packing material which may be between upper and lower handles. Remove handle knobs and carriage bolts from handle as shown in Figure 2 Figure 1. Do not loosen or remove adjacent hex head screws. Figure 3 Figure 1 While stabilizing mower so it doesn’t move, pivot upper handle up as shown in Figure 2. Do not crimp cable while lifting the handle up. Remove the T-bolts from the handle brackets as shown in Figure 3. Follow the steps below to complete handle assembly: Pull upward on the handle until holes in lower handle (shown in Figure 3 deck cutaway) line up with holes in handle bracket. See Figure 4. NOTE: When pulling upward on handle, make sure to not pull handle all the way out. Insert the T-bolts removed earlier through the handle brackets and lower handle and tighten securely to secure the handle in place. See Figure 4. Reattach handle knobs and carriage bolts removed earlier into lower holes of handle as shown in Figure 5. Figure 4... - Page 9 ASSEMBLY Slip plastic channel of grass bag over hooks on the frame. See Figure Figure 5 Figure 7 The rope guide is attached to the right side of the upper handle. Loosen the Follow steps below to attach grass catcher: wing knob which secures the rope guide. See Figure 6. Lift rear discharge door. Hold blade control against upper handle. Place grass catcher into the slots in the handle brackets as shown in Slowly pull starter rope handle from engine and slip starter rope into Figure 8. Let go of discharge door so that it rests on the grass catcher. the rope guide. See Figure 6. To remove grass catcher, lift rear discharge door on the mower. Lift grass catcher Tighten rope guide wing knob. up and of the slots in the handle brackets. Release rear discharge door to allow it to d. Use cable tie(s) to secure cable(s) to lower handle. close rear opening of mower. Figure 8 Figure 6 Attaching Side Discharge Chute Attaching the Grass Catcher Your mower may be shipped as a mulcher. To convert to side discharge, make sure Follow steps below to assemble the grass catcher (if needed). Make certain bag is grass catcher is off of the unit and rear discharge door is closed. turned right side out before assembling (warning label will be on the outside). On the side of the mower, lift the side mulching plug. See Figure 9. Place bag over frame so that its black plastic side is at the bottom. Slide two hooks of side discharge chute under hinge pin on mulching plug assembly. Lower the mulching plug. Do not remove side mulching plug at any time, even when you are not mulching.
- Page 10 ASSEMBLY Side Mulching Plug Higher Lower Higher Lower High Wheel Figure 11 Figure 9 Adjustments Handle Pitch (If Equipped) For convenience of operation, you may be able to adjust the pitch of the handle as Cutting Height follows: There is a cutting height adjustment lever located above the front and rear right Remove wing nuts and carriage bolts from handle. See Figure 11. wheel. Position the handle in one of the three positions that is most comfortable. Pull the height adjustment lever towards wheel (unit will tend to fall when See Figure 11 inset. lever is moved outward). Secure into position with wing nuts and carriage bolts removed earlier. Move lever to desired position for a change in cutting height. See Figure 10 or 11. Lower Higher Higher Lower Low Wheel Figure 10 Figure 12 NOTE: For mowers with low wheels, the height adjustment levers move in the opposite direction to adjust; for those with high wheels, the levers move in the...
-
Page 11: Operation
OPERATION Blade Control Recoil Starter Oil Fill Deck Wash Grass Catcher Cutting Height Cutting Height Adjustment Adjustment Lever Lever Side Discharge Chute Trailing Shield Gas Cap Mulch Plug Figure 13 Blade Control Side Discharge Cover The blade control is attached to the upper handle of the mower. Depress and Your mower is shipped as a mulcher. To discharge the grass clippings to the side squeeze it against the upper handle to operate the unit. Release it to stop engine instead, follow the instructions in the Assembly section to attach the side discharge and blade. cover. -
Page 12: Before Starting Engine
OPERATION Before Starting Engine Service the engine with gasoline and oil as instructed in the separate engine manual. Starting Engine WARNING Be sure no one other than the operator is standing near the lawn mower while starting engine or operating mower. Never run engine indoors or in enclosed, poorly ventilated areas. Engine exhaust contains carbon monoxide, an odorless and deadly gas. -
Page 13: Service And Maintenance
Follow the maintenance schedule given below. This chart describes service WARNING guidelines only. Use the Service Log column to keep track of completed Before performing any type of maintenance/service, disengage all controls maintenance tasks. To locate the nearest Sears Service Center or to schedule service, and stop the engine. Wait until all moving parts have come to a complete simply contact Sears at 1-800-4-MY-HOME®. stop. Disconnect spark plug wire and ground it against the engine to prevent unintended starting. -
Page 14: General Recommendations
SERVICE AND MAINTENANCE Thread the hose coupler (packaged with your mower’s Operator’s Manual) WARNING onto the end of your garden hose. Always stop engine, allow engine to cool, disconnect spark plug wire, and Attach the hose coupler to the water port on your deck’s surface. See Figure ground against engine before performing any type of maintenance on your machine. GENERAL RECOMMENDATIONS • Always observe safety rules when performing any maintenance. • The warranty on this lawn mower does not cover items that have been subjected to operator abuse or negligence. To receive full value from warranty, operator must maintain the equipment as instructed here. •... -
Page 15: Blade Care
SERVICE AND MAINTENANCE After cleaning your deck, restart the mower. Keep the engine and blade running WARNING for a minimum of two minutes, allowing the underside of the cutting deck to An unbalanced blade will cause excessive vibration when rotating at high thoroughly dry. speeds. It may cause damage to mower and could break causing personal Blade Care injury. WARNING When removing the cutting blade for sharpening or replacement, protect your hands with a pair of heavy gloves or use a heavy rag to hold the blade. -
Page 16: Off-Season Storage
OFF-SEASON STORAGE WARNING Never store lawn mower with fuel in tank indoors or in poorly ventilated areas where fuel fumes may reach an open flame, spark, or pilot light as on a furnace, water heater, clothes dryer, or gas appliance. Preparing The Engine Preparing The Lawn Mower •... -
Page 17: Troubleshooting
Wait until all moving parts have come to a complete stop. Always wear safety glasses during operation or while performing any adjustments or repairs. For repairs beyond the minor adjustments listed here, contact Sears at 1-800-4-MY-HOME. Problem Cause Remedy 1. Blade control disengaged. -
Page 18: Warranty
PROVISIONS OF THIS DOCUMENT SHALL REMAIN VALID. Sears retains the exclusive right to repair or replace the product or offer a full refund of the purchase price at its sole discretion. SUCH REMEDY SHALL BE YOUR SOLE AND EXCLUSIVE REMEDY FOR ANY BREACH OF WARRANTY. - Page 19 Sears Emission Control Defects Warranty Provisions The following are specific provisions relative to your Emission Control Defects Warranty Coverage. It is in addition to the Sears engine warranty for non-regulated engines found in the Operating and Maintenance Instructions.
- Page 20 02488 Trademarks of Sears Brands Management Corp. used under license by Sears Canada Marque déposée / Marque de commerce de Sears Brands Management Corp. utilisée en vertu d’une licence de Sears Canada...
Need help?
Do you have a question about the CRAFTSMAN C459-36405 and is the answer not in the manual?
Questions and answers