Sign In
Upload
Download
Table of Contents
Contents
Add to my manuals
Delete from my manuals
Share
URL of this page:
HTML Link:
Bookmark this page
Add
Manual will be automatically added to "My Manuals"
Print this page
×
Bookmark added
×
Added to my manuals
Manuals
Brands
JVC Manuals
Home Theater System
XV-THM508
Manual
JVC XV-THM508 Manual
Dvd digital cinema system
Hide thumbs
Also See for XV-THM508
:
Instructions manual
(52 pages)
,
Service manual
(89 pages)
1
2
3
Table Of Contents
4
5
6
7
8
9
10
11
12
13
14
15
16
17
18
19
20
21
22
23
24
25
26
27
28
29
30
31
32
33
34
35
36
37
38
39
40
41
42
43
44
45
46
47
48
49
50
51
52
53
page
of
53
Go
/
53
Contents
Table of Contents
Troubleshooting
Bookmarks
Table of Contents
Table of Contents
Introduction
Notes on Handling
Supplied Accessories
About Discs
Playable Disc Types
Description of Parts and Controls
Connections
Connecting the FM and am Antennas
Connecting the Satellite (Front, Center, Surround) Speakers
Speaker Layout
Connecting a TV
Connecting the Powered Subwoofer
Connecting to an Analog Component
Connecting to a Digital Component
Setting the VOLTAGE SELECTOR Switch
Connecting the Power Cord
Operating External Components with the Remote Control
Operating the TV
Operating the DBS Tuner or CATV Converter
Operating the VCR
Basic Operations
Turning the System On/Off
Selecting the Source to Play
Adjusting the Volume [VOLUME]
Listening with Headphones (Not Supplied)
Turning off the Sound Temporarily [MUTING]
Adjusting the Brightness of the Indications [DIMMER]
Sleep Timer [SLEEP]
Adjusting the Output Level of the Subwoofer and Center
Surround Speakers [SUBWFR, CENTER, SURR L/R]
Adjusting the Treble Sound [TREBLE]
Changing the Scan Mode
Optimizing the Speaker Settings [Smart Surround Setup]
Playback
Basic Playback
One Touch Replay
Fast-Forward/Fast-Reverse Search
Skip to the Beginning of a Desired Selection
Locating a Desired Title/Group Using Number Buttons
Playing Back a Bonus Group
Advanced Operations
Using the Surround Mode
Using the On-Screen Bar
Playing from a Specified Position on a Disc
Using the File Control Display
Resume Playback
Selecting a View Angle
Selecting the Subtitle
Selecting the Audio
Special Picture Playback
Program Playback
Random Playback
Repeat Playback
Tray Lock
Sound and Other Settings
Setting DVD Preferences
Using the Setup Menus
Menu Description
Tuner Operations
Setting the am Tuner Interval Spacing
Manual Tuning
Preset Tuning
Selecting the FM Reception Mode
Reducing the Noise of am Broadcast
AV COMPU LINK Remote Control System
KARAOKE Operations
Basic KARAOKE Operation
Reserving Songs
Selecting Audio
Adding an Echo Effect to Your Voice
Shifting the Pitch of the Playback Sound
References
Maintenance
Troubleshooting
Specifications
Advertisement
Quick Links
1
Connecting the Powered Subwoofer
Download this manual
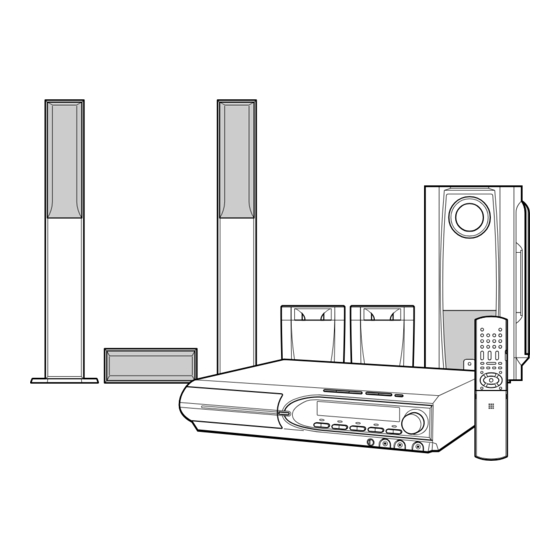
DVD DIGITAL CINEMA SYSTEM
Consists of XV-THM508, SP-PWM508,
SP-THM508F, SP-THM508C and
SP-THM505S
Consists of XV-THM303, SP-PWM303,
SP-THM303F, SP-THM303C and
SP-THM303S
INSTRUCTIONS
LVT1147-010A
[A,US,UN,UW,UG,UX]
Table of
Contents
Previous
Page
Next
Page
1
2
3
4
5
Advertisement
Table of Contents
Need help?
Do you have a question about the XV-THM508 and is the answer not in the manual?
Ask a question
Questions and answers
Related Manuals for JVC XV-THM508
Home Theater System JVC TH-M508 Service Manual
Dvd digital cinema system (89 pages)
Home Theater System JVC TH-M508 Instructions Manual
Jvc dvd digital cinema system instructions (52 pages)
Home Theater System JVC TH-M303 Service Manual
Dvd digital theater system (101 pages)
Home Theater System JVC TH-M508 Service Manual
Dvd digital cinema system (89 pages)
Home Theater System JVC TH-M303 Service Manual
Dvd digital theater system (85 pages)
Home Theater System JVC TH-M301 Instructions Manual
Jvc dvd digital theater system instructions (60 pages)
Home Theater System JVC TH-M303AS Instructions Manual
Dvd digital cinema system (52 pages)
Home Theater System JVC TH-M606 Instructions Manual
Dvd digital theater system (52 pages)
Home Theater System JVC TH-M603 Instructions Manual
(50 pages)
Home Theater System JVC SP-PWS8 Instructions Manual
Dvd digital cinema system (50 pages)
Home Theater System JVC SP-PWS5 Instructions Manual
Dvd digital cinema system (48 pages)
Home Theater System JVC SP-PWM303 Instructions Manual
Dvd digital cinema system (47 pages)
Home Theater System JVC TH-M45 Service Manual
Dvd digital cinema system (85 pages)
Home Theater System JVC TH-SW8 Instructions Manual
Dvd digital cinema system (52 pages)
Home Theater System JVC TH-S33 Instructions Manual
Dvd digital cinema system (41 pages)
Home Theater System JVC TH-S55 Instructions Manual
Dvd digital cinema system (49 pages)
This manual is also suitable for:
Th-m303
Th-m303sa
Th-m603um
Th-m603ud
Th-m508ub
Th-m603sa
...
Show all
Th-m508
Sp-pwm508
Sp-thm508f
Sp-thm508c
Sp-thm505s
Th-m508um
Th-m303at
Th-m603as
Th-m303ub
Th-m303um
Xv-thm303
Sp-pwm303
Sp-thm303f
Sp-thm303c
Sp-thm303s
Table of Contents
Print
Rename the bookmark
Delete bookmark?
Delete from my manuals?
Login
Sign In
OR
Sign in with Facebook
Sign in with Google
Upload manual
Upload from disk
Upload from URL


Need help?
Do you have a question about the XV-THM508 and is the answer not in the manual?
Questions and answers