Advertisement
Introduction
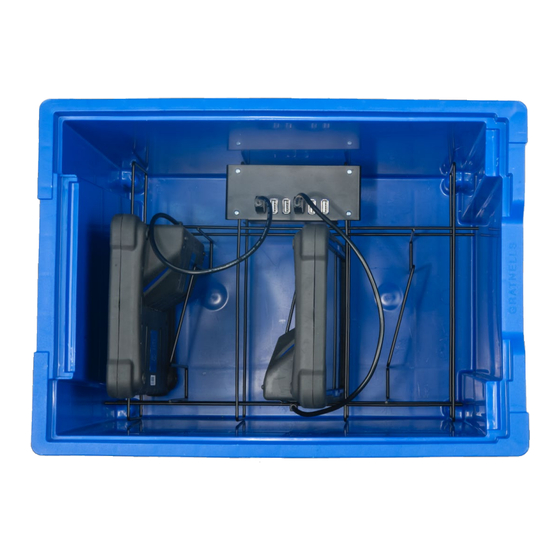
The PS-3602A SPARK LXi2 Charging Station provides
an organized way to charge a class set of SPARK
LXi2 dataloggers. Up to six SPARK LXi2 dataloggers
can be charged simultaneously. The dataloggers are
held in place by a wire rack inside of a Gratnells®
case. The built-in power supply includes six USB
cables which connect to the charging port of the
SPARK
LXi2
dataloggers. The charging station is
powered by a single cord that connects to an electric
receptacle.
Operation
1. Connect the power cord to an electric receptacle.
2. Connect a USB cable to the USB-C port of a
SPARK LXi2 datalogger.
3. Insert the SPARK LXi2 datalogger into the
wire rack with the headphone jack facing down.
800-772-8700
SPARK LXi2 Charging Station
PS-3602A
4. Repeat steps 2 and 3 for up to five additional
SPARK
the
directions into the wire rack (Figure 1).
Figure 1. Insert SPARK LXi2 dataloggers in the wire rack
in alternating directions.
LXi2
dataloggers.
dataloggers are inserted in alternating
Instruction Sheet
012-17395A
Note
that
www.pasco.com
Advertisement
Table of Contents

Summary of Contents for PASCO SPARK LXi2
- Page 1 2. Connect a USB cable to the USB-C port of a SPARK LXi2 datalogger. 3. Insert the SPARK LXi2 datalogger into the Figure 1. Insert SPARK LXi2 dataloggers in the wire rack wire rack with the headphone jack facing down. in alternating directions.
- Page 2 Limited Warranty For a description of the product warranty, see the PASCO catalog. Copyright The PASCO scientific 012-16446A SPARK Figure 2. Charge the SPARK LXi2 dataloggers with the LXi Charging Station Instruction Sheet is copyrighted with cover removed from the charging station.


Need help?
Do you have a question about the SPARK LXi2 and is the answer not in the manual?
Questions and answers