Advertisement
Available languages
Available languages
Quick Links
Advertisement

Related Manuals for Nordcap KK 480-2


Summary of Contents for Nordcap KK 480-2
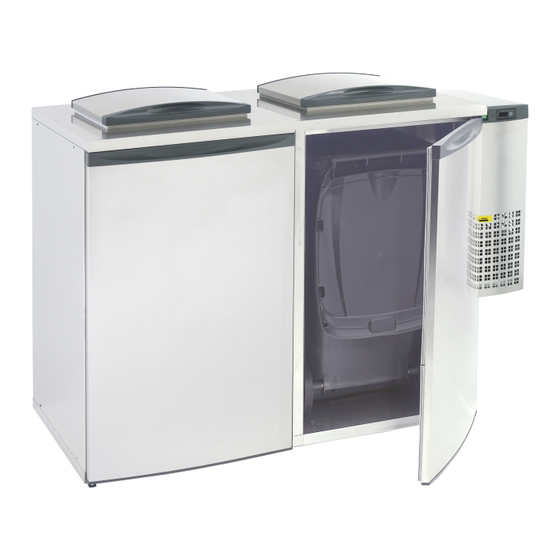
- Page 1 Aufbauanleitung Abfallkühler KK 480-2 [Artikel-Nr.: 46710405002-K] 2022-11...
- Page 2 Montageanleitung N.º MNS00011_03 NHALTSVERZEICHNIS Empfang ..........................................Herstellerplakette ........................................ Montageanleitung ......................................Allgemeine Hinweise ....................................Aufstellung ........................................Montage ........................................Auswechseln des Stromzuführungskabels ............................... Gebrauchsanweisung ......................................Reinigung ........................................Montage ..........................................NMERKUNG DES ERSTELLERS Wir bedanken uns für Ihre Auswahl. Unsere Geräte erfüllen alle relevanten europäischen Normen und Richtlinien. Wir sind sicher , dass indem wir Ihren Erwartungen entgegenkommen, Ihre Bedürfnisse befriedigt werden.
-
Page 3: Montage
Montageanleitung N.º MNS00011_03 3.2 Aufstellung Vorsichtiges Entfernen der Verpackung und der Palette, um die Oberflächen nicht zu beschädigen. Ziehen Sie die Plastikschutzfolie ab. Es wird empfohlen, das Gerät möglichst weit enfernt von Wärmequellen (wie z. B. Herd, Heizung oder direkte ... - Page 4 Montageanleitung N.º MNS00011_03 Stellen Sie die Bodenplatte auf eine gerade Unterfläche (Abb. 2) Fig. 2 Stellen Sie die Rückwand auf die Bodenplatte und befestigen Sie sie (Abb. 3); Fig. 3 Bringen Sie die linke Seitenwand auf der Bodenplatte in Position und befestigen Sie sie mit ihr (Abb. 4); ...
- Page 5 Montageanleitung N.º MNS00011_03 Bringen Sie die rechte Seitenwand auf der Bodenplatte in Position und befestigen Sie sie mit ihr (Abb.5); Fig. 5 Bringen Sie die oberen Bolzen an der Abdeckplatte an (Abb. 6); Fig. 6 Bringen Sie die Abdeckplatte auf den Seitenwänden und der Rückwand in Position und befestigen Sie sie nur mit der Rückwand ...
- Page 6 Montageanleitung N.º MNS00011_03 Stellen Sie die Hülse auf der Unterseite der Tür (Abb.8); Fig. 8 Führen Sie die Tür an der Boden- und Abdeckplatte ein (Abb.9); Fig. 9 Nur für 2 Mülltonnen Befestigen Sie die Leiste an der Abdeck- und Bodenplatte (Abb. 10); ...
- Page 7 Montageanleitung N.º MNS00011_03 Die Befestigung der Haken wird wie folgt an den Außenseiten der Kühltheke vorgenommen: Drehen Sie den Werkzeugschlüssel im Uhrzeigersinn bis zum Anschlag (Abb. 11 – Position A); Drehen Sie den Werkzeugschlüssel in die Gegenrichtung bis es sich verbindet. (Abb. 11 – Position B) ...
- Page 8 Montageanleitung N.º MNS00011_03 Schrauben Sie die V6 mit 2 Hülsen beim innere Seite des rechten Wand (Abb.14); Fig. 14...
-
Page 9: Identification Plate
Assembly Instructions N.º MNS00011_03 INDEX Reception..........................................Identification Plate ......................................Recommendations for Installation ................................... General Notes ......................................Placing .......................................... Installation ........................................Replacement of Power Cord ..................................Recommendations for the User ..................................Cleaning ........................................Assembly ..........................................OTES We would like to thank your preference for our equipment, which follow all the European Directives and Standards and will meet for sure, your expectations and satisfy your needs. -
Page 10: Recommendations For The User
Assembly Instructions N.º MNS00011_03 3.2 Placing Remove the packaging or pallet carefully so that the equipment’s surfaces are not damaged. Remove the PVC protection. The appliance should be installed away from heat sources (ex: heating appliances) and direct sunlight. ... - Page 11 Assembly Instructions N.º MNS00011_03 Put the panel of the bottom on the floor and level it (Fig.2); Fig. 2 Fix the back panel to the panel of the bottom and fasten (Fig.3); Fig. 3 Fix the left-side panel to the panel of the bottom and fasten only the bottom (Fig.4); ...
- Page 12 Assembly Instructions N.º MNS00011_03 Fix the right-side panel to the panel of the bottom and fasten only the bottom (Fig.5); Fig. 5 Insert the superior stud-pins in the top (Fig. 6); Fig. 6 Fix the panel of the top to side and back panels, fasten only the back (Fig.7); ...
- Page 13 Assembly Instructions N.º MNS00011_03 Insert the sleeve in the inferior side of the door (fig. 8); Fig. 8 Fix the door (right and left) to the bottom and to the top (Fig.9); Fig. 9 Only for 2 containers Fix the pillar to the panel of the top and bottom (Fig.10);...
- Page 14 Assembly Instructions N.º MNS00011_03 To fasten the camlocks, being ouside the box, proceed as follows: Turn the screwdriver like the hands of a clock till it stops. (Fig.11 – Position A); Turn the screwdriver on the other sense till it fastens. (Fig.11 – Position B) ...
- Page 15 Assembly Instructions N.º MNS00011_03 Fasten the V6 with 2 sleeves by the inside of the right-side panel (Fig. 14); Fig. 14...
- Page 16 Großmoorbogen 5 Hermann-Bopp-Straße 4 Tel.+49 421 48557-0 Tel.+49 30 936684-0 Tel.+49 211 540054-0 Tel.+49 40 766183-0 Tel.+49 6132 7101-0 Fax+49 421 488650 Fax+49 30 936684-44 Fax+49 211 540054-54 Fax+49 40 770799 Fax+49 6132 7101-20 www.nordcap.de bremen@nordcap.de berlin@nordcap.de erkrath@nordcap.de hamburg@nordcap.de ingelheim@nordcap.de...
Need help?
Do you have a question about the KK 480-2 and is the answer not in the manual?
Questions and answers