Table of Contents
Advertisement
Available languages
Available languages
Quick Links
Advertisement
Chapters
Table of Contents

Related Manuals for Nordcap MORETI FORNI iLab Series


Summary of Contents for Nordcap MORETI FORNI iLab Series
- Page 1 Bedienungsanweisung Teigformer iR 260 - iLab [Art. 493200100] 2017-01...
- Page 2 Bedienungsanleitung Instructions manual Manuale di istruzioni Manue l d ’ instructions Manual instrucciones iR 260/15 PORZIONATRICE E ARROTONDATRICE DIVIDER AND ROUNDING DOUGH MACHINE DIVISEUSES ET BOULEUSES PORTIONERER UND RUNDWIRKER MAQUINA DIVISORIA Y BOLEADORA Numeri di matricola / Serial numbers: Cod.73302800 Ver.: A3...
-
Page 3: Table Of Contents
INHALT 1 - ALLGEMEINES 2 - INFORMATIONEN ZUM PRODUKT 2.1 SPANNUNGEN 2.2 MÖGLICHE AUSFÜHRUNGEN 2.3 VERWENDETE MATERIALIEN 3 - KENNTNISSE ZUM PRODUKT 3.1 WARNUNGEN 3.2 BESCHREIBUNG DER MASCHINENTEILE 4 - SICHERHEIT 4.1 GEFAHREN DURCH MECHANISCHE KOMPONENTEN 4.2 GEFAHREN DURCH ELEKTRISCHE KOMPONENTEN 4.3 GEFAHREN DURCH HYDRAULISCHE KOMPONENTEN 4.4 GEFAHREN DURCH MANGELNDE HYGIENE 4.5 GEFAHREN DURCH LÄRM... -
Page 4: Allgemeines
1 - ALLGEMEINES Es ist unerlässlich, dieses Handbuch zu lesen und sich an die Empfehlungen und/oder Vorschriften für das Auspacken, die Installation, die Nutzung und die Wartung der Maschinen zu halten. Wenn die Maschine verkauft wird, muss dieses Handbuch dem neuen Eigentümer übergeben werden. -
Page 5: Informationen Zum Produkt
2 - INFORMATIONEN ZUM PRODUKT After Sales Service: Kontaktieren Sie Ihren Händler. Alle Maschineninformationen sind auf dem Typenschild angegeben: 2.1 SPANNUNGEN Alle Maschinen werden mit einem Standardanschluss geliefert: Drehstrom 400 Volt 50 Hz. Auf Anfrage sind andere Spannungen möglich. 2.2 MÖGLICHE AUSFÜHRUNGEN Siehe Tabelle Technische Daten auf S. -
Page 6: Kenntnisse Zum Produkt
3 - KENNTNISSE ZUM PRODUKT 3.1 WARNUNGEN Die folgenden Meldungen weisen den Bediener auf mögliche Gefahren durch mechanische oder elektrische Komponenten hin. Lesen Sie dieses Handbuch vor Inbetriebnahme der Maschine aufmerksam durch und befolgen Sie die Anweisungen. Versichern Sie sich, dass die Warnaufkleber in einem guten Zustand sind und ersetzen Sie sie gegebenenfalls. -
Page 7: Beschreibung Der Maschinenteile
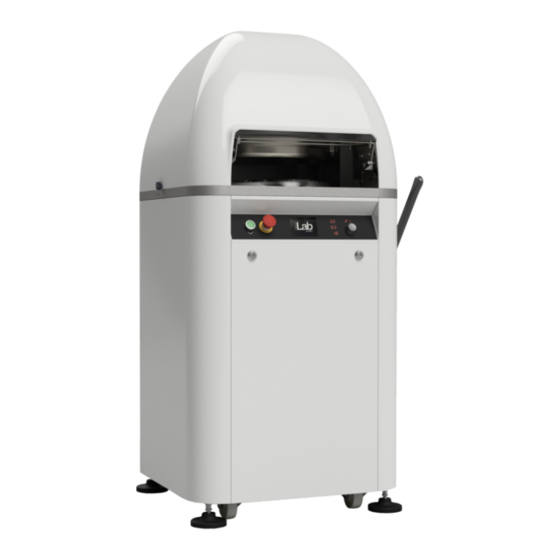
3.2 BESCHREIBUNG DER MASCHINENTEILE Oberes Gehäuse Flache Schutzabdeckung Rundwirkhebel Schalttafel Vorderes Gehäuse Stellfüße Räder DE/5... -
Page 8: Sicherheit
4 - SICHERHEIT . Ziehen Sie vor der Wartung der Maschine den Stecker aus der Steckdose. . Nur Fachpersonal oder gut ausgebildetes Personal darf mechanische oder elektrische Arbeiten durchführen. . Die Maschine darf nur von jeweils einer Person benutzt werden. . -
Page 9: Transport Und Auspacken Der Maschine
5 - TRANSPORT UND AUSPACKEN DER MASCHINE 5.1 TRANSPORT Die Maschine muss in ihrer Originalverpackung transportiert werden. Sie darf nur mit einem geeigneten Hebesystem umgestellt werden, damit sie nicht beschädigt wird und keine Verletzungsgefahr besteht. . Stellen Sie nichts auf die Verpackung. . -
Page 10: Installation
6 - INSTALLATION 6.1 AUFSTELLUNG UND WARTUNG Die Maschine darf nur von autorisiertem Fachpersonal installiert werden. Die Maschine darf nur zum Teilen oder zum Teilen und Wirken von Teig verwendet werden. Wenn ohne Genehmigung des Herstellers Änderungen vorgenommen werden und/oder wenn keine Originalersatzteile verwendet... -
Page 11: Beschreibung Des Produkts
7 - BESCHREIBUNG DES PRODUKTS 7.1 VERWENDUNGSZWECK DER MASCHINE Die Teigteil- und Wirkmaschinen sind Maschinen, die ein Teigstück in kleine Stücke teilen und diese anschließend mit einem Wirkteller zu kleinen Kugeln mit der gleichen Größe und dem gleichen Gewicht formen, und zwar in wenigen Sekunden! Hinweis: Alle Teile, die mit dem Produkt in Kontakt kommen, sind für die Lebensmittelindustrie geeignet 7.2 UNZULÄSSIGER GEBRAUCH DER MASCHINE... -
Page 12: Funktionsweise Der Schalttafel
7.4 FUNKTIONSWEISE DER SCHALTTAFEL 7.4.1 AUSWAHL DES ARBEITSPROGRAMMS Um das Programm zu wählen, mit dem gearbeitet werden soll, halten sie den Drehknopf 3 Sekunden lang gedrückt (die Programmanzeige erscheint); drehen Sie den Drehknopf nach rechts oder nach links, um die Programmzahl zu erhöhen oder zu verringern. Bestätigen Sie das ausgewählte Arbeitsprogramm, indem Sie den Drehknopf einmal drücken. -
Page 13: Fehlermeldungen
* t 1 (Presszeit) Dieser Parameter gibt die Zeit an, die benötigt wird, um den Teig gleichmäßig in der Wanne zu verteilen, sodass beim Teilen jedes Stück das gleiche Gewicht und die gleiche Größe hat. *** t 3 (Öffnung der Formkammer) Dieser Parameter wird für das Öffnen oder Schließen der Formkammer benötigt;... -
Page 14: Wie Mit Der Maschine Gearbeitet Wird
8 - WIE MIT DER MASCHINE GEARBEITET WIRD 8.1 ARBEITSZYKLUS Im Folgenden die Schritte für den korrekten Betrieb der Teigteil- und Wirkmaschine Stellen 2. Setzen Sie den Teller Stellen Hauptschalter auf | ON mit dem gewogenen Teig gewünschte Programm für in die Maschine ein und den Arbeitszyklus ein achten Sie dabei auf die... -
Page 15: Nützliche Hinweise
8.2 NÜTZLICHE HINWEISE Gehen Sie wie folgt vor, um ein gutes Produkt zu erhalten: . KEIN Mehl auf den Wirkteller geben; . Lassen Sie dem Teig ausreichend Zeit zum Vorgären; . Geben Sie den Teig auf den Teller (er muss sich innerhalb der Abdrücke befinden); . -
Page 16: Wartung
10 - WARTUNG 10.1 TÄGLICHE WARTUNG Befolgen Sie bei der täglichen Reinigung der Maschine die unten aufgeführte Vorgehensweise 1. . Lösen Sie zum Öffnen Öffnen Öffnen des oberen Gehäuses die Halteschieber (x2) Schneideinheit, indem Sie entsprechenden sie bis zum Anschlag Befestigungen (x2) bringen Die Maschine zeigt automatisch das Reinigungsprogramm „CL“... -
Page 17: Regelmässige Wartunga
7. Schließen Sie die Halteschieber (x2) 8. Bringen Sie das obere Gehäuses durch Anschrauben entsprechenden Befestigungen an (x2) . Überprüfen Sie, dass die zwei Halteschieber richtig eingerastet sind. Falls dem nicht so ist, kann dies schwere Schäden an der Maschine verursachen. 10.2 REGELMÄSSIGE WARTUNG Damit ein reibungsloser Betrieb und vor allem eine lange Lebensdauer der Maschine gewährleistet ist, empfehlen wir, den Zylinderkopfring regelmäßig zu reinigen (siehe Anleitung... - Page 18 TECHNISCHE DATEN TEIGTEIL- UND WIRKMASCHINEN Mindestgewic Fassungsver Maße Gewicht Maximalgewic Kopfdurchm Stundenlei mögen Teilungsanzah ht (g) * esser (mm) stung ** bxlxh (mm) (Kg) (g) * Wanne (kg) 1,5/5,5 1800 750x700x1450 General überladen von der Maschine N.B.: * Bei den Mindest-/Maximalgewichten handelt es sich um reine Richtwerte, die je nach Teiggärung variieren können;...
- Page 19 CONTENT 1 - GENERAL 2 - PRODUCT INFORMATION 2.1 VOLTAGES 2.2 POSSIBLE VERSIONS 2.3 MATERIALS USED 3 - PRODUCT CONCEPTS 3.1 WARNINGS 3.2 DESCRIPTION OF THE PARTS COMPOSING THE MACHINE 4 - SAFETY 4.1 DANGER DUE TO MECHANICAL COMPONENTS 4.2 DANGER DUE TO ELECTRICAL COMPONENTS 4.3 DANGER DUE TO HYDRAULIC COMPONENTS 4.4 DANGER DUE TO LACK OF HYGIENE 4.5 DANGER DUE TO NOISE...
-
Page 20: General
1 - GENERAL It is important to read this manual and comply with the suggestions and/or rules for unpacking, installation, use and maintenance of the machine. If the machine is sold, the manual must be given to the new owner. Only operators trained for use and having read the manual can operate the machine. -
Page 21: Product Information
2 - PRODUCT INFORMATION After sales support: contact the retailer. All machine data are outlined on the serial number : 2.1 VOLTAGES All the machines are supplied as standard with a 400 Volt 50 Hz 3 phase connection. On request: different voltages can be manufactured. 2.2 POSSIBLE VERSIONS See technical data table on page 16 2.3 MATERIALS USED... -
Page 22: Product Concepts
3 - PRODUCT CONCEPTS 3.1 WARNINGS The following signals warn the operator of possible danger due to mechanical or electrical components. Before using the machine, you need to carefully read this manual and follow the instructions. Ensure the warning adhesives are in good condition and, if necessary, replace them. When you use the machine for the first time, carefully follow the instructions, to avoid unpleasant surprises. -
Page 23: Description Of The Parts Composing The Machine
3.2 DESCRIPTION OF THE PARTS COMPOSING THE MACHINE Upper casing Flat guard casing Shaping lever Control keypad Front casing Support feet Wheels UK/5... -
Page 24: Safety
4 - SAFETY . Remove the plug from the electrical power supply during machine maintenance. . Only qualified and well-instructed staff can carry out mechanical or electrical operations. . The machine must be used by one person at a time. . -
Page 25: Transport And Unpacking The Machine
5 - TRANSPORT AND UNPACKING THE MACHINE 5.1 TRANSPORT The machine must be transported in its original packaging. It must be moved with an adequate lifting system to avoid damaging it and injuring yourself. . Do not position anything on the package. . -
Page 26: Installation
6 - INSTALLATION 6.1 POSITIONING AND MAINTENANCE The machine must only be installed by qualified and authorised staff. The machine must only be used for the purpose of dividing or dividing and rounding dough. The warranty is not valid if changes are made without the manufacturer's authorisation and/or if non-original spare parts are used. -
Page 27: Product Description
7 - PRODUCT DESCRIPTION 7.1 SCOPE OF THE MACHINE Rounding dividers are machines that enable cutting a piece of raw dough in small parts and then, thanks to the oscillating plate rounds every single piece, to obtain balls of equal weight and shape, all in just a few seconds! N.B.: all parts in contact with the product are suitable for the food industry 7.2 UNPERMITED USE OF THE MACHINE... -
Page 28: How The Command Keypad Works
7.4 HOW THE COMMAND KEYPAD WORKS 7.4.1 WORK PROGRAM SELECTION To select the program to work with, keep the knob pressed for 3 seconds (the display highlights relating to the program); turn the knob to the right or left to increase or decrease the program number. -
Page 29: Error Signals
* t 1 (pressing time) This parameter identifies the time needed to evenly distribute the dough inside the basin, to ensure in the cutting phase each piece is the same weight and volume. *** t 3 (opening of the shaping chamber) This parameter is needed to open or close the shaping chamber;... -
Page 30: How To Work With The Machine
8 - HOW TO WORK WITH THE MACHINE 8.1 WORKING CYCLE The phases follow for correct use of the rounding divider 1. Position the main switch 2. Insert the plate with the 3. Set the pre-selected in the | ON position weighed dough inside the program for the working machine, paying attention... -
Page 31: Useful Advice
8.2 USEFUL ADVICE To obtain a good product, proceed as follows: . Do NOT put flour on the shaping plate. . Be sure the dough has the right pre-leavening time; . Place the dough (the dough must stay inside the plate imprints); . -
Page 32: Maintenance
10 - MAINTENANCE 10.1 DAILY MAINTENANCE To clean the machine daily, follow the phases as outlined below 1. Remove the upper casing Open fastening 3. Open the cutting unit unscrewing thrusts (x2) accompanying it to the specific fastenings (x2) support The machine will automatically display the "CL"... -
Page 33: Periodic Maintenance
7. Close the fastening thrusts (x2) 8. Place the upper casing by screwing in the specific fastenings (x2) . Check the two fastening thrusts are correctly coupled. If not, they can cause serious damage to the machine. 10.2 PERIODIC MAINTENANCE To ensure the machine works properly and, in particular to ensure a long life, you are advised to periodically clean the ring on the head (see instructions below). - Page 34 TECHNICAL DATA ROUNDING DIVIDERS hourly weight basin dimensions weight weight max head diameter no. divisions capacity (g) * (mm) min (g) * capacity (Kg) bxlxh (mm) (Kg) 1,5/5,5 1800 750x700x1450 General cluttered of the machine N.B.: * the min./max weights are provided purely as an indication and can vary based on the degree of dough leavening, ** hourly production rates are also approximate, as they always depend on the user's internal organisation (tests conducted in an equipped laboratory).
- Page 35 INDICE 1 - GENERALE 2 - INFORMAZIONI SUL PRODOTTO 2.1 VOLTAGGI 2.2 POSSIBILI VERSIONI 2.3 MATERIALI UTILIZZATI 3 - NOZIONI SUL PRODOTTO 3.1 AVVERTIMENTI 3.2 DESCRIZIONE DELLE PARTI CHE COMPONGONO LA MACCHINA 4 - SICUREZZA 4.1 PERICOLI DOVUTI A COMPONENTI MECCANICI 4.2 PERICOLI DOVUTI A COMPONENTI ELETTRICI 4.3 PERICOLI DOVUTI A COMPONENTI IDRAULICI 4.4 PERICOLI DOVUTI ALLA MANCANZA DI IGIENE...
- Page 36 1 - GENERALE E’ importante leggere questo manuale e conformarsi con i suggerimenti e/o regole per lo sballaggio, l’installazione, l’uso e la manutenzione della macchina. Se la macchina viene venduta, questo manuale deve essere consegnato al nuovo proprietario. Solo l’operatore che è stato istruito all’uso e che ha letto questo manuale può operare con la macchina.
- Page 37 2 - INFORMAZIONI SUL PRODOTTO Assistenza post vendita: contattare il rivenditore. Tutti i dati della macchina sono riportati nella matricola : 2.1 VOLTAGGI Tutte le macchine vengono fornite standard con collegamento in 400 Volt 50 Hz 3 fasi. A richiesta, si possono fare con tensioni diverse. 2.2 POSSIBILI VERSIONI Vedi tabella Dati tecnici a pag.
- Page 38 3 - NOZIONI SUL PRODOTTO 3.1 AVVERTIMENTI I seguenti segnali avvertono l’operatore di possibili pericoli da componenti meccanici o elettrici. Prima di utilizzare la macchina bisogna leggere attentamente questo manuale e seguire le istruzioni. Accertarsi che gli adesivi di avvertimento siano in buone condizioni, e se necessario sostituirli.
- Page 39 3.2 DESCRIZIONE DELLE PARTI CHE COMPONGONO LA MACCHINA Carter superiore Carter riparo piatto Leva di formatura Pulsantiera di controllo Carter anteriore Piedini di appoggio Ruote IT/5...
- Page 40 4 - SICUREZZA . Rimuovere la spina dall’alimentatore di corrente durante la manutenzione della macchina. . Solo personale qualificato o ben istruito può fare operazioni di natura meccanica o elettrica. . La macchina deve essere usata da una sola persona per volta. .
- Page 41 5 - TRASPORTO E SBALLAGGIO DELLA MACCHINA 5.1 TRASPORTO La macchina deve essere trasportata nel suo imballo originale. Deve essere spostata con un adeguato sistema di sollevamento ai fini di non danneggiarla e di non farsi male. . Non posizionare nulla sopra l’imballo. .
- Page 42 6 - INSTALLAZIONE 6.1 POSIZIONAMENTO E MANUTENZIONE La macchina deve essere installata solo da personale qualificato e autorizzato. La macchina può essere utilizzata solo a scopo di dividere o dividere e arrotondare la pasta. La garanzia non è valida se vengono fatti dei cambiamenti senza l’autorizzazione della azienda produttrice e/o se vengono utilizzati ricambi non originali.
- Page 43 7 - DESCRIZIONE DEL PRODOTTO 7.1 SCOPO DELLA MACCHINA Le spezzatrici arrotondatrici sono delle macchine che permettono di tagliare un pezzo di pasta cruda, in piccole parti, e successivamente grazie ad un piatto oscillante di arrotolarne ogni singolo pezzo, in modo da ottenere delle palline di peso e forma uguale, tutto questo in pochi secondi! N.B.: tutte le parti a contatto con il prodotto, sono idonee per l’industria alimentare.
- Page 44 7.4 COME FUNZIONA LA PULSANTIERA DI COMANDO 7.4.1 SELEZIONE DEL PROGRAMMA DI LAVORO Per selezionare il programma con il quale lavorare tenere premuta la manopola per 3 secondi (si evidenzierà il display relativo al programma); ruotare la manopola a destra o a sinistra per aumentare o diminuire il numero di programma.
- Page 45 * t 1 (tempo di pressata) Questo parametro identifica il tempo che serve per distribuire la pasta all’ interno della vasca in modo uniforme, così che nella fase di taglio ogni pezzo sia dello stesso peso e volume. *** t 3 (apertura della camera di formatura) Questo parametro serve ad aprire o chiudere la camera di formatura;...
- Page 46 8 - COME LAVORARE CON LA MACCHINA 8.1 CICLO DI LAVORO Di seguito le fasi per un corretto utilizzo della spezzatrice arrotondatrice 1.Posizionare l’interruttore 2. Inserire il piatto con 3. Impostare il programma generale in posizione | ON l’impasto pesato all’interno prescelto per il ciclo di della macchina...
- Page 47 8.2 CONSIGLI UTILI Per ottenere un buon prodotto procedere come segue: . NON mettere farina sopra il piatto di formatura; . Attendere che l’impasto abbia avuto il giusto tempo di pre-lievitazione; . Mettere l’impasto (l’impasto deve stare all’interno delle impronte del piatto); .
- Page 48 10 - MANUTENZIONE 10.1 MANUTENZIONE GIORNALIERA Per eseguire la pulizia giornaliera della macchina seguire le fasi come sotto riportate Rimuovere carter 2. Aprire gli spintori di 3. Aprire il gruppo taglio superiore svitando fissaggio (x2) accompagnandolo fino appositi fissaggi (x2) all’appoggio La macchina visualizzerà...
- Page 49 7. Chiudere gli spintori di fissaggio (x2) 8. Mettere il carter superiore avvitando gli appositi fissaggi (x2) . Controllare che i due spintori di fissaggio siano correttamente agganciati. Se così non fosse si possono causare gravi danni alla macchina. 10.2 MANUTENZIONE PERIODICA Perché...
- Page 50 DATI TECNICI SPEZZATRICI ARROTONDATRICI diametro grammatura capacità capacità dimensioni peso grammatura nr. divisioni testata max (gr) * min (gr) * vasca (Kg) oraria ** bxlxh (mm) (Kg) (mm) 1,5/5,5 1800 750x700x1450 Ingombri generali della macchina N.B.: * le grammature min./max sono fornite a titolo puramente indicativo e possono variare a seconda del grado di lievitazione dei pastoni, ** sono indicative anche le produzioni orarie, perché...
- Page 51 TABLE DES MATIÈRES 1 - GÉNÉRAL 2 - INFORMATIONS SUR LE PRODUIT 2.1 VOLTAGES 2.2 VERSIONS POSSIBLES 2.3 MATÉRIAUX UTILISÉS 3 - NOTIONS SUR LE PRODUIT 3.1 AVERTISSEMENTS 3.2 DESCRIPTION DES PARTIES QUI COMPOSENT LA MACHINE 4 - SÉCURITÉ 4.1 DANGERS DUS À DES COMPOSANTS MÉCANIQUES 4.2 DANGERS DUS À...
-
Page 52: Général
1 - GÉNÉRAL Il est important de lire ce manuel et de se conformer aux suggestions et / ou règles pour le déballage, l’installation, l’utilisation et la maintenance de la machine. Si la machine est vendue, ce manuel doit être remis au nouveau propriétaire. Seul l’opérateur qui a été... -
Page 53: Informations Sur Le Produit
2 - INFORMATIONS SUR LE PRODUIT Assistance après-vente : contacter le revendeur. Toutes les données de la machine sont reportées sur l'immatriculation : 2.1 VOLTAGES Toutes les machines sont fournies standards avec branchement en 400 Volts 50 Hz 3 phases. Sur demande, elles peuvent être fabriquées avec des tensions différentes. -
Page 54: Notions Sur Le Produit
3 - NOTIONS SUR LE PRODUIT 3.1 AVERTISSEMENTS Les signaux suivants avertissent l’opérateur de possibles dangers provenant de composants mécaniques ou électriques. Avant d'utiliser la machine, il faut lire attentivement ce manuel et suivre les instructions. S'assurer que les autocollants d'avertissement sont en bonnes conditions et, si nécessaire, les substituer. -
Page 55: Description Des Parties Qui Composent La Machine
3.2 DESCRIPTION DES PARTIES QUI COMPOSENT LA MACHINE Carter supérieur Carter de protection plateau Levier de formage Tableau de boutons de contrôle Carter antérieur Pieds d'appui Roues FR/5... -
Page 56: Sécurité
4 - SÉCURITÉ . Enlever la fiche de l’alimentateur de courant durant la maintenance de la machine. . Seul du personnel qualifié ou bien instruit peut faire des opérations de nature mécanique ou électrique. . La machine doit être utilisée par une seule personne à la fois. . -
Page 57: Transport Et Déballage De La Machine
5 - TRANSPORT ET DÉBALLAGE DE LA MACHINE 5.1 TRANSPORT La machine doit être transportée dans son emballage original. Elle doit être déplacée avec un système de soulèvement adéquat pour ne pas l'endommager et ne pas se faire mal. . Ne rien placer sur l’emballage. . -
Page 58: Installation
6 - INSTALLATION 6.1 POSITIONNEMENT ET MAINTENANCE La machine doit être utilisée seulement par du personnel qualifié et autorisé. La machine peut être utilisée seulement dans le but de diviser ou de diviser et bouler la pâte. La garantie n'est pas valable si on effectue des changements sans l’autorisation de l'entreprise productrice et / ou si on utilise des pièces détachées non originales. -
Page 59: Description Du Produit
7 - DESCRIPTION DU PRODUIT 7.1 BUT DE LA MACHINE Les diviseuses bouleuses sont des machines qui permettent de découper un morceau de pâte crue, en petits pâtons, et successivement, grâce à un plateau oscillant, de bouler chaque morceau, de façon à obtenir des boules de poids et forme identiques, tout ceci en quelques secondes ! N.B. -
Page 60: Comment Fonctionne Le Tableau De Boutons De Commande
7.4 COMMENT FONCTIONNE LE TABLEAU DE BOUTONS DE COMMANDE 7.4.1 SÉLECTION DU PROGRAMME DE TRAVAIL Pour sélectionner le programme avec lequel travailler, maintenir la pression sur la poignée pendant 3 secondes (l'afficheur correspondant au programme se mettra en évidence) ; tourner la poignée à... -
Page 61: Signaux D'erreur
* t 1 (temps de pressage) Ce paramètre indique le temps qui sert pour distribuer la pâte à l’intérieur de la cuve de façon uniforme, de manière à ce que lors de la phase de découpage chaque morceau soit du même poids et du même volume. -
Page 62: Comment Travailler Avec La Machine
8 - COMMENT TRAVAILLER AVEC LA MACHINE 8.1 CYCLE DE TRAVAIL Voici les phases pour une utilisation correcte de la diviseuse bouleuse Placer l’interrupteur 2. . Insérer le plateau avec 3. Établir le programme général en position | ON la pâte pesée à l’intérieur pré-choisi pour le cycle de de la machine en faisant travail... -
Page 63: Conseils Utiles
8.2 CONSEILS UTILES Pour obtenir un bon produit, procéder de la façon suivante : . NE PAS mettre de farine sur le plateau de formage ; . Attendre que la pâte ait eu le temps correct de pré-levage ; . Mettre la pâte (la pâte doit rentrer à l’intérieur des empreintes du plateau) ; . -
Page 64: Maintenance
10 - MAINTENANCE 10.1 MAINTENANCE QUOTIDIENNE Pour exécuter le nettoyage quotidien de la machine, suivre les phases reportées ci-dessous Enlever carter 2. Ouvrir les poussoirs de 3. Ouvrir le groupe de supérieur en dévissant les fixation (x2) découpage fixations prévues (x2) l'accompagnant jusqu'à... -
Page 65: Maintenance Périodique
7. Fermer les poussoirs de fixation (x2) 8. Mettre le carter supérieur en vissant les fixations prévues (x2) . Contrôler que les deux poussoirs de fixation sont correctement accrochés. Si ce n'est pas le cas, cela peut causer de graves dommages à la machine. 10.2 MAINTENANCE PÉRIODIQUE Pour que la machine fonctionne correctement et surtout pour sa durée, nous conseillons de faire un nettoyage périodique de la bague de la tête (voir instructions ci-dessous). - Page 66 DONNÉES TECHNIQUES DIVISEUSES BOULEUSES grammage capacité diamètre tête capacité dimensions poids nbre de grammage divisions max (gr) * min (gr) * cuve (Kg) (mm) horaire ** bxlxh (mm) (Kg) 1,5/5,5 1800 750x700x1450 Général encombré de la machine N.B. : * les grammages min. / max. sont fournis à titre purement indicatif et peuvent varier selon le degré...
- Page 67 ÍNDICE 1 - GENERAL 2 - INFORMACIÓN SOBRE EL PRODUCTO 2.1 TENSIONES 2.2 VERSIONES POSIBLES 2.3 MATERIALES UTILIZADOS 3 - NOCIONES SOBRE EL PRODUCTO 3.1 ADVERTENCIAS 3.2 DESCRIPCIÓN DE LAS PARTES QUE COMPONEN LA MÁQUINA 4 - SEGURIDAD 4.1 PELIGROS DEBIDOS A COMPONENTES MECÁNICOS 4.2 PELIGROS DEBIDOS A COMPONENTES ELÉCTRICOS 4.3 PELIGROS DEBIDOS A COMPONENTES HIDRÁULICOS 4.4 PELIGROS DEBIDOS A LA FALTA DE HIGIENE...
- Page 68 1 - GENERAL Es importante leer este manual y respetar las sugerencias y las reglas para el desembalaje, la instalación, el uso y el mantenimiento de la máquina. Si se vende la máquina, este manual debe entregarse al nuevo propietario. Solo el operador que ha sido formado sobre el uso y que ha leído este manual puede trabajar con la máquina.
- Page 69 2 - INFORMACIÓN SOBRE EL PRODUCTO Asistencia post venta: póngase en contacto con el vendedor. La matrícula incluye todos los datos de la máquina: 2.1 TENSIONES Todas las máquinas se suministran de forma estándar con conexión de 400 voltios 50 Hz 3 fases.
- Page 70 3 - NOCIONES SOBRE EL PRODUCTO 3.1 ADVERTENCIAS Las siguientes señales advierten al operador de posibles peligros debidos a componentes mecánicos y eléctricos. Antes de utilizar la máquina es necesario leer atentamente este manual y seguir las instrucciones. Asegúrese que los adhesivos de advertencia estén en buenas condiciones, y si es necesario sustitúyalos.
- Page 71 3.2 DESCRIPCIÓN DE LAS PARTES QUE COMPONEN LA MÁQUINA Cárter superior Cárter de protección de plato Palanca de formado Cuadro de pulsadores de control Cárter anterior Patas de apoyo Ruedas ES/5...
- Page 72 4 - SEGURIDAD Quite el enchufe de mantenimiento del alimentador de corriente durante el mantenimiento de la máquina. . Solo personal cualificado o bien formado puede realizar operaciones de tipo mecánico o eléctrico. . La máquina debe ser utilizada solo por una persona en cada ocasión. .
- Page 73 5 - TRANSPORTE Y DESEMBALAJE DE LA MÁQUINA 5.1 TRANSPORTE La máquina debe transportarse en su embalaje original. Debe desplazarse con un sistema de elevación adecuado para no dañarla y no hacerse daño. . No colocar nunca nada encima del embalaje. .
- Page 74 6 - INSTALACIÓN 6.1 POSICIONAMIENTO Y MANTENIMIENTO La máquina debe ser instalada solo por personal cualificado y autorizado. La máquina puede utilizarse solo con el objetivo de dividir o dividir y redondear la pasta. La garantía no es válida si se realizan cambios sin la autorización de la empresa fabricante y/o si se utilizan recambios no originales.
- Page 75 7 - DESCRIPCIÓN DEL PRODUCTO 7.1 OBJETIVO DE LA MÁQUINA Las porcionadoras redondeadoras son máquinas que permiten cortar una porción de masa cruda en pequeñas partes y después gracias a un plato oscilante redondear cada uno de los trozos, de manera que se obtienen bolas con un peso y una forma igual, todo ello en pocos segundos.
- Page 76 7.4 CÓMO FUNCIONA EL TABLERO DE PULSADORES DE MANDO 7.4.1 SELECCIÓN DEL PROGRAMA DE TRABAJO Para seleccionar el programa con el cual trabajar mantenga apretado el mando durante 3 segundos (se marcará la pantalla relativa en el programa); gire el mando a la derecha o a la izquierda para aumentar o disminuir el número de programa.
- Page 77 * t 1 (tiempo de prensado) Este parámetro identifica el tiempo necesario para distribuir la masa en el interior de la cuba de manera uniforme, de manera que en la fase de corte cada porción tenga el mismo peso y volumen.
- Page 78 8 - CÓMO TRABAJAR CON LA MÁQUINA 8.1 CICLO DE TRABAJO A continuación las fases para una correcta utilización de la porcionadora redondeadora. 1. Coloque el interruptor 2. Introduzca el plato con la 3. Configure el programa general en posición | ON masa pesada en el interior elegido para el ciclo de de la máquina prestando...
- Page 79 8.2 CONSEJOS ÚTILES Para obtener un buen producto siga estos pasos: . NO ponga harina encima del plato de formado; . Espere a que transcurra el tiempo adecuado de prefermentación para la masa; . Ponga la masa (la masa debe estar en el interior de las huellas del plato); .
- Page 80 10 - MANTENIMIENTO 10.1 MANTENIMIENTO DIARIO Para efectuar el mantenimiento diario de la máquina siga las fases que a continuación se indican 1. Quite el cárter superior 2. Abra los dispositivos de 3. . Abra el grupo de corte desenroscándolo empuje de fijación (x2) acompañándolo hasta el relativas fijaciones (x2)
- Page 81 7. Cierre los dispositivos de empuje de 8. Ponga el cárter superior enroscándolo de fijación (x2) las relativas fijaciones (x2) . Controle que los dos dispositivos de empuje de fijación estén correctamente enganchados. Si no es así, se pueden provocar graves daños a la máquina. 10.2 MANTENIMIENTO PERIÓDICO Para que la máquina funcione correctamente y sobre todo para asegurar su duración, aconsejamos realizar una limpieza periódica del anillo del cabezal (véanse instrucciones a...
- Page 82 DATOS TÉCNICOS PORCIONADORAS REDONDEADORAS capacidad capacidad dimensiones peso gramaje min gramaje máx. diámetro n.º divisiones (g) * (g) * cabezal (mm) cuba (kg) horaria ** bxlxh (mm) (Kg) 1,5/5,5 1800 750x700x1450 General desordenado de la máquina N.B.: * los gramajes mínimo o máximo se indican a título puramente indicativo y pueden variar dependiendo del grado de fermentación de las masas, ** también son indicativas las producciones horarias, ya que dependen siempre de la organización interna del utilizador (pruebas realizadas en laboratorio equipado).
- Page 83 Via A.Meucci, 4 - 61037 - Mondolfo (PU) ITALIA Tel. +39-0721-96161 - Fax +39-0721-9616299 Http://www.morettiforni.com NordCap GmbH & Co. KG Thalenhorststraße 15 28307 Bremen Hauptsitz (Service, Finanzen & Personal, Lager, IT, Marketing) Telefon: +49 421 48557-0 Telefax: +49 421 488650 E-Mail: bremen@nordcap.de...
Need help?
Do you have a question about the MORETI FORNI iLab Series and is the answer not in the manual?
Questions and answers