
Related Manuals for AES Proteam iX7


Summary of Contents for AES Proteam iX7
- Page 1 Proteam iX Inverter Automated Environmental Systems, Unit B, Anglian Lane, Bury St Edmunds, IP32 6SR 01284 6587710 | sales@automatedenvironmentalsystems.co.uk...
- Page 2 Automated Environmental Systems, Unit B, Anglian Lane, Bury St Edmunds, IP32 6SR 01284 6587710 | sales@automatedenvironmentalsystems.co.uk...
-
Page 3: Table Of Contents
TABLE OF CONTENT 1. PREFACE …………...…………………………………………………………………………..…………..2 2. CARTON CONTENTS …………...………………………………………………………………..5 3. OVERVIEW OF THE UNIT ……………………………………………………………..……………….……6 4. EXPLODED VIEW …………………………..……………………………………………..……………….……8 5. INSTALLATION AND CONNECTION …………………………..………..………..…………………10 5.1 Installation Illustration …………………………..………..…………………..…………….……10 Swimming Pool Heat Pumps Location ….…………..…………………..…………………10 How Close to Your Pool? ….…………..……………………………………..…………….……11 Swimming Pool Heat Pumps Plumbing ….…………………………..….…………….…11... -
Page 4: Preface
1. PREFACE In order to provide our customers with quality, reliability and versatility, this product has been made to strict production standards. This manual includes all the necessary information about installation, debugging, discharging and maintenance. Please read this manual carefully before you open or maintain the unit. - Page 5 WARNING Do not use means to accelerate the defrosting process to clean, other than those recommended by the manufacturer. The appliance shall be stored in a room without continuously operating ignition sources (for example: open flames, an operating gas appliance or an operating electric heater.) Do not pierce or burn.
- Page 6 Caution & Warning 1. Please make sure that the unit and power connection have good earthing, otherwise may cause electrical shock. 2. Directive 2002/96/EC (WEEE): The symbol depicting a crossed-out waste bin that is underneath the appliance indicates that this product, at the end of its useful life, must be handled separately from domestic waste, must be taken to a recycling centre for electric and electronic devices or handed back to the dealer when purchasing an equivalent appliance.
-
Page 7: Carton Contents
2. CARTON CONTENTS Before starting the installation, please make sure that all following items are found inside the box. Carton Box Item Image Quantity Swimming pool heat pump Operation and Installation Manual Accessories 1 (Set) - 5 - Automated Environmental Systems, Unit B, Anglian Lane, Bury St Edmunds, IP32 6SR 01284 6587710 | sales@automatedenvironmentalsystems.co.uk... -
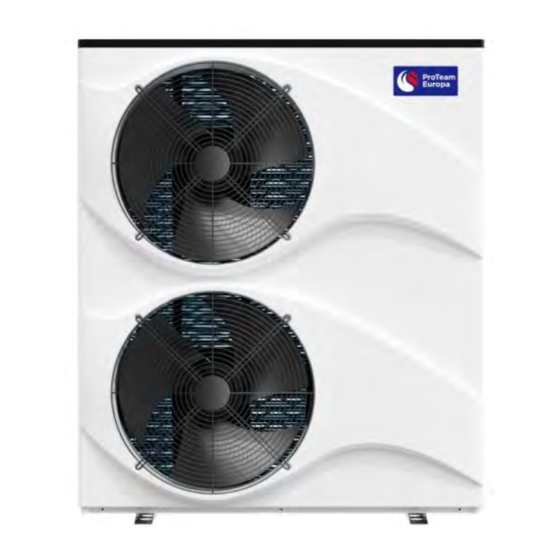
Page 8: Overview Of The Unit
3. OVERVIEW OF THE UNIT iX7/ iX11 iX14 iX19/ iX21/ iX25 1020 137.5 1000 87.2 93.5 96.2 - 6 - Automated Environmental Systems, Unit B, Anglian Lane, Bury St Edmunds, IP32 6SR 01284 6587710 | sales@automatedenvironmentalsystems.co.uk... - Page 9 iX33/ iX40/ iX33T/ iX40T 1170 1389 192.5 96.5 - 7 - Automated Environmental Systems, Unit B, Anglian Lane, Bury St Edmunds, IP32 6SR 01284 6587710 | sales@automatedenvironmentalsystems.co.uk...
-
Page 10: Exploded View
4. EXPLODED VIEW MODELS: iX7/ iX11/ iX14/ iX19/ iX21/ iX25 Top cover 4-way valve assembly Top metal frame Right panel Left panel LCD controller pad Fan bracket Terminals block cover Fan motor Titanium heat exchanger Fan blade Compressor Fan grill Chassis Back net Reactor... - Page 11 MODELS: iX33/ iX40/ iX33T/ iX40T Top cover Middle separation panel Back grille Compressor Fan bracket Gas-liquid separator Left panel Titanium heat exchanger Fan blade 4-way valve assembly Fan motor Right panel Evaporator Terminals block cover Chassis Electrical control box assembly Front panel Electrical control box cover Fan grill...
-
Page 12: Installation And Connection
5. INSTALLATION AND CONNECTION 5.1 Installation Illustration Installation items: The factory only provides the main unit, the other items in the illustration are necessary spare parts for the water system, that provided by users or the installer. Attention: Please follow these steps when using for the first time 1. -
Page 13: How Close To Your Pool
DO NOT place the unit to shrubs which can block air inlet. These locations deny the unit of a continuous source of fresh air which reduces it efficiency and may prevent adequate heat delivery. 5.3 How Close To Your Pool? Normally, the pool heat pump is installed within 7.5 metres of the pool. -
Page 14: Swimming Pool Heat Pumps Electrical Wiring
Condensation: Since the Heat pump cools down the air about 4 -5 , water may condense on the fins of the horseshoe shaped evaporator. If the relative humidity is very high, this could be as much as several litres an hour. The water will run down the fins into the basepan and drain out through the barbed plastic condensation drain fitting on the side of the basepan. -
Page 15: Operating The Unit
6. OPERATING THE UNIT This is achieved via the Digital Controller. NEVER LET THE DIGITAL CONTROLLER GET WET. THIS MAY CAUSE AN ELECTRIC SHOCK OR FIRE. NEVER PRESS THE BUTTONS OF THE DIGITAL CONTROLLER WITH A HARD, POINTED OBJECT. THIS MAY DAMAGE THE DIGITAL CONTROLLER. NEVER INSPECT OR SERVICE THE DIGITAL CONTROLLER YOURSELF. -
Page 16: Lcd Controller Interface
6.1 LCD CONTROLLER INTERFACE Icon Function Icon Function Auto Mode Anti-freeze Heat Mode Compressor Cool Mode Defrost WiFi Water Pump Lock PUMP Error Indicator Water Flow Status - 14 - Automated Environmental Systems, Unit B, Anglian Lane, Bury St Edmunds, IP32 6SR 01284 6587710 | sales@automatedenvironmentalsystems.co.uk... - Page 17 6.1.1 Keypad Lock and Unlock The keypad will automatically lock after 60 seconds of inactivity. An icon will show on the screen indicating the keypad is locked. a. Press " " for 3s to unlock the keypad. b. Repeat operation above to lock the keypad. * PLEASE UNLOCK THE KEYPAD BEFORE DOING THE FOLLOWING OPERATIONS.
-
Page 18: Button Operation Instruction
6.2 BUTTON OPERATION INSTRUCTION 6.2.1 Turn ON/OFF the Unit When the unit is OFF, you can press " " for 3s to turn on the unit. When the unit is ON, you can press " " for 3s to turn off the unit. Light up For example: Flashing... - Page 19 6.2.3 Running Mode Switch In the main interface, press " " or " " or " "to switch different running modes: Boost mode, Silent mode, Smart mode. When the Boost mode starts, icon " " will light up. When the Smart mode starts, icon " "...
- Page 20 6.2.5 Clock Settings In the main interface, you can press " " for 3s to set the Clock. Press " " again then you will see the numbers of the Hour digit are flashing. Press " " and " " to increase or decrease values. After completing settings of the Hour digit, you can press "...
-
Page 21: Timer Setting
Press " " to save and exit. 6.3 TIMER SETTINGS 6.3.1 Setting the Timer There are 3 groups of Timers in this controller. In the main interface, press " " to enter into Timer settings. You will see the number of group "1" is flashing, press "... - Page 22 Press " " Flashing Press " " Press " " Press " " or " " Flashing Press " " Press " " " or " Flashing Press " " - 20 - Automated Environmental Systems, Unit B, Anglian Lane, Bury St Edmunds, IP32 6SR 01284 6587710 | sales@automatedenvironmentalsystems.co.uk...
- Page 23 Press " " " or " Flashing Press " " Press " " or " " Flashing Press " " to save and exit. - 21 - Automated Environmental Systems, Unit B, Anglian Lane, Bury St Edmunds, IP32 6SR 01284 6587710 | sales@automatedenvironmentalsystems.co.uk...
- Page 24 6.3.2 Timer for Silent Mode * The Timer is specially designed for Silent mode. * In the main interface, press " " to enter into Timer settings, then you can press " " or " " to switch to set the Timer The setting method is same as above to set Timer or Timer * The Timer...
-
Page 25: Forced Defrost Mode
6.4 FORCED DEFROST MODE In the main interface, press " " for 5s to enter into forced defrost mode. The Icon " "will light up. Light up 7. ERROR CODES There will related error code showing on the controller screen and the icon "... - Page 26 Error code Error description Er 03 Water flow error Er 04 Winter antifreeze protection Er 05 High pressure error Er 06 Low pressure error Er 09 Communication error Er 10 Inverter module communication error Er 11 Lock the unit in limited time Er 12 High exhaust gas temperature protection Er 15...
-
Page 27: Maintenance And Inspection
8. MAINTENANCE AND INSPECTION Check the water supply device and release often. You should avoid the condition of no water or air entering into system, as this will influence unit's performance and reliability.You should clear the pool/spa filter regularly to avoid damage to the unit as a result of the dirty of clogged filter. ... - Page 28 taking place, the area around the equipment is to be surveyed to make sure that there are no flammable hazards or ignition risks. “No Smoking” signs shall be displayed. Ventilated area Ensure that the area is in the open or that it is adequately ventilated before breaking into the system or conducting any hot work.
- Page 29 Repairs to sealed components 1) During repairs to sealed components, all electrical supplies shall be disconnected from the equipment being worked upon prior to any removal of sealed covers, etc. If it is absolutely necessary to have an electrical supply to equipment during servicing, then a permanently operating form of leak detection shall be located at the most critical point to warn of a potentially hazardous situation.
- Page 30 Leak detection fluids are suitable for use with most refrigerants but the use of detergents containing chlorine shall be avoided as the chlorine may react with the refrigerant and corrode the copper pipe- work. If a leak is suspected, all naked flames shall be removed/ extinguished. If a leakage of refrigerant is found which requires brazing, all of the refrigerant shall be recovered from the system, or isolated (by means of shut off valves) in a part of the system remote from the leak.
- Page 31 When transferring refrigerant into cylinders, ensure that only appropriate refrigerant recovery cylinders are employed. Ensure that the correct number of cylinders for holding the total system charge is available. All cylinders to be used are designated for the recovered refrigerant and labelled for that refrigerant (i.e.
- Page 32 g) Start the recovery machine and operate in accordance with manufacturer's instructions. h) Do not overfill cylinders. (No more than 80 % volume liquid charge). i) Do not exceed the maximum working pressure of the cylinder, even temporarily. j) When the cylinders have been filled correctly and the process completed, make sure that the cylinders and the equipment are removed from site promptly and all isolation valves on the equipment are closed off.
-
Page 33: Wiring Diagrams
9. WIRING DIAGRAMS Please refer to the wiring diagram on the electric box. Models: iX7/ iX11/ iX14/ iX19/ iX21/ iX25 VCC GND HP LP - 31 - Automated Environmental Systems, Unit B, Anglian Lane, Bury St Edmunds, IP32 6SR 01284 6587710 | sales@automatedenvironmentalsystems.co.uk... - Page 34 Models: iX33/ iX40 - 32 - Automated Environmental Systems, Unit B, Anglian Lane, Bury St Edmunds, IP32 6SR 01284 6587710 | sales@automatedenvironmentalsystems.co.uk...
- Page 35 Models: iX33T/ iX40T - 33 - Automated Environmental Systems, Unit B, Anglian Lane, Bury St Edmunds, IP32 6SR 01284 6587710 | sales@automatedenvironmentalsystems.co.uk...
-
Page 36: Cable Specification
10. CABLE SPECIFICATION The Electrical supply must correspond to that indicated on the appliance. All supply cables have to be sized according to the appliance power and installation requirements. Please refer to table below: Heat Pump Model Cable Size iX7/ iX11 3 x 2.0mm iX14 3 x 2.5mm... -
Page 37: Wifi / App Application
11. WIFI / APP APPLICATION 11.1 Install APP Download and install the APP in the "app store" using your computer or smart phone. 1. Search "Smart life" 2.Recognize this 3. Install trademark 11.2 Startup Software After validating the installation, please click the icon "Smart life" to run the software. - Page 38 - 36 - Automated Environmental Systems, Unit B, Anglian Lane, Bury St Edmunds, IP32 6SR 01284 6587710 | sales@automatedenvironmentalsystems.co.uk...
- Page 39 - 37 - Automated Environmental Systems, Unit B, Anglian Lane, Bury St Edmunds, IP32 6SR 01284 6587710 | sales@automatedenvironmentalsystems.co.uk...
- Page 40 Input family name, location, room, then press "Done". - 38 - Automated Environmental Systems, Unit B, Anglian Lane, Bury St Edmunds, IP32 6SR 01284 6587710 | sales@automatedenvironmentalsystems.co.uk...
- Page 41 11.3 Add Device - 39 - Automated Environmental Systems, Unit B, Anglian Lane, Bury St Edmunds, IP32 6SR 01284 6587710 | sales@automatedenvironmentalsystems.co.uk...
- Page 42 2. Flashing 1. Press " "+ " " for 5s. Press " "+ " " for 5s to enter Internet Connection Mode, the " " icon will flash quickly. - 40 - Automated Environmental Systems, Unit B, Anglian Lane, Bury St Edmunds, IP32 6SR 01284 6587710 | sales@automatedenvironmentalsystems.co.uk...
- Page 43 Device added successfully. Then press “Done” to enter operation interface. - 41 - Automated Environmental Systems, Unit B, Anglian Lane, Bury St Edmunds, IP32 6SR 01284 6587710 | sales@automatedenvironmentalsystems.co.uk...
- Page 44 11.4 Operation Interface Device information Set temperature: Slide on the screen to adjust values. Current Running mode Timer settings Mode selection Switch ON/OFF - 42 - Automated Environmental Systems, Unit B, Anglian Lane, Bury St Edmunds, IP32 6SR 01284 6587710 | sales@automatedenvironmentalsystems.co.uk...
- Page 45 NOTES - 43 - Automated Environmental Systems, Unit B, Anglian Lane, Bury St Edmunds, IP32 6SR 01284 6587710 | sales@automatedenvironmentalsystems.co.uk...
- Page 46 NOTES - 44 - Automated Environmental Systems, Unit B, Anglian Lane, Bury St Edmunds, IP32 6SR 01284 6587710 | sales@automatedenvironmentalsystems.co.uk...
- Page 47 NOTES - 45 - Automated Environmental Systems, Unit B, Anglian Lane, Bury St Edmunds, IP32 6SR 01284 6587710 | sales@automatedenvironmentalsystems.co.uk...
Need help?
Do you have a question about the Proteam iX7 and is the answer not in the manual?
Questions and answers