Table of Contents
Advertisement
Available languages
Available languages
Quick Links
DAIK IN ROOM A IR C ON D I TI ON E R
OPERATION MANUAL
M Á Y Đ IỀU H Ò A KH Ô NG KHÍ DÂN D Ụ NG D A IK I N
HƯỚNG DẪN SỬ DỤNG
MO D ELS
MO D EL M ÁY
FTKZ25VVMV
FTKZ35VVMV
[Sticker attachment area]
[Khu vực dán nhãn]
Attach the SSID&KEY sticker of wireless LAN connecting
adapter to the sticker attachment area and keep safe.
Dán nhãn SSID&KEY của bộ tiếp hợp kết nối mạng LAN
không dây vào khu vực dán nhãn và cất giữ an toàn.
Advertisement
Chapters
Table of Contents

Related Manuals for Daikin FTKZ25VVMV


Summary of Contents for Daikin FTKZ25VVMV
- Page 1 M Á Y Đ IỀU H Ò A KH Ô NG KHÍ DÂN D Ụ NG D A IK I N HƯỚNG DẪN SỬ DỤNG MO D ELS MO D EL M ÁY FTKZ25VVMV FTKZ35VVMV [Sticker attachment area] [Khu vực dán nhãn] Attach the SSID&KEY sticker of wireless LAN connecting...
- Page 2 Features Enhanced comfort, energy savings and air cleaning DRY (Dehumidifying) This mode mixes dehumidified cool air with room air to adjust the air outlet temperature and remove moisture. Page 15 INTELLIGENT EYE The INTELLIGENT EYE sensor detects human movement and adjusts the right and left airflow direction.
-
Page 3: Table Of Contents
ON/OFF TIMER Operation ....System control via Smart Control DAIKIN VIETNAM APP INTRODUCTION Daikin Vietnam Application aims to ensure the interests of Wireless LAN connection ....consumers, improve service quality and customer experience. Through this app, customers can update information about Daikin air conditioning equipment, maintenance / repair history, and send service requests. -
Page 4: Read Before Operation
Read Before Operation Safety Precautions Read the precautions in this manual carefully This appliance is filled with R32. before operating the unit. • Keep this manual where the user can easily find it. • The precautions described herein are classified as WARNING and CAUTION. They both contain important information regarding safety. - Page 5 Read Before Operation CAUTION • Do not use the air conditioner for purposes other than those for which it is intended. Do not use the air conditioner for cooling precision instruments, food, plants, animals or works of art as this may adversely affect the performance, quality and/or longevity of the object concerned.
-
Page 6: Names Of Parts
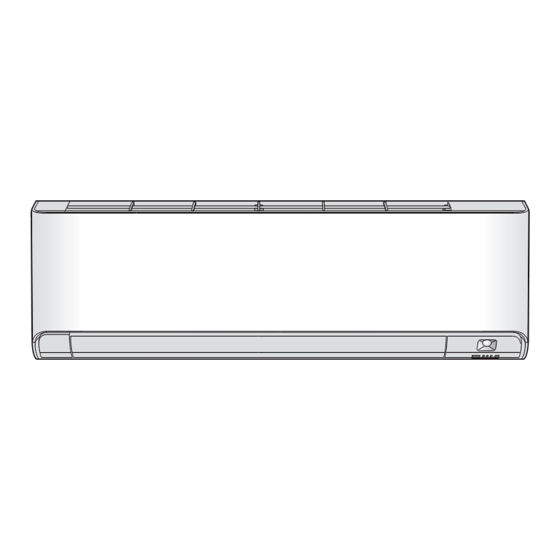
Read Before Operation Names of Parts Indoor Unit Air inlet „ Room temperature sensor and Room Front panel humidity sensor • Sense the air temperature and humidity around the unit. „ Streamer air inlet • Air inlet for streamer operation. INTELLIGENT EYE sensor Air outlet Flaps (horizontal blades) - Page 7 Read Before Operation „ Open the front panel Backside of the front panel Fixing tab Panel support plate Wireless LAN connecting adapter (inside) Page 7, 30 Streamer unit (inside) Prevents mold and allergens with the decomposition power of the streamer discharge. SSID&KEY sticker of wireless LAN connecting adapter Air filter...
- Page 8 Read Before Operation Names of Parts Wireless LAN connecting adapter The wireless LAN connecting adapter function requires the DAIKIN Mobile controller application for connecting to the air conditioner and controlling it via your smartphone or tablet over your network. ATTENTION •...
- Page 9 Read Before Operation Remote Controller Signal transmitter Display (LCD) • Displays the current settings. Receiver (In this illustration, each section is shown with all its displays on for the purpose of explanation.) • To use the remote controller, aim the transmitter at the indoor unit.
- Page 10 Read Before Operation Names of Parts „ Open the front cover MODE selector button • Selects the operation mode. (DRY/COOL/FAN) Page 14 CEILING button • CEILING airflow operation. Page 22 SENSOR button • INTELLIGENT EYE operation. Page 23 SWING button •...
-
Page 11: Preparation Before Operation
Read Before Operation Preparation Before Operation CAUTION Incorrect handling of batteries can result in injury from battery leakage, rupturing or heating, or lead to equipment failure. Please observe the following precautions and use safely. • If the alkaline solution from the batteries should get in the eyes, do not rub the eyes. Instead, immediately flush the eyes with tap water and seek the attention of a medical professional. - Page 12 Read Before Operation Preparation Before Operation „ To set the clock Press “ ” appears on the LCD. “ ” blinks. Press to set the clock to the present time. • Holding down rapidly increases or decreases the displayed time. Press •...
- Page 13 Read Before Operation „ To set the brightness of the indoor unit lamps Adjust the brightness of the indoor unit display as desired, or turn OFF the display. „ To set Press and hold the button for 2 seconds. • ‘‘ ”...
- Page 14 Read Before Operation Preparation Before Operation „ To set the position where the indoor unit is installed Set the indoor unit position to avoid direct airflow to walls. „ To set Press and hold the button for 2 seconds. • ‘‘ ”...
-
Page 15: Basic Operation
Basic Operation COOL · DRY · FAN Operation The air conditioner operates with the operation mode of your choice. From the next time on, the air conditioner will operate with the same operation mode. „ To start Press and select an operation mode. •... - Page 16 Basic Operation COOL · DRY · FAN Operation „ To change the temperature setting Press • Press to raise the temperature and press to lower the temperature. Each pressing of the button changes the temperature by 0.5°C. COOL operation DRY operation FAN operation The temperature setting 16.0~32.0°C...
-
Page 17: Adjusting The Airflow Rate
Basic Operation Adjusting the Airflow Rate You can adjust the airflow rate to increase your comfort. „ To adjust the airflow rate setting Press • Each pressing of changes the airflow rate setting in sequence. AUTO Indoor unit quiet Airflow rate 1-5 (Low to High) •... -
Page 18: Adjusting The Airflow Direction
Basic Operation Adjusting the Airflow Direction You can adjust the airflow direction to increase your comfort. CAUTION • Always use a remote controller to adjust the angles of the flaps and louvres. − If you attempt to move the flaps and louvres forcibly by hand when they are swinging, the mechanism may be damaged. - Page 19 Basic Operation The 3-D airflow direction Press , and set the vertical and horizontal airflow directions to “Swinging”. • “ ” and “ ” appear on the LCD. • The flaps (horizontal blades) and louvres (vertical blades) will move alternately. •...
-
Page 20: Useful Functions
Useful Functions MOLD PROOF Operation The inside of the air conditioner is dried to reduce the occurrence of mold and odour. [To operate automatically] „ To set Press and hold the button for 2 seconds. • “ ” appears on the LCD. •... - Page 21 Useful Functions [Flow of function] MOLD PROOF operation MOLD PROOF setting Stop with streamer Heat exchanger is dried for about 60 mins. Automatic During operation, flap start every time opens and air flows. After Automatic stop Set function stop during Cooling or Dry MOLD PROOF setting MOLD PROOF operation with streamer...
-
Page 22: Flash Streamer Air Cleaning Operation
Useful Functions FLASH STREAMER AIR CLEANING Operation The streamer generates a high-speed electron stream with a high oxidizing power, reducing bad odours and viruses. Together with the deodorizing filter (enzyme blue) and the air filters, this function cleans the air in the room. „... -
Page 23: Ceiling Airflow Operation
Useful Functions CEILING AIRFLOW Operation The flow of air will be in the upward direction while in COOL/FAN/DRY operation, which will provide a comfortable wind that will not come in direct contact with people. Airflow direction : Upward (ceiling spread airflow) COOL/FAN/DRY operation „... -
Page 24: Intelligent Eye Operation
Useful Functions INTELLIGENT EYE Operation The INTELLIGENT EYE sensor detects human movement and adjusts the right and left airflow direction. It can be set to avoid people or to direct airflow specifically at people. If no one is in the room for more than 20 minute, the operation automatically changes to energy saving operation. - Page 25 Useful Functions „ How INTELLIGENT EYE operation works The INTELLIGENT EYE sensor detects human movement and adjusts the right and left airflow direction. If no one is in the room for more than 20 minutes, the operation automatically changes to energy saving operation. The INTELLIGENT EYE sensor works differently depending on the situation.
-
Page 26: Powerful Operation
Useful Functions POWERFUL Operation POWERFUL operation quickly maximises the cooling effect in any operation mode. In this mode, the air conditioner operates at maximum capacity. „ To start Press during operation. • “ ” appears on the LCD. • POWERFUL operation ends in 20 minutes. Then the system automatically operates again with the previous settings which were used before POWERFUL operation. -
Page 27: Econo / Outdoor Unit Quiet Operation
Useful Functions ECONO / OUTDOOR UNIT QUIET Operation ECONO operation enables efficient operation by limiting the maximum power consumption. This function is useful to prevent the circuit breaker from tripping when the unit operates alongside other appliances on the same circuit. OUTDOOR UNIT QUIET operation lowers the noise level of the outdoor unit by changing the frequency and fan speed of the outdoor unit. -
Page 28: Timer Operation
TIMER Operation ON/OFF TIMER Operation Timer functions are useful for automatically switching the air conditioner on or off at night or in the morning. You can also use the ON TIMER and OFF TIMER together. [ON TIMER with a 24 hour clock display] (24 HOUR ON/OFF TIMER) „... - Page 29 TIMER Operation [OFF TIMER with a 24 hour clock display] (24 HOUR ON/OFF TIMER) „ To set • Check that the clock is correct. If not, set the clock to the present time. Page 11 Press “ ” appears on the LCD. “ ...
- Page 30 TIMER Operation ON/OFF TIMER Operation [ON/OFF TIMER with an hours remaining display] (COUNT UP-DOWN ON/OFF TIMER) • Check that the clock is correct. If not, set the clock to the present time. Page 11 Press and hold for about 5 seconds, when signal indicater ( ) blink, release your finger from the button.
-
Page 31: System Control Via Smart Control
• Before downloading the application software for installation, please read ‘‘Configuration” on Page 7 For Android phones 1) Open [Google Play]. 2) Search using the application name: [DAIKIN Mobile Controller]. 3) Follow the on-screen instructions for installation. For iOS phones 1) Open [App Store]. 2) Search using the application name: [DAIKIN Mobile Controller]. - Page 32 System control via Smart Control Wireless LAN connection Enabling/disabling the wireless LAN connecting adapter „ To enable While operation is stopped, press and hold the button for 5 seconds. • “ ” appears on the LCD. • “ ” (SP menu) blinks. Press and select SP menu .
- Page 33 • The wireless LAN connecting adapter lamp (orange) stays lit. If you fail to connect, refer to NOTE. Press to return to the default screen. Connect your smart phone to your home network. Open the Home screen of the DAIKIN Mobile Controller application. The air conditioner will be listed there (Fig.1). Fig. 1 NOTE Note on simple connection (WPS connection) •...
- Page 34 • The wireless LAN connecting adapter lamp (orange) stays lit. If you fail to connect, refer to NOTE. Connect your smart phone to your home network. Open the Home screen of the DAIKIN Mobile Controller application. The air conditioner will be listed there. Fig. 2 Reset connection setting to factory defaults.
-
Page 35: Care
Care Care and Cleaning CAUTION • Before cleaning, be sure to stop the operation and turn off the circuit breaker. • Do not touch the aluminum fins of the indoor unit. If you touch those parts, this may cause an injury. „... - Page 36 Care Care and Cleaning „ Air filter Open the front panel. Wash the air filters with water or clean them with • Hold the front panel by the sides and open it. vacuum cleaner. Backside of the front panel • It is recommended to clean the air filters every Fixing tab 2 weeks.
- Page 37 Care „ Filter (small) * For the applicable filter type, please refer to Page 34 Attaching Clean or replace. [Cleaning] Open the front panel and Deodorizing filter (enzyme blue) : Blue / pull out the air filters. Page 35 Titanium apatite deodorizing filter : Insert the filter.
- Page 38 Care Care and Cleaning „ Prior to a long period of non-use Operate the MOLD PROOF mode. Page 19 After operation stops, turn off the circuit breaker for the room air conditioner. Clean the air filters and reattach them. Page 35 To prevent battery leakage, take out the batteries from the remote controller.
-
Page 39: When The Need Arises
When the Need Arises Indoor unit The flaps do not start swinging immediately. • The air conditioner is adjusting the position of the flaps. The flaps will start moving soon. Operation does not start soon. Different sounds are heard. „ A sound like flowing water „... -
Page 40: Troubleshooting
When the Need Arises Troubleshooting Before making an inquiry or a request for repair, please check the following. If the problem persists, consult your dealer. Not a problem Check This case is not a problem. Please check again before requesting repairs. Air conditioner The air conditioner does not operate Case... - Page 41 When the Need Arises Air conditioner Mist comes out Case Description / what to check • This happens when the air in the room is cooled into mist by the cold airflow during COOL Mist comes out of the indoor unit. or other operation.
- Page 42 • Refer to the FAQ on: None of the above work. http://www.daikinthai.com/product/dmobile For instructions about how to operate the DAIKIN Mobile Controller application, please refer to the operation manual at http://www.daikinthai.com/product/dmobile „ Call your dealer immediately WARNING When an abnormality (such as a burning smell) occurs, stop operation and turn off the circuit breaker.
- Page 43 When the Need Arises „ Fault diagnosis by remote controller • In case the air conditioner is malfunctioning, you can check the error code via the remote controller before consulting with service personnel and informing them of the malfunction code. When is held down for about 5 seconds, “...
- Page 44 Tính năng Tăng cảm giác dễ chịu, tiết kiệm năng lượng và làm sạch không khí DRY (KHỬ ẨM) Chế độ này kết hợp không khí lạnh đã được khử ẩm với không khí trong phòng để điều chỉnh nhiệt độ cửa thoát gió và loại bỏ hơi ẩm. Trang 15 INTELLIGENT EYE (MẮT THẦN THÔNG MINH) Cảm biến MẮT THẦN THÔNG MINH sẽ...
- Page 45 Kết nối mạng LAN không dây .... sửa chữa, nhanh chóng gởi yêu cầu dịch vụ và cập nhập thông tin mới nhất từ Daikin Vietnam. Thực hiện theo hướng dẫn dưới Bảo quản đây để cài đặt ứng dụng.
-
Page 46: Đọc Trước Khi Vận Hành
Đọc trước khi vận hành Lưu ý về an toàn Đọc kỹ các lưu ý trong tài liệu hướng dẫn này Thiết bị này được nạp R32. trước khi vận hành thiết bị. • Để tài liệu hướng dẫn này ở nơi người dùng có thể dễ dàng tìm thấy. •... - Page 47 Đọc trước khi vận hành THẬN TRỌNG • Không sử dụng máy điều hòa cho các mục đích không được thiết kế. Không sử dụng máy điều hòa để làm mát các thiết bị đo chính xác, thức ăn, cây trồng, động vật hoặc tác phẩm nghệ thuật vì làm như vậy có thể ảnh hưởng xấu đến hiệu suất, chất lượng và/hoặc tuổi thọ...
-
Page 48: Tên Các Bộ Phận
Đọc trước khi vận hành Tên các bộ phận Dàn lạnh Cửa hút gió „ Cảm biến nhiệt độ phòng và Cảm biến Mặt nạ độ ẩm phòng • Nhận biết nhiệt độ và độ ẩm không khí xung quanh thiết bị. - Page 49 Đọc trước khi vận hành „ Mở mặt nạ Mặt sau của mặt nạ Chốt cố định Tấm đỡ mặt nạ Bộ tiếp hợp kết nối mạng LAN không dây (bên trong) Trang 7, 30 Thiết bị streamer (bên trong) Ngăn ngừa nấm mốc và...
- Page 50 Bộ tiếp hợp kết nối mạng LAN không dây Chức năng bộ tiếp hợp kết nối mạng LAN không dây yêu cầu bạn phải cài đặt ứng dụng DAIKIN Mobile Controller để kết nối với máy điều hòa và điều khiển máy bằng điện thoại thông minh hoặc máy tính bảng qua mạng.
- Page 51 Đọc trước khi vận hành Bộ điều khiển từ xa Bộ phát tín hiệu Hiển thị (LCD) • Hiển thị cài đặt hiện tại. Bộ thu (Trong hình minh họa này, mỗi mục được minh họa cùng với hình hiển thị của mục đó...
- Page 52 Đọc trước khi vận hành Tên các bộ phận „ Mở nắp trước Nút chọn CHẾ ĐỘ • Chọn chế độ hoạt động. (DRY/COOL/FAN) (KHỬ ẨM/LÀM MÁT/QUẠT) Trang 14 Nút CEILING (TRẦN) • Chế độ CEILING AIRFLOW (LUỒNG GIÓ TRÊN TRẦN). Nút SENSOR (CẢM BIẾN) Trang 22 •...
-
Page 53: Chuẩn Bị Trước Khi Vận Hành
Đọc trước khi vận hành Chuẩn bị trước khi vận hành THẬN TRỌNG Xử lý pin sai có thể dẫn đến thương tích do rò rỉ pin, nổ hoặc nóng lên hoặc dẫn đến lỗi thiết bị. Vui lòng tuân theo các chú ý sau và sử dụng thiết bị một cách an toàn. •... - Page 54 Đọc trước khi vận hành Chuẩn bị trước khi vận hành „ Để cài đặt đồng hồ Nhấn “ ” sẽ hiển thị trên màn hình LCD. “ ” nhấp nháy. Nhấn để cài đặt thời gian hiện tại cho đồng hồ. •...
- Page 55 Đọc trước khi vận hành „ Cách cài đặt độ sáng cho đèn trên dàn lạnh Điều chỉnh độ sáng cho màn hình trên dàn lạnh theo mong muốn hoặc TẮT màn hình. „ Để cài đặt Nhấn rồi giữ nút này trong 2 giây. •...
- Page 56 Đọc trước khi vận hành Chuẩn bị trước khi vận hành „ Cách đặt theo vị trí lắp đặt dàn lạnh Đặt vị trí dàn lạnh để tránh luồng gió phả trực tiếp vào tường. „ Để cài đặt Nhấn rồi giữ...
-
Page 57: Vận Hành Cơ Bản
Vận hành cơ bản Chế độ COOL · DRY · FAN (LÀM MÁT · KHỬ ẨM · QUẠT) Máy điều hòa vận hành ở chế độ hoạt động bạn chọn. Từ lần sau trở đi, máy điều hòa sẽ vận hành với cùng chế độ hoạt động đó. „... - Page 58 Vận hành cơ bản Chế độ COOL · DRY · FAN (LÀM MÁT · KHỬ ẨM · QUẠT) „ Để thay đổi cài đặt nhiệt độ Nhấn • Nhấn để tăng nhiệt độ và nhấn để giảm nhiệt độ. Mỗi lần nhấn nút sẽ thay đổi nhiệt độ 0,5°C. Chế...
-
Page 59: Điều Chỉnh Tốc Độ Gió
Vận hành cơ bản Điều chỉnh Tốc độ gió Bạn có thể điều chỉnh tốc độ gió để tăng cảm giác dễ chịu. „ Để điều chỉnh cài đặt tốc độ gió Nhấn • Mỗi lần nhấn sẽ thay đổi cài đặt tốc độ gió theo tuần tự. AUTO (TỰ... -
Page 60: Điều Chỉnh Hướng Gió
Vận hành cơ bản Điều chỉnh Hướng gió Bạn có thể điều chỉnh hướng gió để tăng cảm giác dễ chịu. THẬN TRỌNG • Luôn sử dụng bộ điều khiển từ xa để điều chỉnh các góc của cánh đảo gió và cửa gió. −... - Page 61 Vận hành cơ bản Hướng luồng gió 3 chiều Nhấn và và đặt hướng luồng gió dọc và ngang thành “Đang quay”. • “ ” và “ ” hiển thị trên màn hình LCD. • Các cánh đảo gió (cánh ngang) và cửa gió (cánh dọc) sẽ chuyển động lần lượt. •...
-
Page 62: Các Chức Năng Hữu Ích
Các chức năng hữu ích Chế độ MOLD PROOF (CHỐNG NẤM MỐC) Bên trong máy điều hòa được làm khô để giảm sự xuất hiện của nấm mốc và mùi hôi. [Cách vận hành tự động] „ Để cài đặt Nhấn rồi giữ... - Page 63 Các chức năng hữu ích [Dòng chức năng] Cài đặt MOLD PROOF Chế độ MOLD PROOF Ngừng (CHỐNG NẤM MỐC) (CHỐNG NẤM MỐC) với streamer Bộ trao đổi nhiệt được sấy khô trong khoảng 60 phút. Luôn tự động Khi hoạt động, cánh đảo khởi động gió...
-
Page 64: Chế Độ Flash Streamer Air Cleaning (Làm Sạch Streamer Tốc Độ Cao Bằng Khí)
Các chức năng hữu ích Chế độ FLASH STREAMER AIR CLEANING (LÀM SẠCH STREAMER TỐC ĐỘ CAO BẰNG KHÍ) Streamer tạo ra dòng electron tốc độ cao có khả năng oxy hóa cao, giúp giảm mùi hôi và vi rút. Cùng với tấm lọc khử mùi (enzym xanh lam) và tấm lọc khí, chức năng này sẽ... -
Page 65: Chế Độ Ceiling Airflow (Luồng Gió Trên Trần)
Các chức năng hữu ích Chế độ CEILING AIRFLOW (LUỒNG GIÓ TRÊN TRẦN) Luồng gió sẽ theo hướng lên trên khi ở chế độ COOL/FAN/DRY (LÀM MÁT/QUẠT/ KHỬ ẨM), đem đến luồng gió dễ chịu mà không tạt trực tiếp vào người. Hướng gió: Hướng lên (luồng gió... -
Page 66: Chế Độ Intelligent Eye (Mắt Thần Thông Minh)
Các chức năng hữu ích Chế độ INTELLIGENT EYE (MẮT THẦN THÔNG MINH) Cảm biến MẮT THẦN THÔNG MINH sẽ phát hiện chuyển động của người trong phòng và điều chỉnh hướng gió phải và trái. Có thể cài đặt để tránh người hoặc chỉnh luồng gió... - Page 67 Các chức năng hữu ích „ Cách thức hoạt động của chế độ INTELLIGENT EYE (MẮT THẦN THÔNG MINH) Cảm biến MẮT THẦN THÔNG MINH sẽ phát hiện chuyển động của người trong phòng và điều chỉnh hướng gió phải và trái. Nếu không có...
-
Page 68: Chế Độ Powerful (Làm Lạnh Nhanh)
Các chức năng hữu ích Chế độ POWERFUL (LÀM LẠNH NHANH) Chế độ POWERFUL (LÀM LẠNH NHANH) nhanh chóng tối ưu hóa hiệu quả làm mát ở mọi chế độ hoạt động. Ở chế độ này, máy điều hòa sẽ hoạt động với công suất tối đa. -
Page 69: Chế Độ Econo / Outdoor Unit Quiet (Tiết Kiệm / Dàn Nóng Chạy Êm)
Các chức năng hữu ích Chế độ ECONO / OUTDOOR UNIT QUIET (TIẾT KIỆM / DÀN NÓNG CHẠY ÊM) Chế độ ECONO (TIẾT KIỆM) cho phép vận hành hiệu quả bằng cách giới hạn mức tiêu thụ điện tối đa. Chức năng này rất hữu ích trong việc ngăn cầu dao điện bị... -
Page 70: Chế Độ Timer (Hẹn Giờ)
Chế độ TIMER (HẸN GIỜ) Chế độ ON/OFF TIMER (HẸN GIỜ BẬT/TẮT) Các chức năng hẹn giờ hữu ích để tự động bật hoặc tắt máy điều hòa vào ban đêm hoặc vào buổi sáng. Bạn có thể sử dụng đồng thời ON TIMER (HẸN GIỜ BẬT) và... - Page 71 Chế độ TIMER (HẸN GIỜ) [OFF TIMER (HẸN GIỜ TẮT) với màn hình đồng hồ 24 giờ] (24 HOUR ON/OFF TIMER (HẸN GIỜ BẬT/TẮT 24 GIỜ)) „ Để cài đặt • Đảm bảo đồng hồ chỉ đúng giờ. Nếu không, hãy cài đặt đồng hồ về thời gian hiện tại. Trang 11 Nhấn “...
- Page 72 Chế độ TIMER (HẸN GIỜ) Chế độ ON/OFF TIMER (HẸN GIỜ BẬT/TẮT) [ON/OFF TIMER (HẸN GIỜ BẬT/TẮT) hiển thị thời gian còn lại] (COUNT UP-DOWN ON/OFF TIMER) (HẸN GIỜ BẬT/ TẮT ĐẾM XUÔI-NGƯỢC) • Kiểm tra xác nhận rằng đồng hồ chạy đúng. Trang 11 Nếu không, hãy cài đặt đồng hồ...
-
Page 73: Điều Khiển Hệ Thống Qua Smart Control
Trang 7 Với điện thoại Android 1) Mở [Google Play]. 2) Tìm kiếm theo tên ứng dụng: [DAIKIN Mobile Controller]. 3) Làm theo hướng dẫn trên màn hình để cài đặt. Với điện thoại iOS 1) Mở [App Store]. 2) Tìm kiếm theo tên ứng dụng: [DAIKIN Mobile Controller]. - Page 74 Điều khiển hệ thống qua Smart Control Kết nối mạng LAN không dây Bật/tắt bộ tiếp hợp kết nối mạng LAN không dây „ Cách bật Khi thiết bị ngừng hoạt động, nhấn và giữ nút trong 5 giây. • “ ”...
- Page 75 để quay về màn hình mặc định. Kết nối điện thoại thông minh với mạng gia đình của bạn. Mở Màn hình chính của ứng dụng DAIKIN Mobile Controller. Máy điều hòa sẽ được liệt kê ở đó (Hình 1).
- Page 76 được, tham khảo GHI CHÚ. Kết nối điện thoại thông minh với mạng gia đình của bạn. Mở Màn hình chính của ứng dụng DAIKIN Mobile Controller. Máy điều hòa sẽ được liệt kê ở đó. Hình 2 Đặt lại cài đặt kết nối về...
-
Page 77: Bảo Quản
Bảo quản Bảo quản và vệ sinh THẬN TRỌNG • Trước khi vệ sinh, đảm bảo tắt hệ thống và ngắt cầu dao. • Không chạm vào các nhánh nhôm của dàn lạnh. Chạm vào những bộ phận đó có thể gây thương tích. „... - Page 78 Bảo quản Bảo quản và vệ sinh „ Tấm lọc khí Mở mặt nạ. Dùng nước để rửa các tấm lọc khí hoặc vệ sinh bằng • Giữ các cạnh của mặt nạ rồi mở ra. máy hút bụi. Mặt sau của mặt nạ •...
- Page 79 Bảo quản „ Tấm lọc (nhỏ) * Để biết có thể dùng loại tấm lọc nào, vui lòng tham khảo Trang 34 Lắp Vệ sinh hoặc thay thế. [Vệ sinh] Mở mặt nạ rồi kéo tấm lọc Tấm lọc khử mùi (enzim xanh lam): khí...
- Page 80 Bảo quản Bảo quản và vệ sinh „ Trước một thời gian dài không sử dụng Vận hành chế độ MOLD PROOF (CHỐNG NẤM MỐC). Trang 19 Sau khi ngừng vận hành, hãy ngắt cầu dao dành cho máy điều hòa trong phòng.
-
Page 81: Khi Nhu Cầu Tăng Cao
Khi nhu cầu tăng cao Các câu hỏi thường gặp Dàn lạnh Cánh đảo gió không bắt đầu quay ngay. • Máy điều hòa đang điều chỉnh vị trí của các cánh đảo gió. Cánh đảo gió sẽ sớm bắt đầu di chuyển. Chế... -
Page 82: Khắc Phục Sự Cố
Khi nhu cầu tăng cao Khắc phục sự cố Trước khi đặt câu hỏi hay yêu cầu sửa chữa, vui lòng kiểm tra lại như sau. Nếu vấn đề vẫn tiếp diễn, hãy tham vấn đại lý của bạn. Không phải là vấn đề Kiểm tra Trường hợp này không phải là... - Page 83 Khi nhu cầu tăng cao Máy điều hòa Sương mù tỏa ra Trường hợp Mô tả / nội dung kiểm tra • Tình huống này xảy ra khi không khí trong phòng được làm mát thành sương do luồng gió Sương mù...
- Page 84 • Tham khảo CHTG trên: quả. http://www.da kinthai.com/product/dmobile Để xem hướng dẫn về cách sử dụng ứng dụng DAIKIN Mobile Controller, vui lòng tham khảo tài liệu hướng dẫn sử dụng tại http://www.daikinthai.com/product/dmobile „ Hãy gọi ngay cho đại lý của bạn CẢNH BÁO...
- Page 85 Khi nhu cầu tăng cao „ Chẩn đoán lỗi bằng bộ điều khiển từ xa • Trong trường hợp máy điều hòa bị sự cố, bạn có thể kiểm tra mã lỗi thông qua bộ điều khiển từ xa trước khi tham vấn với nhân viên bảo dưỡng và báo cho họ biết mã sự cố này. Khi nhấn giữ...
- Page 86 GHI CHÚ...
- Page 88 Quick Reference The two-dimensional bar code is a manufacturing code. 3P620957-13J M20N093B (2106) HT...
Need help?
Do you have a question about the FTKZ25VVMV and is the answer not in the manual?
Questions and answers