Advertisement
Advertisement
Table of Contents

Related Manuals for Mitsubishi TNW4EA Series


Summary of Contents for Mitsubishi TNW4EA Series
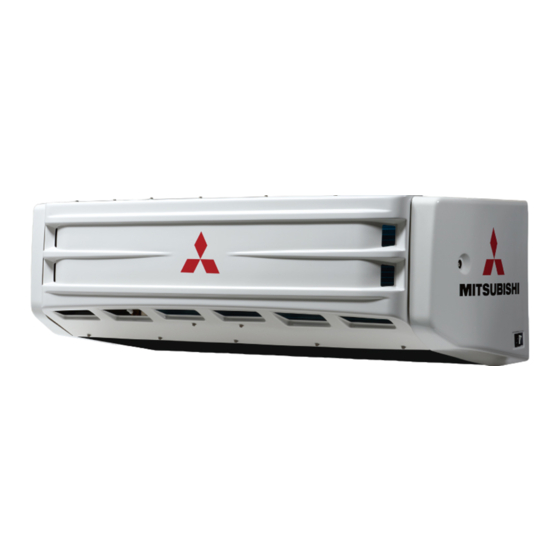
- Page 1 TNW4EA TNW5EA TNW6EA TNW7EA TSJ012A150A YEAR:2016...
- Page 2 Thank you for your purchase of the Mitsubishi Transport Refrigeration Unit. Please read this operation manual carefully in order to ensure that the refrigeration unit is used in a safe and proper manner. This manual explains the operation procedures and includes a brief troubleshooting section.
-
Page 3: Table Of Contents
Contents Items to Observe Parts Mode Display Each Switch Operation Operation Troubleshooting Loading Inspection Specifications... -
Page 4: Items To Observe
1. Items to Observe ( Safety Precautions ) Please read this section "Items to Observe (Safety Precautions)" before using, to ensure that the unit is used correctly. The precautions given here describe important information related safety, and must always be observed. •... - Page 5 Items to Observe Precautions for usage WARNING Always stop operation in an Do not insert fingers, rod, etc., in abnormal state. the air intake or outlet ports. Continuing operation in an abnormal state Since the fan is rotating at a high speed could lead to electric shocks or fires, etc.
- Page 6 Items to Observe WARNING Do not modify, apply undue force by, • Use 4-core cabtyre cables (con- ductor cross section with 5mm for example, bending forcibly, pulling more) for power cable. Do not con- hard, twisting, etc., place under a cargo or pinch the power cord.
- Page 7 Items to Observe WARNING Do not use the cabin controller when driving the vehicle. It could cause trouble. Do not leave combustible objects around the exaust pipe. These could catch fire. It is prohibited standing on, hanging down from, holding on or stepping on the refrigeration unit, or other similar acts.
- Page 8 Items to Observe Precautions for inspections WARNING Persons other than repair technicians or Use the rated fuse. qualified personnel must never disassemble or repair the unit. Use of an incorrectly rated fuse (wire or copper Incorrect disassembly or repairs could lead to injuries from wire) could lead to fires or electric shocks, etc.
-
Page 9: Parts
2 Parts Layout of main components Refrigeration unit Cabin controller Concent assy (1) Refrigeration unit Evaporator unit Label (F-Gas) Inside of view “A” CONT. RUN/AUTO changeover switch Condensing unit Main switch... - Page 10 Parts (2) Inner details of refrigeration unit Evaporator coil Evaporator fan (Two fans are used on TNW4EA.) Heat exchanger (Excluding TNW4EA) Evaporator unit Accumulator Suction pressure regulator valve (SPR) Muffler Dryer Control box Condensing unit Receiver Sight glass Alternator Sub-engine Condenser fan Side cover, sub-engine side...
-
Page 11: Mode Display
3 Mode Display (1) Switch names and functions 1 RUN/STOP switch 3 UP switch 5 SET switch Monitor display area 7 WHISPER switch 6 DEFROST switch 8 Digital display area 2 MODE switch 4 DOWN switch 1 RUN/STOP switch Turns the refrigeration unit RUN and STOP. 2 MODE switch Changes the screen display mode, etc. - Page 12 Mode Display (3) Mode displays and functions • Each time the [MODE] switch is pressed, the mode changes in the sequence shown below. • Refer to the reference page number for details of each mode's settings. • Following a mode change, the item 2 "Setting temperature / room temperature" display appears when the [SET] switch is pressed, or after a 10-second period without a switch input.
- Page 13 Mode Display (4) Set the user setting • • • • • • • • • Set the user setting display Press the [MODE] switch (8 times, when the refrigeration unit is stopped, or 7 times when running) to change the display to the user settings display at the digital display area. Setting the buzzer Press the [UP] or [DOWN] switch to change the display to the buzzer setting display.
- Page 14 Mode Display (5) Setting the time • • • CAUTION Before setting the time, be sure to specify an "ON" setting at the clock ON/OFF setting item in the user setting mode. Stop the refrigeration unit and verify that the current time setting displays. In this condition, press the [UP] or [DOWN] switch continuously for 3 seconds to change the display to the time setting display (Hour).
- Page 15 Mode Display (6) Displaying cumulative engine operating time 1 (with reset function) Displaying cumulative engine operating time 1 Press the [MODE] switch (9 times if the refrigeration unit is stopped and 8 times if it is running) to change the digital display to Cumulative Engine Operating Time 1 display. Press both the [UP] and [DOWN] switches simultaneously 3 seconds or longer to reset the cumulative engine operating time display.
- Page 16 Mode Display (8) Displaying the cumulative motor operating time Displaying the cumulative motor operating time Press the [MODE] switch (11 times if the refrigeration unit is stopped and 10 times if it is running) to change the digital display to the Cumulative Engine Operating Time 1 display. Press the [SET] switch.
- Page 17 Mode Display (10) Displaying the log setting The log setting display mode displays the fixed time interval (in minutes) when the log of the refrigeration unit’s data are recorded while it is running and while it is stopped. In the setting mode, the interval can be changed.
- Page 18 Mode Display (11) Printer output operation • • • • Connect the printer (optional) to the PRINT port. • Turn ON the vehicle’s ignition key to supply power to the printer. Displaying the printer output ON/OFF display Press the [MODE] switch (5 times when the refrigeration unit is stopped, or 4 times when running) to change the printer output ON/OFF display.
- Page 19 Mode Display (12) Displaying number of engine run/stop Displaying number of engine run/stop Press the [MODE] switch (12 times if the refrigeration unit is stopped, or 11 times if it is running) to change the digital display to the number of engine run/stop display. If you press the [SET] switch when the refrigeration unit is running, the digital display will change to the setting temperature/room temperature display.
-
Page 20: Each Switch Operation
4 Each Switch Operation (1) Usage of each switch 3 ELEC/DIESEL change over switch 2 CONT. RUN/AUTO 1 Main switch changeover switch CONT. RUN AUTO START/STOP Cover assy, side (R) Concent assy 1 Main switch ADVICE The refrigeration unit will not run unless the main switch and RUN/STOP switch on the cabin controller are set to "ON". - Page 21 Each switch Operation • When AUTO START/STOP is selected The sub-engine runs at two speeds. It starts by pressing the cabin controller’s [RUN/STOP] switch and when the room temperature is higher than the temperature set on the thermostat, it runs at high Setting temperature speed cooling, then changes to low speed cooling is maintained by...
-
Page 22: Operation
5 Operation (1) Operation procedure (a) For sub-engine drive CONT. RUN AUTO START/STOP (Cover assy, side R) • (Cabin controller) (Concent assy) Set the ELEC/DIESEL changeover switch on the concent assy in the “DIESEL” position. Turn the CONT. RUN/AUTO changeover switch to one of the settings. ADVICE Set to the CONT.RUN switch only when loading refrigerated products. - Page 23 Operation CAUTION If the room temperature is – 29ºC or lower, or 32ºC or higher, the room temperature display may not show the temperature in 0.5ºC units, but there is no problem with operation. Stopping the refrigeration unit If you press the cabin controller’s [RUN/STOP] switch a second time, the refrigeration unit will go OFF and cooling will stop.
- Page 24 Operation Operation ● When AUTO START/STOP is selected Cooling operation will be carried out automatically if the room temperature is higher than the setting temperature, and heating operation will be carried out automatically if the room temperature is lower than the setting temperature.
- Page 25 Operation (b) For motor drive • (Cabin controller) Turn the ELEC./DIESEL changeover switch to the “ELEC.” position. Connect the power supply for motor drive. (Concent assy) ADVICE Always press the [RUN/STOP] switch OFF and confirm that the unit is stopped before connecting the power supply.
- Page 26 Operation This cabin controller is equipped with a function that stores the setting temperature in ADVICE memory from the previous time the refrigeration unit was used (memory function). However, to be sure, please check the setting temperature in the top row of the digital display. CAUTION If the room temperature is –...
- Page 27 Operation (2) Defrost operation and manual defrost operation In order to prevent frost from building up in the evaporator, causing the cooling effect to deteriorate, the defrost timer (set at 6 hours when the unit is shipped from the factory) runs and carries out defrosting automatically.
- Page 28 Operation (3) Setting the ON Timer • • • • • Displaying the ON Timer Press the [MODE] switch (6 times when the refrigeration unit is stopped, or 5 times when running) to change the display to the ON timer display. Setting the ON Timer ON and OFF Press the [UP] or [DOWN] switch to change the display to the ON timer ON/OFF setting display.
- Page 29 Operation (4) Setting the OFF Timer • • • • • Displaying the OFF Timer Press the [MODE] switch (7 times when the refrigeration unit is stopped, or 6 times when running) to display the OFF timer display. Setting the OFF Timer ON/OFF Press the [UP] or [DOWN] switch to change the display to the OFF timer ON/OFF setting display.
- Page 30 Operation (5) WHISPER switch operation Slow speed operation display WHISPER switch If any noise is annoying at night or at the residential area since the sub-engine runs at a high speed, press this switch, and it will be forced to run at a low speed, thus suppressing the running noise. It will return, if it press once again.
-
Page 31: Troubleshooting
6 Troubleshooting (1) Identifying the detail of trouble with the cabin controller When the alarm symbol “ ” has turned on (the backlight blinks) or blinked at the monitor display area, check the detail of trouble on the refrigeration unit. Displaying the active alarm display Alarm symbol display When the alarm symbol “... - Page 32 Troubleshooting Alarm Refrigeration Error Contents Measures Code Unit State The sub-engine oil pressure switch has functioned. Refrigeration unit Sub-engine oil pressure switch operation stops Contact your dealer. is operating. The sub-engine water temperature switch has functioned. Refrigeration unit Sub-engine water temperature (Overheat) operation stops switch is operating.
- Page 33 Troubleshooting List of alarm codes (If the alarm display blinks) Alarm Refrigeration Error Contents Measures Code Unit State One of the fuses for the evaporator fan motor has blown. Refrigeration unit Evaporator fan motor fuse is blown. Inspect and replace the fuses F2 to F4 (TNW4EA: F2 to operation stops F3) in the control box.
- Page 34 Troubleshooting (2) Other troubleshooting Trouble Remedy (1) Frost has built up on the evaporator. If frost has built up, carry out manual Cooling performance is poor defrosting. (2) The door of the cooling van is not tight, causing outdoor air to enter. Inspect and repair so that there are not clearances.
-
Page 35: Loading
7 Loading (1) Preparation before loading (a) Clean the room. (b) Inspect the vehicle and the refrigeration unit. (c) Set the room temperature with the cabin controller. Note Pre-cool the room to the setting temperature before loading the cargo. The room temperature may reach 60°C in the direct sun during summer. - Page 36 Loading (2) Loading procedure (a) Load the cargo so that the cold air can circulate to all corners of the room. Leave a space between the cargo and the inner room wall as shown below. (b) Keep the top layer of the cargo as flat as possible. (c) Run the refrigeration unit after loading.
-
Page 37: Inspection
8 Inspection (1) Daily inspection Always carry out the following inspections before loading the cargo to prevent any unforseen accidents with the refrigeration unit, and to use the refrigeration unit safely. CAUTION Before starting inspection, make sure to turn “OFF” the main switch to put the refrigeration unit in the stopped condition, disconnect connections to battery terminals and the power supply plug and confirm that there is no dangerous condition. - Page 38 Inspection (d) Inspect whether anything is in contact with the movable sections. Condensing unit's moving sections (belt, sub-engine, compressor, motor, fan) Evaporator unit's moving sections (fan and fan motor) Continuing operation while wires, etc., are in contact with the above parts, could cause faults or fires, etc.
- Page 39 Inspection (g) Check of sub-engine speed If the sub-engine speed drops, faults could occur in the centrifugal clutch. Periodically check the sub-engine speed on the cabin controller. Checking of sub-engine speed If the mode switch and set switch are pressed simultaneously for 5 seconds while the refrigeration unit is running (while the setting temperature and room temperature are displayed on the cabin controller’s digital display), the cabin controller changes to the service maintenance mode.
- Page 40 Inspection (h) Inspection with sight glass Sight glass Run the refrigeration unit, and after ten minutes have passed, inspect the state of the refrigerant with the sight glass. Check If the check color is yellow, contact your dealer. color (i) When not using the refrigeration unit for a long time Once in 3-4 days, When not using the refrigeration unit for a long time, for about 15 minutes...
- Page 41 Inspection (3) Periodic inspection check sheet Customer’s Customer signature Inspection interval Model Delivery date Refrigeration Model Serial No. Inspection date Model Inspection company Vehicle Serial No. Inspector Inspection items Inspection result Remarks Engine oil quantity check Fuel oil quantity Engine oil, fuel leakage check Inspection of interference of moving sections Inspection of cooling water quantity, leakage (water hose, radiator, water pump) Engine revolution speed check...
- Page 42 Inspection (4) Details of applicable oils and coolant Applicable oil and antifreeze Volume Diesel fuel Sub-engine fuel (Intense cold season: cold water diesel fuel) Type API Class CD or higher 10W–30 <TNW4EA, TNW5EA: 5500cm > Sub-engine oil Summer:SAE30 <TNW6EA, TNW7EA: 9500cm >...
-
Page 43: Specifications
9 Specifications TNW4EA Type TNW4EA-25 TNW4EA-5 Item Ambient temperature 30 °C Return air Return air Return air Return air Conditions temperature temperature temperature temperature 2588 5249 2588 5249 Sub-engine drive 2039 4280 2039 4280 Motor drive Cooling/heating Functions -30~25 Room temperature °C -20~40 Outdoor temperature... - Page 44 Specifications TNW5EA Type TNW5EA-25 TNW5EA-5 Item Ambient temperature 30 °C Return air Return air Return air Return air Conditions temperature temperature temperature temperature 2552 5406 2552 5406 Sub-engine drive 2262 4243 2262 4243 Motor drive Cooling/heating Functions -30~25 Room temperature °C -20~40 Outdoor temperature...
- Page 45 Specifications TNW6EA Type TNW6EA-25 TNW6EA-5 Item Ambient temperature 30 °C Return air Return air Return air Return air Conditions temperature temperature temperature temperature 4107 6921 4107 6921 Sub-engine drive 2963 5345 2963 5345 Motor drive Cooling/heating Functions -30~25 Room temperature °C -20~40 Outdoor temperature...
- Page 46 Specifications TNW7EA Type TNW7EA-25 TNW7EA-5 Item Ambient temperature 30 °C Return air Return air Return air Return air Conditions temperature temperature temperature temperature 4397 7398 4397 7398 Sub-engine drive 3492 5941 3492 5941 Motor drive Cooling/heating Functions -30~25 Room temperature °C -20~40 Outdoor temperature...
- Page 48 TRANSPORTATION REFRIGERATION DEPARTMENT 3-1, ASAHI, NISHIBIWAJIMA-CHO, KIYOSU, AICHI, 452-8561, JAPAN Phone : 052-503-9312...
Need help?
Do you have a question about the TNW4EA Series and is the answer not in the manual?
Questions and answers