Table of Contents
Advertisement
Quick Links
Advertisement
Table of Contents

Subscribe to Our Youtube Channel
Related Manuals for Diamond ICE70A-R2


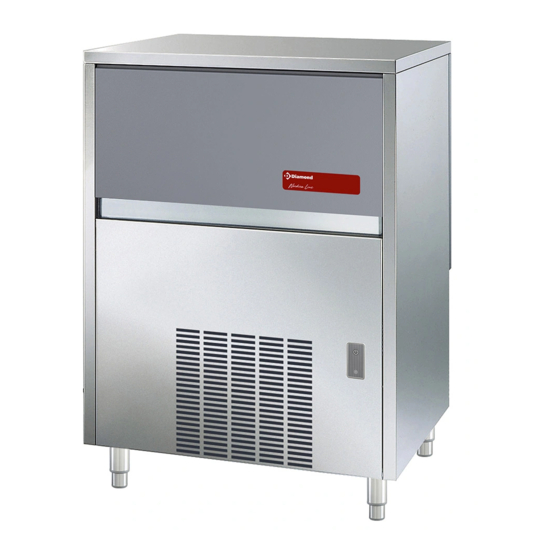
Summary of Contents for Diamond ICE70A-R2
- Page 1 07/2018 Mod: ICE70A-R2 Production code: CB640A HC...
- Page 2 EC DECLARATION OF CONFORMITY The above-mentioned apparatus is designed for the production of ice. We the undersigned declare under our own exclusive responsibility that the ice maker referred to in this declaration is in full compliance with the requirements of the following European Directives, standard, regulations, technical specifications and subsequent modifications.
-
Page 3: Table Of Contents
Dear Customer, Congratulations on having chosen a quality product which will certainly fully meet your expectations. Thank you for having purchased one of our products. Please read this instruction manual carefully before using your new automatic ice-cube maker. TABLE OF CONTENTS IMPORTANT ADVICE AND RECOMMENDATIONS TECHNICAL SPECIFICATIONS ADVICE ABOUT TRANSPORTATION... -
Page 4: Important Advice And Recommendations
The figures in this manual are of a general nature. Some details may therefore differ depending on the specific model. The Manufacturer declines all liability for any inaccuracies in this manual due to printing or transcription errors. The Manufacturer also reserves the right to make any modifications to the products that may be necessary or useful, also in the interests of the user, without impairing the products’... - Page 5 • in places with a minimum volume of 1 m for every 8 grams of R290; the quantity is indicated on the data plate affixed to the appliance • in places with flat, intact flooring, with no channels or grilles or other connections to the floors below, where in the event of leakage the gas could accumulate (R290 refrigerant is heavier than air and tends to accumulate downwards)
- Page 6 WARNING: Do not use mechanical devices such as screwdrivers, sharp tools or other means to speed up the defrosting process. WARNING: Keep the vents in the appliance casing or flush- mounting frame clear from obstructions. WARNING: Do not damage the refrigerant circuit. WARNING: Do not use electrical apparatus in the ice compartments WARNING: Do not keep explosive substances in the apparatus...
- Page 7 The manual describes the state of the art at the time of supply of the appliance, the distributor reserves the right to modify its appliances when deemed useful at any time, without having to update this document or document relating to previous production batches. The technical staff in charge of the activities performed on the appliance are responsible for the application of the safety requirements laid down in this manual, and shall ensure that the...
- Page 8 • do not rest objects on the appliance or in front of the ventilation grilles • always lift the appliance to move it, even slightly. Do not push or pull it • any use of the appliance other than for the production of ice using cold drinking water is to be considered as improper use •...
- Page 9 • do not touch the appliance with wet or damp hands or feet • do not use the appliance when you are barefoot • do not use extensions in premises such as bathrooms or shower rooms • do not tug on the power supply cable to disconnect it from the mains •...
-
Page 10: Advice About Transportation
The Manufacturer shall not be liable for any damage to the environment, animals, persons or objects caused by incorrect installation. 2 TECHNICAL DATA (Fig. 1) The voltage and frequency are given on the data plate on the appliance. Refer to this data plate to check compliance. Voltage (1), power (2), model (3), serial No. -
Page 11: Positioning For Flush-Mounting Models
This appliance: • must be installed in a place where it can be supervised by skilled personnel • must not be used outdoors • must not be installed in damp places or where it is liable to be sprayed with water •... -
Page 12: Start-Up
• make sure that the capacity of the power supply system suits the maximum power value indicated on the rating plate of the appliance • if the appliance comes supplied with a plug, prepare a socket controlled by an omnipolar circuit-breaker (7 in Fig. 4), with a contact- opening gap of not less than 3 mm, that provides full disconnection under overvoltage category III conditions, in accordance with national safety standards currently in force. -
Page 13: Main Causes Of Operating Failure
7 MAIN CAUSES OF OPERATING FAILURE Should the appliance fail to produce ice, before calling on the Authorized Technical Service Centre, first check carefully that: • the water supply tap (8 in Fig. 4), fitted during the installation phase, has been turned on •... -
Page 14: Air-Cooled Models
At least every two months, clean the filter (24) located on the water inlet solenoid valve, proceeding as follows: • switch off the electric power supply by means of the switch (7 in Fig. 4), fitted during installation, and disconnect the plug of the appliance from its socket (if any) •... - Page 15 TO ENSURE CORRECT CLEANING AND SANITIZING OF THE ICE-CUBE MAKER, PERFORM THE OPERATIONS DESCRIBED IN THIS MANUAL AT LEAST ONCE A MONTH. IMPORTANT: • the operations described in this manual must only be performed by skilled, authorised personnel • the appliance must be installed in a hygienically clean location; avoid premises such as cellars and storerooms, because poor hygiene promotes the formation and proliferation of bacteria in the ice-cube maker •...
-
Page 16: Note For Ice Maker With Continuous Delivery
Use a 200 mg/l solution of sodium hypochlorite and water (or a solution of ½ ounce of normal bleach to 1 gallon of water) or one of the solutions commonly used to disinfect babies’ feeding bottles; in this case, check that the sanitizing product is: •... -
Page 17: Note For Ice Maker With Daily Production Of 21 Kg
• open front door and remove ABS shell 11.3 NOTE FOR ICE MAKER WITH DAILY PRODUCTION OF 21 kg Perform cleaning and sanitizing operations as described in chapters 10 and 11. To reach pump filter (Fig. 24): • remove flag support assembly (1) and ice-cube slide (2) and extract overflow pipe (3) to drain water present in the basin •... -
Page 18: Operation
12.2 OPERATION The appliance has a thermostat probe in the ice bin, which stops ice production when the ice accumulated in the bin reaches the probe connected to the thermostat. When ice is taken from the bin, the thermostat will automatically reactivate ice production, thus creating a new supply of ice. FUNCTIONS ON/OFF PUSH BUTTON... -
Page 19: Notes For Cleaning Of Product With Electronic Timer (Optional Function)
Once the washing cycle is over, the appliance resumes its operation at the same point it was when the WASH push button was pressed. It is possible to exit at any time the washing cycle by pressing the WASH or the DEFR. push button. 13 NOTES FOR CLEANING OF PRODUCT WITH ELECTRONIC TIMER (OPTIONAL FUNCTION) To carry out the cleaning and the sanitizing operations, follow the directions below: 13.1 CLEANING... -
Page 20: Periods At A Standstill
4. with plastic tool, push the “W” button (wash position) through dedicated hole below “ON/OFF” button. (Fig 17) The blue LED starts to flash. The appliance will carry out a complete washing and rinsing cycle 5. switch off machine and disconnect it from electricity mains and water supply 6.
Need help?
Do you have a question about the ICE70A-R2 and is the answer not in the manual?
Questions and answers