Table of Contents
Advertisement
Available languages
Available languages
Quick Links
Advertisement
Table of Contents

Related Manuals for TriStar AC-5502AM


Summary of Contents for TriStar AC-5502AM
- Page 1 AC-5502AM...
-
Page 2: Safety Instructions
Instruction manual SAFETY INSTRUCTIONS • If the supply cord is damaged, it must be replaced by the manufacturer, its service agent or similarly • Please read this user’s manual carefully to ensure qualified persons in order to avoid a hazard. proper use, maintenance and installation. - Page 3 Air conditioner WARNING assessment specification. • Servicing shall only be performed as recommended • Do not use means to accelerate the defrosting by the equipment manufacturer. Maintenance process or to clean, other than those recommended and repair requiring the assistance of other by the manufacturer.
- Page 4 Instruction manual WARNING • Individuals who operate or work on the refrigerant circuit must have the appropriate certification Specific information regarding appliances with R 290 issued by an accredited organization that ensures refrigerant gas. competence in handling refrigerants according to •...
-
Page 5: Parts Description
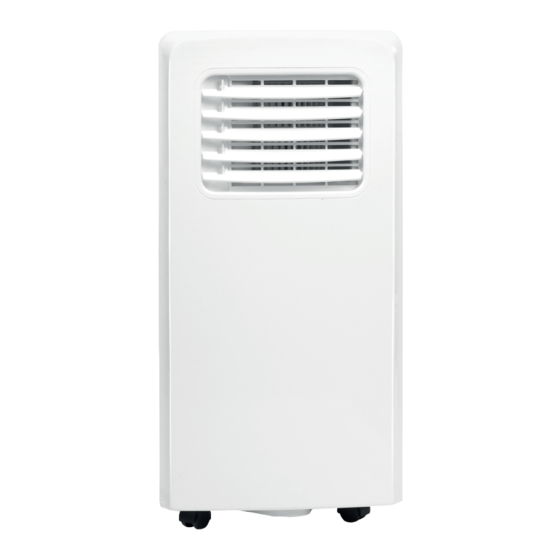
Air conditioner PARTS DESCRIPTION ACCESSORIES 1. Air inlet 2. Air outlet 3. Control panel Part Description 4. Power cord 5. Castor Hot-air exhaust hose Hose connector (window end) Hose connector (Air conditioner end) Window kit Remote controller... -
Page 6: Function Of Control Panel
Instruction manual FUNCTION OF CONTROL PANEL • Insert the power cord into an grounded AC220~240V/50Hz socket; • Press the POWER button to turn on the air-conditioner. • Operation temperature range: 18°C - 35°C 1. Power button • Check whether the exhaust hose has been mounted properly. 2. -
Page 7: Installation
Air conditioner Continuous Drainage • When you plan to leave this unit unused for a long time, please remove the rubber blockage from the drainage hole at the bottom of unit, and connect a drain hose to the lower fixing clip. All the water in the water tank will drain outside. -
Page 8: Cleaning & Maintenance
Instruction manual CLEANING MAINTENANCE • Twist both ends of the exhaust hose into the square fixing clip and the flat fixing clip. • Before cleaning, be sure to disconnect the unit from any electric supply • Insert the square fixing clip into openings at back of the air conditioner. outlet. - Page 9 Air conditioner GUARANTEE Troubles Possible Causes Suggested Remedies • This product is guaranteed for 24 months granted. Your warranty is valid if the product is used in accordance to the instructions and for the purpose for which it was created. In addition, the original purchase Auto Power-Off in •...
- Page 10 Gebruiksaanwijzing VEILIGHEIDSINSTRUCTIES • Kinderen moeten onder toezicht staan om ervoor te zorgen dat ze niet met het apparaat spelen. • U wordt verzocht om de gebruiksaanwijzing zorgvuldig • Als het netsnoer beschadigd is, moet het worden te lezen om het juiste gebruik, onderhoud en de juiste vervangen door de fabrikant, zijn servicebedrijf of een installatie te waarborgen.
- Page 11 Air conditioner WAARSCHUWING veilige manier te behandelen overeenkomstig de specificaties die in industrie van kracht zijn. • Gebruik geen middelen die het ontdooiproces • Reparaties mogen alleen worden uitgevoerd zoals versnellen of reinigingsmiddelen, dan deze die aanbevolen door de fabrikant van het apparaat. door de fabrikant zijn aanbevolen.
- Page 12 Gebruiksaanwijzing WAARSCHUWING mechanische storing wordt vermeden. • Personen die het koelcircuit bedienen of er aan Specifieke informatie voor apparaten met R 290 werken, moeten in het bezit zijn van een gepast koelgas. certificaat van een bevoegde organisatie, zodat • Lees alle waarschuwingen grondig door. deze personen bevoegd zijn om koelmiddelen op •...
-
Page 13: Beschrijving Van De Onderdelen
Air conditioner BESCHRIJVING VAN DE ONDERDELEN ACCESSOIRES 1. Luchttoevoer 2. Luchtuitlaat 3. Bedieningspaneel Onderdeel Beschrijving 4. Netsnoer 5. Kastoor Hetelucht afvoerslang Slangaansluiting (raamuiteinde) Slangaansluiting (Airconditioner uiteinde) Raamset Afstandsbediening... -
Page 14: Vóór De Ingebruikname
Gebruiksaanwijzing BEDIENEN VAN HET BEDIENINGSPANEEL • Plaats het netsnoer in een geaard AC220~240V/50Hz stopcontact; • Druk op de POWER toets om de airconditioner aan te schakelen • Bereik van werkingstemperatuur: 18°C - 35°C 1. Power toets • Controleer of de afvoerslang correct is gemonteerd. 2. - Page 15 Air conditioner Timer OFF setting • Wanneer de airconditioner op AAN staat, drukt u op de “Timer” toets en kiest een gewenst UIT tijdstip via de toetsen voor de temperatuur- en tijdsinstelling. • “Preset OFF Time” wordt weergegeven op het bedieningspaneel. •...
-
Page 16: Reiniging & Onderhoud
Gebruiksaanwijzing REINIGING ONDERHOUD • Draai beide uiteinden van de afvoerslang in de vierkante fixeerclip en de platte fixeerclip. • Zorg er vóór het reinigen voor dat het apparaat uit het stopcontact is gehaald. • Plaats de vierkante fixeerclip in de openingen aan de achterkant van •... -
Page 17: Garantie
Air conditioner GARANTIE • Dit product heeft een garantie van 24 maanden. Uw garantiebewijs is Probleem Mogelijke oorzaken Mogelijke oplossingen geldig als het product in overeenstemming met de instructies wordt gebruikt en voor het doel waarvoor het was gemaakt. Daarnaast moet het oorspronkelijke aankoopbewijs (factuur, kassabon of Auto •... -
Page 18: Consignes De Sécurité
Mode d’emploi CONSIGNES DE SÉCURITÉ • Les enfants doivent être surveillés pour veiller à ce qu’ils ne jouent pas avec l’appareil. • Veuillez lire attentivement ce manuel d'utilisateur pour • Si le cordon d’alimentation est défectueux, il doit assurer une utilisation, un entretien et une installation être remplacé... - Page 19 Climatiseur mobile MISE EN GARDE valide à jour,délivrée par une autorité d’évaluation accréditée du secteur industriel, qui l’autorise à • N’utilisez pas des moyensautres que ceux manipuler les réfrigérants en toute sécurité selon la recommandés par le fabricantpour nettoyer ou spécification d’évaluation reconnue dans l’industrie.
- Page 20 Mode d’emploi MISE EN GARDE • L’appareil doit être rangé de manière à prévenir une panne mécanique. Informations spécifiques sur les appareils à gaz • Les personnes utilisant ou travaillant sur le circuit réfrigérant R 290. de réfrigérant doivent avoir une attestation •...
-
Page 21: Description Des Pièces
Climatiseur mobile DESCRIPTION DES PIÈCES ACCESSOIRES 1. Entrée d'air 2. Sortie d'air 3. Panneau de commande Pièce Description 4. Cordon d’alimentation 5. Roulette Tuyau d'évacuation d’air chaud Connecteur de tuyau (extrémité fenêtre) Connecteur de tuyau (extrémité climatiseur) Kit de fenêtre Télécommande... -
Page 22: Fonctions Du Panneau De Commande
Mode d’emploi FONCTIONS DU PANNEAU DE COMMANDE • Brancher le cordon d’alimentation dans une prise CA220~240V/50Hz reliée à la terre ; • Appuyer sur le bouton POWER pour allumer le climatiseur. 1. Bouton Power • Plage de températures de fonctionnement : 18°C - 35°C 2. -
Page 23: Installation
Climatiseur mobile Réglage Minuteur ARRÊT • Lorsque le climatiseur est EN MARCHE, appuyer sur le bouton “Timer” et sélectionner une heure souhaitée d’ARRÊT avec les boutons de réglage de température et d’heure. • “Preset OFF Time” s’affiche sur le panneau de commandes. •... -
Page 24: Entretien Et Nettoyage
Mode d’emploi ENTRETIEN ET NETTOYAGE • Entrelacer les deux extrémités du tuyau d'évacuation dans le collier de fixation carré et le collier de fixation plat. • Avant de nettoyer, veiller à débrancher l’appareil de la prise électrique. • Insérer le collier de fixation carré dans les ouvertures à l’arrière du •... - Page 25 Climatiseur mobile GARANTIE Suggestions de Problèmes Causes possibles • Ce produit est garantit 24 mois. Votre garantie est valable si le produit solutions est utilisé conformément aux instructions et aux fins pour lesquelles il a été prévu. De plus, la preuve d'achat originale (facture, ticket de caisse Arrêt automa- •...
- Page 26 Bedienungsanleitung SICHERHEITSANWEISUNGEN örtlichen Sicherheitsanforderungen erfüllen. Prüfen Sie diese Anforderungen bei Bedarf. • Bitte lesen Sie dieses Benutzerhandbuch, um • Kinder müssen beaufsichtigt werden, damit die ordnungsgemäßen Nutzung, Wartung und sichergestellt wird, dass sie nicht mit dem Gerät spielen. Installation sicherzustellen. •...
- Page 27 Klimagerät WARNHINWEIS • Jede Person, die bei der Arbeit am oder dem Eingriff in den Kältemittelkreislauf beteiligt ist, muss • Verwenden Sie keine anderen als die vom Hersteller ein aktuell gültiges Zertifikat einer, in der Industrie empfohlenen Mittel, um den Auftauprozess zu anerkannten, Beurteilungsstelle besitzen, das seine beschleunigen oder zur Reinigung.
- Page 28 Bedienungsanleitung WARNHINWEIS und Explosionsgefahr führen, verhindert werden. • Das Gerät muss so gelagert werden, dass Genauere Informationen über Geräte mit R 290 mechanischen Ausfällen vorgebeugt wird. Kältemittelgas. • Personen, die den Kältemittelkreislauf in Betrieb • Lesen Sie sich alle Warnhinweise sorgfältig durch. nehmen oder daran arbeiten, müssen im Besitz •...
- Page 29 Klimagerät TEILEBESCHREIBUNG 1. Lufteintritt 2. Luftaustritt 3. Bedienfeld 4. Netzkabel 5. Lenkrolle...
-
Page 30: Vor Der Ersten Verwendung
Bedienungsanleitung ZUBEHÖR FUNKTION DES BEDIENFELDS 1. Power-Taste 2. Temperature-Tasten Teil Beschreibung 3. Mode-Taste 4. Fanspeed- Einstelltaste 5. Timer on/off-Taste Heißluft-Austrittsschlauch Schlauchanschluss (Fensterende) Schlauchanschluss (Klimaanla- VOR DER ERSTEN VERWENDUNG genende) Vor Betriebsbeginn: • Finden Sie einen Standort mit nahe gelegener Stromversorgung. •... - Page 31 Klimagerät • Stecken Sie das Netzkabel in eine geerdete 220~240V/50Hz- • Die EINSCHALT-Zeit kann auf jede Zeit von 0-24 Uhr eingestellt Wechseslstrom-Steckdose; werden. • Drücken Sie die POWER-Taste, um die Klimaanlage einzuschalten. • Betriebstemperaturbereich: 18°C- 35°C Timer-Stellung AUS • Prüfen Sie, ob der Abluftschlauch richtig montiert wurde. •...
- Page 32 Bedienungsanleitung INSTALLATION • Drehen Sie beide Enden des Abluftschlauchs in die quadratische Halteklammer und die flache Halteklammer. • Eine entfernbare Klimaanlage muss an einem vollständig flachen und • Führen Sie die quadratische Halteklammer in die Öffnungen auf der leeren Platz installiert werden. Blockieren Sie den Luftaustritt nicht. Der Rückseite der Klimaanlage ein.
-
Page 33: Fehlersuche
Klimagerät REINIGUNGSWARTUNG • Vor der Reinigung müssen Sie das Gerät von jeder Stromversorgung trennen. Fehler Mögliche Ursachen Empfohlene Schritte • Reinigen Sie zuerst die Oberfläche mit einem neutralen Reinigungsmittel und einem feuchten Tuch, dann wischen Sie das Das Gerät • Die Türen oder Fenster sind nicht •... - Page 34 Bedienungsanleitung GARANTIE • Dieses Produkt hat eine 24-monatige Garantie. Ihre Garantie ist gültig, wenn das Produkt gemäß den Anweisungen und für die Zwecke, für die es geschaffen wurde, benutzt wird. Darüber hinaus muss der ursprüngliche Kaufbeleg (Rechnung, Kassenbon oder Quittung) mit dem Kaufdatum, dem Namen des Händlers und der Artikelnummer des Produkts eingereicht werden.
-
Page 35: Instrucciones De Seguridad
Aire acondicionado INSTRUCCIONES DE SEGURIDAD reemplazarlo el fabricante, su agente de servicio o personas con una cualificación similar con el fin de • Lea atentamente este manual para garantizarse evitar situaciones de peligro. una correcta instalación, mantenimiento y uso del •... - Page 36 Manual de usuario ADVERTENCIA o en la apertura de un circuito refrigerante debe contar con un certificado vigente emitido por una • No utilice otros medios que no sean los entidad evaluadora acreditada por la industria, el recomendados por el fabricante para acelerar cual autorice su competencia para la manipulación el proceso de descongelación ni para limpiar el segura de refrigerantes de acuerdo con una...
- Page 37 Aire acondicionado ADVERTENCIA • El aparato debe guardarse de forma que se evite cualquier error mecánico. Información específica sobre aparatos con gas • Las personas que manejen o trabajen en el refrigerante R290. circuito refrigerante deben tener la certificación • Lea detenidamente todas las advertencias. apropiada emitida por una organización acreditada •...
-
Page 38: Descripción De Las Piezas
Manual de usuario DESCRIPCIÓN DE LAS PIEZAS 1. Entrada de aire 2. Salida de aire 3. Panel de control 4. Cable de corriente 5. Rueda... -
Page 39: Funciones Del Panel De Control
Aire acondicionado ACCESORIOS FUNCIONES DEL PANEL DE CONTROL 1. Botón Power 2. Botones Temperature Piezas Descripción 3. Botón Mode 4. Ajuste Fan speed 5. Botón de encendido/apagado Timer Tubo de extracción de aire caliente Adaptador (para la ventana) Adaptador del tubo de extracción ANTES DE USAR POR PRIMERA VEZ (para el aparato de aire) Antes de utilizar el aparato:... -
Page 40: Instalación
Manual de usuario • Enchufe el cable a una fuente de alimentación AC220 ~ 240V/50Hz con Ajuste del apagado del temporizador toma de tierra; • Cuando el aire acondicionado esté ENCENDIDO, pulse el botón • Presione el botón POWER para encender el aire acondicionado. “Timer”... - Page 41 Aire acondicionado • Coloque un extremo del tubo de extracción en el adaptador del tubo de extracción y gírelo, y el otro extremo en el adaptador para el kit de ventana. • Inserte el adaptador en el hueco en la parte trasera del aire acondicionado.
-
Page 42: Limpieza Y Mantenimiento
Manual de usuario LIMPIEZA Y MANTENIMIENTO • Desenchufe el cable de corriente antes de limpiar el aparato. Problemas Causas posibles Soluciones sugeridas • Primero limpie la superficie con un paño húmedo y un detergente neutro y luego utilice un paño seco. El aparato no •... -
Page 43: Medio Ambiente
Aire acondicionado GARANTÍA • Este producto tiene una garantía de 24 meses. Su garantía será válida si el producto se usa según las instrucciones y con el fin para el que ha sido creado. Además, deberá mandarse el documento original de compra (factura, tique o recibo) con la fecha de compra, el nombre del vendedor y el código de artículo del producto. -
Page 44: Instruções De Segurança
Manual de utilizador INSTRUÇÕES DE SEGURANÇA • As crianças devem ser supervisionadas para garantir que não brincam com o aparelho. • Leia este manual do utilizador com cuidado para • Se o cabo de alimentação ficar danificado, terá de garantir uma utilização, manutenção e instalação ser substituído pelo fabricante, respetivo agente de corretas. - Page 45 Ar Condicionado AVISO certificado atual válido de uma autoridade de avaliação industrial acreditada, que autorize a • Não use meios para acelerar o processo de sua competência em trabalhar com líquidos de descongelação ou para limpar diferentes dos meios refrigeração em segurança, de acordo com uma recomendados pelo fabricante.
- Page 46 Manual de utilizador AVISO fornos ou outras fontes de ignição. • O aparelho tem de ser armazenado de modo a Informações específicas relativas a aparelhos com gás evitar uma falha mecânica. refrigerante R 290. • As pessoas que operam ou trabalham no circuito •...
-
Page 47: Descrição Das Peças
Ar Condicionado DESCRIÇÃO DAS PEÇAS 1. Entrada de ar 2. Saída de ar 3. Painel de controlo 4. Cabo de alimentação 5. Rodas... -
Page 48: Antes Da Primeira Utilização
Manual de utilizador ACESSÓRIOS FUNÇÃO DO PAINEL DE CONTROLO 1. Botão Power 2. Botões de Temperature Peça Descrição 3. Botão Mode 4. Botão de ajuste Fan speed 5. Botão de ligação/desligamento Timer Bocal de exaustão de ar quente Conetor do bocal (Extremidade da janela) Conetor do bocal (Extremidade do ANTES DA PRIMEIRA UTILIZAÇÃO... - Page 49 Ar Condicionado • Insira o cabo de alimentação numa tomada AC220~240V/50Hz com • O tempo de LIGAÇÃO pode ser regulado em qualquer momento, em ligação à terra; 0-24 horas. • Prima o botão POWER para ligar o ar condicionado. • Gama de temperatura de funcionamento: 18°C - 35°C Definição de DESLIGAMENTO do temporizador •...
- Page 50 Manual de utilizador INSTALAÇÃO • Dobre ambas as extremidades do bocal de exaustão no clipe de fixação quadrado e clipe de fixação plano. • Um ar condicionado amovível deverá ser instalado numa superfície plana • Insira o clipe de fixação quadrado nas aberturas na parte posterior do e com espaço à...
-
Page 51: Manutenção De Limpeza
Ar Condicionado MANUTENÇÃO DE LIMPEZA • Antes de limpar, certifique-se de que desliga a unidade de todas as Problemas Causas Possíveis Soluções Sugeridas tomadas de alimentação elétrica. • Primeiro, limpe a superfície com um detergente neutro e um pano A unidade •... - Page 52 Manual de utilizador GARANTIA • Este produto tem uma garantia de 24 meses. A sua garantia é válida se o produto for usado de acordo com as instruções e para o fim para o qual foi criado. Além disso, a compra original (fatura, talão de vendas ou recibo) deverá...
-
Page 53: Instrukcje Dotyczące Bezpieczeństwa
Klimatyzator INSTRUKCJE DOTYCZĄCE BEZPIECZEŃSTWA elektrycznych. W razie konieczności prosimy sprawdzić wymogi wspomnianych przepisów. • Celem zapewnienia właściwego montażu, użytkowania • Dzieciom należy zapewnić nadzór, aby nie używały i konserwacji urządzenia prosimy uważnie zapoznać się urządzenia do zabawy. treścią niniejszej instrukcji obsługi. •... - Page 54 Instrukcja obsługi UWAGA przez branżowy organ oceniający, który uznaje kompetencje bezpiecznego stosowania czynników • Nie używaj środków przyspieszających proces chłodniczych zgodnie z uznaną branżową odszraniania lub czyszczenia, innych niżzalecane specyfikacją oceny . przez producenta. • Serwisowanie powinno być wykonywane zgodnie •...
- Page 55 Klimatyzator UWAGA zapłonem czynnika chłodniczego przez elektryczne nagrzewnice, piece lub inne źródła zapłonu. Szczegółowe informacje dotyczące urządzeń z gazem • Urządzenie musi być przechowywane w taki chłodniczym R 290. sposób, aby zapobiec awarii mechanicznej. • Dokładnie przeczytaj wszystkie ostrzeżenia. • Osoby, które obsługują lub pracują z obiegiem •...
-
Page 56: Opis Elementów Urządzenia
Instrukcja obsługi OPIS ELEMENTÓW URZĄDZENIA 1. Wlot powietrza 2. Wylot powietrza 3. Panel sterowania 4. Kabel zasilający 5. Kółko samonastawne... -
Page 57: Funkcje Panelu Sterowania
Klimatyzator AKCESORIA FUNKCJE PANELU STEROWANIA 1. Przycisk zasilania (Power) 2. Przyciski regulacji temperatury (Temperature) Element Opis 3. Przycisk trybu roboczego (Mode) 4. Przycisk regulacji prędkości wentylatora (Fan speed) 5. Przycisk włączenia/wyłączenia regulatora czasowego (Timer) Elastyczna rura wylotowa Złączka rurowa (po stronie okna) Złączka rurowa (po stronie kli- PRZED PIERWSZYM UŻYCIEM matyzatora) - Page 58 Instrukcja obsługi • Wtyczkę kabla zasilającego włożyć do uziemionego gniazda prądu Regulator czasowy zmiennego 220~240V/50Hz; • Nacisnąć przycisk zasilania POWER, co spowoduje włączenie Ustawienie WŁĄCZENIA regulatora czasoweg klimatyzatora. • Gdy klimatyzator jest WYŁĄCZONY, należy nacisnąć przycisk „Timer”, • Zakres temperatury roboczej: 18°C - 35°C oraz przyciskami regulacji temperatury i czasu ustawić...
- Page 59 Klimatyzator zbiornika. (W przypadku uszkodzenia pompy wodnej, i gdy zbiornik Montaż rury wyciągowej wody jest całkowicie napełniony, należy zdjąć gumową zatyczkę otworu • Końcówki rury wyciągowej należy wkręcić odpowiednio do drenażowego w dolnej części klimatyzatora, a woda wyleje się na kwadratowego zacisku montażowego oraz płaskiego zacisku zewnątrz.) montażowego.
-
Page 60: Wykrywanie I Usuwanie Usterek
Instrukcja obsługi Montaż zestawu w przesuwnym skrzydle okiennym związków chemicznych. Zestaw przesuwnego skrzydła okiennego można montować zarówno „w • Urządzenia nie wolno polewać wodą. poziomie jak i w pionie, nie ma to istotnego wpływu na sam montaż. • W przypadku uszkodzenia klimatyzatora należy skontaktować się ze sprzedawcą... - Page 61 Klimatyzator GWARANCJA Samoczynne • Zabezpieczenie termiczne. • Urządzenie należy wyłączanie urządzenia W sytuacji, gdy temperatura ponownie uruchomić przy • Niniejszy produkt objęty jest 24-miesięczną gwarancją. Gwarancja jest w trybie ogrzewania u wylotu powietrza niższej temperaturze w ważna, jeśli produkt jest używany zgodnie z instrukcjami i zgodnie przekroczy 70ºC urządzenie pomieszczeniu.
-
Page 62: Istruzioni Importanti Per La Sicurezza
Manuale utente ISTRUZIONI IMPORTANTI PER LA SICUREZZA • Se il cavo di alimentazione è danneggiato, farlo sostituire dal produttore, dall'agente addetto • Leggere attentamente questo manuale d'uso per all'assistenza o altro tecnico qualificato per evitare garantire uso, manutenzione e installazione corretti. pericoli. - Page 63 Condizionatore d'aria AVVERTENZA circuito refrigerante deve essere in possesso di una valido certificato rilasciato da un'autorità di • Non utilizzare mezzi per accelerare il processo valutazione accreditata dal settore, che autorizza di sbrinamento o per la pulizia, diversi da quelli la competenza a manipolare refrigeranti in raccomandati dal fabbricante.
- Page 64 Manuale utente AVVERTENZA causata da riscaldatori elettrici, stufe o altre fonti di ignizione. Informazioni specifiche concernenti gli apparecchi • L'apparecchio deve essere conservato in modo tale con gas refrigerante R 290. da prevenire il guasto meccanico. • Leggere attentamente tutte le avvertenze. •...
- Page 65 Condizionatore d'aria DESCRIZIONE PARTI 1. Ingresso aria 2. Uscita aria 3. Pannello di comando 4. Cavo di alimentazione 5. Rotelle...
-
Page 66: Prima Del Primo Utilizzo
Manuale utente ACCESSORI FUNZIONI DEL PANNELLO COMANDI 1. Tasto Power 2. Tasti Temperature Parte Descrizione 3. Tasto Mode 4. Tasto Fan speed per regolazione ventole 5. Tasto Timer on/off Tubo di uscita dell’aria Connettore del tubo (lato finestra) Connettore del tubo (lato con- PRIMA DEL PRIMO UTILIZZO dizionatore) Prima di iniziare le operazioni descritte in questa sezione:... - Page 67 Condizionatore d'aria Impostazione SPEGNIMENTO timer • Inserire il cavo di alimentazione in una presa di corrente CA 220~240V/50Hz dotata di messa a terra; • Quando il condizionatore è ACCESO, premere il tasto “Timer” e • Premere il tasto POWER per accendere il condizionatore. selezionare l’ora di spegnimento desiderata utilizzando i tasti di •...
-
Page 68: Installazione
Manuale utente INSTALLAZIONE • Ruotare entrambe le estremità del tubo di scarico nella clip di fissaggio quadrata e nella clip di fissaggio piatta. • Un condizionatore portatile deve essere installato in un ambiente vuoto • Inserire la clip di fissaggio quadrata nelle apertura sulla parte e su superficie piana, con spazio tutto intorno. -
Page 69: Pulizia E Manutenzione
Condizionatore d'aria PULIZIA E MANUTENZIONE • Prima della pulizia, assicurarsi di scollegare l’unità da qualsiasi presa Problemi Possibili cause Rimedi consigliati elettrica. • Pulire prima la superficie con un detergente neutro ed un panno L’unità non • Le porte o le finestre non sono chiuse. •... -
Page 70: Garanzia
Manuale utente GARANZIA • Questo prodotto è coperto da una garanzia di 24 mesi. La garanzia è valida se il prodotto è usato secondo le istruzioni e per la finalità per la quale è stato creato. Inoltre l’acquisto originale, (fattura, scontrino o ricevuta) deve essere presentato con la data di acquisto, il nome del rivenditore ed il codice articolo del prodotto. - Page 71 Luftkonditionering SÄKERHETSINSTRUKTIONER • Barn ska övervakas så att de inte leker med utrustningen. • Läs denna användarhandbok noggrant för att • Om nätkabeln är skadad måste den bytas ut av säkerställa korrekt användning, underhåll och. tillverkaren, dess servicerepresentant eller liknande •...
- Page 72 Bruksanvisning VARNING värderingsspecifikation. • Service skall endast utföras såsom rekommenderas • Använd inga hjälpmedel för att snabba på av utrustningens tillverkare. Underhåll och avfrostningen eller för rengöring annat än som reparationer som kräver assistans av annan rekommenderas av tillverkaren. kunnig personal skall utföras under övervakning •...
- Page 73 Luftkonditionering VARNING kylkretsar måste ha lämplig certifiering utgiven av en ackrediterad organisation som garanterar Specifik information beträffande apparaten med R kompetensen för hantering av kylmedel i enlighet 290 kylgas. med en specifik utvärdering som godkänts i • Läs noga igenom alla varningar. förbindelse med industrin.
-
Page 74: Beskrivning Av Delarna
Bruksanvisning BESKRIVNING AV DELARNA TILLBEHÖR 1. Luftinlopp 2. Luftutlopp 3. Kontrollpanel Beskrivning 4. Strömkabel 5. Castor Slang för varmluftsutlopp Slanganslutning (fönsteränden) Slanganslutning (luftkonditioner- aränden) Fönsterpaket Fjärrkontroll... -
Page 75: Före Första Användning
Luftkonditionering KONTROLLPANELENS FUNKTION • Sätt i strömkabeln i ett jordat eluttag med 220~240 V/50 Hz AC; • Tryck på POWER-knappen för att slå på luftkonditioneraren. • Drifttemperaturintervall: 18 °C–35 °C 1. Power-knapp • Kontrollera att utloppsslangen har monterats korrekt. 2. Temperature-knappar •... - Page 76 Bruksanvisning Timerns inställning AV • När luftkonditioneraren är påslagen, tryck på knappen ”Timer” och välj önskad avstängningstid med inställningsknapparna för temperatur och tid. • ”Preset OFF Time” visas på driftpanelen. • Avstängningstiden kan ställas in på valfri tid inom 0–24 timmar. Kontinuerlig dränering •...
- Page 77 Luftkonditionering UNDERHÅLLSRENGÖRING • För in båda ändarna av utloppsslangen i den fyrkantiga fästklämman och den platta fästklämman. • Innan du rengör enheten, koppla bort den från alla elektriska • För in den fyrkantiga fästklämman i öppningarna bak på anslutningar. luftkonditioneraren. •...
- Page 78 Bruksanvisning GARANTI Problem Möjliga orsaker Förslag på lösningar • Denna produkt har 24 månaders garanti. Din garanti gäller om Strömmen stängs • Överhettningsskydd, • Starta om enheten när produkten används i enlighet med instruktionerna och det syfte för av automatiskt i enheten stängs av rummets temperatur är vilket den konstruerats.
-
Page 79: Bezpečnostní Pokyny
Klimatizace BEZPEČNOSTNÍ POKYNY • Je-li napájecí šňůra poškozena, musí být vyměněna výrobcem, jeho servisním střediskem nebo • Přečtěte si laskavě pečlivě tento manuál, aby se podobně kvalifikovanou osobou, aby se předešlo zajistilo řádné používání, údržba a instalace. nebezpečí. • Toto zařízení je vhodné pouze pro vnitřní použití. •... - Page 80 Návod na použití VÝSTRAHA který autorizuje její způsobilost pro bezpečnou manipulaci s chladivy v souladu s uznávanými • Nepoužívejte prostředky pro urychlení procesu specifikacemi posuzování. odmrazení nebo čištění kromě těch, které • Zajišťování servisu musí být prováděno pouze doporučuje výrobce. tak, jak doporučujte výrobce zařízení.
- Page 81 Klimatizace VÝSTRAHA • Zařízení musí být uskladněno takovým způsobem, aby bylo zabráněno mechanickým poškozením. Konkrétní informace, týkající se zařízení s chladivovým • Osoby, které budou provozovat nebo pracovat plynem R290. na chladivovém okruhu, musí mít příslušnou • Důkladně si přečtěte všechna upozornění. certifikaci, vydanou akreditovanou organizací, jež...
-
Page 82: Popis Součástí
Návod na použití POPIS SOUČÁSTÍ PŘÍSLUŠENSTVÍ 1. Přívod vzduchu 2. Odvod vzduchu 3. Ovládací panel Díl Popis 4. Napájecí šňůra 5. Kolečko Hadice pro odvod horkého vzduchu Konektor hadice (konec u okna) Konektor hadice (konec u klima- tizace) Okenní sada Dálkové... -
Page 83: Před Prvním Použitím
Klimatizace FUNKCE OVLÁDACÍHO PANELU • Zasuňte napájecí šňůru do uzemněné zásuvky AC220~240V/50Hz; • Stiskem tlačítka POWER klimatizaci zapnete. • Provozní teplotní rozsah: 18°C - 35°C 1. Tlačítko Power • Zkontrolujte, že byla odváděcí hadice řádně instalována. 2. Tlačítka Temperature • Při použití... - Page 84 Návod na použití Nastavení časovače pro VYPNUTÍ • Když je klimatizace ZAPNUTA, stiskněte tlačítko “Timer” a zvolte požadovaný čas VYPNUTÍ pomocí tlačítek teploty a nastavení času. • “Na provozním panelu se zobrazí “Preset OFF Time”. • Čas VYPNUTÍ lze regulovat kdykoli v době 0-24 hodin. Kontinuální...
-
Page 85: Odstraňování Problémů
Klimatizace ÚDRŽBA ČIŠTĚNÍM • Stočte oba konce odváděcí hadice do čtvercové upevňovací spony a ploché upevňovací spony. • Před čištěním nezapomeňte odpojit jednotku od každého výstupu • Vložte čtvercovou upevňovací sponu do otvorů v zadní části elektrického napájení. klimatizace. • Nejdříve vyčistěte povrch neutrálním čistícím prostředkem a vlhkým •... -
Page 86: Životní Prostředí
Návod na použití ZÁRUKA Problémy Možné příčiny Navrhovaná řešení • Záruka na tento výrobek je 24 měsíců. Záruka je platná, pokud je Automatické Vypnutí v • Ochrana vytápění jednotku • Jednotku znovu zapněte při výrobek používán v souladu s návodem a k účelu, ke kterému je určen. režimu vytápění... -
Page 87: Bezpečnostné Pokyny
Klimatizácia BEZPEČNOSTNÉ POKYNY bezpečnosť. Ak je to potrebné, prosím, skontrolujte ju ohľadom požiadaviek. • Prosím, prečítajte si starostlivo tento užívateľský • Deti by mali byť pod dozorom, aby sa zabezpečilo, manuál pre zabezpečenie správneho používania, že sa so zariadením nehrajú. údržby a inštalácie. - Page 88 Návod na použitie VAROVANIE pri bezpečnej manipulácií s chladivom podľa hodnotiacej špecifikácie uznávanej v priemysle. • Pre zrýchlenie procesu rozmrazovania alebo • Údržba musí byť vykonávaná iba podľa čistenia nepoužívajte žiadny iný spôsob než ten odporučenia vybavenia výrobcu. Údržba a opravy odporúčaný...
- Page 89 Klimatizácia VAROVANIE • Zariadenie by malo byť uskladnené takým spôsobom, aby sa predišlo mechanickému Špecifická informácia týkajúca sa zariadení s zlyhaniu. chladiacim plynom R 290. • Jednotlivci, ktorí narábajú s alebo pracujú • Pozorne si prečítajte všetky varovania. na chladiacom okruhu, musia mať príslušné •...
-
Page 90: Popis Častí
Návod na použitie POPIS ČASTÍ PRÍSLUŠENSTVO 1. Vstup vzduchu 2. Výstup vzduchu 3. Ovládací panel Časť Popis 4. Napájací kábel 5. Závlek Hadica odvodu horúceho vzduchu Konektor hadice (koniec okienka) Konektor hadice (Koniec klima- tizácie) Okenná sada Diaľkový ovládač... -
Page 91: Pred Prvým Použitím
Klimatizácia FUNCTION OF CONTROL PANEL • Napájací kábel vložte do uzemnenej zásuvky AC220~240 V/50 Hz; • Stlačte tlačidlo POWER pre zapnutie klimatizácie. • Rozsah prevádzkovej teploty: 18°C - 35°C 1. Power tlačidlo • Skontrolujte, či je hadica odvodu správne namontovaná. 2. - Page 92 Návod na použitie Nastavenie VYPNUTIA časovača • Keď je klimatizácia ZAPNUTÁ, stlačte tlačidlo “Timer” a zvoľte želaný čas VYPNUTIA prostredníctvom tlačidiel nastavenia teploty a času. • Na prevádzkovom paneli sa objaví “Preset OFF Time”. • Čas VYPNUTIA sa dá nastaviť kedykoľvek za 0-24 hodín. Súvislé...
- Page 93 Klimatizácia ÚDRŽBA ČISTENÍM • Zohnite obidva konce hadice odvodu do obdĺžnikovej upevňovacej svorky a rovnej upevňovacej svorky. • Pred čistením zabezpečte, aby sa jednotka odpojila z výstupu • Vložte obdĺžnikovú upevňovaciu svorku do otvorov na zadnej strane elektrického napájania. klimatizácie. •...
- Page 94 Návod na použitie ZÁRUKA Problémy Možné príčiny Navrhované opravy • Tento výrobok má záruku 24 mesiacov. Vaša záruka úlatí, ak sa výrobok Automatické vypnutie • Ochrana zohrievania, keď • Reštartujte jednotku pri používa v súlade s pokynmi a na účel, na ktorý bol vyrobený. Okrem napájania v režime teplota vo výstupe vzduchu dostatočne nízkej teplote...
- Page 98 Quality shouldn't be a luxury! www.tristar.eu Tristar Europe B.V. | Jules Verneweg 87 | 5015 BH Tilburg | The Netherlands...
Need help?
Do you have a question about the AC-5502AM and is the answer not in the manual?
Questions and answers