
Related Manuals for astreea Igloo Plus

Summary of Contents for astreea Igloo Plus
- Page 1 Built for a lifetime. Installation Guide Igloo Plus - Size L ITM. / ART. 2127500...
- Page 2 3. Retain this Guide for future reference 4. These cards that you will find in the Guide are very important. Please give them your attention. Astreea igloos North America, LLC PO Box 773192 Eagle River Alaska 99577 www.us.astreea.com Please call our customer service US &...
-
Page 3: Table Of Contents
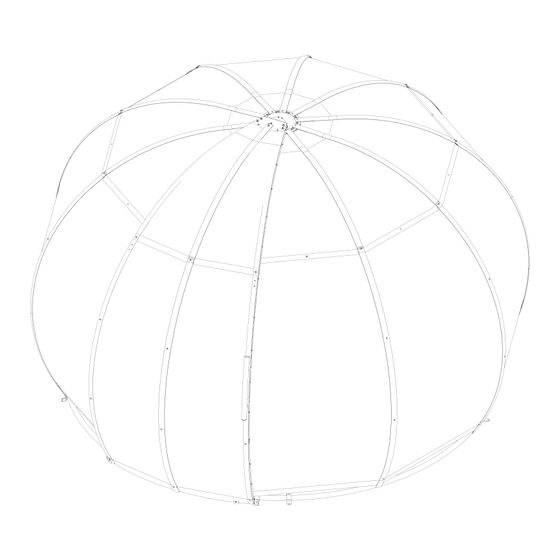
Summary Introduction, Safety regulations, Information regarding assembly and maintenance, Cleaning, storage and disposal. Frame and Cover components 1. Mounting the Frame 1.1 Base rails, stop plate and locking plate. 1.2 Vertical poles 1.3 Support plate on the vertical pole 1.4 First vertical pole on the base rail 1.5 Second vertical pole 1.6 All the vertical poles and the crown plate 1.7 Anchor the frame to the floor... -
Page 4: Introduction, Safety Regulations, Information Regarding Assembly And Maintenance
• Do not leave candles, oil lamps or other sources of fire unattended in the igloo! • Astreea® Igloo can bear up to 200 kg (450 lbs) of snow. It is rec- • The temperatures inside the igloo during summer can go ommended to broom off the snow regularly to prevent collapsing. -
Page 5: Cleaning, Storage And Disposal
MAKE SURE THAT THE IGLOO IS SECURED TO THE GROUND USING THE FIXING CLAMPS, OR WEIGHED DOWN USING THE ASTREEA® WEIGHTS AVAILABLE AT ASTREEA.COM. FOR ASTREEA® IGLOO PLUS MODEL, LEAVING THE IGLOO IN WINDY CONDITIONS WITH MISSING POLYCARBONATE PANELS OR THE SLIDING DOOR OPEN, MAY RESULT IN DAMAGE TO THE IGLOO. THE SAME APPLIES TO OTHER COVERS, IF THERE’S AN OPENING THAT ALLOWS THE WIND TO INFLATE THE... -
Page 6: Frame And Cover Components
Installation Guide - Igloo Plus - Size L Igloo Frame and Cover Plus – Components - Size L 10x Lower Poles 5x Base Rails 10x Upper Poles 1x Gutter Panel 1x Left Lower Door Panel 8x Lower Panels 9x Upper Panels... - Page 7 4, 5 and 6 Securing to ground *optional Remember The Astreea® Igloo is designed for any season. Update your existing product with accessories and covers for year round use. Scan for: astreea.com/igloo Missing or you lost spares? Please call our customer service: (907) 931-4469 Proudly manufactured by ARSAT®...
-
Page 8: Mounting The Frame
Installation Guide - Igloo Plus - Size L 1. Mounting the Frame 1.1 Base rails, stop plate and locking plate Place the base rails on the floor. Consider one base rail as door rail. Place the stop plate on the left side of the door rail and the locking plate on the right side. - Page 9 Installation Guide - Igloo Plus - Size L M8x50 912 screw SM850912 Stop Plate IGP07 M8 nut NM8934 M8 nut M8x50 NM8934 912 screw SM850912 Door Rail Stop Plate IGP07 M8 nut NM8934 Locking Plate M8x50 IGP06 912 screw SM850912 Join the base rails on the left side and on the right side of the door rail.
-
Page 10: Vertical Poles
Installation Guide - Igloo Plus - Size L 1. Mounting the Frame 1.2 Vertical Poles Insert 1 pc. of frame ring on the upper pole and 3 pcs. on the lower pole. Join the upper pole with the lower pole and fix it using the M8x25 7380 screw. -
Page 11: Support Plate On The Vertical Pole
Installation Guide - Igloo Plus - Size L M8 Nuts NM8934 Upper Pole IGL03 Support plate IGCL03 M8x20 7991 screw SM8207991 M8x25 7380 screw SM687380 Frame Rings IGP35 1.3 Mounting the support plate on the vertical pole Insert 1 pc. of electric frame ring on the upper electric pole and 3 pcs. on the lower electric pole. Join the upper pole with the lower pole and fix it using the M8x25 screw. -
Page 12: First Vertical Pole On The Base Rail
Installation Guide - Igloo Plus - Size L 1. Mounting the Frame 1.4 First vertical pole on the base rail Mount the vertical pole with the support plate on the base rail and fix it with M8x50 912 screws and M8 nuts, as shown in detail E. Make sure to hold on to it until the opposed pole is mounted. -
Page 13: Second Vertical Pole
Installation Guide - Igloo Plus - Size L 1.5 The second vertical pole Mount the second vertical pole on the opposite side from the first pole and fix it in the upper and lower part as shown (details F and G). -
Page 14: All The Vertical Poles And The Crown Plate
Installation Guide - Igloo Plus - Size L 1. Mounting the Frame 1.6 All the vertical poles and the crown plate Mount all of the other poles while also fixing the crown plate using the same screws (detail H). Door Rail... -
Page 15: Anchor The Frame To The Floor
Installation Guide - Igloo Plus - Size L 1.7 Anchor the frame to the floor Place the aluminum clamps on the base rails. Fix them using M8 anchors (not included). Do not mount them on the door rail! Door Rail... -
Page 16: First Upper Panel
Installation Guide - Igloo Plus - Size L 2. Mounting Cover - model Plus with sliding Door 2.1 First upper panel Detach the protection film* from the polycarbonate panel. Stick the lateral and the upper D sealing as follow: 1. Identify the short and the long part of the panel 2. - Page 17 Installation Guide - Igloo Plus - Size L Mount the first upper panel on the right side of the door rail. Place the panel with the long part on the left. Fix it together with the central bolt assembly on the crown plate using 2xM6x30 7380 screws, 2x D6 washer and 2x D6 rubber washer.
-
Page 18: First Lower Panel
Installation Guide - Igloo Plus - Size L 2. Mounting Cover - model Plus with sliding Door 2.2 First lower panel Mount the first lower panel on the right side of the door, under the upper panel, and align the lower holes of the upper panel with the upper holes of the lower panel. -
Page 19: Second Upper Panel
Installation Guide - Igloo Plus - Size L 2.3 Second upper panel Install the second upper panel under the polycarbonate disc of the central bolt assembly. Make sure that the left part overlaps with the right part of the previous panel. Fix it to the crown plate in the same way as the previous one was fixed. -
Page 20: Mounting The Rest Of The Panels
Installation Guide - Igloo Plus - Size L 2. Mounting Cover - model Plus with sliding Door 2.4 Rest of the polycarbonate panels. Mount the rest of the polycarbonate panels just as the previous ones were mounted, going in a counterclockwise direction. -
Page 21: Identifying The Strips
Installation Guide - Igloo Plus - Size L 2.5 Identifying the strips Frame Door Lower Strip Lower Strip IGPL05B Door Left and Right Upper Strip Door Strip Frame Upper Strip IGPL05A Lower part of the left and right door strip... -
Page 22: Mounting The Strips
Installation Guide - Igloo Plus - Size L 2. Mounting Cover - model Plus with sliding Door 2.6 Installing the Strips Start with the pole right next to the door pole. Fix the upper strip together with the lower strip by placing the lower one under the upper one. - Page 23 Installation Guide - Igloo Plus - Size L 2.6 Installing the Strips Adjust the position of the lower strip by aligning the holes with the holes of the lower frame rings. Use 2 pcs. M6x12 and 1 pc. M16x16 to fix the lower strip. Tighten the M6x16 screw connecting the upper and lower strips. Fix the upper part of the upper strip on the crown plate using M6x35 7991 screws.
-
Page 24: Mounting The Gutter Panel
Installation Guide - Igloo Plus - Size L 2. Mounting Cover - model Plus with sliding Door 2.7 Installing the Gutter Panel Detach the protection film. Stick the D sealing on, the same way its been stuck on the upper panels. Bend the panel over as shown. -
Page 25: Mounting The Left/Right Side Of The Door Strips
Installation Guide - Igloo Plus - Size L 2.8 Installing the left/right side of the door strips Keep the gutter panel bent over and align the upper holes of the strips with the holes of the crown plate having the strips rotated, as shown. -
Page 26: Fixing The Gutter Panel
Installation Guide - Igloo Plus - Size L 2. Mounting Cover - model Plus with sliding Door 2.9 Fixing the gutter panel Place the gutter panel in position and fix it in the left lower part using a M6x10 7380 screw. Also fix the lower part of the left side door strip using a M6x16 7991 screw. - Page 27 SLIDING DOOR 2023 MAXIMUM EFFICIENCY. The Astreea® Igloo is designed for any season. Update your existing product with accessories and covers for year round use. Super clear protected panels. 200 times more resistant than glass. 2x Aluminum Anodized Handlebar Waterproof...
-
Page 28: Door Components
Installation Guide - Igloo Plus - Size L 3. Sliding Door – Components - Size L 1x Door base rail 1x Left Lower Pole 1x Central Lower Pole 1x Right Lower Pole (handle pole) 1x Left Upper Pole 1x Central Upper Pole... - Page 29 Installation Guide - Igloo Plus - Size L 1x Door Lower stripe 1x Door Upper stripe 1x LH and RH door sealing 1x Lower Plate 1x Upper Plate 1x Interior Handle 1x Exterior Handle 12x M6x8 4x M6x10 30x M6x12...
-
Page 30: Upper Poles
Installation Guide - Igloo Plus - Size L 3. Sliding Door - Size L 3.1 Mount the upper poles Mount the upper poles between the upper and lower plate and fix them using 5 pcs. of M8x55 screws, M8 washers and M8 nuts. The M8x70 screw will be mounted only together with the upper strip. -
Page 31: Right Lower Pole
Installation Guide - Igloo Plus - Size L 3.2 Mount the right lower pole Insert on the right upper pole 1 pc. of door ring then join the upper assembly with the right lower pole. Fix them using M8x25 screw. -
Page 32: Central Lower Pole
Installation Guide - Igloo Plus - Size L 3. Sliding Door - Size L 3.3 Mount the central lower pole Insert on the central upper pole 1 pc. of frame ring, then join the upper assembly with the central lower pole. Fix them together using 8x25 screw. -
Page 33: Left Lower Pole
Installation Guide - Igloo Plus - Size L 3.4 Mount the left lower pole Insert on the left upper pole 1 pc. of door ring, then join the upper assembly with the left lower pole. Fix them together using M8x25 screw. -
Page 34: Base Door Rail
Installation Guide - Igloo Plus - Size L 3. Sliding Door - Size L 3.5 Mount the base door rail Insert on the right lower pole 2 pcs. of door ring, on the central lower pole 3 pcs. of frame ring and on the left lower pole 3 pcs. of door ring. -
Page 35: Pvc Door Sealing
Installation Guide - Igloo Plus - Size L 3.6 Mount the PVC door sealing Mount the right and left door sealing on the door frame and fix each one with M6x12 screws. Pay attention to the position of the door sealing. -
Page 36: Upper Panels
Installation Guide - Igloo Plus - Size L 3. Sliding Door - Size L 3.7 Mount the upper panels Mount the upper panels and fix them in the upper part using M6x12 screws. M6x12 screws SM6127380 Upper Panels IGPL03 Top view of the door with... -
Page 37: Right Lower Panels
Installation Guide - Igloo Plus - Size L 3.8 Mount the right lower panels Place the upper part of the right lower panel under the right upper panel. Align the lower holes of the upper panel with the upper holes of the lower panel and fix them on the upper rings using 2 pcs. -
Page 38: Left Lower Panels
Installation Guide - Igloo Plus - Size L 3. Sliding Door - Size L 3.9 Mount the left lower panels Place the upper part of the left lower panel under the left upper panel. Align the lower holes of the upper panel with the upper holes of the lower panel and fix them on the upper rings using 2 pcs. -
Page 39: Door Upper Strip
Installation Guide - Igloo Plus - Size L 3.10 Mount the door upper strip Mount the upper strip on the central upper pole and fix it using M8 washer and M8 nut as shown. M8 Nut NM8934 M8 Washer W87089... -
Page 40: Door Lower Strip
Installation Guide - Igloo Plus - Size L 3. Sliding Door - Size L 3.11 Mount the door lower strip Place the upper part of the lower strip under the lower part of the upper strip. Use M6x16 7991 screw to fix them together on the upper frame ring. -
Page 41: Install The Door Onto The Igloo
Installation Guide - Igloo Plus - Size L 4. Install the door onto the Igloo 4.1 Place the door on the igloo Place the wheels on the base rail, one wheel in the left side of the left door pole and one wheel on the right side of the pole. Bend the left lower panel (which is shorter in order to help install the door more easily), allowing the wheel to get behind it. - Page 42 Installation Guide - Igloo Plus - Size L 4. Install the door onto the Igloo 4.1 Place the door on the igloo Make sure that the panel is back to its initial position and that the wheel is on the rail.
-
Page 43: Fixing The Door To The Central Bolt Assembly
Installation Guide - Igloo Plus - Size L 4.2 Fixing the door to the central bolt assembly Put the door in open position. Bend the right part of the gutter panel towards the inside of the igloo, to gain a better position for fixing the door in the upper part. -
Page 44: Fix The Gutter Panel
Installation Guide - Igloo Plus - Size L 4. Install the door onto the Igloo 4.3 Fix the gutter panel After the door is in place, bend the gutter panel back to its initial position and secure it in place with a M6x10 7380 screw. Then also fix the right door strip using a M6x16 7991 screw. -
Page 45: Applying The Protective Strips
Installation Guide - Igloo Plus - Size L 4.4 Applying the protective strips Apply the protective strip on the edge of the polycarbonate panels which are the lower panel on right side of the door and right lower door panel. The protective strips are pre-cut to size. Place the trimmed strips on the areas of the panels where they fit. -
Page 46: Mount The Accessories
Installation Guide - Igloo Plus - Size L 5. Mount the accessories Install the 2 clothing racks on the desired poles using the M4x10 7991 screws. Install the eye screws on the upper poles and fix the SKY VIEW PRIVACY accessory (not included in PLUS COVER) or the desired accessory/ornament. - Page 47 IGLOO UMBRELLA LOREM IPSUM. The Astreea® Igloo is designed for any season. Update your existing product with accessories and covers for year round use. The umbrella top: 520 g/m² opaque anti-bacterial and UV stabilized technical textile for roofs and plain camping applications. Fire behavior: <100mm/min.
- Page 48 Installation Guide - Igloo Plus - Size L Install the Umbrella Cover 1. Unmount the door Unmount the door by unscrewing the 2pcs of screws M6x12 7380 M6x12 7380 Page 48 Proudly manufactured by ARSAT® in the European Union...
- Page 49 Installation Guide - Igloo Plus - Size L 2. Unmount the strips Unmount the lower strips by unscrewing the indicated screws. M6x16 7991 screw SM6167991 M6x12 7991 screw SM6127991 M6x12 7991 screw SM6127991 M6x16 7991 screw SM6167991 Proudly manufactured by ARSAT® in the European Union...
- Page 50 Installation Guide - Igloo Plus - Size L 3. Unmount the Panels Unmount the lower polycarbonate panels and the gutter panel. Each panel is fixed in the lower part with 6x M6 screws and in the upper part, toghether with the upper polycarbonate panel, with 3x M6 screws that need to be tightened back after the lower panels are removed.
- Page 51 Installation Guide - Igloo Plus - Size L 4. Fix the strips Tighten back the M6x16 7991 screws that fix the lower part of the upper strips to the frame. M6x16 7991 screw SM6167991 need to be tighten back after the lower panels are removed Proudly manufactured by ARSAT®...
- Page 52 Installation Guide - Igloo Plus - Size L Place the umbrella over the upper polycarbonate panels. Untight the lower screws M8x25 7380, that fix the upper pole to the lower pole, and fix the umbrella to the frame using them. Proceed in the same way for all 10 poles.
- Page 53 Installation Guide - Igloo Plus - Size L Notes Proudly manufactured by ARSAT® in the European Union Page 53...
- Page 54 Installation Guide - Igloo Plus - Size L Notes Page 54 Proudly manufactured by ARSAT® in the European Union...
- Page 55 COSTCO ® Companies Distribution Locations Costco Wholesale Costco Wholesale Spain Iceland S.L.U. Polígono Distributed by: Costco Wholesale ehf. Kauptún Empresarial Los Costco Wholesale New Zealand 3-7, 210 Gardabaer Gavilanes C/ Agustín Corporation 2 Gunton Drive Iceland de Betancourt, 17 P.O. Box 34535 Limited Westgate 28906 Getafe Seattle, WA...
- Page 56 Igloo Plus - Size L Installation Guide Scan for: astreea.com/igloo...
Need help?
Do you have a question about the Igloo Plus and is the answer not in the manual?
Questions and answers