Advertisement
Quick Links
Advertisement

Related Manuals for Electrolux EFI 60021


Summary of Contents for Electrolux EFI 60021
- Page 1 User manual EFI 60021...
- Page 3 W W W W W elcome to the world of Electr elcome to the world of Electr elcome to the world of Electr elcome to the world of Electr elcome to the world of Electrolux olux olux olux olux...
-
Page 4: Table Of Contents
4 4 4 4 4 electr electr electr electr electrolux olux olux olux contents olux Contents Safety warnings ........ 5 Description of the Appliance ..... 7 Control Panel ........8 Maintenance and Care ..... 9 Special accessories ......14 Something Not Working ....14 Installation ........ -
Page 5: Safety Warnings
5 5 5 5 5 electrolux electrolux Safety warnings • The premises must be sufficiently • When used as an extractor unit, the ventilated, when the kitchen hood is hood must be fitted with a hose... - Page 6 6 6 6 6 6 electr electr electr electr electrolux olux olux olux olux safety warnings • We decline any responsibility for any problems, damage or fires caused to the appliance as the result of the non-observance of the instructions included in this manual.
-
Page 7: Description Of The Appliance
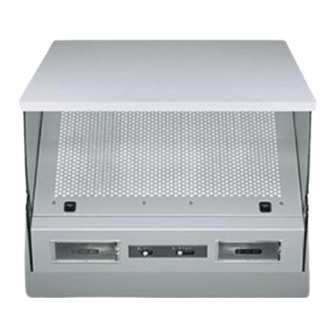
7 7 7 7 7 electrolux electrolux Description of the Appliance • • • • • The cooker hood is designed to The cooker hood is designed to The cooker hood is designed to... -
Page 8: Control Panel
8 8 8 8 8 electr electr electr electr electrolux olux olux olux olux description of the appliance - control panel Control Panel • Best results are obtained by using a low speed for normal conditions and a high speed when odours are more concentrated. -
Page 9: Maintenance And Care
9 9 9 9 9 electrolux electrolux Maintenance and Care Attention! Attention! Attention! Attention! Attention! Before performing any maintenance operation, isolate the hood from the electrical supply by switching off at the connector and removing the connector fuse. - Page 10 Char Char coal filter coal filter Char Charcoal filter Char coal filter coal filter • The charcoal filter should only be used if you want to use the hood in recirculation mode.
- Page 11 W W W W W ar ar ar ar arning ning ning ning ning • Failure to observe the instructions on cleaning the unit and changing the filters will cause a fire hazard. You are therefore strongly recommended to follow these instructions.
- Page 12 Cleaning the hood Cleaning the hood Cleaning the hood Cleaning the hood Cleaning the hood • Clean the outside of the hood using a damp cloth and a solution of water and mild washing up liquid.
-
Page 13: Special Accessories
Special accessories Special accessories Special accessories Special accessories Special accessories Char Char coal filter coal filter Char Char Charcoal filter coal filter coal filter type 29 Something Not Working If your appliance fails to work properly please carry out the following checks. -
Page 14: Installation
Installation T T T T T echnical Details echnical Details echnical Details echnical Details echnical Details Dimensions (in cm): Dimensions (in cm): Dimensions (in cm): Dimensions (in cm): Dimensions (in cm):... - Page 15 Electrical connection Safety war Safety war Safety warnings for the electrician nings for the electrician nings for the electrician nings for the electrician Safety war Safety war nings for the electrician The mains power supply must correspond to the rating indicated on the plate situated inside the hood.
- Page 16 Installation Installation Installation Installation Installation Make sur Make sur Make sure that the cooker hood is disconnected fr Make sur Make sur e that the cooker hood is disconnected fr...
- Page 17 • Check that the side wall units between which to install the hood are sufficiently heavy for installing the Rear view hood. Otherwise mount the brackets to use as additional supports: a. a. a. a. a. Insert each bracket from the rear inside the hood through the opposite slots.
- Page 18 Fixing a fur Fixing a fur nitur nitur e door to the visor e door to the visor Fixing a fur Fixing a furnitur Fixing a fur nitur niture door to the visor...
- Page 19 Fixing the hood Fixing the hood Fixing the hood Fixing the hood Fixing the hood • • • • • Use template N2 N2. Position the template on the front edges of the wall unit (right wall unit, B side) – (left...
- Page 20 • • • • • Mount the lower corner Q Q Q Q Q (*) to the hood with two screws and plastic FRONT VIEW washers T T T T T . They will serve to cover possible spaces between the rear of the hood and the wall.
- Page 21 Standar Standard guarantee conditions d guarantee conditions d guarantee conditions We, Electrolux, undertake that if within • Appliances found to be in use within 12 months of the date of the purchase a commercial environment, plus tho- se which are subject to rental agree- this Electrolux appliance or any part ments.
- Page 22 Customer Care e e e e Customer Car Customer Car For general enquiries concerning your Electrolux appliance, or for further infor- mation on Electrolux products please contact our Customer Care Department by letter or telephone at the address below or visit our website at www.electrolux.co.uk...
- Page 23 Guarantee opean Guarantee opean Guarantee This appliance is guaranteed by Electrolux in each of the countries listed at the back of this user manual, for the period specified in the appliance guarantee or otherwise by law. If you move from one of these countries to...
- Page 24 Albania +35 5 4 261 450 Rr. Pjeter Bogdani Nr. 7 Tirane Belgique/België/ Bergensesteenweg 719, 1502 Lembeek +32 2 363 04 44 Belgien Èeská republika +420 2 61 12 61 12 Budìjovická...
- Page 25 Slovensko +421 2 43 33 43 22 Domáce spotrebièe SK, Seberíniho 1, 821 03 Bratislava Suomi www.electrolux.fi Electrolux Service, S:t Göransgatan 143, Sverige +46 (0)771 76 76 76 S-105 45 Stockholm Türkiye +90 21 22 93 10 25 129090 Москва, Олимпийский...
- Page 28 LI3L7A Ed. 05/08...
Need help?
Do you have a question about the EFI 60021 and is the answer not in the manual?
Questions and answers