Table of Contents
Advertisement
Advertisement
Table of Contents

Related Manuals for Electrolux EMC38915X


Summary of Contents for Electrolux EMC38915X
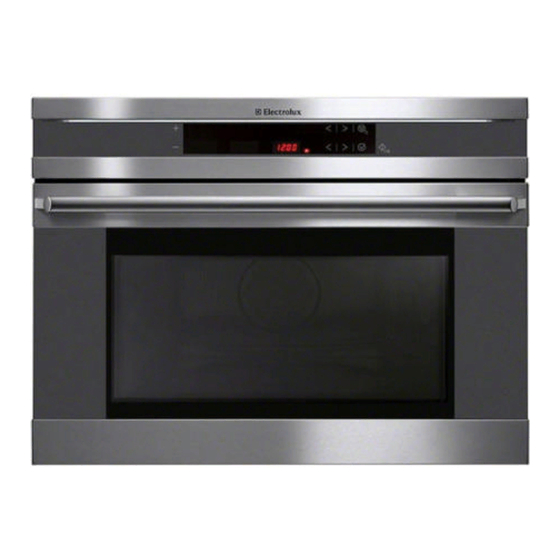
- Page 1 USER MANUAL User Manual Gebruiksaanwijzing Gebrauchsanweisung Manuel d'instructions Gebrauchsanweisung Microwave Oven Mikrowelle Mikrowelle Micro-ondes Magnetron Microwave Oven Mikrowelle EMC38915X EMC38915X EMM1015...
- Page 3 Dear Customer: Before going any further, we want to thank you for preferring our product. We are sure that this modern, functional and practical microwave oven, manufactured with top quality materials, will fully meet your expectations. We ask you to read the instructions in this booklet very carefully as this will allow you to get the best results from using your microwave oven.
-
Page 4: Table Of Contents
Contents Installation instructions ...5 Before installation... 5 After installation... 5 Microwave safety ...6 The advantages of microwaves ...8 Description of your oven ...9 Basic controls ...10 Setting the clock ... 10 Safety blocking ... 10 Stopping the rotating plate ... 11 Microwave oven ... -
Page 5: Installation Instructions
Installation instructions Before installation Check that the input voltage indicated on the characteristics plate is the same as the voltage of the power outlet you are going to use. Open the oven door and take out all the accessories and remove the packing material. Do not remove the mica cover on the ceiling of the interior! This cover stops fat and pieces of food damaging the microwave generator. -
Page 6: Microwave Safety
Microwave safety • Warning! Never leave the oven unwatched, especially when using paper, plastic or other combustible materials. These materials can char and may fire. FIRE RISK! • Warning! If you see smoke or fire, keep the door closed in order to smother the flames. Switch off the oven and take the plug out of the socket or cut off the oven power supply. - Page 7 Microwave safety This oven is exclusively for domestic use! Use the oven only for preparing meals. Avoid damaging the oven or other dangerous situations by following these instructions: • Do not switch on the oven without the turntable support, the turntable ring and the respective plate being in place.
-
Page 8: The Advantages Of Microwaves
The advantages of microwaves In conventional ovens, heat radiated by electrical elements or gas burners slowly penetrates the food from outside to inside. On account of this there is a major amount of energy is wasted heating the air, the oven components and the food containers. -
Page 9: Description Of Your Oven
Description of your oven 1. – Door window glass 2. – Catches 3. – Turntable support 4. – Turntable ring 5. – Turntable plate 6. – Drop-down grill a. – Plus and Minus keys b. – Function selection keys c. – Cancel / Safety Block key 7. -
Page 10: Basic Controls
Basic controls Setting the clock The clock display will flash to indicate that the time shown is not correct. To set the clock, proceed as follows: 1. Select the Clock Symbol with the Parameter selection keys (not microwave oven is first plugged in or after a power failure). -
Page 11: Stopping The Rotating Plate
Basic controls Stopping the rotating plate 1. To stop the rotating plate, press Confirmation and Cancel keys for 3 seconds to get the word SAFE in the display 2. To start plate rotation again, repeat the above procedure. -
Page 12: Microwave Oven
Basic Functions Microwave oven Use this function to cook and heat vegetables, potatoes, rice, fish and meat. 1. Select the Microwave function with the Function selection keys. 2. Select Power Level selection keys. The Power Level symbol and display start blinking. If you do not change the power level the microwave operates with the default power 800 W. -
Page 13: Grill
Basic Functions Grill Use this function to brown the top of food quickly. 1. Select the Grill function with the Function selection keys. 2. Select the Duration with Parameter selection keys. The Duration symbol and display start blinking. 3. Set the duration with the “+” and “–” keys. Microwave + Grill Use this function to cook lasagne, poultry, roast potatoes and toasted foods. -
Page 14: Hot Air
Basic Functions Hot air Use this function to bake and roast. 1. Select the Hot-Air function with the Function selection keys. 2. Select Temperature selection keys. The Temperature symbol and display start blinking. If you do not change the temperature the oven operates with the default temperature 160ºC. -
Page 15: Grill With Fan
Basic Functions Grill with Fan Use this function for crispy roast meat, fish, poultry or French fries 1. Select the Grill with Fan function with the Function selection keys. 2. Select Temperature selection keys. The Temperature symbol and display start blinking. If you do not change the temperature the oven operates with the default temperature 160ºC. -
Page 16: Defrosting By Weight (Automatic)
Basic Functions Defrosting by weight (automatic) Use this function to defrost meat, poultry, fish, fruit and bread quickly. 1. Select the Defrost by Weight function with the Function selection keys. 2. Select the Program with Parameter selection keys. The Duration and Clock symbols and the display start blinking. -
Page 17: Defrosting By Time (Manual)
Basic Functions Defrosting by time (manual) Use this function to defrost any type of food quickly. 1. Select the Defrost by Time function with the Function selection keys. 2. Select the Duration with Parameter selection keys. The Duration symbol and display start blinking. -
Page 18: Special Functions
Special functions Special Function F1: Heating food Use this function to heat various types of food. 1. Select the Special function F1 with the Function selection keys. 2. Select the Program with Parameter selection keys. The Duration and Clock symbols and the display start blinking. -
Page 19: Special Function P2: Cooking
Special functions Special Function F2: Cooking Use this function to cook fresh food. 1. Select the Special function F2 with the Function selection keys. 2. Select the Program with Parameter selection keys. The Duration and Clock symbols and the display start blinking. 3. -
Page 20: Special Function P3: Defrosting & Toasting
Special functions Special Function F3: Defrosting & Toasting Use this function to cook and toast various types of food. 1. Select the Special function F3 with the Function selection keys. 2. Select the Program with Parameter selection keys. The Duration and Clock symbols and the display start blinking. -
Page 21: When The Oven Is Working
When the oven is working... Interrupting a cooking cycle You can stop the cooking process at any time by pressing the Cancel key once or by opening the oven door. In both cases: • Microwave emission immediately. • The grill is de-activated but is still very hot. Danger of burning! •... -
Page 22: Defrosting
Defrosting The table below shows different defrosting and standing times (in order to ensure the food temperature is evenly distributed) for different Food Weight (g) Portions of meat, veal, beef, pork 1000 1500 2000 Goulash 1000 Minced meat Sausages Poultry (portions) Chicken 1000 Poularde... - Page 23 Defrosting General instructions for defrosting 1. When defrosting, use only dishes that are appropriate for microwaves (china, glass, suitable plastic). 2. The defrost function by weight and the tables refer to the defrosting of raw food. 3. The defrosting time depends on the quantity and thickness of the food.
-
Page 24: Cooking With A Microwave Oven
Cooking with a microwave oven Warning! Read the section “Microwave Safety” before cooking with your microwave. Follow these recommendations when cooking with your microwave: • Before heating or cooking foods with peel or skin (e.g. apples, tomatoes, potatoes, sausages) prick them so that they do not burst. - Page 25 Cooking with a microwave oven Tables and suggestions – Cooking vegetables Food Quantity (g) Cauliflower Broccoli Mushrooms Peas & carrots Frozen carrots Potatoes Paprika Leek Frozen Brussel sprouts Sauerkraut Tables and suggestions – Cooking fish Food Quantity (g) Fish fillets Whole fish Addition of Power...
-
Page 26: Cooking With The Grill
Cooking with the grill For good results with the grill, use the grid iron supplied with the oven. Fit the grid iron in such a way that it doesn’t come into contact with the metal surfaces of the oven cavity since if it does there is a danger of electric arcing which may damage the oven. - Page 27 Cooking with the Grill Tables and suggestions – Grill without microwave Fish Fish Bass Sardines/gurnard Meat Sausages Frozen hamburgers Spare rib (approx. 3 cm thick) Others Toast Toasted sandwiches Heat up the grill beforehand for 2 minutes. Unless indicated otherwise, use the grid iron. Place the grid on a bowl so that the water and the fat can drop.
- Page 28 Cooking with the Grill Tables and suggestions – Microwave + Grill The microwave + grill function is ideal for cooking quickly and, at the same time, browning foods. Furthermore, you can also grill and cook cheese covered food. Food Quantity (g) Cheese topped pasta Cheese topped potatoes Lasagne...
-
Page 29: Roasting And Baking
Roasting and baking Table and advices – Preparing meat and cake Microwave / Hot air Quantity Food Roast beef 1000-1500 Pork loin / Cutlet or bones 800-1000 Pork roast Whole chicken 1000/1200 Half chicken 500-1000 Roast loin of veal 1500/2000 Beef topside 1500-1800 Microwave / Baking... - Page 30 Roasting and baking Advice to roast - bake Turn the pieces of meat halfway through the cooking time. When the roasted meat is ready you should let it stand for 20 minutes in the oven with this switched off and closed. This will ensure the juices in the meat are well distributed.
- Page 31 Baking Table and advices – baking/hot air Type Walnut cake Fruit tart Ring cake Piquant cakes e.g. Pizza made with potatoes Sponge cake Jelly roll Cherry pie Advice on cake baking ware The most commonly used type of baking ware is black metal tins.
-
Page 32: What Kind Of Ovenware Can Be Used
What kind of ovenware can be used? Microwave function For the microwave function, keep in mind that microwaves are reflected by metal surfaces. Glass, china, clay, plastic, microwaves pass. For this reason, metal pans and dishes or containers with metal parts or decorations cannot be used in the microwave. - Page 33 What kind of ovenware can be used? Table of Ovenware The table below gives you a general idea of what type of ovenware is suitable for each situation. Operating mode Type of ovenware Glass and china Home use, not flame resistant, can be used in dish washer Glazed china Flame resistant glass and china...
-
Page 34: Oven Cleaning And Maintenance
Oven Cleaning and Maintenance Cleaning is the only maintenance normally required. Warning! Your microwave oven should be cleaned regularly, with all food remains being removed. If the microwave is not kept clean its surfaces may deteriorate, reducing the oven’s working life and possibly resulting in a dangerous situation. -
Page 35: Oven Ceiling
Oven Cleaning and Maintenance Oven ceiling If the oven ceiling is dirty, the grill can be lowered to make cleaning easier. To avoid the danger of burning, wait until the grill is cold before lowering it. Proceed as follows: 1. Turn the grill support by 90º (1). 2. -
Page 36: What Should I Do If The Oven Doesn't Work
What should I do if the oven doesn’t work? WARNING! Any type of repair must only be done by a specialised technician. Any repair done by a person not authorised by the manufacturer is dangerous. You do not need to contact Technical Assistance to resolve the following questions: •... -
Page 37: Technical Characteristics
Technical characteristics Description of Functions Symbol Function Microwave Grill Microwave + Grill Hot-Air Microwaves + Hot-Air Grill + Fan Specifications • AC Voltage ... (see rating plate) • Power required... 3400 W\ • Grill power..1500 W • Hot air power ...1500W •... -
Page 38: Installation
Installation 1. Push oven completely into the cabinet and centre it. 2. Open microwave door and fasten the appliance to the cabinet using the four screws provided. Insert the screws through the front holes. - Page 42 w w w . e l e c t r o l u x . c o m A l b a n i a + 3 5 5 4 2 6 1 4 5 0 B e l g i q u e / B e l g i ë / B e l g i e n + 3 2 2 3 6 3 0 4 4 4 Č...
- Page 44 Cód: 163859 8221915 - 12 - 00 022008...