Table of Contents
Advertisement
Available languages
Available languages
Quick Links
Advertisement
Chapters
Table of Contents

Related Manuals for Kenwood M-925DAB


Summary of Contents for Kenwood M-925DAB
- Page 1 Kompaktes Stereo-System M-925DAB BEDIENUNGSANLEITUNG JVCKENWOOD Corporation...
-
Page 2: Table Of Contents
Inhaltsverzeichnis Inhalt Seite Vor der Inbetriebnahme / Sicherheitshinweise Inbetriebnahme Komponenten und Funktionen Bedienung des Radios Ein- / Ausschalten (Standby) Navigieren in den Menüs Lautstärke anpassen Klang einstellen Zusätzliche Informationen Einstellen der Menüsprache Einstellen von Uhrzeit und Datum Einstellen der Display-Beleuchtung Einstellen des Sleeptimers 4.10 Einstellen des Weckers... - Page 3 1. Vor Einschalten der Spannungsversorgung WICHTIGE SICHERHEITSANWEISUNGEN Achtung: Lesen Sie diese Seite aufmerksam durch, um den sicheren Betrieb des Gerätes zu gewährleisten. Hinweise aufmerksam lesen! • Befolgen Sie alle Sicherheits- und Bedienungsanweisungen, wenn Sie dieses Produkt in Betrieb nehmen. Hinweise sorgfältig aufbewahren! •...
- Page 4 Überlastung • Überlasten Sie niemals Netzsteckdosen, Verlängerungskabel oder Mehrfachsteckdosen, weil sonst die Gefahr von Feuer oder elektrischen Schlägen besteht. Eindringen von Fremdmaterial und Flüssigkeit • Achten Sie darauf, dass niemals Fremdmaterial oder Flüssigkeit durch Belüftungsöffnungen in dieses Gerät eindringt, da es anderenfalls zu Kontakt mit unter hoher Spannung stehenden Bauteilen bzw.
- Page 5 VORSICHT: Nicht das Gehäuse öffnen. Das Gerät enthält keine Teile, die vom Benutzer gewartet werden können; Wartungen nur vom qualifizierten Fachpersonal durchführen lassen. EU-Konformitätserklärung Hiermit erklärt die JVCKENWOOD Corporation, dass der Funkanlagentyp M-925DAB der Richtlinie 2014/53/EU entspricht. Der vollständige Text der EU-Konformitätserklärung ist unter der folgenden Internetadresse verfügbar: http://www.kenwood.com/euukdoc/ Hersteller: JVCKENWOOD Corporation 3-12.
-
Page 6: Inbetriebnahme
2. Inbetriebnahme 2.1 Auspacken Packen Sie das Gerät vorsichtig aus und achten Sie darauf, dass alle Zubehörteile vorhanden sind: • Infrarot Fernbedienung • UKW/DAB+ Wurfantenne • 2 x Batterie AAA/R03 • Bedienungsanleitung • 2 x Lautsprecher 2.2 Anschließen • Öffnen Sie das Batteriefach der Fernbedienung und setzen Sie die Batterien polungsrichtig ein. Die vorgegebene Polarität (+/-) ist im Batteriefach gekennzeichnet. -
Page 7: Komponenten Und Funktionen
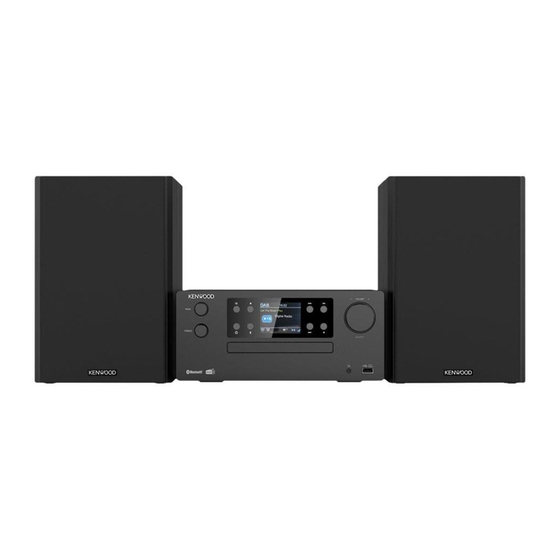
3. Komponenten und Funktionen Standby Ein/Aus Modusauswahl Menü Wiederholungsauswahl Zufallsmodus Vorheriges Album, Presetspeicher - Lautstärke erhöhen Titelsprung/Titelsuchlauf rückwärts Eingabe bestätigen, Wiedergabe/Pause Lautstärke verringern Stummschaltung Ein/Aus Zifferntasten Titelprogrammierung, Presetspeicher belegen CD-Lade öffnen/schliessen (Eject) Uhr einstellen Wecker einstellen Wiedergabe stoppen, BLUETOOTH Kopplung, Sendersuchlauf Sleeptimer einstellen Nächstes Album, Presetspeicher + Titelsprung/Titelsuchlauf vorwärts... - Page 8 3. Komponenten und Funktionen Fortsetzung Frontseite 1 - Wiedergabe stoppen, BLUETOOTH Kopplung, Sendersuchlauf 2 - Modusauswahl 3 - BASS Regelung 4 - TREBLE Regelung 5 - Standby Ein/Aus 6 - BLUETOOTH Modus 7 - CD Lade 8 - TFT Anzeige 9 - Titelsprung vorwärts 10 - CD Eject 11 - Kopfhöreranschluss...
-
Page 9: Bedienung Des Radios
4. Bedienung des Radios 4.1 Ein- / Ausschalten (Standby) Drücken Sie die Standby-Taste am Gerät oder auf der Fernbedienung, um das Radio einzuschalten. Drücken Sie die Taste erneut, um das Gerät in den Standby-Modus zu versetzen. Um es vollständig auszuschalten, trennen Sie das Radio vom Stromnetz. 4.2 Navigieren in den Menüs Drücken Sie die Taste <MENU>... -
Page 10: Einstellen Der Display-Beleuchtung
4. „Zeit/Datum einstellen“ auswählen und bestätigen. Anschließend Stunden, Minuten, Tag, Mo- nat und Jahr auswählen, einstellen und bestätigen. Das Menü „Uhrzeit“ kann auch über die Taste <CLOCK> auf der Fernbedienung aufgerufen werden. Weitere Einstellungen im Menü „Uhrzeit“ Folgende Funktionen können im Menü „Uhrzeit“ eingestellt werden: „Autom. -
Page 11: Digitalradio Dab
4. „Wecker 1“ wird angezeigt. Sie können nun die Weckzeit 1 einrichten oder mit den Tasten <Titelsprung vorwärts> oder <Titelsprung rückwärts> auf die Weckzeit 2 wechseln („Wecker 2“). 5. Nach der Bestätigung führen Sie bitte folgende Schritte durch: • Einstellung von Stunden und Minuten, die Auswahl jeweils bestätigen.. •... -
Page 12: Nicht (Mehr) Empfangbare Sender Löschen
Hinweis: Die Empfangsqualität eines Senders ist von Faktoren wie Wetter, Aufstellungsort und Antennenausrichtung abhängig. Sollte ein Sender aus der Senderliste nicht empfangbar sein, verän- dern Sie die Ausrichtung der Antenne oder den Aufstellort des Radios. Nicht mehr empfangbare Sender können aus der Senderliste entfernt werden. 5.4 Nicht (mehr) empfangbare Sender löschen Sender, die nicht mehr empfangen werden können, lassen sich aus der Liste löschen. -
Page 13: Speichern Von Stationen Im Senderspeicher
• Drücken Sie die Taste <Titelsprung rückwärts> um die Empfangsfrequenz zu verringern. • Wenn Sie eine dieser Tasten gedrückt halten, startet ein automatischer Sendersuchlauf, der bei der nächsten gefundenen Station stoppt. • Drücken Sie die Taste <SCAN>, um eine automatische Senderspeicherung zu starten. Alle gefundenen Stationen werden im Senderspeicher abgelegt. -
Page 14: Abspielen Von Mp3-Dateien
7.1 Abspielen von MP3-Dateien Über die Tasten <ALBUM+> oder <ALBUM-> können Sie in den Ordnerstrukturen navigieren. Mit der Taste <OK> wird die Wiedergabe pausiert und fortgesetzt. Durch dauerhaftes Drücken der Tasten <TITEL- SPRUNG> kann innerhalb des Titels mit zunehmender Geschwindigkeit vor- und zurückgespult werden. Durch einen kurzen Tastendruck auf <TITELSPRUNG RÜCKWÄRTS>... -
Page 15: Bluetooth Audio
Vergewissern Sie sich, dass das zu koppelnde Endgerät eingeschaltet und BLUETOOTH aktiviert ist. Im Display erscheint „Nicht verbunden“. Öffnen Sie jetzt die BLUETOOTH-Einstellungen auf dem zu koppelnden End- gerät und starten dort die Suche nach verfügbaren BLUETOOTH-Geräten. Wählen Sie „M-925DAB“ aus, und starten Sie den Koppelungsvorgang. Nach erfolgreichem Pairing erscheint im Display „Verbunden“. -
Page 16: Störungsbehebung
12. Störungsbehebung Bitte überprüfen Sie bei Fehlfunktionen die folgenden Punkte: Kein Ton Stecken Sie das Steckernetzteil ordnungsgemäß ein. Stellen Sie die Lautstärke auf den richtigen Pegel. Stellen Sie sicher, dass die gewünschte Quelle ausgewählt ist. Das System reagiert nicht auf Tastendruck ... -
Page 17: Entsorgung
Bezüglich der verwendbaren USB-Geräte gelten folgende Einschränkungen: Verwendbare USB-Geräte • USB-Geräte, die zur USB-Massenspeicherklasse gehören. • USB-Geräte, deren maximale Stromaufnahme bei höchstens 500 mA liegt. • USB-Massenspeicherklasse : USB-Geräte, die der PC als externen Speicher erkennt, ohne dass ein spezieller Treiber oder eine spezielle Anwendungssoftware erforderlich wäre. •... -
Page 18: Technische Daten
15. Technische Daten M-925DAB Spannungsversorgung Wechselspannung ~ 100 – 240 V Eingangswechselstromfrequenz 50/60 Hz Aufnahmeleistung 40 Watt Aufnahmeleistung im Bereitschaftsbetrieb < 1 Watt Tuner UKW/DAB+ DAB-Abstimmbereich BAND III 174,928 MHz – 239,200 MHz UKW-Abstimmbereich 87,50 MHz – 108,00 MHz CD-Betrieb ≥... -
Page 19: Garantie
Bitte bewahren Sie diese Garantiekarte sorgfältig auf. Kenwood gewährt auf dieses Gerät eine Garantie von zwei Jahren ab Kaufdatum laut Rechnung oder Kaufbeleg des Kenwood-Händlers. Diese Garantie erstreckt sich auf Material- und Verarbeitungs-Mängel. Wir behalten uns das Recht vor, das Produkt umzutauschen, falls eine wirtschaftliche Instandsetzung nicht mehr möglich ist. - Page 21 Compact Stereo System M-925DAB OPERATING INSTRUCTIONS JVCKENWOOD Corporation...
- Page 22 Table of contents Content Page Before start-up / Safety instructions Start-up Components and functions Operating the radio Switching On / Off (standby) Navigate in the menus Adjusting the volume Setting the sound Additional information Setting the menu language Setting the time and date Setting the display illumination Setting the sleep timer 4.10...
- Page 23 1. Before switching on the power supply IMPORTANT SAFETY INSTRUCTIONS Attention: Read this page carefully to ensure safe operation of the device. Read instructions carefully! • Follow all safety and operating instructions when using this product. Keep the instructions in a safe place! •...
- Page 24 Overload • Never overload mains sockets, extension cords or multiple sockets, otherwise there is a risk of fire or electric shock. Penetration of foreign material and liquid • Be careful not to allow foreign material or liquid to enter this device through ventilation holes, otherwise it may come into contact with high voltage components or short circuit resulting in a fire or electric shock.
- Page 25 Maintenance should only be carried out by qualified personnel. EU Declaration of conformity Hereby, JVCKENWOOD Corporation declares that the radio equipment type M-925DAB complies with Directive 2014/53/EU. The full text of the EU Declaration of Conformity is available at the follow- ing Internet address: http://www.kenwood.com/euukdoc/...
-
Page 26: Start-Up
2. Start-up 2.1 Unpacking Carefully unpack the device and make sure all accessories are present: • Infrared remote control • FM/DAB + wire antenna • 2 x AAA/R03 batteries • Operating instructions • 2 x speakers 2.2 Connecting • Open the battery compartment of the remote control and insert the batteries with correct polarity. -
Page 27: Components And Functions
3. Components and functions Standby On/Off Mode selection Menu Repeat selection Shuffle mode Previous album, preset memory - Increase the volume Skip track / track search backwards Confirm entry, playback/pause Reducing volume Mute On/Off Number keys Track programming, use preset memory Open/close CD tray (eject) Set the time... - Page 28 3. Components and functions continuation Front side 1 - Stop playback, BLUETOOTH pairing, station search 2 - Mode selection 3 - BASS control 4 - TREBLE control 5 - Standby On/Off 6 - BLUETOOTH mode 7 - CD drawer 8 - TFT display 9 - Skip track forwards 10 - CD Eject 11 - Headphone port...
-
Page 29: Operating The Radio
4. Operating the radio 4.1 Switching On / Off (standby) Press the Standby key on the device or on the remote control to switch on the radio. Press the button again to put the device into standby mode. To switch it off completely, disconnect the radio from the power supply. -
Page 30: Setting The Display Illumination
The "Time" menu can also be called up using the <CLOCK> key on the remote control. Additional settings in the "Time" menu The following functions can be set in the "Time" menu: "Auto Update": Setting from which source the time is automatically retrieved. Choices: "Update from Any"... -
Page 31: Digital Radio Dab
forwards> or <Skip track backwards> switch to Alarm Time 2 ("Alarm 2 Setup"). 5. After confirming, please perform the following steps: • Setting of hours and minutes, confirming the selection. • Setting the alarm duration ("15, 30, 45, 60, 90 Minutes") • Next, select Buzzer, DAB, FM, CD or USB as source and confirm. • "Last listened" or select other storage space and confirm. This item appears only when DAB or FM is selected as the source. •... -
Page 32: Favourites (Memory Locations)
the antenna or the location of the radio. Stations that can no longer be received can be removed from the station list. 5.4 Delete stations that can no longer be received Stations that can no longer be received can be deleted from the list. To do this, press the <MENU> button and select "Prune". -
Page 33: Storing Stations In The Station Memory
RDS functions The following information can be retrieved by repeatedly pressing the <INFO/INTRO> key: PTY (Program Type) / RDS Radio text / Frequency / Stereo-reception / Time / Date In case of inadequate reception conditions, the reception of this information may be interrupted or not possible. -
Page 34: Playing Mp3 Files
7.1 Playing MP3 files Using the <ALBUM+> or <ALBUM-> keys you can navigate through the folder structures. With the <OK> buttons, playback is paused and continued. By continuously pressing the <SKIP TRACK> buttons you can fast forward and rewind within the track with increasing speed. Brief pressing of the <SKIP TRACK BACKWARD>... -
Page 35: Bluetooth Audio
"Not connected" appears in the Display. Now open the BLUETOOTH settings on the terminal device to be paired and start searching for available BLUETOOTH devices there. Select "M-925DAB" and start the pairing process. After successful pairing, "Connected" appears on the display. Now the music playback can be controlled via the terminal. -
Page 36: Troubleshooting
12. Troubleshooting Please check the following points in case of malfunctions: No sound Plug in the power adapter properly. Adjust the volume to the correct level. Make sure the desired source is selected. The system does not respond at the touch of a button ... -
Page 37: Disposal
The following restrictions apply to the usable USB Devices: Usable USB devices • USB Devices that belong to the USB Mass Storage Class. • USB Devices whose maximum power consumption is 500 mA or less. • USB Mass Storage Class: USB Devices that the PC recognises as external storage without the need for a special driver or application software. -
Page 38: Technical Specifications
15. Technical specifications M-925DAB Power supply AC ~ 100 - 240 V. AC input frequency 50/60 Hz Power consumption 40 Watts Power consumption in standby mode < 1 Watt Tuner FM/DAB + DAB tuning range BAND III 174.928 MHz – 239.200 MHz FM tuning range 87.50 MHz –... -
Page 39: Guarantee
Please keep this warranty card in a safe place. Kenwood guarantees this device for a period of two years from the date of purchase as shown on the invoice or sales receipt from the Kenwood dealer. - Page 41 Système stéréo compact M-925DAB NOTICE D’EMPLOI JVCKENWOOD Corporation...
- Page 42 Sommaire Sommaire Page Avant la mise en service / consignes de sécurité Mise en service Éléments et fonctions Commande de la radio Activer / désactiver (mode veille) Navigation dans les menus Réglage du volume Réglage du son Informations complémentaires Réglage de la langue des menus Réglage de la date et de l’heure Réglage de l’éclairage de l’écran Réglage du minuteur de sommeil...
- Page 43 1. Avant la mise sous tension CONSIGNES DE SÉCURITÉ IMPORTANTES Attention : Lisez attentivement cette page afin d’assurer l’utilisation sûre de l’appareil ! Lire attentivement ces consignes ! • Respectez toutes les consignes de sécurité et d’action lorsque vous mettez ce produit en service. Conserver soigneusement ces consignes ! •...
- Page 44 Surcharge • N’exposez jamais les prises secteur, rallonges ou multiprises à une surcharge, puisque cela génère un risque d’incendie ou d’électrisation. Pénétration de corps étrangers et de liquides • Veillez à ce qu’aucun corps étranger ou liquide ne puisse pénétrer dans l’appareil par les orifices de ventilation.
- Page 45 Déclaration de conformité UE Par la présente, la société JVCKENWOOD Corporation déclare que le type de dispositif radio M-925DAB satisfait aux exigences de la directive 2014/53/UE. Le texte complet de la déclaration de conformité UE est disponible via l’adresse Internet suivante : http://www.kenwood.com/euukdoc/ Fabricant :...
-
Page 46: Mise En Service
2. Mise en service 2.1 Déballage Déballez avec précaution l’appareil en veillant à ce que tous les accessoires soient présents. • Télécommande infrarouge • Antenne filaire FM / DAB+ • 2 x piles AAA/R03 • Notice d’emploi • 2 x baffles 2.2 Branchement •... -
Page 47: Éléments Et Fonctions
3. Éléments et fonctions Veille Marche / Arrêt Sélection de mode Menu Sélection de lecture en boucle Mode aléatoire Album précédent, mémoire de préréglages – Augmenter le volume Changement de titre / Recherche de titre parmi les titres précédents Confirmer la saisie, Lecture / Pause Diminuer le volume Mode silencieux Marche / Arrêt... - Page 48 3. Éléments et fonctions, suite Face avant 1 - Interrompre la lecture, Appariage Bluetooth Recherche de stations 2 - Sélection de mode 3 - Réglage BASS (basses) 4 - Réglage TREBBLE (aigües) 5 - Veille Marche / Arrêt 6 - Mode Bluetooth 7 - Tiroir CD 8 - Écran TFT 9 - Titre suivant...
-
Page 49: Commande De La Radio
4. Commande de la radio 4.1 Activer / désactiver (mode veille) Appuyez sur la touche « Veille » de l’appareil ou de la télécommande pour allumer la radio. Appuyez une nouvelle fois sur cette touche pour commuter l’appareil en mode veille. Pour éteindre la radio entièrement, débranchez-la de l’alimentation électrique. -
Page 50: Réglage Du Minuteur De Sommeil
4. Sélectionnez « Régl. heure/date » et confirmez. Sélectionnez et réglez ensuite les heures et les minutes, le jour, le mois et l’année, puis confirmez. Le menu « Heure » peut être ouvert aussi à l’aide de la touche <CLOCK> de la télécommande. Autres réglages dans le menu « Heure »... -
Page 51: Radio Numérique Dab
3. Sélectionnez à présent le menu « Réveils », puis confirmez. 4. « Réveils 1 Config » s’affiche. Vous pouvez à présent régler l’heure de réveil 1 ou passer à l’heure de réveil 2 (« Réveils 2 Config ») à l’aide des touches <Titre suivant> ou <Titre précédent>. 5. -
Page 52: Favoris (Emplacements Mémoire)
Remarque : La qualité de réception de la station dépend de facteurs tels que le temps, le lieu d’installation et de l’orientation de l’antenne. Si la réception d’une station de la liste de stations devait ne pas être possible, vous pouvez modifier l’orientation de l’antenne ou déplacer la radio. Les stations supprimées peuvent être effacées de la liste des stations. -
Page 53: Enregistrement Des Stations Dans La Mémoire De Stations
• Appuyez sur la touche <Titre précédent> pour diminuer la fréquence de réception. • Si vous maintenez une de ces touches appuyées, l’appareil lance une recherche de stations automatiques qui sera interrompue à la prochaine station trouvée. • Appuyez sur la touche <SCAN> pour lancer une mémorisation automatique des stations. Toutes les stations détectées sont enregistrées dans la mémoire des stations. -
Page 54: Lecture De Fichiers Mp3
7.1 Lecture de fichiers MP3 Les touches <ALBUM+> ou <ALBUM-> vous permettent de vous déplacer dans les arborescences de répertoires. La touche <OK> permet d'interrompre ou de poursuivre la lecture. Tant que vous maintenez la touche <SAUT DE TITRES> appuyée, vous pouvez faire défiler les titres à une vitesse croissante vers l’avant ou l’arrière. -
Page 55: Audio Bluetooth
L’écran affiche « Non connecté ». Ouvrez alors les réglages Bluetooth du terminal à apparier et lancez la recherche d’appareils Bluetooth disponible sur ce terminal. Sélectionnez l’option « M-925DAB » et lancez le processus d’appariage. Lorsque l’appariage s’est terminé avec succès, l’écran affiche « Connecté ». Vous pouvez à présent gérer la diffusion de musique via le terminal. -
Page 56: Élimination Des Défaillances
12. Élimination des défaillances En cas de dysfonctionnements, veuillez vérifier les points suivants : Absence de son Branchez correctement le bloc d’alimentation à fiches. Réglez le volume à un niveau adéquat. Assurez-vous d’avoir bien sélectionné la source souhaitée. Le système ne réagit pas à... -
Page 57: Mise Au Rebut
Les restrictions suivantes s’appliquent concernant les appareils USB utilisables : Appareils USB utilisables • Appareils USB appartenant à la classe des mémoires masse USB. • Appareils USB, dont le courant absorbé maximal est de 500 mA. • Appareils USB, de la classe des mémoires de masse USB : des appareils USB que le PC détecte comme mémoire externe, sans qu’un pilote spécial ou un logiciel d’application spécial ne soit nécessaire. -
Page 58: Caractéristiques Techniques
15. Caractéristiques techniques – M-925DAB Alimentation électrique Tension alternative ~ 100 - 240 V Fréquence de courant alternatif d’entrée 50/60 Hz Puissance absorbée 40 Watt Puissance absorbée en mode veille < 1 Watt Antenne UKW/DAB+ Gamme d'accord DAB BANDE III 174,928 MHz –... -
Page 59: Garantie
Veuillez conserver soigneusement la présente carte de garantie. Kenwood accorde sur cet appareil une garantie de deux ans à partir de la date d’achat indiqués sur la facture ou le justificatif d’achat du revendeur Kenwood. Cette garantie s’étend aux défauts de pièces et main d'œuvre. Nous nous réservons le droit de remplacer le produit si sa réparation n’est plus appropriée sur le plan économique. - Page 61 Sistema stereo compatto M-925DAB MANUALE DI ISTRUZIONI JVCKENWOOD Corporation...
- Page 62 Indice Contenuto Pag. Prima della messa in funzione / istruzioni di sicurezza Messa in servizio Componenti e funzioni Funzionamento della radio Accensione/Spegnimento (Standby) Navigazione dei menu Regolare il volume Regolare l’audio Ulteriori informazioni Impostazione della lingua dei menu Impostazione della data e dell'ora Impostazione dell'illuminazione del display Regolazione del timer di sospensione 4.10...
- Page 63 1. Prima di attivare la tensione di alimentazione IMPORTANTI ISTRUZIONI DI SICUREZZA Attenzione: Leggere attentamente questa pagina per garantire un funzionamento sicuro dell'unità. Leggere attentamente queste istruzioni! • Seguire tutte le istruzioni di sicurezza e d'uso durante l'utilizzo di questo prodotto. Conservare le note in un luogo sicuro! •...
- Page 64 Penetrazione di materiale estraneo e liquido • Non permettere che materiali estranei o liquidi entrino nell'apparecchio attraverso le aperture in dotazione, poiché ciò potrebbe causare il contatto diretto dell'apparecchio con elementi soggetti a tensioni eccessive, provocare cortocircuiti, incendi o scosse elettriche. Non versare mai liquidi di alcun tipo su questo apparecchio.
- Page 65 Dichiarazione di conformità UE JVCKENWOOD Corporation dichiara che l'apparecchiatura radio tipo M-925DAB è conforme alla Direttiva 2014/53/UE. Il testo integrale della dichiarazione di conformità UE è disponibile al seguente indirizzo Internet: http://www.kenwood.com/euukdoc/...
-
Page 66: Messa In Servizio
2. Messa in servizio 2.1 Sconfezionamento Sconfezionare delicatamente il dispositivo e assicurarsi che tutti gli accessori siano presenti: • Telecomando a infrarossi • Antenna mobile FM / DAB+ • 2 x batterie AAA/R03 • Manuale di istruzioni • 2 x altoparlanti 2.2 Collegamento •... -
Page 67: Componenti E Funzioni
3. Componenti e funzioni Standby On/Off Selezione della modalità Menu Ripetere la selezione Modalità random Album precedente, memoria preim- postata - Aumento volume Salto del brano/ricerca brano all'in- dietro Confermare immissione, Riproduzione / Pausa Diminuire il volume Mute On/Off Tasti numerici Programmazione dei titoli, occupa- zione della memoria di preselezione Apertura/chiusura del vassoio CD... - Page 68 3. Componenti e funzioni Continuazione Fronte 1 - Interrompere la riproduzione, Accoppiamento BLUETOOTH, Scansione stazioni 2 - Selezione della modalità 3 - Regolazione BASSI 4 - Regolazione ACUTI 5 - Standby On/Off 6 - Modalità BLUETOOTH 7 - Carica CD 8 - Display TFT 9 - Salta traccia in avanti 10 - Espelli CD...
-
Page 69: Funzionamento Della Radio
4. Funzionamento della radio 4.1 Accensione/Spegnimento (Standby) Premere il pulsante di standby sull'unità o sul telecomando per accendere la radio. Premere nuova- mente il tasto per mettere il dispositivo in modalità standby. Per spegnerla completamente, scollegare la radio dalla rete elettrica. 4.2 Navigazione dei menu Premere il tasto <MENU>... -
Page 70: Impostazione Dell'illuminazione Del Display
Il menu "Ora" il menu può essere richiamato anche tramite il tasto <CLOCK> sul telecomando. Ulteriori impostazioni nel menu "Ora Si possono selezionare le seguenti funzioni nel menu "Ora": "Aggiorn. automatico": Impostazione della fonte da cui viene richiamata automaticamente l'ora. Possibilità... -
Page 71: Radio Digitale Dab
con i tasti <brano avanti> o <brano indietro> per passare alla sveglia 2 ("Sveglia 2 impost"). 5. Dopo la conferma si prega di eseguire le seguenti operazioni: • Impostazione di ore e minuti, conferma della selezione ogni... • Impostazione della durata dell'allarme ("15, 30, 45, 60, 90 minuti") •... -
Page 72: Preferiti (Spazi Di Memoria)
5.4 Cancellare le stazioni che non sono (più) ricevibili Le stazioni che non possono più essere ricevute possono essere cancellate dalla lista. Per fare questo, premere il tasto <MENU> e scegliere "Elimina". Selezionare "SI" e questi canali verranno eliminati. Selezionare "NO" vi riporta al menu senza cancellare i canali. 5.5 Preferiti (spazi di memoria) Sono disponibili 30 posizioni di memoria (Preferiti) per memorizzare le vostre stazioni DAB+. -
Page 73: Memorizzazione Delle Stazioni Nella Memoria Delle Stazioni
Funzioni RDS Premendo ripetutamente il tasto <INFO/INTRO> si possono richiamare le seguenti informazioni: PTY (Tipo di programma) / RDS Testo radiofonico / Frequenza / Ricezione stereo / Ora / Data In caso di condizioni di ricezione insufficienti, la ricezione di queste informazioni potrebbe essere disturbata o non possibile. -
Page 74: Riproduzione Di File Mp3
7.1 Riproduzione di file MP3 Tramite i tasti <ALBUM+> o <ALBUM-> per navigare nella struttura delle cartelle. Col tasto <OK> si mette in pausa e riprende la riproduzione. Premendo in modo permanente i tasti <SALTA TITOLO> è possibile avanzare o retrocedere all'interno del titolo a velocità crescente. Con una breve pressione del tasto <SALTA TITOLO INDIETRO>... -
Page 75: Audio Bluetooth
Assicurarsi che il dispositivo terminale da accoppiare sia acceso e che il BLUETOOTH sia attivato. Il display visualizza "Non collegata". A questo punto aprire le impostazioni BLUETOOTH sul dispositivo da accoppiare e avviare la ricerca dei dispositivi BLUETOOTH disponibili. Selezionare "M-925DAB" e iniziare il processo di accoppiamento. Dopo il successo dell'accoppiamento, il display mostra "Collegato". -
Page 76: Risoluzione Dei Problemi
12. Risoluzione dei problemi In caso di malfunzionamenti, verificare i seguenti punti: Nessun suono Inserire correttamente l’alimentatore di rete. Impostare il volume al livello corretto. Verificare sempre che sia selezionata la fonte desiderata. Il sistema non risponde alla pressione di un tasto ... -
Page 77: Smaltimento
Per quanto concerne i dispositivi USB utilizzabili valgono le seguenti limitazioni: Dispositivi USB utilizzabili • Dispositivi USB appartenenti alla classe dei dispositivi di memoria di massa USB. • I dispositivi USB il cui assorbimento massimo di corrente non supera i 500 mA. •... -
Page 78: Dati Tecnici
15. Dati tecnici M-925DAB Alimentazione della tensione Tensione alternata ~ 100 – 240 V Frequenza di corrente alternata in ingresso 50/60 Hz Potenza assorbita 40 Watt Potenza assorbita nella modalità stand-by < 1 Watt Antenna UKW/DAB+ Intervallo di sintonizzazione DAB BAND III 174,928 MHz –... -
Page 79: Garanzia
Il numero di serie e il nome del modello del prodotto. Kenwood si riserva il diritto di rifiutare il servizio di garanzia se le informazioni di cui sopra sono assenti o se sono state apportate modifiche al prodotto dalla data di acquisto. - Page 81 Compact stereosysteem M-925DAB GEBRUIKSAANWIJZING JVCKENWOOD Corporation...
- Page 82 Inhoudsopgave Inhoud Pagina Vóór de ingebruikname / veiligheidsinstructies Ingebruikname Componenten en functies Bediening van de radio In- / uitschakelen (stand-by) Navigeren in de menu’s Volume aanpassen Klank instellen Bijkomende informatie Instellen van de menutaal Instellen van tijd en datum Instellen van de displayverlichting Instellen van de Sleeptimer 4.10 Instellen van de wekker...
-
Page 83: Vóór De Ingebruikname / Veiligheidsinstructies
1. Vóór het inschakelen van de spanningsvoorziening BELANGRIJKE VEILIGHEIDSINSTRUCTIES Let op: Lees deze pagina aandachtig door om de veilige werking van het apparaat te garanderen. Opmerkingen aandachtig lezen! • Geef gevolg aan alle veiligheids- en bedieningsinstructies wanneer u dit product in gebruik neemt. Instructies zorgvuldig bewaren! •... - Page 84 Overbelasting • Overbelast nooit wandcontactdozen, verlengsnoeren of meervoudige contactdozen, omdat anders het gevaar voor brand of elektrische schokken bestaat. Binnendringen van vreemd materiaal en vloeistof • Let erop dat er nooit vreemd materiaal of vloeistof door ventilatieopeningen dit apparaat binnendringt, omdat het anders tot contact met onder hoe spanning staande componenten dan wel tot een kortsluiting met de daaruit voortvloeiende brand of elektrische schok kan komen.
- Page 85 EU-conformiteitsverklaring Hiermee verklaart de JVCKENWOOD Corporation dat de radio-installatie van het type M-925DAB aan de richtlijn 2014/53/EU voldoet. De volledige tekst van de EU-conformiteitsverklaring is op volgende website beschikbaar: http://www.kenwood.com/euukdoc/...
-
Page 86: Ingebruikname
2. Ingebruikname 2.1 Uitpakken Pak het apparaat voorzichtig uit en let erop dat alle accessoires aanwezig zijn: • Infrarood-afstandsbediening • FM/DAB+ werpantenne • 2 x batterij AAA/R03 • Gebruiksaanwijzing • 2 x luidspreker 2.2 Aansluiten • Open het batterijvak van de afstandsbediening en breng de batterijen met de juiste polariteit aan. De vooropgestelde polariteit (+/-) is in het batterijvak aangegeven. -
Page 87: Componenten En Functies
3. Componenten en functies Stand-by "Aan" / "Uit" Modusselectie Menu Herhalingsselectie Willekeurige modus (at random) Vorig album, voorinstelgeheugen - Volume verhogen Titelsprong/titel-zoekfunctie achterwaarts Invoer bevestigen, Weergave/pauze Volume verlagen Stille afstemming "Aan" / "Uit" Cijfertoetsen Titelprogrammering, voorinstelgeheugen bezetten CD-lade openen/sluiten (Eject) Uur instellen Wekker instellen Weergave stoppen, BLUETOOTH... - Page 88 3. Componenten en functies vervolg Voorzijde 1 - Weergave stoppen, BLUETOOTH koppeling, Afstemming van de zenders 2 - Modusselectie 3 - BASS regeling (woofer 4 - TREBLE regeling (tweeter) 5 - Stand-by "Aan" / "Uit" 6 - BLUETOOTH modus 7 - CD lade 8 - TFT display 9 - Titelsprong voorwaarts 10 - CD Eject...
-
Page 89: Bediening Van De Radio
4. Bediening van de radio 4.1 In- / uitschakelen (stand-by) Druk op de stand-by toets aan het apparaat of op de afstandsbediening om de radio in te schakelen. Druk opnieuw op de toets om het apparaat in de stand-by modus te zetten. Om de radio uit te schakelen, koppelt u de radio van het stroomnet. -
Page 90: Instellen Van De Displayverlichting
4. "Set Time/Date" selecteren en bevestigen. Daarna uren, minuten, dag, maand en jaar selecteren, instellen en bevestigen. Het menu "Time" kan ook via de toets <CLOCK> op de afstandsbediening opgeroepen worden. Bijkomende instellingen in het menu "Time" Volgende functies kunnen in het menu "Time" ingesteld worden: "Auto Update": Instelling van welke bron de tijd automatisch opgevraagd wordt. -
Page 91: Digitale Radio Dab
4. "Alarm 1 setup" wordt aangegeven. U kunt nu de wektijd 1 instellen of met de toets <Skip track forwards> of <Skip track backwards> naar de wektijd 2 omschakelen ("Alarm 2 setup"). 5. Gelieve na de bevestiging volgende stappen uit te voeren: •... -
Page 92: Niet (Meer) Ontvangbare Zenders Wissen
Opmerking: De ontvangstkwaliteit van een zender is van factoren zoals weer, opstellingsplaats en antenne-oriëntering afhankelijk. Indien een zender uit de zenderlijst niet ontvangbaar is, wijzigt u de oriëntatie van de antenne of de plaats van opstelling van de radio. Niet meer ontvangbare zenders kunnen uit de zenderlijst verwijderd worden. 5.4 Niet (meer) ontvangbare zenders wissen Zenders die niet meer ontvangen kunnen worden, kunnen uit de lijst gewist worden. -
Page 93: Opslaan Van Stations In Het Zendergeheugen
• Wanneer u één van deze toetsen ingedrukt houdt, start er een automatische zender-zoekfunctie die bij het volgende gevonden station stopt. • Druk op de toets <SCAN> om een automatische zenderopslag te starten. Alle gevonden stations worden in het zendergeheugen opgeslagen. RDS-functies Volgende informatie kan opgevraagd worden door de toets <INFO/INTRO>... -
Page 94: Afspelen Van Mp3-Bestanden
7.1 Afspelen van MP3-bestanden Via de toets <ALBUM+> of <ALBUM-> kunt u in de mapstructuren navigeren. Met de toets <OK> wordt de weergave gepauzeerd en voortgezet. Door het permanent indrukken van de toetsen <Skip track> kan er binnen de titel met toenemende snelheid vooruit en achteruit gespoeld worden. Door even te drukken op <Skip track backwards>... -
Page 95: Bluetooth Audio
Op het display verschijnt "Not connected". Open nu de BLUETOOTH-instellingen op het te koppelen eindapparaat en start daar het zoeken naar beschikbare BLUETOOTH-apparaten. Selecteer "M-925DAB" en start het koppelingsproces. Nadat het Pairing voltooid werd, verschijnt op het display "Connected". Nu kan de muziekweergave via het eindapparaat gestuurd worden. Gebruik daarvoor een muziek-app naar keuze. -
Page 96: Oplossing Van Storingen
12. Oplossing van storingen Gelieve bij functiestoringen de volgende punten te controleren: Geen klank Steek de stekkernetvoeding correct in. Zet het volume op het juiste niveau. Vergewis u ervan dat de gewenste bron geselecteerd is. Het systeem reageert niet op het indrukken van een toets ... -
Page 97: Afvalverwerwijdering
Met betrekking tot de bruikbare USB-apparaten gelden volgende beperkingen: Bruikbare USB-apparaten • USB-apparaten die tot de USB-massageheugenklasse behoren. • USB-apparaten, wier maximale stroomopname hoogstens 500 mA bedraagt. • USB-massageheugenklasse: USB-apparaten die de PC als extern geheugen detecteert zonder dat er speciale driver of zonder dat er speciale toepassingssoftware noodzakelijk zou zijn. -
Page 98: Technische Gegevens
15. Technische gegevens M-925DAB Spanningsvoorziening Wisselspanning ~ 100 – 240 V Ingangswisselstroomfrequentie 50/60 Hz Opnamecapaciteit 40 watt Opnamecapaciteit in de stand-by modus < 1 watt Tuner UKW/DAB+ DAB-afstembereik BAND III 174,928 MHz – 239,200 MHz FM-afstembereik 87,50 MHz – 108,00 MHz CD-modus ≥... -
Page 99: Garantie
Gelieve deze garantiekaart zorgvuldig te bewaren. Kenwood verleent op dit apparaat een garantie van twee jaar, te rekenen vanaf de datum van aankoop, volgens factuur of kassabon van de Kenwood-dealer. Deze garantie heeft betrekking op gebreken van materiaal en afwerking. Wij behouden ons het recht voor, het product om te ruilen indien een economisch verantwoorde reparatie niet meer mogelijk is.
Need help?
Do you have a question about the M-925DAB and is the answer not in the manual?
Questions and answers