
Subscribe to Our Youtube Channel
Related Manuals for Avallon AWBC242GGFDBLSS


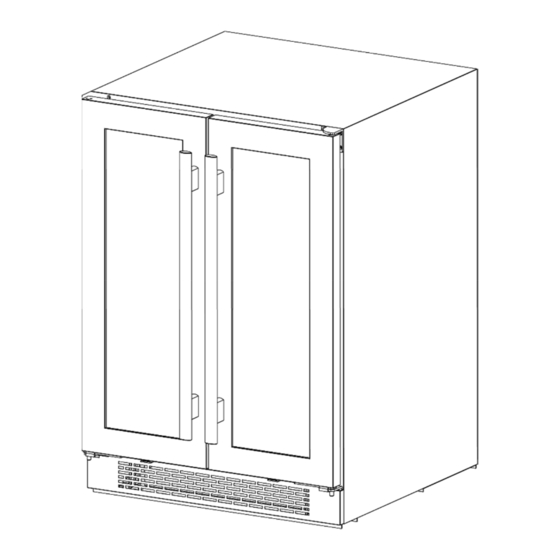
Summary of Contents for Avallon AWBC242GGFDBLSS
- Page 1 USER’S GUIDE Installation, Operation, and Maintenance for your product. Built‐In Wine and Beverage Refrigerator Model – AWBC241GGFDBLSS www.avallon.com V2.1‐06272022 ...
-
Page 2: Important Safety Information
Important Safety Information Improper handling can cause serious damage to the Avallon wine and beverage refrigerator and/or injury to the user. This wine and beverage refrigerator is designed for domestic indoor use only. Do not use the unit for industrial or commercial use. Any other use may invalidate the warranty. Please review the rating label located on the rear panel of the unit for electrical and other technical data related to this unit. The unit must be used in a properly grounded wall outlet. Please read and follow the safety information listed below to reduce the risk of fire, electric shock, or injury. ELECTRICAL SAFETY • Do not exceed the power outlet ratings. • It is recommended the wine and beverage refrigerator be connected on its own circuit. • The unit must be installed in accordance with state and local electrical codes. • A standard electrical supply (115 V, 60Hz), that is properly grounded in accordance with the National Electrical Code and local codes and ordinances is required. • Use outlets that cannot be turned off by a switch or pull chain. • Always turn the unit off and unplug it from the outlet when cleaning. • Unplug the unit if it is not going to be used for an extended period of time. • Do not operate the unit with a power plug missing the ground plug, a damaged cord, or a loose socket. ... - Page 3 GENERAL SAFETY To prevent injuries, use at least two people to move and install the beverage refrigerator. Install the beverage refrigerator in a well‐ventilated area where the ambient temperature is above 50° F and below 90° F. The temperature range for this refrigerator is optimized for beverage storage. Perishable food items may require a different storage environment. Do not place hot or warm items into the refrigerator before they cool down to room temperature. This unit is designed to be installed indoors, and protected from rain, sleet, snow, and / or moisture. This unit is not intended to be used by children. Children should be supervised to ensure that they do not play with this product. Never allow children to crawl inside the refrigerator. If you are disposing of the unit, remove the door. ...
-
Page 4: Table Of Contents
Installing Your Door Handle and Shelves .......................... 6 INSTALLING THE DOOR HANDLE: ............................ 6 INSTALLING THE SHELVES: .............................. 7 REMOVING THE SHELVES: ............................... 7 Operation .................................... 8 INSTALLATION CHECK‐LIST BEFORE OPERATION: ........................ 8 USING YOUR CONTROL PANEL: ............................... 9 Internal Light .................................. 10 Defrosting ..................................... 11 Normal Sounds .................................. 11 Temperature Alarm ................................ 11 Door Ajar Alarm .................................. 11 Cleaning and Maintenance .............................. 12 INTERIOR CLEANING: ................................ 12 EXTERIOR CLEANING: ................................ 12 Preparing Your Wine and Beverage Refrigerator for Storage .................... 12 Troubleshooting .................................. 13 Specifications .................................. 15 Avallon Product Warranty .............................. 16 iv ... - Page 5 First Time Operating Instructions: Before use, make sure all packaging labels and materials are removed from the unit. Be sure to keep track of all included parts and pieces before discarding packaging materials. It is advised that you keep the original box and packaging materials in case you need to move or ship the appliance in the future. Allow the unit to stand for at least 24 hours before you use it; this allows the cooling components time to settle from transit. The instruction manual should be read before use. This owner’s manual is provided for reference use only. Specifications may change without prior notice. Refer to the product label on the back of your wine and beverage refrigerator for the latest technical information. v ...
-
Page 6: Introduction
Model Number: Serial Number: Date of Purchase: To better serve you, please do the following before contacting customer service: • If you received a damaged product, immediately contact the retailer or dealer that sold you the product. • Read and follow this instruction manual carefully to help you install, use, and maintain your wine and beverage refrigerator. • Read the troubleshooting section of this manual as it will help you diagnose and solve common issues. • Visit us on the web at http://www.avallon.com to download product guides, additional troubleshooting resources, and up‐to‐date information. • If you need warranty service, our friendly customer service representatives are available via email at service@avallon.com. ... -
Page 7: Parts Identification
Parts Identification Back View ... -
Page 8: Installing Your Wine And Beverage Refrigerator
Carbon Filter A built‐in carbon filter protects your wine and beverages by acting as a natural barrier against harmful odors. Internal Fan This is an air‐cooled unit equipped with an internal fan that maintains a consistent internal temperature. Note: The carbon filter should be replaced every 3‐6 months depending on the unit’s exposure level to odor. If the unit is placed in a kitchen, regular replacement every three (3) months is ideal. Tip: Gather the model and serial number from the product label and write them down before installing the wine and beverage refrigerator. Installing Your Wine and Beverage Refrigerator ... -
Page 9: Types Of Installation
Warning: Use two or more people to move and install the wine and beverage refrigerator. Failure to do so can result in back or other injury. Carefully remove the packaging materials. Remove any shipping tape and glue from your wine and beverage refrigerator before using. Do not use sharp instruments, rubbing alcohol, flammable fluids, or abrasive cleaners to remove tape or glue. These products can damage the surface of your wine and beverage refrigerator. Important: Do not remove any safety, warning, or product information labels from your wine and beverage refrigerator. TYPES OF INSTALLATION: This wine and beverage refrigerator has been designed for freestanding or built‐in installation. In every case, there must be adequate ventilation and access for service. Freestanding Installation A freestanding installation will allow you to install the wine and beverage refrigerator in almost any place you desire. You must follow the stated instructions for electrical requirements and leveling the wine and beverage refrigerator. Built‐in Installation A recessed installation will allow you to install the wine and beverage refrigerator under a counter or in a kitchen cabinet provided the clearance space requirements around the wine and beverage refrigerator are followed. It is necessary to allow adequate ventilation space around the unit (make sure there is at least some ventilation room for the back of the unit). The following additional items must be observed: 1. Place the wine and beverage refrigerator in front of the installation location. 2. Adjust the feet and place the unit flat on the floor or on a platform depending on your installation requirements. ... -
Page 10: Installation Clearance Requirements
Installation Clearance Requirements: When installing the wine and beverage refrigerator under a counter, follow the recommended spacing dimensions shown. • To ensure proper service access and ventilation, allow between 1 ‐ 2 inches of clearance at the back as shown in the diagram. • The installation should allow the unit to be pulled forward for servicing, if necessary. • A standard electrical supply (115 VAC only, 60 Hz), properly grounded in accordance with National Electrical Code and local codes and ordinances, is required. LEVELING: The wine and beverage refrigerator should be installed on a firm and level surface that will be able to ... -
Page 11: Recommended Grounding Method
RECOMMENDED GROUNDING METHOD: For your personal safety, this appliance must be grounded. It is equipped with a power supply cord having a 3‐prong grounding plug. To minimize possible shock hazard, the cord must be plugged into a mating 3‐ pronged wall socket, and grounded in accordance with the National Electrical Code and local codes and ordinances. If a mating wall socket is not available, it is the personal responsibility of the customer to have a properly grounded, 3‐prong wall receptacle installed by a qualified electrician. Electrical Shock Hazard! Plug into a grounded 3‐prong outlet. Never remove the grounding prong from the plug. Never use an adapter to bypass the grounding prong. DO NOT use an extension cord. Failure to follow these instructions can result in fire, electrical shock, or personal injury. Before you move your wine and beverage refrigerator into its final location, it is important to make sure you have the proper electrical connection. A standard electrical supply (115 V, 60Hz), properly grounded in accordance with the National Electrical Code and local codes and ordinances, is required. It is recommended that a separate circuit, serving only your wine and beverage refrigerator, be provided. Use receptacles that cannot be turned off by a switch or pull chain. The fuse (or circuit breaker) size should be 15 Amps. Installing Your Door Handle and Shelves INSTALLING THE DOOR HANDLE: 1. -
Page 12: Installing The Shelves
INSTALLING THE SHELVES: Left Zone 1. Open the door completely. 2. Push the shelf tracks affixed to the walls of the inner cabinet to the rear of the unit so that the tracks are fully seated inside the cooler compartment. 3. Line up the rails affixed to the shelf with the corresponding wine and beverage cooler tracks attached to the inner cabinet walls. 4. Push the front of the shelf inwards evenly until the shelf rests fully inside of the unit and you are able to close the door. 5. The shelf should glide smoothly back and forth. If it does not, you may need to remove it and start over. Right Zone 1. Open the door completely. 2. Ensure that the metal guide posts are attached to the rear of the shelf. 3. Tilt the shelf 45° counterclockwise. The metal guide post on your left side should rest on the shelf track. 4. Gently push the shelf back towards the rear of the unit until the right side metal guide post meets the vertical indentation in the plastic interior cabinet. 5. Gently set the right side of the shelf down on the shelf track. The shelf should move forwards and backwards smoothly. REMOVING THE SHELVES: Left Zone 1. Open the door completely. 2. Remove all of the contents loaded on the shelf, if applicable. 3. Pull the shelf towards yourself until it is fully extended outward. 4. -
Page 13: Operation
Right Zone 1. Open the door completely. 2. Make sure the shelf is pushed back completely. 3. Lift either the left or right side of the shelf to create a 45° angle from its original position. Make sure not to lift either side of the shelf too hard as it may come in contact with the inner wall mount. 4. Pull the shelf outward until it is removed from the inner compartment. You may encounter some resistance from the shelf guard rail. Tip: To prevent damaging the door gasket, make sure to open the door fully before pulling the shelves out of their track. Note: The refrigerator may experience decreased cooling efficiency if air flow is restricted due to a fully loaded cabinet. Operation INSTALLATION CHECK‐LIST BEFORE OPERATION: 1. Have all packing materials and tape been removed from the interior and exterior of the wine and beverage refrigerator? 2. Have the installation instructions been followed, including connecting the machine to electricity? 3. -
Page 14: Using Your Control Panel
USING YOUR CONTROL PANEL: Each independently controlled temperature zone – right and left – contains its own control panel. The right (beverage) zone has a temperature range of 34° F to 65° F. The left (wine) zone has a temperature range of 40° F to 65° F. Power Button Press and hold this button down for three seconds to power your unit on. Once pressed, the “Run” indicator light will illuminate to indicate the unit is on and running. Press and hold this button for three seconds again and the unit will power off and the “Run” Indicator light will turn off. Increase Temperature Press this button to increase the temperature by one (1) degree increments. 65° F is the highest available temperature in both zones. Decrease Temperature Press this button to decrease the temperature by one (1) degree increments. 34° F is the lowest available temperature in the right zone. 40° F is the lowest available temperature in the left zone. Interior Light Press this button to cycle through the different internal light settings. There are four light settings: Constant Blue, Constant White, Automatic Blue, and Automatic White. Press this button to choose the next option in the progression, eventually cycling back to the original setting. The lights will fade out of the previous setting and into the next setting in the cycle each time you press this button. Press and hold this button for three seconds to turn the lights completely off or to turn them back on. Open and close the door to check the internal light color and whether the lights stay on with the door closed (Constant Mode) or illuminate only when the door is open (Automatic Mode). Please refer to the “Internal Light” section on the next page for further detail. Note: Pressing and holding the increase and decrease temperature buttons at the same time will switch the temperature display from °F to °C. ... -
Page 15: Internal Light
Warning: Allow at least 24 hours for your wine and beverage refrigerator to run before storing your wine and beverages and to allow the temperature to acclimate. Whether your wine and beverage refrigerator can reach the actual set temperature depends on the ambient environmental conditions. Internal Light This refrigerator is equipped with top and side internal lights that can be set to a blue or white color. Because the unit comes with a glass door, the inside will be seen whether the door is open or closed. You can choose to display each color of light in two different modes: Constant Mode and Automatic Mode. Constant Mode The internal lights will stay constantly illuminated whether the door is open or closed. Automatic Mode The internal lights will illuminate each time the door is opened and fade off once the door is closed. This feature is triggered by a sensor located on the front vent. This sensor allows the refrigerator to recognize when the door is open or closed. With each press of the light button, the unit will progress through the cycle of light settings seen below. Note: We run test every unit that we produce in our factory. Because of this, your model may default to any of the above settings out of the box. Simply cycle through the progression of settings until you reach your desired light setting. The lights will return to the Constant Blue setting after the Automatic White ... -
Page 16: Defrosting
Normal Sounds Your new wine and beverage refrigerator may make sounds that are not familiar to you. Most of the new sounds are normal. Hard surfaces like the floor or walls can make the sounds seem louder than they actually are. The following describes the kinds of sounds that might be new to you and what may be making them. • Rattling noises may come from the flow of the refrigerant or the water line. • Items stored on top of the wine and beverage refrigerator can also make noises. • The high efficiency compressor may make a pulsating or high‐pitched sound. • The internal fan will run frequently to create a consistent internal temperature environment. • Water running from the evaporator to the water bin may make a splashing sound. • As each cycle ends, you may hear a gurgling sound due to the refrigerant flowing in your wine and beverage refrigerator. • You may hear air being forced over the condenser by the condenser fan. Temperature Alarm If the interior temperature is higher than 73°F (23°C), “HI” is shown on the temperature control panel and the temperature alarm will sound continuously after one (1) hour. This indicates that the inner temperature is too high. If the inner temperature is lower than 25°F (‐4°C), “LO” is shown on the temperature display panel and the temperature alarm will sound continuously after fifteen minutes. If one of these situations occurs, please reference the troubleshooting section found in this manual or contact Avallon for support. Door Ajar Alarm This wine and beverage cooler includes a door ajar alarm, which will sound if one of the doors is open for more than three (3) minutes. Leaving the door open for extended periods of time will cause poor cooling performance and may shorten the life of the refrigerator. Keep the door closed as frequently as possible. 11 ... -
Page 17: Cleaning And Maintenance
Cleaning and Maintenance Periodic cleaning and proper maintenance will ensure efficiency, top performance, and long life. INTERIOR CLEANING: 1. Disconnect power to the unit. 2. Open the door and remove the contents and shelves. 3. Wait until the unit defrosts. 4. With a clean cloth, wipe down the interior of the unit. 5. Reinsert the shelves and wine and beverages. 6. Reconnect power to the unit. EXTERIOR CLEANING: The door and cabinet may be cleaned with a mild detergent and lukewarm water solution. Do not use solvent based or abrasive cleaners. Use a soft sponge and rinse with clean water. Wipe with a soft clean towel to prevent water spotting. If the door panel is stainless steel, it can discolor when exposed to chlorine gas and moisture. Clean stainless steel with a cloth dampened with a mild detergent and warm water solution. Never use an abrasive or caustic cleaning agent. Preparing Your Wine and Beverage Refrigerator for Storage If the wine and beverage refrigerator will not be used for a long time, or is to be moved to another place, it will be necessary to defrost the unit and dry the interior. 1. Disconnect the refrigerator from the power supply by removing the power plug from the wall socket. 2. Leave the door open to allow for air circulation and to prevent mold, mildew, and unpleasant smells. 3. Once the interior is dry and clean the unit will be ready for storage. ... -
Page 18: Troubleshooting
Troubleshooting ISSUE POSSIBLE CAUSE SOLUTION The wine and beverage The room temperature is higher Run the refrigerator at the refrigerator turns on and off than the recommended ambient appropriate ambient frequently. environment. temperature. The door is being opened often. Minimize the number of times the door is opened. The door is not completely closed. Make sure the door is completely closed. The door gasket is not sealing Make sure the door gasket is properly. properly sealed. The refrigerator does not have the Read and follow the “Installation suggested ventilation. Clearance Requirements” section. The wine and beverage There is a power failure. Ensure the refrigerator is plugged refrigerator does not turn on. in and the outlet has power. The refrigerator is not plugged in. Plug the unit in to a power outlet that has sufficient amperage. ... - Page 19 ISSUE POSSIBLE CAUSE SOLUTION The wine and beverage The refrigerator has restricted air Open up space in the cabinet to refrigerator will not reach the flow due to too much storage. allow air flow. desired temperature. The refrigerator is placed too Keep the refrigerator away from close to a heat source. direct sunlight or other heat sources. The refrigerator does not have Read and follow the “Installation sufficient ventilation. Clearance Requirements” section. The door is opened too frequently Close the door tightly and do not or for long periods of time. open the door too frequently or for long periods of time. The wine and beverage Certain sounds are normal Read the “Normal Sounds” refrigerator is making strange section. noises. The unit is not level or is touching Check to make sure the another appliance. refrigerator is level and that it is not in contact with another appliance or furniture. The body of the wine and ...
-
Page 20: Specifications
Specifications Dual Zone Built‐In French Door Wine and Beverage DESCRIPTION OF PRODUCT Refrigerator MODEL AWBC241GGFDBLSS VOLTAGE / FREQUENCY AC 115 / 60 Hz AMPERAGE 1.5 A INPUT POWER 130 W COLOR Black Cabinet with Black Stainless Steel Door STORAGE CAPACITY 21 Bottles and 64 Cans* REFRIGERANT R600a, 1.41 oz. 34° F to 65° F Right (Beverage) Zone TEMPERATURE RANGE 40° F to 65° F Left (Wine) Zone DIMENSIONS 34‐5/16” X 23‐13/16” X 25‐3/8” ** (HEIGHT X WIDTH X DEPTH) NET WEIGHT 135 Pounds Note: Technical data and performance information are provided for reference only. Specifications are subject to change. Check the rating label on the wine and beverage refrigerator for the most accurate ... -
Page 21: Avallon Product Warranty
1st year All costs for repairing or replacing parts and/or unit which All transportation costs after 90 days. proves to be defective. All transportation costs in the first 90 days. Limited 2 ‐5 year Repairing or replacing any compressor which proves to be Labor and all transportation costs. (compressor only) defective. (Labor not included) This product is warranted by Avallon and is subject to any conditions set forth as follows: WHAT IS COVERED: One Year Parts and Labor: For one year from the date of original retail purchase, Avallon will repair or replace any part free of charge including labor that fails due to a defect in materials or workmanship. Avallon will be responsible for all transportation costs for the first 90 days from original purchase date, after 90 days the consumer will be responsible. Labor will be performed free of charge at an authorized Avallon repair facility and will supply new, rebuilt, or refurbished parts free of charge. Avallon may request a defective part be returned in exchange for the replacement part. After the 12‐month period, Avallon will no longer be responsible for labor charges incurred or replacement parts. All defective products and parts covered by this warranty will be repaired or replaced on a mail‐in basis to an Avallon authorized repair facility. Five Year Limited Warranty (Compressor‐ Labor Not Included): In the second through fifth year from the date of original retail purchase, Avallon will replace the compressor free of charge. The consumer will be responsible for all transportation and labor costs. Avallon will supply a new, rebuilt, or refurbished compressor and may request for the defective compressor to be returned in exchange. This limited 5‐Year warranty is for the compressor only and does not include labor. All warranties apply to the original purchaser only, and only covers defects in workmanship experienced during operation of the product under normal service, maintenance, and usage conditions. This warranty applies to the purchase and use of this product in residential settings within the United States of America. All products and parts replaced by Avallon under warranty service become the property of Avallon. All defective products and parts covered by this warranty will be repaired or replaced on a mail‐in basis to an Avallon authorized repair facility. Exceptions: Commercial or Rental Use Warranty: 90 days labor and parts from date of original purchase. No other warranty applies. WHAT IS NOT COVERED: Labor charges for installation, setup or training to use the product. Shipping damage, and any damage caused by improper packaging for shipment to an authorized service center, and any damaged caused by improper voltage or any other misuse, including abnormal service, handling, or usage. Cosmetic damage such as scratches and dents. Normal wear and tear on parts or replacement of parts designed to be replaced, e.g. filters, cartridges, batteries. Service trips to deliver, pick‐up, or repair, install the product, or to instruct in proper usage of the product. Damages or operating problems resulting from ...
Need help?
Do you have a question about the AWBC242GGFDBLSS and is the answer not in the manual?
Questions and answers