Advertisement
Quick Links
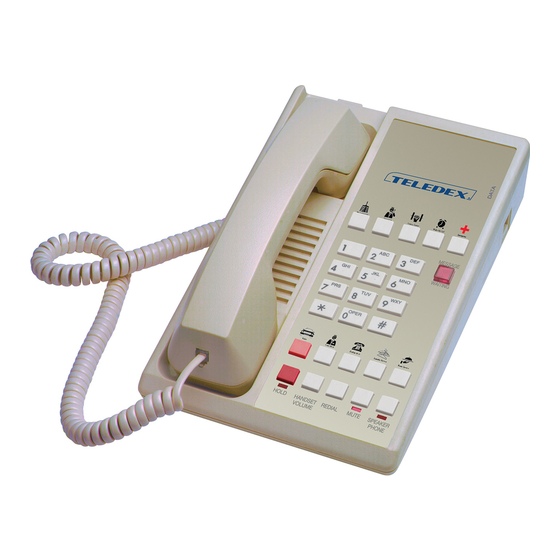
CONNECTING THE DIAMOND+S-5/S
Included with the Diamond+S-5/S are (one each):
• Base unit
• Coiled handset cord
• Handset
• Clear plastic overlay
Contact your supplier or Teledex for information on ordering
custom designed and printed faceplates to enhance the look of your
Teledex Diamond+S-5/S telephone.
1) Located on the left side of the Diamond is a modular jack
TO HANDSET.
labeled
Insert one end of the coiled handset cord
into this jack. (You should hear the coil cord click when proper-
ly inserted).
2) Insert the other end of the coiled handset cord into the modular
jack on the handset.
3) Turn the telephone so the back panel is facing you. Insert either
end of the line cord into the jack on the back of the telephone
TO TEL.
labeled
4) Insert the other end of the line cord into a telephone wall outlet
jack.
5) Once your telephone is connected, place the paper faceplate over
the keys. The plastic overlay slips into place by hooking the tabs
on the overlay into the recessed slots located on both sides. The
overlay is easiest to insert when; the left or right side tabs are
inserted first, and the middle part of the overlay is slightly bowed
to allow for insertion of the other tabs.
RECEIVING A CALL ON THE HANDSET
1) Lift the handset to connect to the ringing line.
2) To end the call, hang up by replacing the handset.
PLACING A CALL ON THE HANDSET
1) Lift the handset.
2) Listen for dial tone, dial the desired number, or press an
DIAL
key to automatically dial a number.
3) To end the call, hang up by replacing the handset.
ADJUSTING SPEAKERPHONE VOLUME
To increase/decrease Speakerphone volume:
Locate the slide switch (labeled
the telephone.
To increase speaker volume slide the SPKR VOL switch towards the
rear of the telephone. To decrease speaker volume slide the SPKR VOL
switch towards the front of the telephone.
USING THE SPEAKERPHONE
SPEAKERPHONE
1) Press the
2) Face the phone to talk (The microphone is located on the front
edge of the telephone).
3) To go to the handset mode, lift the handset, press the SPEAKER-
PHONE key (the LED will go out).
1) Press SPEAKERPHONE key. The red light will light.
2) Replace the handset.
3) To end a speakerphone call, press the SPEAKERPHONE key.
PLACING A CALL ON THE SPEAKERPHONE
1) Without lifting the handset, press the
red LED will light indicating an active call.
2) Listen for dial tone dial the desired number, or press an
DIAL
key to automatically dial a number.
3) To end speakerphone calls press the SPEAKERPHONE key - the
LED will go out.
RECEIVING A CALL ON THE SPEAKERPHONE
1) Without lifting the handset, press the
LED will light - you will be on the Speakerphone.
2) To end speakerphone calls press the SPEAKERPHONE key - the
LED will go out.
AUTO DIAL / ONE TOUCH FEATURE KEYS
The Diamond+S-5/S has up to 10 programmable
These keys can be programmed to automatically dial telephone num-
bers or activate telephone system features. The Diamond will dial the
stored number each time an AUTO DIAL key is pressed.
• User guide
• Line cord
SPKR VOL
) located on the right side of
key. The red LED will light.
SPEAKERPHONE
key. The
AUTO
SPEAKERPHONE
key. The
AUTO DIAL
DIAMOND+S-5/S
GUESTROOM TELEPHONE
USERS GUIDE
STORING AUTO DIAL/ONE TOUCH KEYS
The phone must be connected to a telephone line.
1) Lift the handset.
STORE
2) Press the
3) Enter the telephone number including PAUSE* as required.The
dialing sequence can be up to 15 digits.
AUTO DIAL
4) Press the
5) Replace the handset.
USING THE HOLD KEY
1) Press the red
handset can be replaced without disconnecting the call.
2) To return to the call on HOLD, remove the handset from the
cradle, or press the HOLD key.
HANDSET VOLUME KEY
HANDSET VOLUME
The
Pressing this button during a call will increase the receive volume.
Pressing again will return the volume to the normal level. The handset
volume is reset to normal with each new call.
CALL WAITING
CALL WAITING
The
delivery the CALL WAITING key will be programmed with a 600ms.
hookflash.
*Some PBX systems may require 'Flash Plus Digits' to be dialed to access
CALL WAITING. Contact your systems administrator for details.
FLASH KEY
The FLASH key, when programmed behind an AUTO DIAL key pro-
vides a timed line interrupt typically used for accessing PBX/CO fea-
tures like transfer and conference. The timing of the hookflash is pro-
grammable with the factory default set to 600 millieseconds. Some
AUTO
PBX's may require you to change the hookflash timing from the
default 600ms.
To change the Hookflash timing:
1) Lift the Handset.
STORE
2) Press the
FLASH
3) Press the
4) Select 1-0 on the DTMF pad. The number selected will be the
new Flash timing in milliseconds (ie: "3" = 300 milliseconds).
STORE
5) Press the
PAUSE KEY
The PAUSE key can be used to provide a timed pause between dialed
digits within an AUTO DIAL key. The timing of the pause is program-
mable with the factory default set to zero (0) seconds.
To change the Pause timing:
1) Lift the Handset.
STORE
2) Press the
PAUSE
3) Press the
4) Select 1 - 9 on the DTMF pad. The number selected will be the
new Pause timing in seconds (ie: "3" = 3 seconds).
STORE
5) Press the
MESSAGE WAITING LIGHT
The raised red lens is a Message Waiting light. Some telephone systems
permit an operator or message center to turn on the red Message
Waiting light to alert you that you have a message waiting.
Additionally, the Message Waiting light will act as a visual ring indica-
tor, flashing when the telephone is ringing.
USING THE MUTE KEY
MUTE
Press the
The party on the other end will not hear you when the MUTE key is
de-pressed.
MUTE
Pressing the
MUTE LED will go out). This will allow you to be heard.
keys.
REDIAL
1) Lift the handset, or press the
REDIAL
2) Press the
key and release it.
key where the number is to be stored.
HOLD
key. The red HOLD LED will light. The
key will increase the handset volume.
key is a programmable AUTO DIAL key*. Upon
key (see diagram on back page).
key (see diagram on back page).
key.
key (see diagram on back page).
key (see diagram on back page).
key.
key. The red LED below the MUTE key will light.
key again will deactivate the MUTE key (the
SPEAKERPHONE
key, the Diamond will dial the last number dialed.
key.
Advertisement

Related Manuals for Teledex Diamond Plus S


Summary of Contents for Teledex Diamond Plus S
-
Page 1: Users Guide
• Coiled handset cord • Handset • Clear plastic overlay Contact your supplier or Teledex for information on ordering custom designed and printed faceplates to enhance the look of your Teledex Diamond+S-5/S telephone. 1) Located on the left side of the Diamond is a modular jack TO HANDSET. -
Page 2: Using The Data Port
Teledex. After repair, Teledex will return telephone products to the Customer freight prepaid in the same manner in which is was sent (i.e. Freight sent to Teledex UPS Blue, will be returned via 2 day ship- ping). **Please note: When telephones are returned for repair due to misuse (i.e. - Page 3 Notice: The Ringer Equivalence Number (REN) assigned to each terminal device provides an indi- cation of the maximum number of terminals allowed to be connected to a telephone interface. The termination on an interface may consist of any combination of devices subject only to the require- ment that the sum of the Ringer Equivalence Numbers of all the devices does not exceed 5.