Table of Contents
Advertisement
Quick Links
Advertisement
Table of Contents

Subscribe to Our Youtube Channel
Related Manuals for Solt GGSFLW900B


Summary of Contents for Solt GGSFLW900B
- Page 1 MODEL GGSFLW900B V1.1 0723 User Manual Front Load Washing Machine...
- Page 2 Support Team are here to help. residentia.group www.Sôlt.house You can use our online Support Centre at any time by visiting: @Solt.house → http://support.residentiagroup.com.au — Postage Or you can contact us via phone by dialling: 1300 11 HELP (4357).
-
Page 3: Table Of Contents
User Manual Contents Safety Information Installation Instructions Your Washing Machine Quick Start Guide Operating Instructions Cleaning & Maintenance Troubleshooting Technical Specifications Purchase Details Warranty Information Customer Care Sôlt recommends the use of original spare parts. When contacting our customer service team by calling 1300 11 4357, or by e-mailing support@residentiagroup.com.au, please ensure that you have the following information at hand. -
Page 4: Safety Information
User Manual Safety Information Conditions of Use Installation • This appliance is intended to be used in household and • Carefully rremove all the packaging. similar applications such as farm houses or by customers • Do not install or use a damaged appliance. in serviced apartments, holiday apartments and other •... - Page 5 User Manual • The appliance can be installed as freestanding or below Care & Cleaning the kitchen counter with correct space. This washing WARNING: Risk of injury or damage to the appliance. machine is not intended to be built-in. • When the appliance is put in its permanent position, •...
- Page 6 User Manual Safety Information (continued) Appliance Use • If wanting to install a tumble dryer on top of your washing machine, use the suitable stacking kit. WARNING: Risk of fire, explosion, electric shock or The stacking kit, available from your authorised vendor, damage to the appliance.
-
Page 7: Installation Instructions
area User Manual mportant to prevent the product from Installation Instructions at the product should not stand on W> 20mm he machine, the location characterized Installation Positioning selected: • Ensure that your appliance is installed on solid and vel surface flat ground, in a level position. - Page 8 User Manual Loosen the 4 Remove the bol Loosen the 4 Remove the bolts Close the holes transport bolts with including the ru transport bolts with including the rubber using the cover c a spanner. parts and keep a spanner. parts and keep them for future use.
- Page 9 User Manual Water trough Acoustic Sponge Note! • Please make sure to assemble the acoustic s reduce the noise caused by the machine whil you with a more peaceful and quiet living env Applying the Acoustic Sponge NOTE: Please make sure to assemble the acoustic sponges, which can effectively reduce the noise caused by the machine while working, in order to provide you with a more peaceful and quiet living environment.
-
Page 10: Your Washing Machine
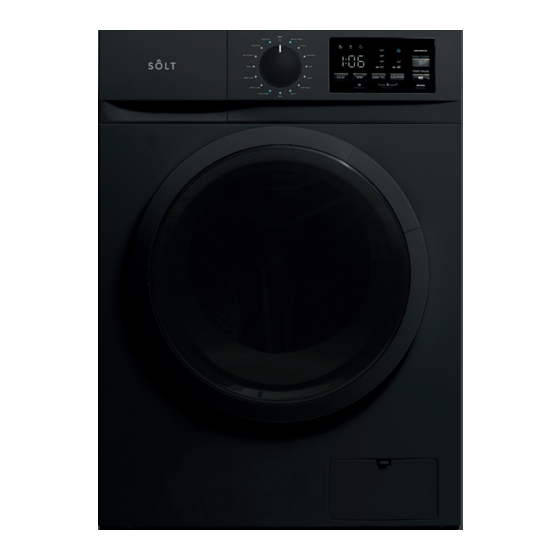
User Manual Your Washing Machine Front Load Washing Machine Water Supply Hose Power Supply Cord Detergent Dispenser Control Panel 9kg Capacity Drum Drain Hose Front Load Door Service Panel NOTE: The images in this user manual are for explanatory purposes only. Your Front Load Washing Machine may appear slightly different. - Page 11 User Manual Program Selection Dial Display INSTALLATION Product Description Top cover Water supply hose Control panel Power supply cord Detergent dispenser Drum Different washing cycles can be selected The display shows the setting, estimated program time remaining, according to the users need and the type of options and status messages of your washer.
- Page 12 User Manual Your Washing Machine (continued) Display Display Drum Clean Child lock Pre Wash Door lock Extra Rinse Delay Mute...
- Page 13 User Manual Detergent Dispenser Program Pre Wash Main Detergent Softener Steam Wash Optional Required Optional Cotton Optional Required Optional Synthetic Optional Required Optional Optional Required Optional Jeans Optional Required Optional ECO Wash — Required Optional 20° C — Required Optional Spin —...
-
Page 14: Quick Start Guide
User Manual Quick Start Guide Calibration Completion Of The Washing Cycle • It’s recommended to calibrate the washing machine, so • At the completion of a wash program, the washing that provide the best performance. machine will make an audible tone and “End” will be displayed on the screen. -
Page 15: Operating Instructions
User Manual Operating Instructions Preparation Before Washing Clothes should be washed within a special washing bag, to prevent damage to themselves and other clothes. Please follow these steps carefully to avoid trouble with • When washing a large single item that could become your washing machine and damaging your clothing heavy (i.e. - Page 16 User Manual Operating Instructions (continued) Washing Clothes for the First Time Selecting the main washing program depend on the types of clothing to be washed, as follows: • Before washing any clothes, please perform one cycle without clothes inside as follows: Steam Wash •...
- Page 17 User Manual Spin Additional Functions This procedure provides a spin only option. Residual soapy Delay Function water shall be drained out before spinning. The Delay function can be set with this button, where the Rinse & Spin delay is 0–24 Hrs. This procedure provides a short rinse cycle followed by a To set the Delay function: spin cycle.
- Page 18 User Manual Operating Instructions (continued) Pre Wash Function Reload (Add a Garment) Function The Pre Wash function adds an additional wash prior to This function can be executed during operation of a the main wash. Extra detergent should be placed in the washing program.
- Page 19 User Manual Washing Program Table Program Load (kg) Default Temp (° C) Default Speed (RPM) Default Time Steam Wash 1000 1:26 Cotton 1000 1:28 Synthetic 1000 1:25 1000 0:58 Jeans 1:40 ECO Wash 1000 0:59 20° C 1000 1:01 Spin –...
-
Page 20: Cleaning & Maintenance
User Manual Cleaning & Maintenance Cleaning Procedures Frozen Washing Machine WARNING: Before beginning cleaning or maintenance, • Should the temperature drop below zero and your always ensure the appliance is switched off, washing machine becomes frozen, you should: the power plug is removed from the power •... - Page 21 User Manual Cleaning the Inlet Filter Cleaning the Drum Pump Filter You should clean the inlet filter every 3 months, or if WARNING: To avoid the risk of an electric shock, you find that insufficient water is being supplied to your always remove the power plug from the power washing machine when the supply tap is open.
-
Page 22: Troubleshooting
User Manual Troubleshooting If the above steps don’t resolve your issue or you cannot resolve the fault by yourself, press the “On/Off” button. Switch off the appliance at the power outlet and remove the plug, and call our customer service team. Before contacting our customer service team, please refer to the table below to see if your fault can be fixed by yourself. -
Page 23: Technical Specifications
Net Weight 61kg Rated Power 2000W Power Supply 220-240V, ~50Hz, 10Amp Standard Water Pressure 0.05MPa~1.0MPa GGSFLW900B Testing Methods ADDITIONAL INFORMATION FOR Standard performance TESTING: (AS/NZS 2040.1:2005+Amdt1-2007+Amdt2-2009) • Water Connections: Cold & hot water connection • Water Supply Pressure: 320 kPa •... -
Page 24: Purchase Details
User Manual Purchase Details For future reference, please record the following information which can be found on the rating plate and the date of purchase which can be found on your sales invoice. STORE DETAILS STORE NAME ADDRESS TELEPHONE PURCHASE DATE PRODUCT DETAILS MODEL NO. - Page 25 User Manual Notes...
-
Page 26: Warranty Information
User Manual Warranty Information WARRANTY TERMS AND CONDITIONS IN THIS WARRANTY LAUNDRY APPLIANCES ‘acceptable quality’ as referred to in clause 10 of this warranty has the same meaning referred to in This document sets out the terms and conditions of the the ACL;... - Page 27 User Manual You will bear the cost of transportation, travel and For Appliances and services provided by Residentia delivery of the Appliance to and from Residentia Group Group in Australia, the Appliances come with a or its ASR. If you reside outside of the service area, you guarantee by Residentia Group that cannot be excluded will bear the cost of: under the Australian Consumer Law.
- Page 28 An initiative by Residentia Group T. 1300 11 4357 E. support@residentiagroup.com.au www.solt.house...
Need help?
Do you have a question about the GGSFLW900B and is the answer not in the manual?
Questions and answers