Gourmia GSV550 9 Qt Sous Vide Water Oven Cooker with Digital Timer Cooking Guide & Charts
- Manual (15 pages)
Advertisement
FEATURES & FUNCTIONS

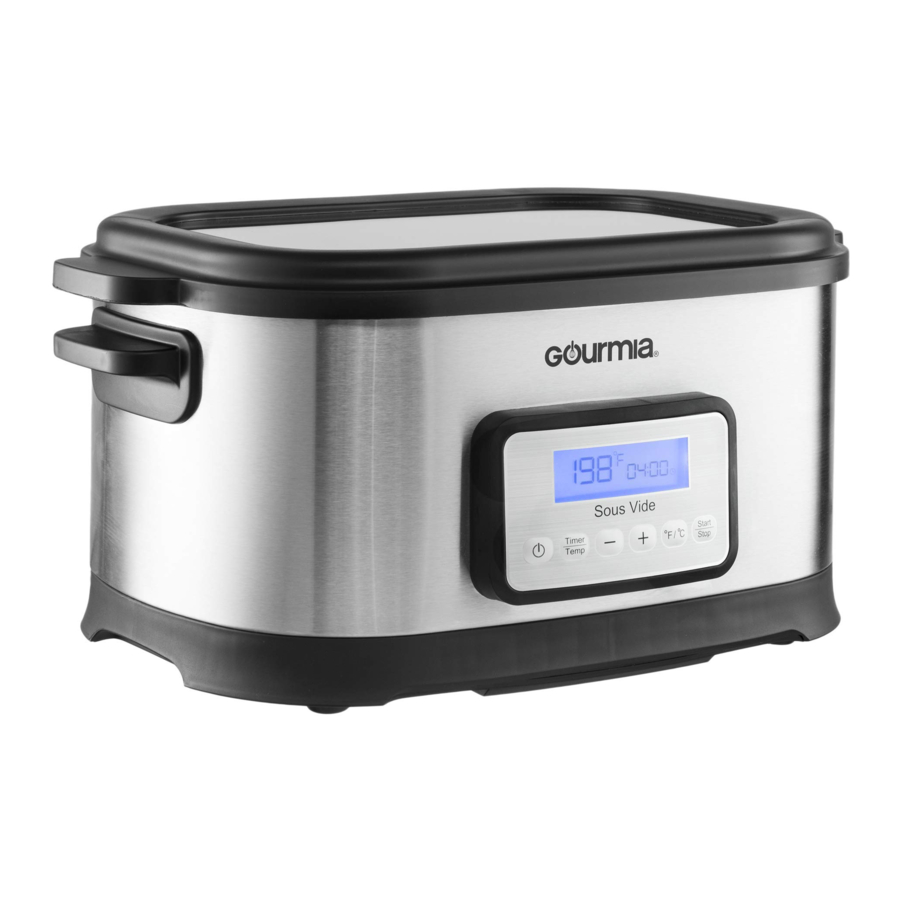
- Sous Vide Oven Base: The Sous Vide Oven Base has a stainless steel exterior with EasyLift Handles, and houses the heating unit and temperature probe. The Base holds the Sous Vide Oven Water Tank with the EasyVue Transparent Lid, as well as the Sous Vide Stainless Steel Cooking Rack. The Simple Set Control Panel is housed on the front side panel of the Base.
- EasyVue Transparent Lid: An important feature of the Sous Vide Oven is the EasyVue Transparent Lid. Designed with a full viewing window, the Lid allows observation of the cooking process without opening the Lid. Opening the Lid while cooking is not recommended, as it reduces the oven temperature and causes a subsequent increase in cooking times.
To open the Lid after cooking, use the handles to lift up and away from your face. Care should be taken when opening the Lid, as the collected steam may be hot. Use pot holders, if needed, to open the Lid and stand well away from any escaping steam. Place the Lid on a heat-resistant surface. Remove the hot food bags with tongs. - EasyLift Handles: The EasyLift Handles on the Sous Vide Oven Base allow for the safe movement of the Base, particularly when removing the water after usage. The Sous Vide Oven Base should only be moved while it is unplugged and cool to the touch. The EasyLift Handles allow the user to safely grasp both handles and pour the water into a sink or large basin.

- Sous Vide Oven Water Tank: The Sous Vide Oven Water Tank holds the Sous Vide Stainless Steel Cooking Rack and is non-removable. Food should always be placed on the Rack in the Water Tank. Food should not be placed in the Water Tank without a prepared cooking bag.
The Temperature Probe is the small pin in the bottom of the Water Tank that monitors the oven temperature and maintains it. Do not block access to the Probe with the Rack or filled food bags. - Sous Vide Oven Water Fill Levels: Note that the Water Tank wall indicates a Minimum Fill Line and the Maximum Fill Line. While cooking, the water levels must ALWAYS remain between the two lines.
- Sous Vide Stainless Steel Cooking Rack: The Stainless Steel Cooking Rack is specifically made to be used in the Sous Vide Oven Water Tank. Other racks should not be substituted. Pack filled food bags onto the Rack either vertically or horizontally. Do not place bags in the Water Tank without using the Rack and do not place food on the Rack in the Water Tank without using prepared bags.
ASSEMBLY BEFORE USE
- Place the Sous Vide Oven Base on a sturdy, level surface (see Fig 1).

- Remove the Lid, using the Handles on each side, lifting straight up. Place on the counter (see Fig 2).

- Place the Rack in the Sous Vide Oven Water Tank.
- Fill the Tank with warm water (below the cooking temperature) in between the Minimum Fill Line and the Maximum Fill Line (see Fig 3).

- Replace the Lid and insert the plug into the outlet (see Fig 4).

- Press the Power Button and follow directions for either Simple Set Sous Vide Cooking or use the Simple Set Control Panel following to set Time and Temperature.
- When the Timer beeps indicating the water is at the correct temperature, add the filled food bags onto the rack. (see Fig 5).

- When the Timer beeps to indicate the cooking time is done, use tongs to remove the cooked food bags (see Fig 6).


SIMPLE SET CONTROL PANEL
THE SIMPLE SET CONTROL PANEL houses the electronic platform for the operation controls of the Sous Vide Oven. You can choose to follow the easy Simple Set Sous Vide Cooking steps for preset times and temperatures, or adjust the settings to suit your own preference.

- POWER BUTTON
Easy On/Off button. - TIMER/TEMP BUTTON
Press to select times and temperatures as desired. - - BUTTON
decrease time and/or temperature - + BUTTON
increase time and/or temperature - °F/°C BUTTON
Press the Button to choose between Celsius and Fahrenheit displays. - START/STOP BUTTON
Starts and/or Stops the action of the Oven - DISPLAY CLOCK
Indicates Time and Temperature readings
Simple Set Sous Vide Cooking:
- Follow the Assembly instructions to prepare the Oven for cooking.
- Press the Power Button to turn ON. The Display will flash a preset temperature of 140°F and a preset cooking time of four (4:00) hours.
- Follow the Step-by-Step Operating Instructions to complete the cooking process.
- Enjoy!
VARIABLE TIMES & TEMPERATURES
- Press the Power Button to turn ON. The Display will flash a preset temperature of 140°F and a preset cooking time of four (4:00) hours.
- Adjust the desired temperature. Press the + and — Buttons to set the desired temperature (minimum temperature setting allowed is 100°F/maximum temperature setting allowed is 200°F).
- Adjust the desired cooking time. Press the Time/Temp Button. The Timer display will flash. Press the + and — Buttons to set the desired time in fifteen (15) minute increments. (minimum time setting allowed is 00:30 minutes/ maximum time setting allowed is 72:00 hours).
STEP-BY-STEP OPERATING INSTRUCTIONS
- After assembly and setting the time and temperature, press the Start/ Stop Button. The Oven will preheat the water to the Set Temperature.
(The display will show the increasing water temperature.) - When the water reaches the Set Temperature, the Oven will beep three (3) times. Remove the Lid up and away from your face. Use tongs to place the filled food bags onto the Rack. Replace the Lid.
- Press the Start/Stop Button. The cooking time will begin to countdown.
- When the cooking time has elapsed, the Oven will beep three (3) times. Oven will automatically turn OFF.
- To remove the cooked food bags, lift the Lid up and away from your face. Be aware that warm steam may escape. Use tongs to remove cooked food bags. Allow the Water Tank and Base to cool completely before cleaning (see "Maintenance" for instructions).
NOTE: In the event of a temporary power outage during cooking, the Oven will resume the cooking process if it is powered ON again within thirty (30) minutes.
FOOD PREP & COOKING GUIDE
The art of sous vide cooking is truly an art. It is simple in nature, yet this cooking method is often used by gourmet chefs to prepare the most complex, rich entrées and vegetables. Because the foods are cooked at low temperatures for longer times, the texture and flavors are authentically and naturally good-for-you and flavorful. Beef, poultry, fish and pork are fork-tender when done, with rich and inviting textures. Vegetables retain all their nutrients when cooked sous vide, so many of the natural sugars are retained, offering delightfully sweet and nutritious side dishes. In fact, everything about sous vide says, "naturally good-for you!"
The following Cooking Chart, along with our favorite Hints & Tips, will help determine how you'll prep food and how long and at what temperature you'll want to cook your foods for safety and flavor. Because temperatures are low and the cooking times are extended, be sure to follow all safety precautions. Enjoy!
Sous Vide Oven Cooking Chart
| BEEF | Cook Temp | Cook Time | Chef's Finish |
| Filet or Steak | |||
| rare | 120° - 135°F | 1 hour | Sear in hot skillet/top with butter |
| medium | 140°F | 1 hour | Sear in hot skillet/top with butter |
| well-done | 160°F | 1 hour | Sear in hot skillet/top with butter |
| Tri tip Roast | 140°F | 6-8 hours | Sear all sides when done. Slice thinly. |
| Prime rib roast | 140°F | 6-14 hours | Sear all sides when done. Slice thickly. |
| PORK | Cook Temp | Cook Time | Chef's Finish |
| Boneless or Chop | |||
| medium | 144°F | 1-1.5 hours | Sear in hot skillet/top with butter & herbs |
| well-done | 160°F | 1-1.5 hours | Sear in hot skillet/top with butter & herbs |
| POULTRY | Cook Temp | Cook Time | Chef's Finish |
| Chicken breast | 150°F | 1-1.5 hours | Splash olive oil in skillet/sear all sides |
| Chicken dark meat | 167°F | 1-3 hours | Splash olive oil in skillet/sear all sides |
| FISH | Cook Temp | Cook Time | Chef's Finish |
| Filet or steak | 122°F | 45 -1 hour | Sear in hot butter for 30 seconds |
| EGGS | Cook Temp | Cook Time | Chef's Finish |
| Poached | 150°F | 1-2 hours | Semi-soft to hard-cooked |
| VEGETABLES | Cook Temp | Cook Time | Chef's Finish |
| Green Vegetables | 180°F | 5 - 20 min | Toss w/ olive oil, kosher salt & toasted nuts |
| Root Vegetables | 180°F | 1.5-3 hours | Quarter/toss in mustard butter & herbs |
Hints & Tips for Sous Vide Cooking
- The thickness of meat, poultry and fish will determine the length of cooking time. Use an instant-read thermometer after removing from the cooking bag to guarantee that a safe-food temperature is indicated.
- Food safety in handling and cooking is always a priority. When unsure of doneness, add 30 minutes to the cook time to pasteurize eggs and/or poultry.
- Searing after cooking gives foods a crispy texture and an appealing visual picture. When meat is done, toss butter into a smoking-hot skillet and quickly sear the cooked meat for 30 seconds on each side. This gives the meat a caramel color and an appetizing outer appearance.
- Some tough cuts of beef and pork can be cooked sous vide to tender perfection in 4 to 24 hours. Sear quickly when done and serve with root vegetables.
- Vegetables will cook faster if they are thinly sliced or cut in small pieces; or if left whole, they will take more time to become tender. Either way, the natural sweetness and full nutrient value adds to the delight in sous vide vegetables.
- Fruit can be cooked sous vide to make toppings, purees, syrups and such. Cook for 2-2½ hours at 160°F and cool in the bag before using.
- To prep meat, poultry and fish before cooking, add seasonings or rubs before bagging. Vacuum seal or use the Water Displacement Method to remove the water from the bag before cooking (see following).
- To avoid the cooked protein that surfaces in sous vide chicken and fish, called "albumin, " brine the chicken or fish for one hour in lightly salted water, drain and pat dry.
- ALWAYS use a BPA-free vacuum-sealed bag when cooking foods more than 8 hours.
- Use a vacuum-sealed bag or use the "Water Displacement Method" for foods cooked fewer than 8 hours.
Water Displacement Method
- Fill a large plastic container with cool water.
- Prep your food to be cooked and place food in a BPA-free plastic freezer bag. Do not seal.
- Slowly immerse the food-filled bag into the water. This will force the air out as the bag is immersed.
- Continue immersing the bag until just before the water reaches the top of the bag.
- With the bag still immersed as much as possible, close or zip to seal, forcing out all remaining air as much as possible.
BEFORE FIRST USE
- Remove all packaging and discard plastic bags.
- Wipe the stainless steel Sous Vide Oven Base with stainless steel cleaner.
- Using a warm, damp cloth, thoroughly wipe the interior of the Water Tank. Dry well.
- Using a warm, damp cloth, wipe the Sous Vide Rack and Lid. Dry well.
- Follow the step-by-step instructions and enjoy!
MAINTENANCE
- Do not leave the water in the Water Tank after use. When cool, drain the Tank and dry with a clean cloth.
- If food particles or minerals are released into water, carefully remove. Clean the area around the probe with a soft cloth to ensure it is wiped free of food.
- To descale the Water Tank, fill with 1 gallon water. Add 1 cup vinegar. Set to 100°F for 1 hour. Empty the Water Tank when cool and repeat the process using clean water only to rinse the unit. Wipe with a soft cloth to dry.
- If the Sous Vide Oven will not work, ensure that it is plugged in. Press the Start/Stop button and, if it doesn't start, re-position your finger and press again.
IMPORTANT SAFEGUARDS

When operating this electric appliance, basic safety instructions should always be followed. Refer to the following for these instructions.
- READ ALL SAFETY & USAGE INSTRUCTIONS BEFORE USING SOUS VIDE OVEN.
- EXERCISE EXTREME CAUTION: AVOID ELECTRICAL SHOCK. DO NOT immerse cord, plugs or the Sous Vide Oven Base in water or other liquid.
- Do not touch the Sous Video Oven Base or the water content inside while the oven is working. Use potholders or tongs to remove food bags and avoid hot water spills.
- Do not overfill the Water Tank in the Sous Vide Oven as there is a risk of electrical shock. Visually check the Minimum line and Maximum line to ensure the water is in-between those lines before use. Do not allow the water to fall below the Minimum line.
- Do not open the EasyVue Transparent Lid during cooking. Opening the Lid causes the cooking temperature to drop and also increases the cooking time as a result. Use pot holders if the Lid must be opened and stand well away from any escaping steam.
- Do not place metal plates, trays or other metal objects in the Sous Vide Oven, as it may cause fire and/or short circuit damage.
- UNPLUG the Sous Vide Oven from outlet when not in use or before cleaning. Allow the Oven to cool before cleaning. Do not let cord hang over edge of table or counter or touch hot surfaces.
- Children should never use the Sous Vide Oven; close supervision is required when appliance is used near children.
- Operate the Sous Vide Oven on a level surface well away from any hot gas or electrical burner, heat source, combustible spray cans or pressurized items. The Sous Vide Oven must be level for optimal performance.
- Do not operate the Sous Vide Oven outdoors.
- Never operate the Sous Vide Oven with a damaged cord or plug or one that has malfunctioned or been damaged in any way. Immediately contact Customer Service for analysis.
- DO NOT add unauthorized accessory attachments. Such use may result in electric shock, injury or fire.
- Use only factory cord supplied; NEVER add extension cords. When done using, press Start/Stop to turn OFF, then pull plug from outlet. Do not use the Immersion Sous Vide Oven for any use other than intended.
- Do not use the Sous Vide Oven for any use other than intended. Do not use on a stovetop.
FOR HOUSEHOLD USE ONLY
Electrical Polarized Plug: This Sous Vide Oven has a polarized plug (one blade is wider than the other). To reduce the risk of electrical shock, the plug is intended to be used by inserting it into the electrical outlet only one way. If the plug does not fit securely into the outlet, turn the plug and re-insert. Do not modify this plug. If the plug does not fit the outlet securely, call a qualified electrician for assistance. DO NOT use this plug with extension cords of any kind.

GOURMIA IN YOUR KITCHEN!
Did you know? Although Gourmia is the new kid on the block, we've already established ourselves as one of the leading manufacturers of creative and innovative kitchen products. Check out these new kitchen appliances and check our website often for new product release information @ www.gourmia.com


For Customer Service or Questions, Please call: 888-552-0033
www.gourmia.com

Documents / Resources
References
Download manual
Here you can download full pdf version of manual, it may contain additional safety instructions, warranty information, FCC rules, etc.
Download Gourmia GSV550 9 Qt Sous Vide Water Oven Cooker with Digital Timer Cooking Guide & Charts
Advertisement


Need help?
Do you have a question about the GSV550 and is the answer not in the manual?
Questions and answers