Advertisement
INTRODUCTION
Congratulations!
Your  SmartFry XLTM Deep Fryer will give your kitchen a professional look, while providing you with delicious meals night after night. The large cooking capacity can accommodate a wide variety of foods, in fact by using the two smaller baskets you can fry up to two different ingredients at one time! The preprogrammed settings make frying your favorite foods a snap while the digital display offers precise control. The SmartFry XLTM is just another example of how Aroma products help make your busy life that much easier.
For recipe suggestions, more kitchen solution ideas or to sign up for a MyAroma account please visit us online at www.AromaCo.com.
Read all the instructions before first use.
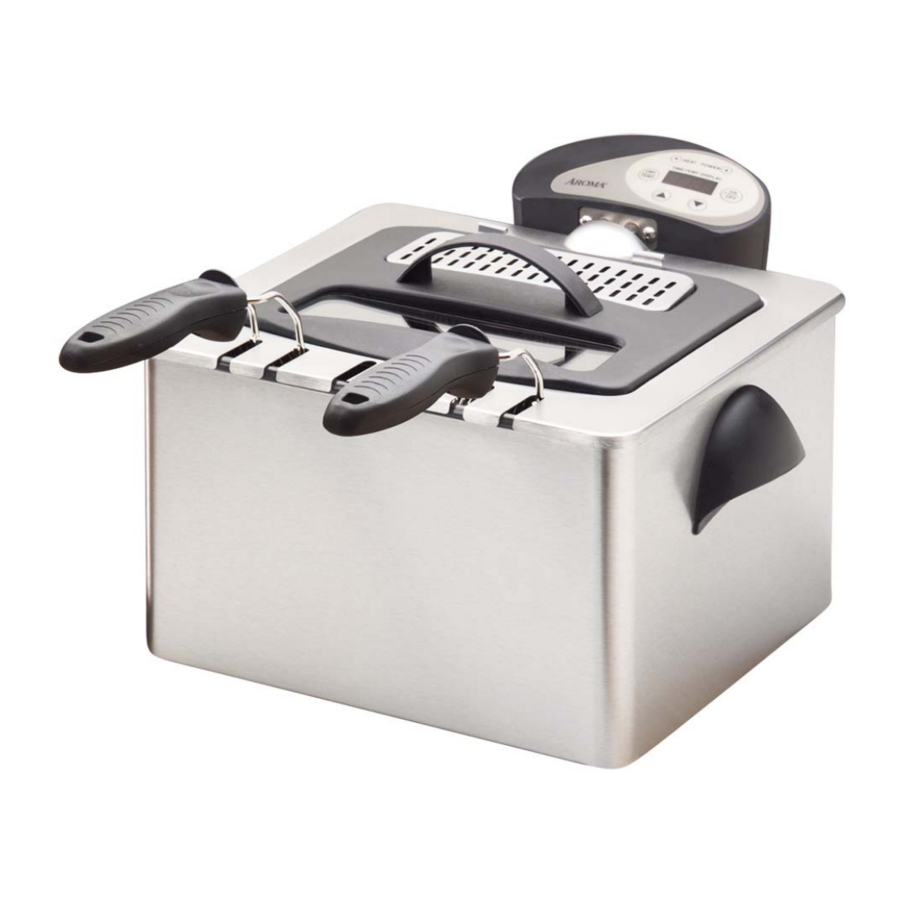
PARTS IDENTIFICATION


Control Panel Diagram

HOW TO USE
Before First Use
- Read all instructions and important safeguards.
- Remove all packaging materials and make sure items are received in good condition.
- Tear up and discard all plastic bags as they can pose a risk to children.
- Wash accessories and enameled oil pan in warm, soapy water. Rinse and dry thoroughly. The heating element can be immersed in water, but never immerse the electrical unit. Dry the heating element thoroughly before use.
- Wipe the body clean with a damp cloth.
- Place the deep fryer on a level, stable and heat resistant surface.
- Do not use abrasive cleaners or scouring pads.
- Do not immerse the lid, cord or plug in water at anytime.
To Assemble the Deep Fryer, please read the following

Assembling the Deep Fryer
Resetting the Safety Thermostat
Oil Level and Maintenance
Assembling the Basket Handles
ASSEMBLING THE DEEP FRYER
- Place enameled oil pan into stainless steel base (Fig. A).

Fig. A - Set heating element into the enameled oil pan (Fig. B).
![]()
Fig. B


The automatic safety switch ensures that the unit will not operate unless the fryer control has been inserted correctly onto the stainless steel base. Slide the guides on the fryer control onto the guides on the back end of the stainless steel base (Fig. B & D).

Fig. D
This will activate the automatic safety switch (Fig. C).

Fig. C
If you plug your appliance into the electric outlet but the unit does not have power (power indicator light does not illuminate), unplug the appliance from the electric outlet and then remove the magnetic plug from the appliance. Remove the fryer control from the base and reassemble correctly.
Your deep fryer is also equipped with a safety thermostat that will automatically shut down the unit in the event that it overheats. If your appliance overheats, follow the steps in "Resetting the Safety Thermostat".
RESETTING THE SAFETY THERMOSTAT
This deep fryer has been designed to include a sensor that will automatically shut down the unit if it overheats. This situation may occur if the oil is old, too thick or if there is not enough oil in the enameled tank. To reset the unit, follow the instructions below.
- Turn the unit off. Unplug the unit from the electric outlet and then remove the magnetic plug from the back of the control.
- Allow the unit to cool completely.
- Correct the oil situation in your appliance by adding oil or changing the oil as stated above.
- Reassemble the unit and continue cooking.
Oil Level and Maintenance
Before plugging the unit into the electric outlet, always make sure that the oil is at least at the minimum marking on the inside of the enameled oil pan. If oil is not filled to at least the minimum level (14 cups), the unit may overheat. Do not fill oil over the maximum line (20 cups).

OIL LEVEL AND MAINTENANCE
Oil Selection
- We recommend the following oils for healthier deep-frying: canola, corn, safflower or soybean.
- We do not recommend frying with animal fats as they are more prone to deteriorate under high heat. Heavily flavored oils such as extra virgin olive oil should also be avoided.
- We do not recommend mixing old and new oil together as this taints the new oil.
- The number of times that the frying oil can be reused depends on the food that is fried in it. For example, when foods that leave a residual flavor (such as fish) are fried frequently, the oil will need to be replaced more often.
 NOTE:
NOTE:
- When reusing oil, it is recommended that you strain the oil to remove food particles. Use a mesh strainer over a bowl to separate food particles from the oil.* For best results, you can line the mesh strainer with two layers of cheesecloth. Once the oil is strained, place in a container that can be sealed tightly and store it in the refrigerator.
* ONLY AFTER THE OIL HAS COMPLETELY COOLED
It is important to replace the oil if you notice any of the following:
- An unpleasant odor.
- Excessive smoking when heating the oil.
- Oil is dark in color.
- Oil has been stored for a long period of time.

- We do not recommend frying with animal fats or shortening. Using solid fat or shortening to fry may cause your deep fryer to overheat. Also, it solidifies as it cools, which makes it difficult to remove the submerged heating element and fryer control from the oil tank.
ASSEMBLING THE BASKET HANDLES
Your basket handles will come assembled on the two small baskets. You will need to attach the handle to the large basket and lock the small basket handles in place before use.
Large Basket

- Squeeze handle prongs together and slip the handle prong wings through the handle prong wing slots.
- Pull handle back toward you, squeezing and rotating slightly from one side to the other to lock the handle prongs into place.
Small Basket

- Pull handle back toward you, squeezing and rotating slightly from one side to the other side to lock the handle prongs into place.
- To remove handle for cleaning and storage, simply reverse this process.
- Always check basket handles to ensure that the handles are secured before cooking with hot oil. This will help to prevent personal injury.
Magnetic Cord Instructions
This stainless steel deep fryer has been specially designed with a "breakaway" cord, making deep frying safer than ever. The magnetic plug will only attach to the appliance in one direction. The plug is clearly marked "This Side Up." The bottom of the plug also has a notch, which will prevent you from attaching the plug the wrong way. The magnets on the plug and appliance automatically make the connection. Should you accidentally move or tug on the power cord while in use, it will automatically pull away from the appliance, breaking the connection and preventing the hot oil tank from tipping over. DO NOT place the appliance on top of the cord or run the cord around the unit. This will prevent the magnetic cord from detaching easily if the cord is accidentally tugged on.
Always attach the magnetic plug to the appliance first and then to the wall outlet. After use, unplug from the wall outlet first, and then remove the magnetic plug from the appliance.
COOKING GUIDE & USES
Preheat Oil
- Make sure that the fryer is unplugged.
- Wipe the enameled oil pan dry and fill it with oil no higher than the MAX level (20 cups) and no lower than MIN level (14 cups).
- Attach the magnetic plug to the appliance and then plug the cord into the electric outlet. The power light will illuminate.
- The LCD display will flash 00:00. Press the "On/Off" button and the default temperature of 375°F will show up on the LCD screen. The green "Heat" light will illuminate to indicate that the oil is heating to 375°F.
- Use the up or down buttons to program the prope rtemperature. Temperatures can be set from 300°F to 375°F in 5°F increments.
- Press the Time/Temp button once you have selected the desired temperature.
- After temperature has been selected, time will automatically go to the default time of 10:00, which will show up on the LCD screen. Use the up or down buttons to program the proper time setting. Time can be set between 2 minutes and 30 minutes in 30 second increments.
- When oil is preheated, you will hear three beeps and the green"Heat" light will flash.
NOTE:
- Your deep fryer will hold approximately 14 cups of oil at the minimum oil mark inside the enamel oil pan and 20 cups of oil at the maximum mark.


Frying
- For foods that are not coated with batter, place directly in the basket. Be sure not to fill the basket more than ½ full. Over filling will cause food to cook improperly and may cause the oil to bubble over.
- Lower the basket carefully into oil.
- For foods coated with batter, first lower the basket into the oil and gently place foods directly into the oil. This will prevent the food coated with batter from sticking to the bottom of the basket.
- Replace the lid securely.
- The display will default back to temperature reading. To check time, press the time/temperature control once.
- When the programmed time has run its course, you will hear three beeps. The LCD display will read 00:00. Lift the basket up out of the oil and place it on the drain hooks to allow excess oil to drain away. If another batch of the same food is desired, press the On/Off button once to repeat the previous setting and repeat steps 1-5. If you wish to discontinue frying, unplug the cord from the electric outlet and then remove the magnetic end from the unit.
- Carefully remove the fried food from the basket. Be cautious of the hot oil that may spatter from the frying pot.
- To turn off the deep fryer, unplug it from the electric outlet.
- Allow the oil to cool completely before moving or cleaning the appliance (3-4 hours).
NOTE:
- Always shake frozen foods to remove ice particles prior to frying. Pat dry fresh-cut French fries and other damp foods before frying as moist food may cause excess foaming and spattering of oil.


Using the Preprogrammed Settings
Read all directions carefully before using these settings.
- To access the preprogrammed settings, press the "Time/Temp" and "
![]() " buttons simultaneously. The LED readout will display "P00", with the "00" flashing. This signifies that the unit is ready to be set. Following the "Using the Preprogrammed Settings", select the preset number you are going to use by using the "
" buttons simultaneously. The LED readout will display "P00", with the "00" flashing. This signifies that the unit is ready to be set. Following the "Using the Preprogrammed Settings", select the preset number you are going to use by using the "![]() " button. You can scroll up "
" button. You can scroll up " ![]() " or "
" or " ![]() " down to find the correct setting you want to use. Once you have selected a preset setting, the temperature and time will be automatically programmed into the unit as outlined in the chart.
" down to find the correct setting you want to use. Once you have selected a preset setting, the temperature and time will be automatically programmed into the unit as outlined in the chart.

- Press the "On/Off" button to preheat the oil. The green "Heat" light will illuminate to indicate that the oil is preheating.
- Once the oil is preheated, it will beep 3 times. The green "Heat" light will flash and the unit will pause. Lower the food slowly into the oil and press the "On/Off" button to begin the countdown timer. The display will default back to temperature reading. To check time, press the time/temperature control once.
- After the preset time has run its course, you will hear three beeps. The LCD display will read the program code that you just used.
- Lift the basket up out of the oil and place on drain hooks to allow excess oil to drain away. If another batch of the same food is desired, press the On/Off button once to repeat the previous setting and repeat steps three, four and five. If you wish to discontinue frying, unplug the cord from the electric outlet and then remove the magnetic end from the unit.
 " buttons simultaneously. The LED readout will display "P00", with the "00" flashing. This signifies that the unit is ready to be set. Following the "Using the Preprogrammed Settings", select the preset number you are going to use by using the "
 " or "
  " down to find the correct setting you want to use. Once you have selected a preset setting, the temperature and time will be automatically programmed into the unit as outlined
NOTE:
- The preset settings can be stopped at anytime during the cooking cycle by pressing the "On/Off" button once and unplugging the unit from the electric outlet.
Using the Preprogrammed Settings
| Code | Food | Time (min) | Temp (0F) |
| P01 | Frozen Shrimp | 3:00 | 355 |
| P02 | Frozen Mushrooms | 4:00 | 355 |
| P03 | Frozen Cheese Sticks | 2:30 | 375 |
| P04 | Frozen Onion Rings | 3:00 | 375 |
| P05 | Frozen Fish Sticks/ Frozen Chicken Nuggets | 5:00 | 375 |
| P06 | Frozen Boneless Chicken Wings | 9:30 | 375 |
| P07 | Frozen French Fries | 4:00 | 375 |
| P08 | Fresh French Fries | 5:00 | 375 |
| P09 | Frozen Chicken Wings w/ Bone | 10:30 | 375 |
| P10 | Fresh Chicken Wings w/ Bone | 10:00 | 375 |
Actual cooking time may vary due to differences in quanity, meat, and temperature of food. If provided, follow food manufacturer's directions.
Changing Between Manual and Preset Mode
When the unit is first plugged in, it automatically defaults to the manual mode. If you wish to switch to the Preset Mode, simply press the Time/Temp Button and the "  " button simultaneously.
To switch back to manual mode from Preset Mode, press the Time/Temp Button and the " " button at the same time once again.
| Food Selection | Quantity | Temp. | Approximate Time |
| French Fries | 10 oz. | 375 0F | 5-7 min. |
| French Fries (Frozen) | 10 oz. | 350 0F | 6-8 min. |
| Chicken Strips (Fresh) | 12 oz. | 375 0F | 9-11 min. |
| Chicken Nuggets (Frozen) | 10 oz. | 375 0F | 3-4 min. |
| Chicken Drumsticks | ½ Basket | 300 0F | 7-8 min. |
| Fish (Fresh) | 8 oz. | 375 0F | 4-6 min. |
| Fish (Frozen) | 8 oz. | 3500F | 5-7 min. |
| Shrimp | 8 oz. | 3750F | 4-5 min. |
| Onion Rings (Fresh) | 6 oz. | 3500F | 3-4 min. |
| Fresh Vegetables | 10 oz. | 350 0F | 2-3 min. |
| Doughnuts | 2-3. | 325 0F | 1 min. each |
Cooking times and temperatures given here are only a guide. They may vary due to differences in meat and temperature of food. If provided, follow food manufacture's directions. Adjust cooking time and temperature to your preference.
 Helpful Hints for Deep Frying:
- Prepare food to be fried in equal size and thickness so that they will fry more evenly and at the same speed.
- Do not fill the frying basket over ½ full. If too much food is fried at the same time, food may not be fried crispy and evenly.
- Before deep frying, always remove excess moisture or ice crystals from food by rubbing with paper towel. Moist food may cause excess foaming and spattering of oil.
- To avoid overflow or splashing hot oil, do not drop the frying basket quickly into the hot oil
- During frying, hot steam will escape from the openings of the lid. This is normal. Avoid touching these area, when the fryer is in use.
- The fryer may give off a slight odor and smoky haze during the first use. This is normal due to the manufacturing process and should wear off shortly.
- When opening the lid, be extremely cautious of splashing hot oil.
CLEANING
Always unplug unit and allow to cool completely before cleaning.
Changing Oil and Storing Oil
- When reusing oil, it is recommended that you strain the oil to remove food particles. Use a mesh strainer over a bowl to separate food particles from the oil.* For best results, you can line the mesh strainer with two layers of cheesecloth. Once the oil is strained, place in a container that can be sealed tightly and store it in the refrigerator. See for oil selection information.
* ONLY AFTER THE OIL HAS COMPLETELY COOLED
To Clean Oil Tank, Fryer Lid and Fry Baskets
- Disassemble the unit by reversing the steps of assembly on"Assembling the Deep Fryer".
- Dispose of the oil in a jar or can. Oil should NOT be poured into the drain of your sink. If you are storing your oil for future use, see "Storing Oil"on above.
- To clean the lid and filters, lift the filter lid and remove the two filters. Wash the filters in warm, soapy water and rise thoroughly. Allow the filters to dry completely.
- EXCEPT FOR THE CONTROL PANEL WITH THE HEATING ELEMENT AND THE MAGNETIC PLUG; All parts of your fryer are fully immersible and dishwasher-safe.
- To clean the heating element, rinse with water or immerse in warm, soapy water. Wipe with a damp cloth and dry thoroughly before next use.
- Dry the enameled oil pot completely before next use.
- Clean the body of the fryer with a damp cloth and then dry.
- Place filters back into the lid for future use.
- Do not use harsh abrasive cleaners or products that are not considered safe to use on nonstick coatings.
- Do not attempt to cool the unit by pouring cold water into the pot.
- Do not immerse the electrical unit in water or any other liquid.
![]()

To Clean Fryer Control Panel and Magnetic Cord
- Use a damp, soapy dishcloth and completely wipe down all parts of the temperature control panel and heating element.
- Rinse dishrag and wipe off all residual soap.
- Use a damp cloth to wipe down the magnetic plug and electric cord.
- Do not reassemble the deep fryer until all parts are thoroughly dry.
Changing Filters
It is recommended that the carbon filter (black) be changed every 6 months and the vapor filter (white) once a year. These recommendations are approximate and the filters should be changed depending on amount of usage.
To change:
See Diagram 1:

Fig. A

Fig. B
- Lift the two tabs to unclip the filter cover (Fig. A).
- Remove black and white filter (Fig. B).
- Place the new filter(s) into the slot (white on top of black).
- Replace filter cover and snap into place.
Replacement Filters
- Replacement filters are available through Aroma Customer Service at 1-800-276-6286 or online at www.aromaco.com
- The life of the filter varies according to the type of food fried and the frequency of use.
- Aroma Housewares Company recommends the filter be replaced after30 times of operation.
RECIPES
Deep Fried Onion Blossom
Canola oil or blended vegetable oil for frying
1 large onion
2 eggs
½ cup beer
½ cup milk
2 cups all-purpose flour
½ teaspoon baking soda
½ teaspoon black pepper
Preheat oil to 375°F. Peel onion and cut the bottom off. Cut the onion into ¾-inch wedges without cutting all the way through the base.
Soak onion in ice cold water until wedges open (approximately 712 minutes). Drain onion and pat dry. Mix together eggs, beer and milk. In a separate bowl mix flour, baking soda and black pepper.
Dust the onion with the flour mixture. Dip the onion in the batter. Redust with the flour mixture. Shake off the excess. Make sure that the onion is completely coated.
Carefully lower the blossom into hot oil, being very careful to avoid splattering.
Cook for 2 minutes. Turn onion and cook for an additional 2 minutes or until golden brown. Lift the cooked blossom from the oil. Sprinkle with salt and pepper to taste.
Vegetarian Egg Rolls
Corn oil for frying
6 egg roll wrappers
2 green onions, minced
¼ lb. minced white button mushrooms
2 oz. grated carrot
1 teaspoon minced ginger and garlic
2 soaked and minced dried black mushrooms
1 teaspoon sesame oil
1 teaspoon salt
¼ cup bean spouts
1 teaspoon chopped roasted peanuts
Preheat oil to 375°F. Heat 2 teaspoons of corn oil in a fry pan over medium heat. Add garlic, ginger and green onions. Cook for 2 minutes. Add button mushrooms and black mushrooms. Cook for 3 minutes. Add salt to taste. Stir in peanuts, carrots, bean sprouts and sesame oil, turn off heat.
To prepare egg roll wrappers put 2½ teaspoons filling in each one. Roll up, tucking in edges over filling. Seal the edge with a drop of thick flour paste.
Deep fry 3 rolls at a time for approximately 4-6 minutes or until the egg rolls are golden brown all sides. Carefully lift the cooked egg rolls from the fryer. Let drain in the basket then pat dry with paper towels.
Fried Chicken Tenders
4 boneless, skinless chicken breasts
1 cup bread crumbs
1 teaspoon lemon juice
1 tablespoon dried basil leaves
1 cup flour
½ teaspoon of salt and pepper
½ cup milk
1 cup vegetable oil
Preheat oil to 350°F. Cut the chicken in even strips, about 1 inch wide and 1 inch thick. Marinate chicken with salt, pepper, basil leaves and lemon juice for about 30 minutes. Coat chicken breasts evenly with flour and bread crumbs.
Deep fry chicken strips at 350°F for 8-10 minutes. Let drain in the basket and serve with honey mustard or sweet and sour sauce.
Fried Jumbo Shrimp
Canola oil for frying
14 large shrimp in the shell
1 teaspoon salt
½ teaspoon white pepper
3 teaspoons corn starch
1 teaspoon rice wine vinegar
Preheat oil to 350°F. De-vein shrimp by cutting a slit on the shell along the back of shrimp. Season shrimp with rice wine and salt and let it sit about 20 minutes.
Evenly dust each shrimp with cornstarch. Add shrimps to the frying basket, lower basket into oil. Fry 4-5 minutes or until shrimp has reached desired doneness, color and crispness.
Let drain in the basket then pat dry with paper towels.
Garnish with lettuce leaves and lemon slices.
Fontina Cheese Fritos (Fritters)
Corn oil for frying
¾ lb. chilled fontina cheese
2 egg yolks (keep the egg whites)
½ cup minced fresh basil
1 ½ cups unbleached flour
2/3 cup ice water
1 teaspoon baking powder
1-2 cloves of finely minced garlic
3 teaspoon olive oil
salt to taste
Preheat corn oil to 350°F. Cut cheese into 1-inch cubes. Mix wine, egg yolks and garlic in a bowl. Add baking powder, flour, ½ teaspoon salt, olive oil and water. Mix until smooth. Let rest at room temperature for 2 hours.
Beat egg whites with a pinch of salt until barely stiff. Fold into batter along with minced basil.
Dip cheese chunks into batter. Drip off excess batter. Lower cheese chunks into oil until golden. Approximately 1-1½ minutes.
Drain and remove from basket and serve immediately.
Aroma's Favorite Fried Bananas
Canola oil for frying
1 cup all purpose flour
½ tsp. salt
1 tbsp. sugar
1 egg, lightly beaten
1 cup milk
¼ cup powder sugar
3 bananas, cut into 1 inch length
Preheat oil to 370°F. Mix flour, sugar and salt in a large bowl. Combine egg, milk and 2 tsp. of heated vegetable oil in another bowl and mix well. Combine egg mixture with flour paste.
Stir with a fork or whisk until the batter is smooth. Dip each 1-inch long banana into batter and let the excess batter drip off. Place frying basket in preheated oil in deep dryer.
Slowly place battered banana with a draining spoon into frying basket, one at a time. Fry all bananas until golden brown, about 3 to 4 minutes. Drain excess oil in clean paper towel. Sprinkle fried bananas with powder sugar and serve immediately.
Website: www.aromaco.com
Published By:
Aroma Housewares Co. 6469 Flanders Drive San Diego, CA 92121 U.S.A.
1-800-276-6286

Documents / Resources
References
Download manual
Here you can download full pdf version of manual, it may contain additional safety instructions, warranty information, FCC rules, etc.
Advertisement


Need help?
Do you have a question about the ADF-212 and is the answer not in the manual?
Questions and answers