Sennheiser MOMENTUM True Wireless 3, MTW3 - Stereo Earbuds Manual
- Instruction manual (47 pages) ,
- User manual (2 pages) ,
- Quick manual (11 pages)
Advertisement
- 1 Package contents
- 2 Product overview
- 3 Getting started
-
4
Using the earbuds
- 4.1 Charging the rechargeable batteries using the USB cable
- 4.2 Charging the rechargeable batteries wirelessly
- 4.3 Connecting the earbuds to a Bluetooth device
- 4.4 Information on the Bluetooth wireless connection
- 4.5 Pairing the earbuds with a Bluetooth device
- 4.6 Switching the connection to paired Bluetooth devices/"Connections"
- 5 Care and maintenance of the earbuds/charging case
- 6 FAQ
- 7 Specifications
- 8 Documents / Resources
Package contents
 | Earbud R for right ear (model: MTW3 R) and earbud L for left ear (model: MTW3 L) |
 | Charging case (model: MTW3 C) with built-in rechargeable battery for the earbuds |
 | USB charging cable with USB-C and USB-A connector, length approx. 0.4 m |
 | Silicone ear adapters (size XS, S, M (pre-mounted to the earbuds) and L) |
 | Silicone ear fins (size S, M (pre-mounted to the earbuds) and L) |
 | Quick guide |
 | Safety guide |
Online you can find:
- this detailed instruction manual and additional information (www.sennheiser-hearing.com/download)
- the Sennheiser Smart Control app for configuring the headphones and for additional functions (www.sennheiser-hearing.com/smartcontrol)
- a list of accessories on the MOMENTUM True Wireless 3 product page at www.sennheiser-hearing.com (to purchase online or contact your local Sonova Consumer Hearing partner: www.sennheiser-hearing.com/service-support)
Product overview
Charging case
Model: MTW3 C

- LED
displays the charging process/charge status of the rechargeable battery of the charging case or of the earbuds (when inserted into the charging case) - Input for USB-C connector for charging the rechargeable batteries
- Contact area for wireless charging
- Built-in rechargeable battery for charging the earbuds on the go
- Type plate
- Charging compartment for the left earbud L
- Magnetic holders
- Charging compartment for the right earbud R
- Charging contacts
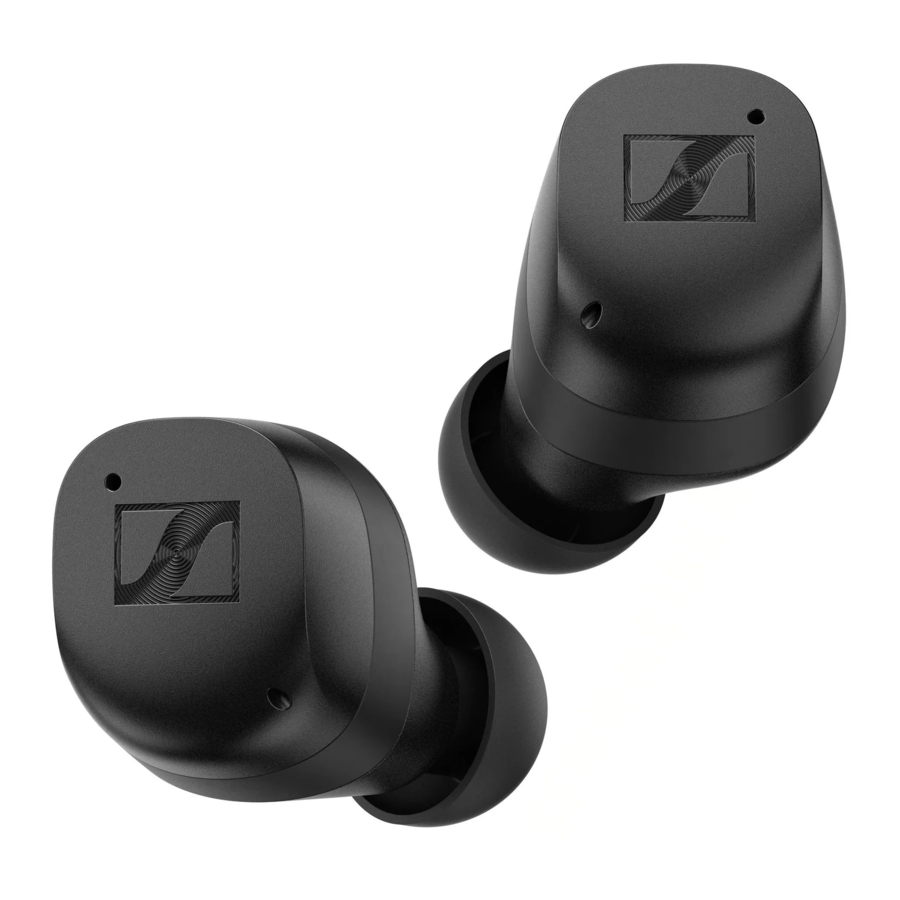
Earbuds
Model: MTW3 R and MTW3 L

- Touch control panel
- Changeable silicone ear adapters
- Left earbud L
- Status LED
- Infra-red proximity sensor
- Magnetic holders
- Charging contacts
- Microphones for the active noise cancellation ANC, for the perception of your surroundings ("Transparency Mode") and for phone calls
- Right earbud R
- Built-in rechargeable battery
- Changeable ear fins for a secure fit of the earbuds in the ears
Overview of the LED indications of the charging case

When a USB cable is connected or the charging case is placed on a wireless charging station, the LED of the charging case permanently displays the charging process:
| LED | Charging case WITH earbuds inserted | Charging case WITHOUT earbuds inserted | |
 | pulses yellow | ... earbuds and charging case are being charged | ... charging case is being charged |
 | lights up green | ... earbuds and charging case are fully charged | ... charging case is fully charged |
 | flashes red | ... charging error/ battery error | ... charging error/ battery error |

If you open the lid of the charging case and no USB cable is connected or the charging case is not placed on a wireless charging station, the LED of the charging case displays the battery charge status or the charging process of the earbuds. If you close the lid of the charging case, the LED will go off after 5 seconds.
| LED | Charging case WITH earbuds inserted | Charging case WITHOUT earbuds inserted | |
 | lights up green | ... earbuds are fully charged and the charging case can still charge at least one complete cycle | ... charging case is fully charged |
 | pulses yellow | ... earbuds are being charged via the rechargeable battery of the charging case | – |
 | lights up yellow | ... earbuds are fully charged, the charging case cannot charge another complete cycle | ... charging case is charged less than 90 % |
 | lights up red | ... rechargeable batteries of the earbuds and the charging case are empty | ... rechargeable battery of the charging case is empty |
| | flashes red | ... charging error/ battery error | ... charging error/ battery error |

If the LED does not light up:
- Clean the contacts on the earbuds and in the charging case
- Make sure that the charging case rests on the wireless charging station (maximum distance 3 mm).
- Wait for at least 10 seconds. With some wireless charging stations the charging process starts delayed.
- Observe the setup instructions of the wireless charging station so that no electromagnetic fields or materials influence the charging station (see instruction manual of the wireless charging station).
- Charge the rechargeable batteries of the earbuds and the charging case until the LED lights up again
Overview of the LED indications of the earbuds

| LED | Meaning; the earbuds... | |
 | flashes red-blue for approx. 2 minutes | ... are in Bluetooth pairing mode |
 3x 3x | flashes blue 3x | ... Bluetooth pairing or earbud pairing successful |
 3x 3x | flashes red 3x | ... Bluetooth pairing or earbud pairing failed |
 | lights up blue | ... are connected to a device via Bluetooth |
 | lights up red | ... are not connected to a device via Bluetooth or the connection has been lost |
 | flashes red quickly | ... rechargeable battery is almost empty |
 | flashes red slowly | ... system error – perform a reset. |
 | flashes redgreen for approx. 1 minute | ... are in earbud pairing mode (to pair the right and left earbud) |
When you insert the earbuds into your ears, the LEDs of the earbuds automatically go off.
When you do not insert the earbuds into your ears, the LEDs of the earbuds go off after 30 seconds.
Notes on voice prompts
The earbuds output voice prompts for events (the table gives some examples). Using the Smart Control app, you can change the language of the voice prompts, choose between voice prompts and beep sounds, or deactivate the status messages with a few exceptions (e.g. rechargeable battery is empty).
| Voice prompt | Meaning/earbuds... |
| "Power on" | ... are switched on |
| "Power off" | ... switch off |
| "Connected" | ... connected via Bluetooth |
| "No connection" | ... not connected via Bluetooth |
| "Pairing" | ... in Bluetooth pairing mode |
| "Pairing cancelled" | ... Bluetooth pairing cancelled |
| "Pairing successful" | ... Bluetooth pairing successful |
| "Pairing failed" | ... Bluetooth pairing not successful |
| "Recharge headset" | ... Rechargeable battery is almost empty. Recharge the rechargeable battery. |
| "Call rejected" | ... incoming call rejected |
| "Call ended" | ... call ended |
| "Volume min" | ... volume set to minimum |
| "Volume max" | ... volume set to maximum |
Getting started
- Waking up the earbuds and the charging case and charging the rechargeable batteries


Upon delivery, the rechargeable batteries of the earbuds and the charging case are in sleep mode and have to be woken up by connecting them to a USB power source once.
- Insert the earbuds into the charging case.
- Close the lid of the charging case.
- Connect the USB-C cable to the charging case and to a USB power source
- Charge the rechargeable batteries for at least 30 seconds. The earbuds and the charging case are woken up and the rechargeable batteries are being charged. The earbuds are no w ready for use.
Waking up the rechargeable batteries is only possible when a USB cable is connected to the charging case. The wireless charging function cannot be used to wake up the rechargeable batteries.
We recommend charging the earbuds and the charging case for a complete charging cycle without interruption before using for the first time.
- Selecting suitable ear adapters and ear fins for optimum fit of the earbuds


The perceived sound quality including bass performance, the best possible noise cancellation, the best voice quality for phone calls and a secure hold of the earbuds in the ear depends to a large extent on the correct fit of the earbuds. Therefore, you can choose between ear adapters and ear fins in different sizes.
- Test which ear adapter size and which ear fins give you the best sound quality and the best wearing comfort.
- You can choose between 4 different ear adapters in size XS, S, M and L and 3 different ear fins in size S, M and L.

- Assign the right earbud to your right ear and the left earbud to your left ear.
- Insert the earbuds at a slight angle into the ears and twist them slightly into the ear canal so that they sit comfortably and snugly in the ear canal and auricle.

- Connecting the earbuds to a Bluetooth device

Connect the earbuds to your smartphone via Bluetooth. - Installing the Smart Control app on your smartphone
![]()
![www.apple.com]()
![play.google.com]()
The Sennheiser Smart Control app allows you to use all functions and settings of the earbuds and to e.g. adjust the sound to your liking using the equalizer.


Using the earbuds
Information on the rechargeable battery, the charging process and the first use
The earbuds and the charging case each have a built-in rechargeable battery.
To charge the rechargeable batteries, you can use one of the following options:
- the supplied USB cable,
- a wireless charging station (Qi-compatible, to be ordered separately).
The earbuds must be inserted into the charging case for charging. Thus, even on the go, the earbuds are always safely stored and always charged.
Upon delivery, the rechargeable batteries of the earbuds and the charging case are in sleep mode and have to be woken up by connecting them to a USB power source for at least 30 seconds. The lid of the charging case must be closed during this process.
A complete charging cycle of the charging case and the earbuds takes about 1.5 hours. The quick charge function gives you approx. 1 hour of playback time after 10 minutes of charging. The charging time can vary depending on the power source used and the ambient temperature.
We recommend charging the earbuds and the charging case for a complete charging cycle without interruption before using for the first time.
When a USB cable connected to a power source is also connected to the charging case or when you place the charging case on a wireless charging station, the rechargeable battery of the charging case is being charged. When the earbuds are inserted into the charging case, their rechargeable batteries are being charged at the same time. The LED of the charging case displays the charge status.
When the battery charge of the earbuds drops to a critical level, a voice prompt asks you to recharge the earbuds ("Recharge headset").
The charge status of the rechargeable battery of the charging case is displayed by the LED on the charging case.
At the end of its operational lifetime, this product with its built-in rechargeable battery must be disposed of separately from normal household waste. You can find more information here: .
Charging the rechargeable batteries using the USB cable

- Open the charging case by overcoming a slight magnetic resistance and insert the left earbud into the left charging compartment and the right earbud into the right charging compartment. The earbuds are magnetically pulled into the charging compartments.
- Connect the USB-C connector of the USB cable to the USB-C socket of the charging case.
- Connect the USB-A connector to a corresponding socket of a USB power source (to be ordered separately). Make sure that the US B power source is connected to the power supply system. The rechargeable batteries of the earbuds and the charging case are being charged.
If no earbuds are inserted into the charging case, only the rechargeable battery of the charging case is being charged.
The LED of the charging case displays the charge status:
| LED | Charging case WITH earbuds inserted | Charging case WITHOUT earbuds inserted | |
 | pulses yellow | ... earbuds and charging case are being charged | ... charging case is being charged |
 | lights up green | ... earbuds and charging case are fully charged | ... charging case is fully charged |
| | flashes red | ... a charging error/ battery error has been detected in at least one earbud | ... a charging error/ battery error has been detected in the charging case |
If the LED does not light up:
- Clean the contacts on the earbuds and in the charging case.
- Clean the USB-C socket of the charging case.
- Charge the rechargeable batteries of the earbuds and the charging case (at least 30 minutes) until the LED lights up again.
Charging the rechargeable batteries wirelessly

- Open the charging case by overcoming a slight magnetic resistance and insert the left earbud into the left charging compartment and the right earbud into the right charging compartment. The earbuds are magnetically pulled into the charging compartments.
- Place the bottom of the charging case centered on a wireles scharging station (Qi-compatible, to be ordered separately). The rechargeable batteries of the earbuds and the charging case are being charged.
If no earbuds are inserted into the charging case, only the rechargeable battery of the charging case is being charged.
The LED of the charging case displays the charge status:
| LED | Charging case WITH earbuds inserted | Charging case WITHOUT earbuds inserted | |
 | pulses yellow | ... earbuds and charging case are being charged | ... charging case is being charged |
 | lights up green | ... earbuds and charging case are fully charged | ... charging case is fully charged |
 | flashes red | ... a charging error/ battery error has been detected in at least one earbud | ... a charging error/ battery error has been detected in the charging case |
If the LED does not light up:
- Clean the contacts on the earbuds and in the charging case
- Make sure that the charging case rests on the wireless charging station (maximum distance 3 mm).
- Wait for at least 10 seconds. With some wireless charging stations the charging process starts delayed.
- Observe the setup instructions of the wireless charging station so that no electromagnetic fields or materials influence the charging station (see instruction manual of the wireless charging station).
- Charge the rechargeable batteries of the earbuds and the charging case (at least 30 minutes) until the LED lights up again.
Connecting the earbuds to a Bluetooth device
To be able to use the Bluetooth wireless connection, you must register both devices (earbuds and e.g. smartphone) via the device settings of your smartphone. This process is called pairing.
If operation differs from the steps mentioned, also refer to the instruction manual of the Bluetooth device you are using.
When you switch on the earbuds for the first time after initial charging, they automatically switch to Bluetooth pairing mode.
Information on the Bluetooth wireless connection
The earbuds are compatible with Bluetooth 5.2.
If your audio source supports one of the following high-resolution audio encoding methods, music is automatically played in high audio quality: aptX®, aptX adaptive® or AAC. Otherwise the headphones will play your music in normal audio quality (SBC). The used audio coding is displayed via the Smart Control app.
Paired devices establish the Bluetooth wireless connection immediately after switch-on and are ready for use.
When you switch on the earbuds, they automatically try to connect to the last connected Bluetooth device. The earbuds can save the connection profiles of up to six Bluetooth devices with which they have been paired. Audio playback is only possible from one device at a time.
If you pair the earbuds with the seventh Bluetooth device, the saved connection profile of the least used Bluetooth device will be overwritten. If you want to re-establish a connection with the overwritten Bluetooth device, you have to pair the earbuds again.
Using the Smart Control app, you can view the list of paired devices and selectively connect and disconnect devices ("Connections").

 Paired and connected Bluetooth device
 Paired Bluetooth device (currently not connected)
The right and the left earbud also use a Bluetooth wireless connection. Both earbuds are paired with each other upon delivery. If you are using a different earbud (e.g. a spare earbud), the two earbuds must also be paired with each other.
Pairing the earbuds with a Bluetooth device

- Take both earbuds out of the charging case and insert them into your ears. The distance between the earbuds and the Bluetooth device should not exceed 40"/1 m.
- Simultaneously touch and hold the right and the left touch control panel for 3 seconds until you hear the voice prompt "Pairing" and a beep. The LEDs of the earbuds flash blue and red. The earbuds are in pairing mode.
- Activate Bluetooth on your Bluetooth device.
- Via the menu of your Bluetooth device, start the search for new Bluetooth devices.
All active Bluetooth devices in the proximity of your smartphone are displayed.
From the list of found Bluetooth devices, select "MOMENTUM TW 3". If necessary, enter the default pin code "0000".
If pairing was successful, you hear the voice prompt "Pairing successful" and the LEDs of the earbuds flash blue 3x.
If no connection is established within 2 minutes, pairing mode is terminated and the earbuds switch to idle mode. If necessary, repeat the steps described above.
If the earbuds are not paired with any Bluetooth device (the pairing list is empty), pairing mode is permanently active.
Switching the connection to paired Bluetooth devices/"Connections"
To selectively switch the audio connection to paired Bluetooth devices using the "Connections" function, you require the Smart Control app.
- In the Smart Control app, tap "Connections". The list of Bluetooth devices paired with the earbuds appears.
- From the list, select the paired device to which you want to connect the earbuds. Make sure that the desired device is switched on and Bluetooth is activated.
The Bluetooth audio connection between the desired Bluetooth device and the earbuds is established.
The app connection between the device with the Smart Control app installed and the earbuds remains active (only Bluetooth Low Energy for communication between app and earbuds, the device name is highlighted in bold).
Using the "Connections" function, you can also selectively delete pairing information of devices without resetting the earbuds to the factory default settings.
Disconnecting the earbuds from a Bluetooth device
- Via the menu of your Bluetooth device, disconnect the connection to the earbuds.
The earbuds are disconnected from the Bluetooth device. The earbuds then search for other paired devices. If no device is found, you hear the voice prompt "No connection". The headphones switch to idle mode.
Using the "Connections" function in the Smart Control app, you can also selectively connect the earbuds to paired devices without terminating an existing connection or deleting the pairing information of certain devices.
If you want to clear the Bluetooth pairing list of the earbuds, use the Smart Control app or reset the earbuds to the factory default settings.
Pairing a spare earbud
The right and the left earbud are paired with each other upon delivery. If, however, you are using a different earbud (e.g. a spare earbud), you have to pair the two earbuds with each other once. This pairing process resets the earbuds to the factory default settings.

- Insert both earbuds into the charging case and leave the lid of th echarging case open.
- After 20 seconds, the earbuds are paired with each other.
The LED of the charging case then lights up red and green 3x.
The earbuds are now paired with each other.
If you have closed the lid of the charging case too early, repeat the above procedure.
After the pairing process with a spare earbud, all settings are reset. Pair the earbuds with your smartphone again.
Installing the Smart Control app
To make full use of all the settings and functions of the headphones, you need to have the free Sennheiser Smart Control app installed on your smartphone.
Download the app from the Apple App Store or Google Play and install it on your smartphone. Alternatively, you can use your smartphone to scan the following QR code or to call up the following Internet site:
www.sennheiser-hearing.com/smartcontrol


- Connect your smartphone to the earbuds using Bluetooth.
- Start the Smart Control app.
- Follow the instructions in the app.
Selecting suitable ear adapters and ear fins for optimum fit of the earbuds
The perceived sound quality including bass performance, the best possible noise cancellation, the best voice quality for phone calls and a secure hold of the earbuds in the ear depends to a large extent on the correct fit of the earbuds. Therefore, you can choose between ear adapters and ear fins in different sizes.
Silicone ear adapters

- Pull the ear adapter away from the in-ear sound tunnel.
- Mount the new ear adapter to the in-ear sound tunnel. Ensure that it locks into place.
- Test which ear adapter size gives you the best sound quality and the best wearing comfort.
You can choose between 4 different ear adapters in size XS, S, M and L. The ear adapters must fit snugly in the ear canal and completely seal your ears.
Silicone ear fins

- Carefully remove the ear fin from the earbud housing.
- Assign the right and left ear fin to the right and left earbud (see embossing on the bottom).
- Place the latch on the inside of the ear fin ring into the recess provided on the earbud and slip the ring over the earbud housing. Make sure the ring fits neatly into the duct on the earbud housing.
- Test which ear fin size gives you the best fit and the best wearing comfort.
You can choose between 2 different ear fins in size M and L. The ear fin holds the earbud securely in the back of the ear. If you do not want to use an ear fin, put size S on the earbud.
Inserting the earbuds into the ears

- Assign the right earbud to your right ear and the left earbud to your left ear.
- Insert the earbuds at a slight angle into the ears and twist them slightly into the ear canal so that they sit comfortably and snugly in the ear canal. If you are using an ear fin, make sure that the fin finds support in the auricle.
The right or left earbud can be used alone. If you insert one earbud into the charging case during use, a short interruption of playback may occur in the other earbud.
The Smart Pause function automatically stops music playback when you remove an earbud from the ear.
Switching the earbuds on

Danger of hearing damage due to high volume levels!
Listening at high volume levels can lead to permanent hearing defects.
- Before putting the headphones on, adjust the volume to a low level
- Do not continuously expose yourself to high volume levels.
- Open the lid of the charging case, take out both earbuds and insert them into your ears.
If a paired Bluetooth device is within the transmission range, yo u hear the voice prompts "Power On" and "Connected". The LEDs of the earbuds light up blue.
If you take the earbuds out of the charging case during an incoming call, the call is automatically accepted and you can use the earbuds directly for making calls.
This Auto Call function can also be deactivated via the Smart Control app.
The earbuds automatically switch to idle mode if no paired Bluetooth device can be found within 15 minutes. You can also change this setting via the Smart Control app. You can wake up the earbuds from idle mode by touching their touch control panels 1x or by briefly inserting them into the charging case.
Switching the earbuds off

The earbuds do not have to be switched off explicitly.
- Insert the earbuds into the charging case and close the lid to switch the earbuds off.
As soon as the earbuds are inserted into the charging case an d the lid of the charging case is closed, the earbuds switch off an d are being charged.
If you do not close the lid of the charging case, the Bluetooth connection is briefly interrupted but immediately restored and the earbuds are being charged.
The earbuds automatically switch to idle mode if no paired Bluetooth device can be found within 15 minutes. You can wake up the earbuds from idle mode by touching their touch control panels 1x or by briefly inserting them into the charging case.
You can also switch off the earbuds via the Smart Control app.
Adjusting the volume
Danger of hearing damage due to high volume levels!
Listening at high volume levels can lead to permanent hearing defects.
- Before putting the headphones on and before toggling between audio sources, adjust the volume to a low level.
- Do not continuously expose yourself to high volume levels.

To increase the volume:
- Touch and hold the touch control panel of the right earbud until the volume is increased. To reduce the volume:
- Touch and hold the touch control panel of the left earbud until the volume is reduced.
When the maximum or minimum volume is reached, you hear the voice prompt "Volume max" or "Volume min".
You can also adjust the volume using the connected Bluetooth device.
If you have activated the voice assistant and then change the volume of the earbuds, the volume of the voice assistant is adjusted accordingly and saved permanently.
Information on active noise cancellation ANC
Due to the wearing style in the ear canal, the earbuds provide effective passive isolation from ambient noise.
In addition, the earbuds have an active noise cancellation (ANC ) function, which allows you to reduce ambient noise to a minimum. Even when ANC is activated, your headphones' sound quality is always at its best.
If you want to create a quiet space in a noisy environment, you ca n simply use the earbuds as noise protection by using ANC.
With the Smart Control app, you can select different ANC modes that offer the optimal settings for your application situation. With the adaptive noise cancellation, the intensity is automatically adjusted depending on the noise conditions. Notes on active noise cancellation
- Continuous low-frequency noise, such as motor or fan noise, is particularly well suppressed.
- Speech or high-frequency noise is significantly reduced, but can remain perceptible.
- If unusual (whistling or beeping) noise occurs, take the headphones off and put them on again. Make sure that the earbuds properly fit in your ears and make a good seal with the ear canal.
- To avoid loud, unusual (whistling or beeping) noise and to ensure proper noise cancellation, do not cover the microphone openings of the active noise cancellation circuitry located on the outside of the ear cups.
- With active noise cancellation ANC activated, the battery life o f the earbuds is reduced.
Activating/deactivating the active noise cancellation ANC
- Tap the touch control panel of the left earbud 3x.
The active noise cancellation ANC is activated or deactivated.


You can also activate or deactivate the active noise cancellation ANC via the Smart Control app.
During phone calls, the active noise cancellation ANC is always activated to ensure the best possible voice quality.
Adjusting the active noise cancellation ANC
To be able to adjust the active noise cancellation, you require the Smart Control app.
- In the Smart Control app, select the desired ANC mode.
| ANC mode | Reduction of low-frequency noise and background noise |
| "Adaptive" * | Reduction depending on the noise conditions Maximum reduction in noisy environments and minimum reduction in quiet environments. |
| "Anti Wind" | Slight reduction to minimize disturbing wind or movement noise |
* default setting
Listening to ambient sounds or conversations - activating/deactivating the Transparency Mode
With the Transparency Mode activated, you can hear ambient sounds or communicate without having to remove the earbuds from your ears. This allows you to hear e.g. announcements in the train or aircraft or to have short conversations.

- Tap the touch control panel of the left earbud 1x.
The Transparency Mode set in the Smart Control app is activated. You can hear ambient sounds without having to remove the earbuds from your ears.
To deactivate the Transparency Mode: - Tap the touch control panel of the left earbud 1x.
Adjusting the Transparency Mode
To be able to fully use the Transparency Mode, you require the Smart Control app.
- Select the desired Transparency Mode function in the Smart Control app:
| Transparency Mode | Description |
| "Keep music playing and mix with ambient sound" | Audio playback (e.g. music) continues and is mixed with ambient sounds. You can adjust the volume of the ambient sounds via a slider. |
| "No music playback, only | Audio playback (e.g. music) is muted and you hear only ambient sounds. |
*: default setting
Using the voice assistant/voice dialing
- Tap the touch control panel of the right earbud 3x.
The available voice assistant of your smartphone is activated (*depending on the system or app used on your smartphone: Siri, Google Assistant, ...). - Ask the voice assistant your question or make a request.
To cancel the voice assistant/voice dialing: - Tap the touch control panel of the right earbud 1x.


| Right touch control panel | Function | |
 | Tap 3x | Activates the voice assistant |
If you have activated the voice assistant and then change the volume of the earbuds, the volume of the voice assistant is adjusted accordingly and saved permanently.
Using the Smart Pause function
The earbuds automatically detect whether they are worn in the ear or removed from the ear.
Music playback pauses when you remove an earbud from your ear and resumes when you insert it again (if you interrupt for more than 2 minutes, playback will not start automatically).
You can activate (default setting) or deactivate the function via the Smart Control app.
Controlling music playback
The music playback functions are only available when the earbuds and the device are connected via Bluetooth. Some smartphones or music players may not support all functions.

Playing/pausing music
- Tap the touch control panel of the right earbud 1x.
| Right touch control panel | Function | |
 | Tap 1x | Plays or pauses music |
Playing the previous track
- Tap the touch control panel of the left earbud 2x.


| Left touch control panel | Function | |
 | Tap 2x | Plays the previous track in the playlist |
Playing the next track
- Tap the touch control panel of the right earbud 2x.


| Right touch control panel | Function | |
 | Tap 2x | Plays the next track in the playlist |
Making calls using the earbuds
The call functions are only available when the earbuds and the smartphone are connected via Bluetooth.
Some smartphones and telephony apps (e.g. WhatsApp, MS Teams, WeChat) may not support all call control functions.
During a call, you can use the right and/or left earbud to control the call functions.

Making a call
- Dial the desired number on your smartphone.
If your smartphone does not automatically transfer the call to the headphones, select "MOMENTUM TW 3" as the output device on your smartphone (see the instruction manual of your smartphone if necessary).
Accepting/rejecting/ending a call
If your headphones are connected to a smartphone and you receive a call, you hear a ring tone in the headphones.
If you are playing music when you receive a call, the music pauses until you end the call.
| Right or left touch control panel | Function | |
 | Tap 1x | Accepts a call |
 | Tap 1x | Ends a call Voice prompt "Call ended" |
 | Tap 2x | Rejects a call Voice prompt "Call rejected" |
 | Tap 1x | Accepts an incoming call and ends the active call |
 | Tap 2x | Rejects an incoming call and continues the active call |
Using the Auto Call function
If you take the paired earbuds out of the charging case during an incoming call, the call is automatically accepted and you can use the earbuds directly for making calls.
You can activate (default setting) or deactivate the function via the Smart Control app. Note that both earbuds must be switched on to adjust the settings for both earbuds (right and left).
The right or left earbud can be used alone. If you insert one earbud into the charging case during use, a short interruption of playback may occur in the other earbud.
Displaying the battery charge status
When the earbuds are connected to your Bluetooth device, the battery charge status can be displayed on the screen of your smartphone or device (depending on the device and operating system used).
The Smart Control app also displays the charge status of the earbuds' rechargeable batteries and the charging case.
Displaying the battery charge status using the charging case

If no USB cable is connected to the charging case or the charging case is not placed on a wireless charging station:
- Open the lid of the charging case.
The LED of the charging case displays the battery charge status. If you close the lid of the charging case, the LED will go off after 5 seconds.
| LED | Charging case WITH earbuds inserted | Charging case WITHOUT earbuds inserted | |
 | lights up green | ... earbuds are fully charged and the charging case can still charge at least one complete cycle | ... charging case is fully charged |
 | pulses yellow | ... earbuds are being charged via the rechargeable battery of the charging case | – |
| | lights up yellow | ... earbuds are fully charged, the charging case cannot charge another complete cycle | ... charging case is charged less than 90 % |
 | lights up red | ... rechargeable batteries of the earbuds and the charging case are empty | ... rechargeable battery of the charging case is empty |
 | flashes red | ... a charging error/ battery error has been detected in at least one earbud | ... a charging error/ battery error has been detected in the charging case |
Adjusting sound effects/the equalizer
To be able to use the sound effects/equalizer, you require the Smart Control app
- In the Smart Control app, select the desired sound effects via the equalizer. You can use predefined presets, define sound modes (e.g. Bass Boost) or define your own settings.
The sound effects are stored in the earbuds. These sound settings are active even without using the Smart Control app, i.e. when you are using a different Bluetooth device. Note that both earbuds must be switched on to adjust the settings for both earbuds (right and left).
The Sound Check function of the Smart Control app allows you to create customized equalizer presets. Sound Check guides you step by step to the optimal results.
Setting the voice prompts/beep sounds
To be able to set the voice prompts and beep sounds, you require the Smart Control app
You can choose between voice prompts and beep sounds, or deactivate the status messages with a few exceptions (e.g. rechargeable battery is empty). Note that both earbuds must be switched on to adjust the settings for both earbuds (right and left).
Customizing the control functions
To be able to customize the control functions for music playback, you require the Smart Control app
The app allows you to customize the control functions and other commands of the earbuds, to select preset control functions or to switch off the control functions. Some basic functions cannot be changed (e.g. call control).
Storing or transporting the earbuds in the charging case
Store the earbuds in the charging case to prevent damage to the earbuds when not in use or during transport. The earbuds are automatically charged in the charging case so you always have the full battery life to work with.
- Open the charging case by overcoming a slight magnetic resistance and insert the left earbud into the left charging compartment and the right earbud into the right charging compartment. The earbuds are magnetically pulled into the charging compartments.
- Close the lid of the charging case.


Care and maintenance of the earbuds/charging case

Liquids can damage the electronics of the product!
Liquids entering the housing of the product can cause a short-circuit and damage the electronics.
- Keep all liquids far away from the product.
- Do not use any solvents or cleansing agents.
- Only clean the charging case with a soft, dry cloth.
- Clean the earbuds with a slightly damp cloth.
- You can clean the silicone ear adapters and silicone ear fins under lukewarm running water. Let the ear adapters and ear fins dry at room temperature for at least 12 hours before re-attaching them to the earbuds.
- Clean the charging contacts on the earbuds and in the charging case from time to time using e.g. a cotton swab.


If the earbuds have gotten wet:
- Remove the ear adapters and dry the earbuds and ear adapters with a dry cloth. If necessary, let the earbuds and ear adapters dry at room temperature for approx. 12 hours.
Replacing the ear adapters and ear fins
For reasons of hygiene, you should replace your ear adapters and ear fins from time to time. Spare ear adapters and spare ear fins can be found on the MOMENTUM True Wireless 3 product page at www.sennheiser-hearing.com.
- Pull the ear adapter away from the in-ear sound tunnel.
- Mount the new ear adapter to the in-ear sound tunnel. Ensure that it locks into place.
- Carefully remove the ear fin from the earbud housing.
- Slip the new ear fin onto the earbud. Make sure that the latch on the inside of the ear fin ring is placed in the recess provided on the earbud housing


Information on the built-in rechargeable battery
Sonova Consumer Hearing ensures and guarantees that the rechargeable batteries perform at their optimum upon purchase of the product. If, upon purchase or within the warranty period, you suspect that a rechargeable battery is obviously defective or if a charging error/battery error is displayed stop using the product, disconnect it from the power supply system and contact your Sonova Consumer Hearing partner. Your Sonova Consumer Hearing partner will coordinate the repair/replacement with you.
Do not return a product with a defective battery to your dealer or Sonova Consumer Hearing partner unless requested to do so. To find a partner in your country, search at www.sennheiser-hearing.com/ service-support.
At the end of its operational lifetime, this product with its built-in rechargeable battery must be disposed of separately from normal household waste. You can find more information here:
Installing firmware updates
Firmware updates can be downloaded free of charge from the Internet using the Sennheiser Smart Control app.
- Before updating, the earbuds must be removed from the charging case and must not be placed back into the charging case during the update.
- Connect your earbuds to your smartphone and start the Smart Control app
- The app provides information on available firmware updates and guides you through the installation process.
- Make sure that the batteries are fully charged before updating. Avoid connecting or disconnecting the USB power supply during the update process.
FAQ
If a problem has occurred, proceed in the following order until the problem is solved and you can use the earbuds again:
- Insert the earbuds into the charging case and close the lid. Wai tfor at least 10 seconds
- Connect the earbuds to the Smart Control app to install the latest firmware
- Reset the earbuds to the factory default settings
- Check the list of frequently asked questions to see if there is a solution to the problem
- Contact your Sonova Consumer Hearing partner to solve the problem
Current list of frequently asked questions (FAQ)
Visit the MOMENTUM True Wireless 3 product page at www.sennheiser-hearing.com
There you will find a current list of frequently asked questions (FAQ) and suggested solutions.
Your question has not been answered or the problem persists?
If a problem occurs that is not listed in the FAQ section or if the problem cannot be solved with the proposed solutions, please contact your Sonova Consumer Hearing partner for assistance.
To find a partner in your country, search at www.sennheiser-hearing.com/service-support.
Leaving the Bluetooth transmission range
Wireless calling and streaming are only possible in the Bluetooth transmission range of your smartphone. The transmission range largely depends on environmental conditions such as wall thickness, wall composition etc. With a free line of sight, the transmission range of most smartphones and Bluetooth devices is up to 10 meters.
If you, and therefore the earbuds, leave the Bluetooth transmission range of the smartphone, the sound quality deteriorates increasingly until you hear the voice prompt "No connection" and the connection breaks down completely. If you immediately re-enter the Bluetooth transmission range, the connection is automatically re-established and you hear the voice prompt "Connected". If this is not the case, tap the touch control panel of the earbud 1x.
Resetting the earbuds
If the function of the earbuds is disturbed, perform a reset. Individual settings such as the pairing settings are not deleted.
- Insert the earbuds into the charging case and close the lid. After 10 seconds, the earbuds will restart (reset).


Resetting the earbuds to the factory default settings
If the function of the earbuds is disturbed and a reset does not improve, reset the earbuds to the factory default settings. This deletes, among other things, all pairing settings
The easiest way to reset the earbuds to the factory default settings is using the Smart Control app.
Alternatively, you can manually proceed as follows:

- Deactivate Bluetooth on your smartphone.
The connection between your smartphone and the "MOMENTUM TW 3" is disconnected. - Take one earbud out of the charging case, leave the other earbu din the charging case.
- Touch and hold the touch control panel of the earbud that is no tin the charging case for 10 seconds.
The LED on this earbud alternately lights up green and red. - Now stop touching the touch control panel.
- Place the earbud back into the charging case. Be sure to leave th elid of the charging case open when doing so.
After 20 seconds, the earbuds are reset to the factory default settings and automatically reconnect to each other.
After the earbuds have been successfully reset and paired with each other, the LED of the charging case lights up red and green 3x.
- To reconnect your earbuds to your smartphone, reactivate Bluetooth on your smartphone.
Pairing a spare earbud with another earbud
The right and the left earbud are paired with each other upon delivery. If, however, you are using a different earbud (e.g. a spare earbud), you have to pair the two earbuds with each other once. This pairing process resets the earbuds to the factory default settings.

- Insert both earbuds into the charging case and leave the lid of th echarging case open.
- After 20 seconds, the earbuds are paired with each other.
The LED on the charging case then lights up red and green 3x.
The earbuds are now paired with each other.
If you have closed the lid of the charging case too early, repeat the above procedure.
After the pairing process with a spare earbud, all settings are reset. Pair the earbuds with your smartphone again
Specifications
MOMENTUM True Wireless 3
Model: MTW3, MTW3 R, MTW3 L, MTW3 C


Documents / Resources
References
![www.sennheiser-hearing.com]() Download | Sennheiser
Download | Sennheiser![www.sennheiser-hearing.com]() Smart Control App | Sennheiser
Smart Control App | Sennheiser![www.sennheiser-hearing.com]() Official website and online shop | Sennheiser
Official website and online shop | Sennheiser![www.sennheiser-hearing.com]() Service & Support | Sennheiser
Service & Support | Sennheiser![www.apple.com]() App Store - Apple
App Store - Apple![play.google.com]() Google Play
Google Play

Download manual
Here you can download full pdf version of manual, it may contain additional safety instructions, warranty information, FCC rules, etc.
Download Sennheiser MOMENTUM True Wireless 3, MTW3 - Stereo Earbuds Manual
Advertisement


Need help?
Do you have a question about the MOMENTUM True Wireless 3 and is the answer not in the manual?
Questions and answers