Philips HD4937 - Cooktop Manual
- User manual (2 pages) ,
- User manual (2 pages) ,
- User manual (2 pages)
Advertisement
To fully benefit from the support that Philips offers, register your product at www.philips.com/welcome.
What's in the box

Induction cooker main unit
Important information leaflet
Warranty card
User manual
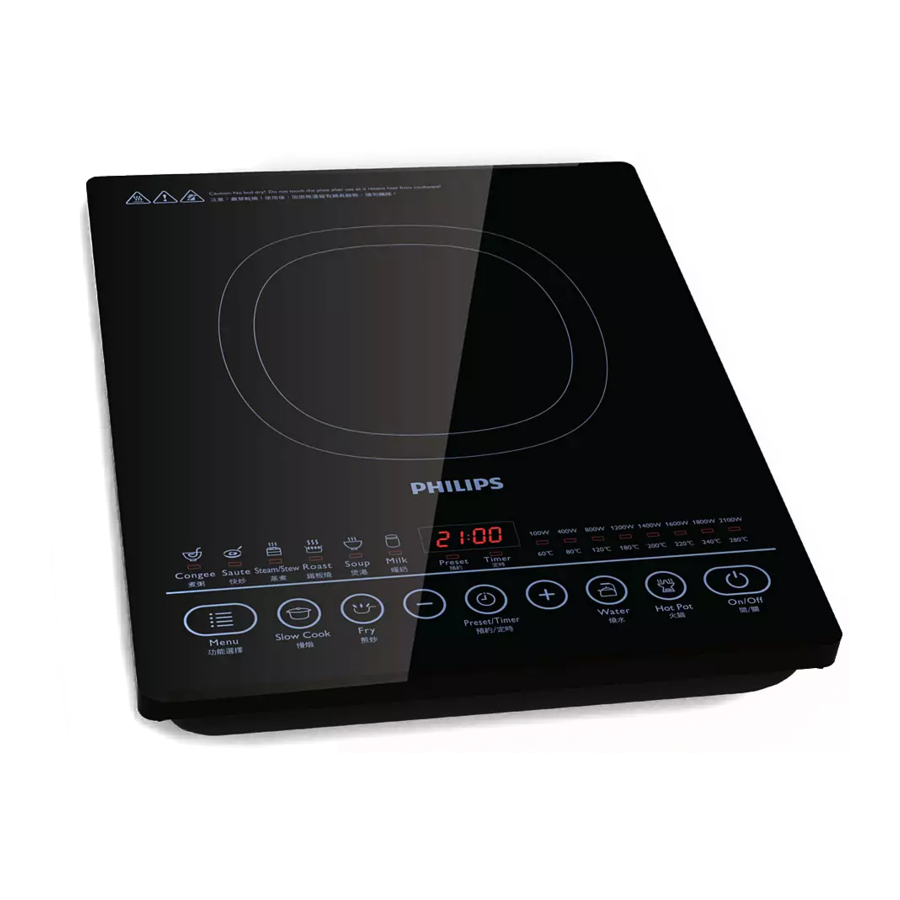
Overview

 | Cooking plate |  | Control panel |
 | Cooking zone |  | Air outlets |
 | Air inlet |  | Power cord |
Controls overview

 | Congee button |  | On/Off button |
 | Saute button |  | Hot Pot button |
 | Steam/Stew button |  | Water button |
 | Roast button |  | Increase button |
 | Soup button |  | Preset/Timer button |
 | Milk button |  | Decrease button |
 | Preset indicator |  | Fry button |
 | Display screen |  | Slow Cook button |
 | Timer indicator |  | Menu button |
 | Cooking power and temperature |
Before first use
Remove all packaging materials from the induction cooker.
Preparing for use
- Place the appliance on a dry, stable and level surface.
![]()
- Make sure there is at least 10cm free space around the appliance to prevent overheating.
![]()
- Always place the cookware on the cooking zone during cooking.
![]()
- Make sure you use cookware of the correct types and sizes (see the table below).


Recommended types and sizes of cookware

| Material | Cookware with a bottom made of iron or magnetic stainless steel |
| Shape | Cookware with a flat bottom |
| Size | Cookware with a bottom diameter of 12- 23cm, depending on the cooking mode |
Using the device
There are ten cooking modes: Congee ( ![]() ), Saute (
), Saute ( ![]() ), Steam/Stew (
), Steam/Stew ( ![]() ), Roast (
), Roast ( ![]() ), Soup (
), Soup ( ![]() ), Milk (
), Milk ( ![]() ), Slow Cook (
), Slow Cook ( ![]() ), Fry (
), Fry ( ![]() ), Water (
), Water ( ![]() ) and Hot Pot (
) and Hot Pot ( ![]() ).
).

- Follow the steps in "Preparing for use".
- Press the On/Off button (
![]() ), the On/Off indicator lights up.
), the On/Off indicator lights up. - Press the cooking buttons or the Menu button to choose the desired cooking mode. The corresponding indicator lights up and the induction cooker starts working in the selected mode.
- When the cooking is finished, press the On/Off button (
![]() ) to switch off the appliance.
) to switch off the appliance. - Unplug the induction cooker after the fan stops working.
 ), the On/Off indicator lights up.
 Note
Note
- During cooking, you can change the power level by pressing the Increase (
![]() ) or Decrease (
) or Decrease ( ![]() ) button.
) button. - In Water (
![]() ), Soup (
), Soup ( ![]() ), Steam/Stew (
), Steam/Stew ( ![]() ), Congee (
), Congee ( ![]() ) and Milk (
) and Milk ( ![]() ) modes, the cooking power automatically changes for better cooking result.
) modes, the cooking power automatically changes for better cooking result.


 )
) 
Default cooking time and temperature
Refer to below table for the default cooking time and temperature of different cooking modes.
| Cooking mode | Cooking temperature | Default cooking power | |
Congee (  ) ) | 100°C | 1400W (0-2 mins) | |
| 1600W (3-15 mins) | |||
| 1400W (16-25 mins) | |||
| 400W (26-60 mins) | |||
| 100W (60 mins onwards) | |||
Saute (  ) ) | 200 (±20)°C | 1200W | |
Steam/Stew (  ) ) | 100°C | 1800W (0-5 mins) | |
| 1400W (6-15 mins) | |||
| 1200W (15 mins onwards) | |||
Roast (  ) ) | 200 (±20)°C | 1200W | |
Soup (  ) ) | 100°C | 1400W (0-2 mins) | |
| 1600W (3-15 mins) | |||
| 1400W (16-25 mins) | |||
| 400W (26-60 mins) | |||
| 100W (60 mins onwards) | |||
Milk (  ) ) | 60 (±20)°C | 800W | |
Slow Cook (  ) ) | 85-100°C | 1800W (0-2 mins) | |
| 1600W (3-15 mins) | |||
| 1400W (16-25 mins) | |||
| 400W (26 mins onwards) | |||
Fry (  ) ) | 200 (±20)°C | 1200W | |
Water (  ) ) | 100°C | Starts with 1800W. When water is brought to boil, the power drops to 800W and the appliance keeps the water at boiling temperature for another 3 minutes. After that the appliance turns off automatically. | |
Hot Pot (  ) ) | 100°C | 100°C | |
| Cooking mode | Default cooking time | Timer | Ideas for Use |
Congee (  ) ) | 3 hrs | 1-180 mins | Lentils, Legumes, Beans |
Saute (  ) ) | 2 hrs | 1-120 mins | / |
Steam/Stew (  ) ) | 1 hr | 1-120 mins | Casseroles Stewing Fruit |
Roast (  ) ) | 2 hrs | 1-120 mins | / |
Soup (  ) ) | 3 hrs | 1-180 mins | / |
Milk (  ) ) | 20 mins | / | Good for Dairy Chocolate/ Cheese Fondu |
Slow Cook (  ) ) | 6 hrs | 1-600 mins | Lamb Shanks |
Fry (  ) ) | 2 hrs | 1-120 mins | Boiling water and leaving it on boil for your Pasta & Noodle Maker Demonstrations |
Water (  ) ) | 20 mins | / | Bring water to boil for a cuppa |
Hot Pot (  ) ) | 2 hrs | 1-120 mins | It's recomanded to use it as Manual mode, as you can change the power manually. |
Note
- Depending on the cookware being used or the ingredients in the cookware, the actual cooking temperature may be different.
Using the timer
You can use the Preset/Timer button to decide how much time you want the appliance to work at different cooking modes (not applicable in Water ( ![]() ) and Milk (
) and Milk ( ![]() ) modes).
) modes).

- Follow the steps in "Preparing for use".
- Press the On/Off (
![]() ) button, the On/Off (
) button, the On/Off ( ![]() ) indicator lights up.
) indicator lights up. - Choose the desired cooking mode.
- Press the Preset/Timer button (
![]() ) once or more times until the timer indicator lights up.
) once or more times until the timer indicator lights up. - Press the Increase (
![]() ) or Decrease (
) or Decrease ( ![]() ) button to adjust the time.
) button to adjust the time. - When the time has elapsed, the induction cooker turns off automatically.
 ) button, the On/Off (
  ) indicator lights up.
 ) button to adjust the time.
 Note
- After you have selected the cooking time, wait for a few seconds before the induction cooker automatically confirms it.
- After the timer is set, you can press the Preset/Timer button (
![]() ) again to cancel the timer.
) again to cancel the timer.
Preset time for delayed cooking
You can use the Preset/Timer button (  ) to set the time at which you want the appliance to start cooking. The preset timer is available up to 24 hours.

- Follow the steps in "Preparing to use".
- Press the On/Off button (
![]() ), the On/Off indicator lights up.
), the On/Off indicator lights up. - Choose the desired cooking mode.
- Press the Preset/Timer button (
![]() ) once or more times until the preset indicator lights up.
) once or more times until the preset indicator lights up. - Press the Increase (
![]() ) or the Decrease (
) or the Decrease ( ![]() ) button to choose the desired preset time.
) button to choose the desired preset time. - When the preset time has elapsed, you will hear a few beeps and the induction cooker starts working automatically.
 ), the On/Off indicator lights up.
 ) or the Decrease (
  ) button to choose the desired preset time.
 Note
- The preset timer is available in the following cooking modes: Congee (
![]() ), Steam/Stew (
), Steam/Stew ( ![]() ), Soup (
), Soup ( ![]() ), Milk (
), Milk ( ![]() ), Slow Cook (
), Slow Cook ( ![]() ) and Water (
) and Water ( ![]() ).
). - After you have selected the preset time, wait for a few seconds before the induction cooker automatically confirms it.
- When the induction cooker is at preset mode, you can press the Preset/Timer button ( ) again to cancel the preset time.


Cleaning
- Unplug the appliance after the fan stops working and let it cool down.
![]()
- Clean the appliance with a damp cloth and, if necessary, with some mild cleaning agent.
![]()


Recycling
Do not throw away the product with the normal ousehold waste at the end of its life, but hand it in at an official collection point for recycling. By doing this, you help to preserve the environment.
Troubleshooting
If your induction cooker does not function properly or if the cooking quality is insufficient, consult the table below. If you are unable to solve the problem, contact a Philips service centre or the Consumer Care Centre in your country.
| Problem | Solution |
The On/Off button (  ) does not respond. ) does not respond. | There is a connection problem. Check if the induction cooker is connected to the mains and if the plug is inserted firmly into the wall socket |
| The appliance beeps continuously and then stops working. | You may have put unsuitable cookware on the cooking plate or you may have removed the cookware from the cooking plate during cooking. Make sure the cookware is made of steel, iron or aluminum with stainless steel cladding base and has a base diameter larger than 12cm. |
| You may have placed the cookware outside of the cooking zone. | |
| The cookware does not heat up to the required temperature. | The bottom of the cookware may not be flat. Use cookware with a flat bottom. If the problem still exists, take the appliance to your Philips dealer or a service center authorised by Philips. |
| The appliance stops working suddenly. | The temperature of the cookware might be too high. Let the cookware cool down for a while. |
| The cooking temperature of the preset modes are too high or too low. | During cooking, you can change the power level by pressing the Increase (  ) or Decrease ( ) or Decrease (  ) button. ) button. |
| When I press one of the cooking mode buttons, the light of the selected mode does not go on. | The light is defective. Take the appliance to your Philips dealer or a service centre authorised by Philips. |
| The cooking temperature automatically changes in some preset modes. | In Water (  ), Soup ( ), Soup (  ), Steam/ Stew ( ), Steam/ Stew (  ), Congee ( ), Congee (  ) and Milk ( ) and Milk (  ) modes, the cooking temperature automatically changes for better cooking result. ) modes, the cooking temperature automatically changes for better cooking result. |
| Error code E1, E2, E3, E4, or E7 is displayed on the screen. | The induction cooker has malfunction. Take the appliance to your Philips dealer or a service center authorised by Philips. |
| Error code E5 or E6 is displayed on the screen. | The voltage is either too high or too low. Check if the voltage in your home is suitable for the induction cooker. |

Documents / Resources
References
Download manual
Here you can download full pdf version of manual, it may contain additional safety instructions, warranty information, FCC rules, etc.
Advertisement


Need help?
Do you have a question about the HD4937 and is the answer not in the manual?
Questions and answers