Advertisement
Location of Controls

![]() Standby/ON button
Standby/ON button- SOURCE
![]() button
button - BLUETOOTH
![]() / LEVEL indicator
/ LEVEL indicator - AUX IN / LEVEL indicator
- OPTICAL IN / LEVEL indicator
- LINE IN / LEVEL indicator
- -/+ VOLUME button
- DC IN jack
- AUX IN R / L jack
- LINE IN 3.5mm jack
- OPTICAL IN jack
- Remote Sensor
 Standby/ON button
 button
 / LEVEL indicator
REMOTE CONTROL

![]() MUTE button
MUTE button- BLUETOOTH
![]() button
button - VOL
![]() button
button - AUX button
- BASS
![]() button
button ![]() button
button- LINE IN button
- SOURCE button
- OPTICAL button
- TREBLE
![]() button
button - SURROUND button
 MUTE button
 button
 button
USING THE REMOTE CONTROL
- Point the remote control at the REMOTE SENSOR located on the unit (see Front Panel illustration for precise location).
- When there is a strong ambient light source, the perform ance of the infrared REMOTE SENSOR may be degraded, causing unreliable operation.
- The recommended effective distance for remote operation is about 16 feet (5 meters).
TO CHANGE REMOTE BATTERIES
- Open the battery door.
![]()
- Insert two AAA batteries.
![]()


BATTERY REPLACEMENT
When the batteries become weak, the operating distance of the remote control is greatly reduced and you will need to replace them.
Notes:
- If the remote control is not going to be used for a long time, remove the batteries to avoid corrosion damage caused by battery leakage.
- Do not mix old and new batteries. Do not mix ALKALINE, standard (CARBON-ZINC) or rechargeable (NICKEL-CADMIUM) batteries.
- Always remove batteries as soon as they become weak.
- Weak batteries can leak and severely damage the remote control.
![]()
Do not dispose of batteries in a fire. batteries may explode or leak.

Danger of explosion if battery is incorrectly replaced. Replace only with the same or equivalent type.
Connections
CONNECT AUDIO THROUGH AN ANALOG AUDIO CABLE
- Connect an Audio Cable (not included) from the AUX IN jacks to the AUDIO OUT jacks of your TV, Set-Top Box or Blu-ray/DVD Player.
- Connect a 3.5mm Audio Cable (not included) from the LINE IN jack to the AUDIO OUT jacks or from the AUX IN jacks to the Headphone Out jack of your TV, Set-Top Box or Blu-ray/DVD Player.
CONNECT AUDIO THROUGH A DIGITAL OPTICAL CABLE
- Connect an Optical Cable (not included) from the OPTICAL IN jack to the OPTICAL OUT jack of your TV, Set-Top Box or Blu-ray/DVD Player.

Plug one end of a 3.5mm Audio Cable(not included) into the LINE IN jack and other end into your iPad®, iPhone®, iPod® or other audio devices.
Note: OPTICAL IN only supports PCM signal. You may need to activate PCM (Downmix) on your source device, e.g. TV, Set-Top Box or Blu-ray/DVD Player.
Power Supply
USING THE AC ADAPTER
Using an AC adapter other than the one supplied with the unit may damage the unit.
- Before use, ensure the rated voltage of the adapter matches your local voltage.
- The included AC adapter is for use with this unit only. Do not use it with other equipment.
- If you are not going to use the unit for a long time, disconnect the AC adapter from the wall outlet.
- Whenever the AC adapter is plugged in to a wall outlet, the AC adapter will draw some power, even when the Sound Bar is turned off.
Placement
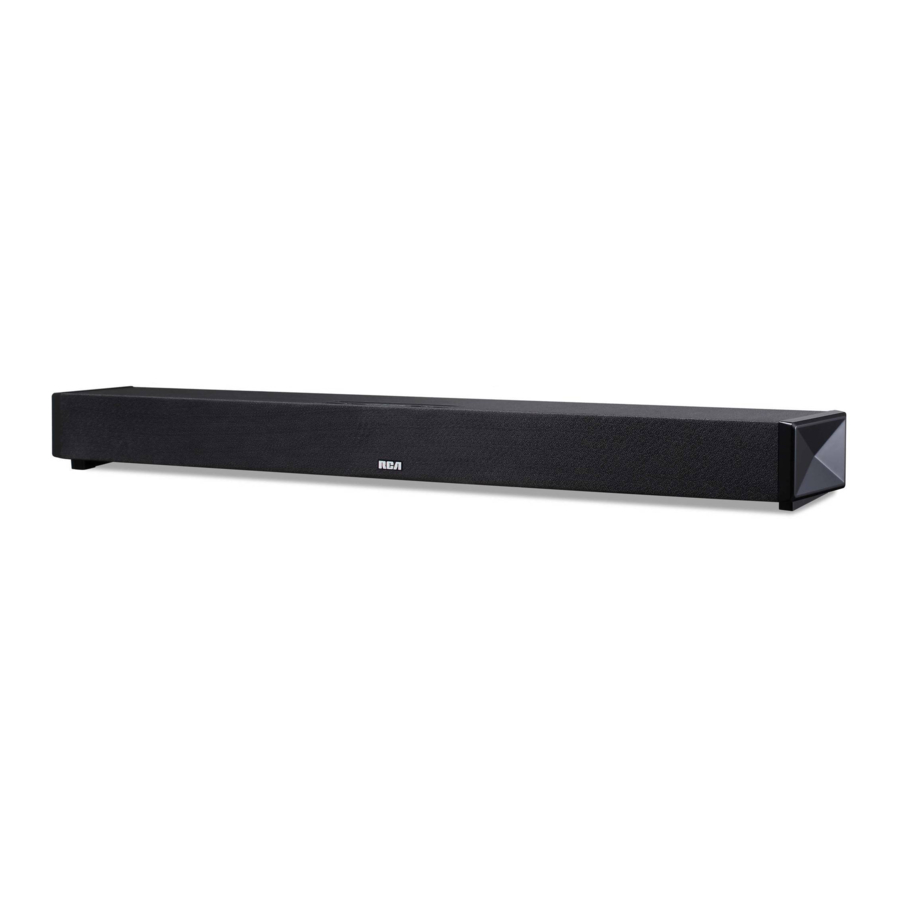
The Soundbar can be placed freestanding on a table or mounted on a wall.
PLACING THE SOUNDBAR ON A WALL
The Soundbar requires additional mounting hardware that must be purchased separately.
- Install the Wall Mount Brackets to the Soundbar as below.
- Place the Wall Mount Template (included) on the wall and then mark the locations of the screw holes.
- Drill the screws (not supplied) into the wall carefully.
- Gently hang the Soundbar onto the screws in the wall.
Note: Allow 2mm space between screw and the wall for fitting the wall mount bracket.

- We recommend that Wall-mounting be carried out by a professional. The wall mount bracket "key-holes" are intended for use with #8 (Imperial) or M4 (Metric) with head size: Diameter 7.5 - 9.4 mm. Additional or alternative parts may be needed for certain types of wall constructions.
- Make sure that the wall-mount is fixed securely enough so that it meets safety standards.
- Allow at least 2"(5 cm) separation in all directions between the Sound Bar and other AV equipment (such as your TV or Set-Top Box).
- It is recommended that all cables (AC adapter and Audio cables) be connected to the Sound Bar before placing it on the wall.
Bluetooth Pairing
Before Bluetooth pairing, you should turn on the Bluetooth function of your other device (such as, mobile phone with Bluetooth function).
- Press SOURCE button on the unit or
![]() button on the remote control to select BT (Bluetooth) mode. The Bluetooth indicator light on the soundbar will blink.
button on the remote control to select BT (Bluetooth) mode. The Bluetooth indicator light on the soundbar will blink. - On your device (mobile phone, MP3 player, etc.), select RCA RTS739BWS from the list of available Bluetooth connections. Note: If your Bluetooth device (such as, mobile phone) requires a password while pairing, please enter 4-digit number: 0000.
- If the Bluetooth pairing is successful, the Bluetooth indicator will illuminate.
- If the Bluetooth pairing is unsuccessful, the Bluetooth indicator will blink at slow speed. Please try again.
TO DISCONNECT THE CURRENTLY PAIRED DEVICE
- On your currently paired and connected device, select RCA RTS739BWS from the list and disconnect it.
or - turn off the connected device.
ENJOY THE MUSIC THROUGH BLUETOOTH
- Press
![]() to begin or pause playback
to begin or pause playback - Press
![]() to select a specific track
to select a specific track - Press and hold
![]() to start moving backward/forward at high speed.
to start moving backward/forward at high speed.
 to begin or pause playback
 to select a specific track
Accessories
Please locate the included accessories.
To order replacement units, visit http://www.RCAav.com
- Remote control (with 2 x AAA batteries) x 1
- AC power adapter x 1
- Wall Mount Bracket (with screws x 4) x 2
Basic Operation
- Press
![]() STANDBY/ON button on the Soundbar or
STANDBY/ON button on the Soundbar or ![]() button on the remote to turn on the unit.
button on the remote to turn on the unit. - Press SOURCE
![]() on the remote to select AUX IN, OPTICAL IN, LINE IN or Bluetooth source (input). The LEDs located on top of Sound Bar will indicate the currently-selected source.
on the remote to select AUX IN, OPTICAL IN, LINE IN or Bluetooth source (input). The LEDs located on top of Sound Bar will indicate the currently-selected source. - Press VOLUME
![]() , BASS
, BASS ![]() or TREBLE
or TREBLE ![]() on the remote to adjust Volume, Bass or Treble levels. When adjusting Volume, Bass or Treble, the four LEDs will temporarily display the current level setting (see illustration).
on the remote to adjust Volume, Bass or Treble levels. When adjusting Volume, Bass or Treble, the four LEDs will temporarily display the current level setting (see illustration).


Note: When mute is enabled, the 4 LED indicators will flash. Press the MUTE button on the remote control to disable the mute function and LED flashing stop.
Troubleshooting
| PROBLEMS | SOLUTIONS |
| The unit does not switch on. |
|
| I have no sound. |
|
| Cannot setup Bluetooth pairing |
|
| The remote control doesn't work |
|
Safety Precautions
FCC INFORMATION
This device complies with Part 15 of the FCC rules. Operation is subject to the following two conditions:
- This device may not cause harmful interference, and
- This device must accept any interference received, including interference that may cause undesired operation.
NOTE: This equipment has been tested and found to comply with the limits for a Class B digital device, pursuant to part 15 of the FCC Rules. These limits are designed to provide reasonable protection against harmful interference in a residential installation. This equipment generates, uses, and can radiate radio frequency energy and, if not installed and used in accordance with the instructions, may cause harmful interference to radio communications. However, there is no guarantee that interference will not occur in a particular installation. If this equipment does cause harmful interference to radio or television reception, which can be determined by turning the equipment off and on, the user is encouraged to try to correct the interference by one or more of the following measures:
- Reorient or relocate the receiving antenna.
- Increase the separation between the equipment and receiver.
- Connect the equipment into an outlet on a circuit different from that to which the receiver is connected.
- Consult the dealer or an experienced radio/TV technician for help.

- Changes or modifications to this unit not expressly approved by the party responsible for compliance could void the user's authority to operate the equipment.
- The AC adapter is used as disconnect device and it should remain readily operable during intended used. In order to disconnect the unit from the mains completely, the AC adapter should be disconnected from the mains socket outlet completely.
- The AC adapter of unit should not be obstructed OR should be easily accessed during intended use.
- Minimum 10 cm (4 inches) distances around the unit for sufficient ventilations.
- The ventilation should not be impeded by covering the ventilation openings with items such as newspaper, tablecloths, curtains, etc.
- No naked flame sources such as lighted candles should be placed on the unit.
ON SAFETY
- Should any objects or liquids fall into the unit, disconnect the power supply and have the unit checked by qualified personnel before any further operation.
- The unit shall not be exposed to dripping or splashing and that no objects filled with liquid, such as vases, shall be placed on the unit.
ON USE
Never use the unit where it would be subject to:
- Heat sources such as radiators or air ducts.
- Direct sunlight.

Documents / Resources
References
Download manual
Here you can download full pdf version of manual, it may contain additional safety instructions, warranty information, FCC rules, etc.
Advertisement


Need help?
Do you have a question about the RTS739BWS and is the answer not in the manual?
Questions and answers