Silverlit BUMPER DRONE MINI - Drone Manual
- Instruction manual (2 pages)
Advertisement
- 1 Content Delivery
- 2 Part Identification
- 3 Battery Installation and Charging
- 4 Flying the Drone
- 5 Trimming the Drone
- 6 Flight control: Take off and landing
- 7 Flight control
- 8 Fly mode setting
- 9 Protective Bumpers
- 10 Troubleshooting
- 11 Safety precautions
- 12 Battery warnings
- 13 Special notes to adults
- 14 FCC Statements
- 15 Care and Maintenance
- 16 Battery requirements
- 17 Documents / Resources
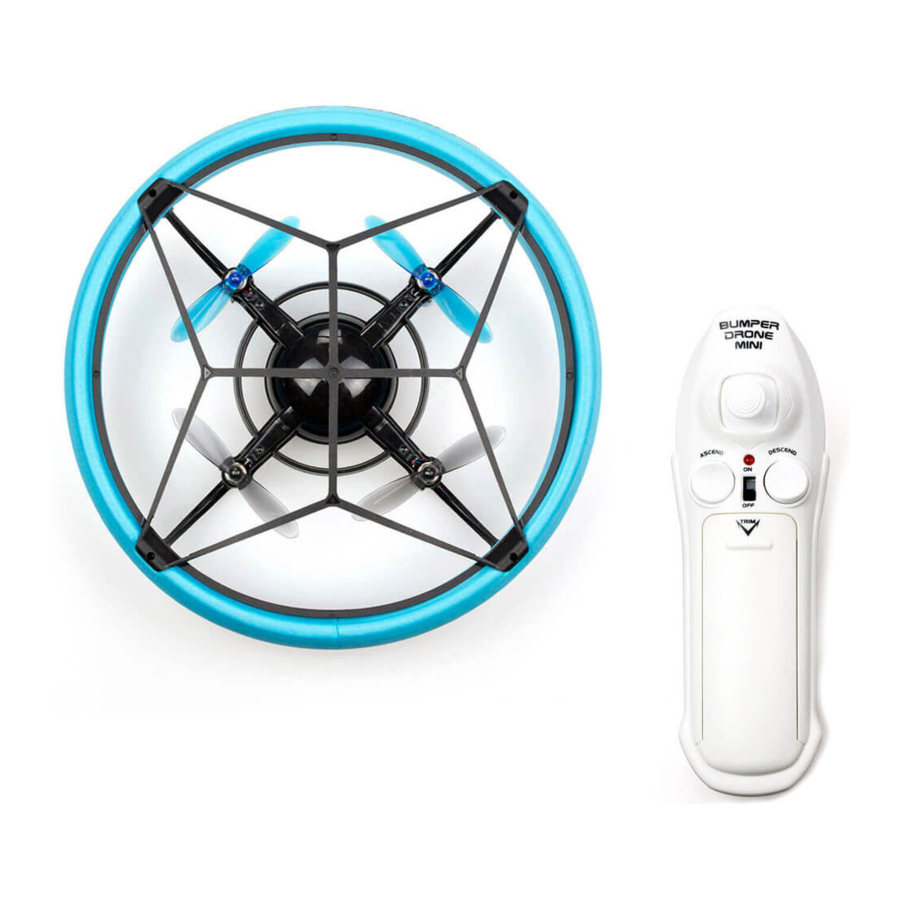
Content Delivery
(See picture A)

-
- Bumper Drone Mini
- Transmitter
- Spare Propellers
- USB Recharge Cable
- Instruction Manual
Part Identification
(See picture B)

| Bumper Drone Mini | Transmitter |
|
|
-
- Using a fork or tool, gently pry the blade from the motor shaft.
- Replace new correct propeller
- When replacing the rotor, please make sure the arrows on both Drone and propeller are in the same direction.
Battery Installation and Charging
(See picture C)

Transmitter Battery Installation
-
- Press down the button (1) on the transmitter, and then follow the arrow (2) direction to push out the battery compartment cover.
- Insert 2 AAA batteries in the battery compartment with correct polarity.
- Close the battery compartment.
Charging the Drone
-
- Connect the USB cable to a USB socket.
- Switch off the drone. Insert DC plug into the charging socket on the drone. The charging process will begin automatically and the green LED on drone will light up.
- Unplug the charging plug when the LED turns off, charging is completed.
Note:
- The Drone can operate for about 4 - 5 minutes per every 30-45 minutes charging.
- Before recharging the battery, wait 10 - 15 minutes for it to cool down.

Remove these batteries from the unit by pulling up on one end of each battery positive by hand.

DO NOT remove or install batteries using sharp or metal tools.

Flying the Drone
(See picture D)


Piloting hints
- For controlling the sticks on transmitter, try not to push the sticks immediately to any extreme positions. It should be like steering a bicycle rather than pressing computer game sticks.
- For the novice pilot (after the trimming procedure is completed), it is highly recommended to focus exclusively on learning to control the left stick first. If the Drone turns around by itself there is no need to keep it straight. For the first flight, it is important to learn to keep the Drone at a constant left of around 1 meter with very gentle inputs on the left stick. Once the pilot masters this, he may start learning to take control with the right stick.
Procedure for PAIR / SYNC the Drone and Transmitter
2.4 GHz technology allows for many Drone to fly without signal interference. A connection, PAIR / SYNC, must be made between the Drone and the transmitter to function. Follow these steps to PAIR/SYNC the Drone and the transmitter.
- Turn the Power Switch button to "ON" position on the Drone, the LED will gradually fade in and out. (D1)
- Place the Drone on the ground with the tail pointing towards you and the noise pointing away.
- Turn the Power Switch on Transmitter to "ON" position, the LED will gradually fade in and out. (D2)
- When the LED on Transmitter become solid and LEDs on Drone flash regularly, the pair procedure is completed. (D3)
Self Calibration
Place the Drone on a horizontal surface.
Pull the direction stick to lower left corner and press and hold "Descend" button (D4) for 8 seconds. You will hear a "beep" sound. The rotors will spin and calibration proceeds. When "beep beep beep" sound presents meaning that the calibration is completed. You can control the Drone now. (Only do the Self Calibration when unstable flying of Drone is happened.)
Flight environment
Indoor environment with calm air. Beware of the air circulation from the air-conditioner.

There must not be any dangerous objects (electric fan, air-conditioner, reading lamp, etc) on the flight path.
Trimming the Drone
(See picture E)

Press the Ascend button to take-off the Drone about 0.5 to 1 meter above the ground.
E1: Keep turning right
| E4: Keep going left
|
E2: Keep turning left
| E5: Keep going forward
|
E3: Keep going right
| E6: Keep going backward
|
Flight control: Take off and landing
(See picture F)

Auto take-off & landing:
| Press "Ascend " button (F1), Drone flies up to a standard level and hover in the air. |
| Press "Descend" button for 2 seconds, Drone will land automatically. (F2) |
| Press the "Ascend" button and "Descend" button at the same time over 1s for emergency stop. (F3) |
Flight control
(See picture G)

| G1: Ascend When the Drone hovering in the air, press the "Ascend" button to ascend the Drone. |
| G2: Descend When the Drone hovering in the air, press the "Descend" button to descend the Drone. |
| G3: Turn left and right Maintain the Drone at a certain height. Push the direction stick toward left to turn the Drone anticlockwise, and push it toward right to turn it clockwise. |
| G4: Forward and backward flight Maintain the Drone at a certain height. Push the direction stick upward to fly the Drone forward, and pull it downward to fly the Drone backward. |
Fly mode setting
(See picture H)

- Vertical press the stick gently (H1) to change between Beginner Mode (beep once) (H2) / Intermediates Mode (beep 2 times) (H3) / Advanced (beep 3 times) (H4)
Protective Bumpers

The bumpers are highly protective to keep propellers away from obstacles, to prevent crash and fall.
Troubleshooting
| Symptom | Cause | Correction |
| The Drone does not response. |
|
|
| The Drone does not react, or react poorly to operation by transmitter. |
|
|
| Loss of control. |
|
|
| CHOKING HAZARD - Small parts. Not for Children under 3 years. |
For ages 8+

 The crossed-out dustbin symbol indicates that batteries, rechargeable batteries, button cells, battery packs, etc. must not be put in the household waste. Batteries are harmful to health and the environment. Please help to protect the environment from health risks. If the toy is out of use, please use common household tool to break the product for built-in rechargeable battery operated toy or unscrew the battery door for replaceable battery operated toy, then take the battery out from the toy. Dispose of battery in accordance with your local battery recycling or disposal laws. |
| Waste Electrical and Electronic Equipment (WEEE)
|

Safety precautions
Conversion or modifications to this product not expressly approved by the party responsible for compliance could void the user's authority to operate the product.
- The USB cable is tailor-made for the LiPo rechargeable battery used in Drone. Do not use it to charge any battery other than that in the Drone.
Battery warnings
- Non-rechargeable batteries are not to be recharged.
- Rechargeable batteries are to be removed before being charged. (Transmitter only)
- Rechargeable battery are only to be charged by an adult.
- Different types of batteries or new and used batteries are not to be mixed. (Transmitter only)
- Only batteries of the same or equivalent type as recommended are to be used.
- Batteries are to be inserted with correct polarity.
- Exhausted batteries are to be removed from the product. (Transmitter only)
- The supply terminals are not to be short-circuited.
- Do not mix old and new batteries. (Transmitter only)
- Do not mix alkaline, standard (carbon-zinc) or rechargeable batteries. (Transmitter only)
Special notes to adults
![]()
Read the manual carefully before first use.- Use only under adult supervision.
- Only operate the product indoor.
This Drone is equipped with a LiPo rechargeable battery, please pay attention to the following cautions for safety use:
- Do not dispose the battery in fire or heat.
- Do not use or leave the battery near a heat source such as fire or heater.
- Do not strike or throw the battery against hard surface.
- Do not immerse the battery in water, and keep the battery in a cool dry environment.
- When recharging, only use the battery charger specifically for that purpose.
- Do not over-discharge the battery.
- Do not connect the battery to an electrical outlet.
- Do not directly solder the battery and pierce the battery with a nail or other sharp object.
- Do not disassemble or alter the battery.
- Charge the battery every 6 months.
- Do not transport or store the battery together with metal objects such as necklaces, hairpins etc.
- As for a used battery, please recycle after covering the battery terminals with insulation tape or inserting it to an individual poly-bag.
- Battery inside the product is not replaceable
- The USB charger used with the toy is to be regularly examined for damage on the cord, plug, enclosure and other parts, and that in the event of such damage, the toys must not be used with this charger until the damage has been repaired.
Notes:
- New alkaline batteries are recommended to use in this product to obtain best and maximum performance.
- This product must only be used with the recommended charger.
Not suitable for children under 8 years of age.
Hereby, Silverlit Toys Manufactory Ltd declares that the radio equipment 84820 is in compliance with Directive 2014/53/EU. The full text of the EU declaration of conformity is available at the following internet address: www.silverlit.com/a/certificate
FCC Statements
This device complies with part 15 of the FCC rules. Operation is subject to the following two conditions:
- This device may not cause harmful interference, and
- This device must accept any interference received, including interference that may cause undesired operation.
NOTE: This equipment has been tested and found to comply with the limits for a Class B digital device, pursuant to Part 15 of the FCC Rules. These limits are designed to provide reasonable protection against harmful interference in a residential installation
However, there is no guarantee that interference will not occur in a particular installation. If this equipment does cause harmful interference to radio or television reception, which can be determined by turning the equipment off and on, the user is recommended to:
- Reorient or relocate the receiving antenna.
- Increase the separation between the equipment and receiver.
- Connect the equipment into an outlet on a circuit different from that to which the receiver is connected.
- Consult the dealer or an experienced radio/TV technician for help.
Care and Maintenance
- Always remove batteries from the product when it is not being used for a long period of time. (Transmitter only)
- Regularly examine for damage to the plug, enclosure and other parts. In the event of any damage, the product must not be used with the transmitter charger until the damage has been repaired.
- Wipe the product gently with a clean cloth.
- Keep the product away from direct heat.
- Do not submerge the product into water that can damage the electronic assemblies.
Safety hints
- Never take apart or attempt to modify the product. This could damage the product.
- Drone piloting requires specific skills and should be learned under direct supervision of an experienced adult.
- Never operate this product if it has damaged parts.
- Wind and short transmission range can lead to loss of control.
- Attention! Do not fly the Drone near persons and animals.
- Do not fly the Drone in the vicinity of water and power lines.
- For safe use, the room where the toy is used must be sufficiently large.
- Always keep your eyes on the Drone and prevent it from landing or crashing near your head, your body, or on other people.
- Stand during operation in order to get out of the way of the Drone quickly if necessary.
- Always switch the Drone and the transmitter off when not operating.
![]()
Do not touch the running rotors. Keep hands, hair and loose clothes away from moving parts to avoid injury.- Never hold or throw any objects into the running rotors.
- Attention! Risk of eye injuries! Keep a safety distance of at least 1 meter.
- Keep this instruction manual for future reference.
The normal function of the product may be disturbed by Strong Electro Magnetic Interference. If so, simply reset the product to resume normal operation by following the instruction manual.
In case the function could not resume, please use the product in other location.
Battery requirements
Transmitter:
![]()
Power supply: ![]()
Battery ratings: DC 3.0 V, 0,5 W
Batteries: 2 x 1.5 V "AAA"/LR03/AM4 (not included)
Drone:

Power supply: ![]()
Battery ratings: DC 3.7 V, 13 W
Batteries: 1 x 3.7 V Li-Po Rechargeable Battery Pack (included)
Capacity: 250 mAh
 Become our fan on Facebook
facebook.com/SilverlitToys
Visit us at
www.Silverlit.com
Silverlit SAS, 80 rue Barthelemy Danjou, 92100 Boulogne-Billancourt / France.
© 2018 Silverlit. All rights reserved.

Documents / Resources
References
Download manual
Here you can download full pdf version of manual, it may contain additional safety instructions, warranty information, FCC rules, etc.
Advertisement


Need help?
Do you have a question about the BUMPER DRONE MINI and is the answer not in the manual?
Questions and answers