Advertisement
INTRODUCTION
Thank you for purchasing the Elite Gourmet Air Fryer. Your new Air Fryer has a variety of functions to handle a wide array of cooking tasks. With its easy to use temperature and timer knobs, you can fry, cook, or even bake your favorite meals and snacks with ease! Best of all you will be cooking healthier without the addition of oil. Not only can you cook foods without the mess of oil but you can cook faster which saves you time and energy. Unlike most conventional deep fryers, the Air Fryer's unique vapor system combined with circulating hot air will automatically make foods crispier and of course healthier without oil. We hope you enjoy your new Elite Gourmet Air Fryer and start cooking healthier today!
IMPORTANT SAFEGUARDS
The Elite Brand takes consumer safety very seriously. Products are designed and manufactured with our valued consumers' safety in mind. Additionally, we ask that you exercise a level of caution when using any electrical appliance by following all instructions and important safeguards.
READ ALL INSTRUCTIONS BEFORE USE AND SAVE FOR FUTURE REFERENCE

When using electrical appliances, basic safety precautions should always be followed as below:
- Read all instructions before using your Elite Gourmet Air Fryer.
- Never immerse the power cord, plug or housing in water or under the tap.
- Make sure no liquid enters the appliance to prevent electric shock or short-circuit.
- Do not cover the air inlet and outlet of the appliance during operation.
- Always place foods to be cooked on the rack, foods should never come into direct contact with the heating elements.
- Never ill the pan with oil as this may cause a ire hazard and damage to the appliance.
- Never touch the inside of the appliance during operation.
- Make sure that your output voltage corresponds to the voltage stated on the rating label of the appliance.
- It is recommended to regularly inspect the appliance to avoid a hazard. Do not operate any appliance with a damaged cord or plug or after the appliance malfunctions or has been damaged in any manner. Return appliance to the nearest authorized service facility for examination, repair, or adjustment.
- If the supply cord is damaged, it must be replaced by a special cord or assembly available from the manufacturer or its service agent.
- Never attempt to repair the appliance yourself, otherwise the warranty becomes invalid.
- This appliance is not intended for use by persons (including children) with reduced physical, sensory or mental capabilities, or lack of experience and knowledge, unless they have been given supervision or instruction concerning use of the appliance by a person responsible for their safety.
- Close supervision is necessary when appliance is used near children.
- NEVER ALLOW A CHILD TO USE THIS PRODUCT.
- DO NOT let the power cord hang over the edge of the table or work-top, and keep it away from any hot surfaces.
- Do not plug in the appliance or operate the control panel with wet hands.
- Do not place or use the appliance on or near combustible materials, such as a tablecloth, curtains or wallpaper.
- Only connect the appliance to a grounded wall socket. Always make sure that the plug is inserted into the wall socket properly.
- Never connect this appliance to an external timer switch in order to avoid a hazardous situation.
- Never leave appliance unattended.
- Appliance surfaces may become hot during use.
- The appliance should be placed on a horizontal and stable surface when using. Do not place on plastics, boards or any other easy-wear surface.
- Do not place the appliance against wall or other appliances, leave at least 4 inches of space from nearby objects. Do not place anything on the top of appliance.
- Do not use the appliance beyond the specifications of this manual.
- During operation, hot steam will exhaust through the rear air outlet. Keep your hands and face at a safe distance from the steam and the air outlet openings. Also be careful of hot steam and air when you remove the drawer pan from the appliance.
- If food burns and dark smoke releases from the air outlet, unplug immediately and wait for smoke release to stop, then clean the food and oil from the pan and rack.
- After use, turn off power to the appliance then unplug from the wall outlet.
- Do not use any accessories that have not been provided with the appliance.
- Unplug the appliance from outlet when it is not in use or before cleaning. Allow it to cool down completely before cleaning.
- This appliance is intended to be used indoors. Do not use outdoors.
- Clean and dry the drawer pan and the rack before placing food inside.
- Always unplug the appliance when not in use.
- If the appliance is of the grounded type, the extension cord should be a grounded cord.
- To ensure continued protection against risk of electric shock, connect to properly grounded outlets only.
- Some countertop and table surfaces, such as Corian®, wood and / or laminates, are not designed to withstand prolonged heat generated by certain appliances. It is recommended by countertop manufacturers and Maxi-Matic that a hot pad or trivet be placed under your appliance to prevent possible damage to the surface.
SAVE THESE INSTRUCTIONS.
THIS PRODUCT IS FOR HOUSEHOLD USE ONLY.
SHORT CORD PURPOSE
Longer power-supply cords or extension cords are available and may be used if care is exercised in their use.
If an extension cord is used:
- the marked electrical rating of the extension cord should be at least as great as the electrical rating of the product;
- the extension cord should be arranged so that it will not drape over the countertop or tabletop where it can unintentionally be pulled on or tripped over by children or pets.
POLARIZED PLUG
If this appliance is equipped with a polarized plug (one blade is wider than the other), please follow the below instructions:
To reduce the risk of electrical shock, this plug is intended to fit into a polarized outlet only one way. If you are unable to fit the plug into the electrical outlet, try reversing the plug. If the plug still does not fit, contact a qualified electrician. Never use the plug with an extension cord unless the plug can be fully inserted into the extension cord. Do not alter the plug of the product or any extension cord being used with this product. Do not attempt to defeat the safety purpose of the polarized plug.
 NOTE:
NOTE:
A short power cord is provided to reduce the risk of personal injury resulting from becoming entangled in or tripping over a long cord.
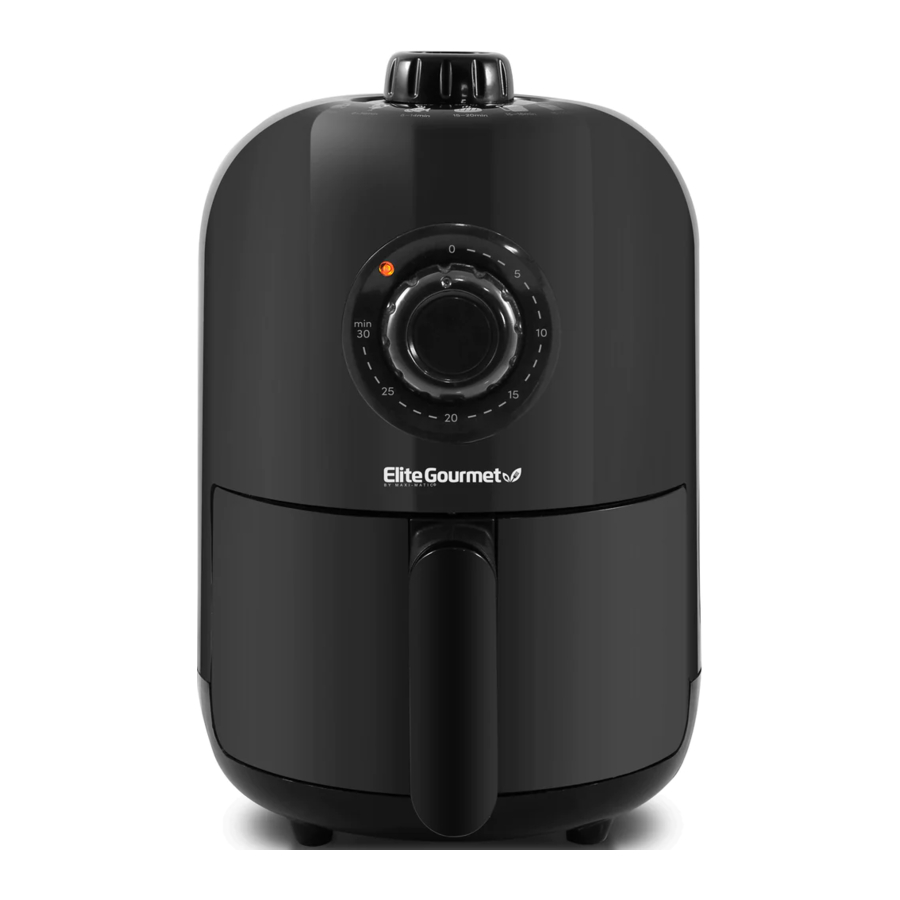
PARTS IDENTIFICATION

- Handle
- Pull-Out Drawer Pan
- Frying Rack
- Temperature Knob
- Power Indicator
- Timer Knob
- Air Inlet
- Air Outlet
- Power Cord
NOTE:
The Frying Rack consists of a non-stick surface. To avoid scratching the nonstick surface, please use wooden or heatproof silicone utensils.
CONTROL PANEL
TIMER CONTROL KNOB

Use this knob to set the desired time setting between 1-minute and 30-minutes. The timer knob MUST be set in order for the appliance to begin heating.
TEMPERATURE CONTROL KNOB

Use this knob to set the temperature between 175°F up to 395°F.
BEFORE FIRST USE
- Before using your Air Fryer for the first time, carefully remove all packaging material and recycle appropriately.
- Remove the parts from the box and wash the Drawer Pan and Frying Rack with warm, soapy water and a non-abrasive sponge.
![]()
DO NOT IMMERSE THE MAIN HOUSING IN WATER. Wipe the interior and exterior of appliance with a damp cloth to clean.
![]()
THIS IS NOT A DEEP FRYER. DO NOT FILL THE APPLIANCE OR ITS DRAWER WITH OIL OR FRYING FAT. - Place the appliance on a flat, horizontal and stable surface (make sure surface is heat-resistant). Place away from walls and other appliances. Leave at least 4 inches of space from nearby objects.

HOW TO USE

Never place anything on top of the Main Body, for this will block the air flow and reduce the effect of hot air heating.
- Carefully pull out the Drawer Pan from the Main Fryer Body by pulling forward on the Handle.
![information]() TIP: Never place food directly into the Drawer Pan without the Frying Rack inside. In place of using the Frying Rack, an oven-safe plate or bowl (not included) can be placed onto a wire rack (not included) into the Drawer Pan.
TIP: Never place food directly into the Drawer Pan without the Frying Rack inside. In place of using the Frying Rack, an oven-safe plate or bowl (not included) can be placed onto a wire rack (not included) into the Drawer Pan. - Place the Frying Rack into the Drawer Pan (Figure 1).
![]()
FIGURE 1 - Place ingredients onto Frying Rack.
![information]() TIP: Do not fill the Drawer Pan over the MAX fill position. If cooking food that expands, make sure the cooked capacity will not exceed the MAX fill position.
TIP: Do not fill the Drawer Pan over the MAX fill position. If cooking food that expands, make sure the cooked capacity will not exceed the MAX fill position. - Slide Drawer Pan back into the Main Body.

HOW TO PROGRAM FRYING TIME AND TEMPERATURE:
- Plug Power Cord into an electrical outlet.
- Turn the Temperature Control Knob to the desired temperature and then turn the Timer Control Knob to the desired time setting (the Timer must be set in order for the unit to begin heating). TIP: It is recommended to preheat the air fryer on empty for 3 minutes if the appliance is cold or you can add 3 minutes to your desired time setting in order to pre-heat. The initial 15 minutes of use may result in minimal smell and smoke. This is normal and harmless and comes from the protective substance applied to the heating elements during manufacturing.
- The Power Indicator will illuminate.
Do not touch the Drawer Pan during and immediately after use, as it gets very hot. Only hold the Drawer Pan by the Handle.
NOTE:
Any excess oil from food will collect at the bottom of the Drawer Pan.
DURING THE COOKING/FRYING PROCESS:
- Some recipes require stirring/mixing the contents mid-way through cooking (see Cooking Time Chart). You can do this in the middle of the cooking process by pulling the Drawer Pan out from the Main Fryer Body. Shake or stir the contents on the rack using a non-metallic utensil and then slide Drawer Pan back into the Main Fryer Body.
 TIP: If you set the timer to half the required cook time, you will hear the timer indicator when you have to stir the ingredients. However, this means that you will need to set the timer again to the remaining cook time after stirring.
During cooking, the Drawer Pan and Frying Rack will be very hot, only use the Drawer Pan Handle or oven mitts.
NOTE:
You can also switch off the appliance manually by turning the Timer Control Knob to 0 at any time during the cooking process.
WHEN FRYING IS COMPLETE:
- When the timer completes its countdown, the timer bell will ring and the air fryer will stop heating - this signals it is time to remove your food.
- Carefully pull out the Drawer Pan from the Main Fryer Body by pulling forward on the Drawer Pan Handle and place on a flat, heat resistant surface.
- Check that your foods are fully cooked and ready. If not, then place the Drawer Pan back into the Main Fryer Body and set the timer for a few more minutes.
- Empty the contents of the Drawer Pan into a bowl or onto a plate using non-metallic tongs or a scoop.
![information]() TIP: Do not turn the Drawer Pan and Frying Rack upside down together, as any excess oil that has collected in the bottom of the Drawer Pan will be poured onto the foods.
TIP: Do not turn the Drawer Pan and Frying Rack upside down together, as any excess oil that has collected in the bottom of the Drawer Pan will be poured onto the foods. - When the next batch of ingredients is ready, the air fryer is instantly ready to use again.
- When cooking is complete, remove the Power Cord from the electrical outlet.
- When sliding out the Drawer Pan, be careful of hot air and steam. Keep hands and face away from the opening.
- After cooking, the Drawer Pan and Frying Rack will be extremely hot to the touch. Do not touch surfaces of the Drawer Pan or Frying Rack directly.
CLEANING & MAINTENANCE
The Air Fryer should be cleaned thoroughly after every use.
- Make sure the Power Cord is disconnected from the electrical outlet and that the appliance has cooled down before attempting to clean.
- The Drawer Pan, Frying Rack and the inside of the appliance have a nonstick coating. Do not use metal utensils or abrasive cleaning materials on them, as this can damage the non-stick coating.
- Wipe the outside of the appliance with a damp cloth.
- Lift the Frying Rack upwards out of the Drawer Pan (Figure 2) and clean both with hot water, dishwashing soap and a non-abrasive sponge.
![]()
FIGURE 2 - You can use a degreaser to remove any stuck-on residue.
![information]() TIP: If food residue is stuck to the Frying Rack or the bottom of the Drawer Pan, place the Frying Rack into the Drawer Pan and fill with water and dishwashing soap and let soak for 10 minutes.
TIP: If food residue is stuck to the Frying Rack or the bottom of the Drawer Pan, place the Frying Rack into the Drawer Pan and fill with water and dishwashing soap and let soak for 10 minutes. - Clean the inside of the appliance with a non-abrasive sponge and warm water.
- Never immerse the power cord, plug or the appliance body in water or any other liquids.
- Dry all parts after each use, re-assemble and store in a cool, dry location.

NOTE:
The Drawer Pan and Frying Rack are dishwasher-safe (top rack only).
COOKING TIME CHART
| INGREDIENTS | AMOUNT (ounces) | TIME (minutes) | TEMP. (°F) | STIR | NOTES |
| POTATOES | |||||
| Thin frozen fries | 15 ~ 25 | 12-21 | 390 | STIR | |
| Thick frozen fries | 15 ~ 25 | 19-27 | 390 | STIR | |
| Homemade fries (0.3"x0.3") | 15 ~ 30 | 21-27 | 390 | STIR | add 1/2 tbsp of oil |
| Homemade potato wedges | 15 ~ 30 | 25-28 | 355 | STIR | add 1/2 tbsp of oil |
| Homemade potato cubes | 15 ~ 25 | 20-24 | 355 | STIR | add 1/2 tbsp of oil |
| Homemade potato chips | 10 | 13-14 | 320 | ||
STIR means the recipe requires mixing the contents mid-way through cooking. You can do this by carefully pulling out the Drawer Pan using the Handle, stir the contents using a non-metallic utensil. Then slide the Drawer Pan back into the Main Fryer Body.
NOTE:
All information is for reference only and can be adjusted according to the user's preference. They are approximations as foods differ in size and density. Cooking temperatures and times cannot be guaranteed.
| INGREDIENTS | AMOUNT (ounces) | TIME (minutes) | TEMP. (°F) | STIR | NOTES |
| MEAT | |||||
| Steaks | 6 ~ 18 | 13-16 | 355 | ||
| Porkchops | 6 ~ 18 | 14-18 | 355 | ||
| Hamburgers | 6 ~ 18 | 10-16 | 355 | ||
| Drumsticks | 6 ~ 18 | 26-29 | 355 | ||
| Chicken wings | 15 ~ 20 | 21-24 | 390 | ||
| Chicken strips | 6 ~ 18 | 17-19 | 355 | ||
| SNACKS | |||||
| Egg rolls | 6 ~ 18 | 13-15 | 390 | STIR | Use oven-ready |
| Frozen chicken nuggets | 6 ~ 18 | 10-14 | 390 | STIR | Use oven-ready |
| Frozen fish sticks | 6 ~ 14 | 10-14 | 390 | Use oven-ready | |
| Fish fillet in batter | 6 ~ 18 | 13-19 | 355 | STIR | |
| Battered shrimp | 6 ~ 18 | 11-16 | 355 | STIR | |
| Frozen cheese sticks | 6 ~ 14 | 12-13 | 355 | Use oven-ready | |
| Stuffed veggies | 6 ~ 14 | 14 | 320 | ||
| Mushrooms | 6 ~ 14 | 14 | 320 | ||
| Onion rings | 6 ~ 18 | 12-17 | 355 | ||
| BAKING | |||||
| Cake | 10 | 30 | 320 | Use oven- safe dish | |
| Quiche | 15 | 30 | 355 | Use oven- safe dish | |
| Muffins | 10 | 26-30 | 390 | Use oven-safe muffin cups | |
| Sweet snacks | 15 | 30 | 320 | Use oven- safe dish | |
HINTS & TIPS
- Smaller cuts of food usually require a slightly shorter cooking time than larger foods.
- A larger amount of food only requires a slightly longer cooking time and a smaller amount of food only requires a slightly shorter cooking time.
- Stirring or shaking smaller foods mid-way through the cooking process will improve the end result and can help cook more evenly.
- Adding a small amount of oil to fresh potatoes can result in a crispier result. Cook your ingredients in the air fryer within a few minutes after adding the oil.
- Do not air fry extremely greasy foods such as sausages in the air fryer.
- Snacks that can be prepared in an oven can also be prepared in the air fryer.
- The air fryer can also reheat foods. To reheat foods, set the temperature to 300°F for up to 10 minutes.
- To cook frozen foods, add an additional 3-5 minutes to your cook time.
NOTE:
- Add 3 minutes to the cooking time if you begin cooking while the air fryer is still cold.
- When cooking/baking foods that rise, the Drawer Pan should not be filled more than halfway.
- Do not pour the potato sticks from the bowl onto the Frying Rack to avoid transferring any excess oil into the Drawer Pan.
- Do not cook frozen, raw foods in the air fryer.
BAKING/STEAMING FOODS:
- Place a wire rack (not included) onto the bottom of the Drawer Pan and place an oven-safe dish onto the wire rack if you want to bake a cake/quiche, steam foods or if you want to air fry delicate foods or foods with fillings.
- Use pre-made dough to prepare foods with fillings quickly and easily. Pre-made dough also requires a shorter cooking time than home-made dough.
- For steaming foods, generally, 1-2 cups of water provides approximately 5-10 minutes of steam time. Add water to the Drawer Pan. Place wire rack (not included) into the Drawer Pan. Place food into an oven-safe dish (not included) and place dish onto the wire rack.
HOMEMADE FRENCH FRIES:
- When making your own French fries, follow these steps:
- Peel potatoes and slice them into strips.
- Wash and dry them thoroughly.
- Mix potato strips in a bowl with ½ tablespoon of olive oil, make sure they are evenly coated.
- Using your hands or tongs, place the potato strips onto the frying rack.
TROUBLESHOOTING GUIDE
| PROBLEM | POSSIBLE CAUSE | SOLUTION |
| The airfryer does not work. | The appliance is not plugged in. | Plug the Power Cord into an electrical outlet. |
| You have failed to set the timer. | Turn the timer knob to set the right time needed for cooking. | |
| The appliance is defective. | Contact customer service at www.maxi-matic.com | |
| Food is not completely cooked/fried. | There is too much food in the Drawer Pan. | Use smaller batches of food in the Drawer Pan. Small batches of food will cook more evenly. |
| The cooking temperature is set too low. | Increase the temperature setting. Check "Cooking Time Chart" found in this manual. | |
| The cooking time is too short. | Increase the time setting. Check "Cooking Time Chart" found in this manual. | |
| Food is raw and frozen solid. | Raw frozen foods should be thawed before cooking in the air fryer. Exceptions to this are pre-cooked frozen foods. | |
| Food is unevenly cooked. | Certain foods need to be stirred mid-way through the cooking process. | Foods that overlap inside the Drawer Pan need to be stirred mid-way through cooking. |
| Fried snacks are not crispy. | You used a type of snack meant to be prepared in a traditional deep fryer. | Use oven snacks or lightly brush some oil onto the snacks for a crispier result. |
| I cannot close the Drawer Pan properly. | The Drawer Pan is too full. | Do not overfill the Drawer Pan. |
| The Drawer Pan is not properly placed inside. | Make sure there is no obstruction for the Drawer Pan to close properly. | |
| White smoke is emitting out of the appliance during use. | You are preparing food with a high oil content. | When cooking with oily foods, oil will drain into the Drawer Pan. When the air fryer heats up, the pan heats up the oil and produces white smoke. This does not adversely affect the air fryer or your cooking process. |
| The pan has built-up oil residue from previous uses. | White smoke is caused by oil leftover in the Drawer Pan. Make sure to thoroughly clean the Drawer Pan after every use. | |
| Home-made French fries are coming out unevenly cooked. | Your potatoes are not fresh or are frozen. | Make sure to use fresh and firm potatoes, not frozen potatoes, for home-made French fries. |
| Potato strips were not well rinsed prior to frying. | Thoroughly rinse sliced potato to remove all starch prior to frying. | |
| Home-made French fries are not crispy after air frying. | Crispy results are directly linked to the amount of oil used and water content of the potato. | Potato strips need to be thoroughly dried before adding oil. |
| Slice potato strips thinner if you want them crispier. | ||
| Use a bit more oil on the potato strips prior to frying if you want crispier results. |
Questions?
Elite's customer service team is ready to help.
Call us toll-free at 800-365-6133 ext. 120/105.
For more Elite products, visit us at www.maxi-matic.com.

Documents / Resources
References

Download manual
Here you can download full pdf version of manual, it may contain additional safety instructions, warranty information, FCC rules, etc.
Download Elite Gourmet EAF1121 - 1QT. Oil-Free Air Fryer Manual
Advertisement


Need help?
Do you have a question about the EAF1121 and is the answer not in the manual?
Questions and answers