Table of Contents
Advertisement
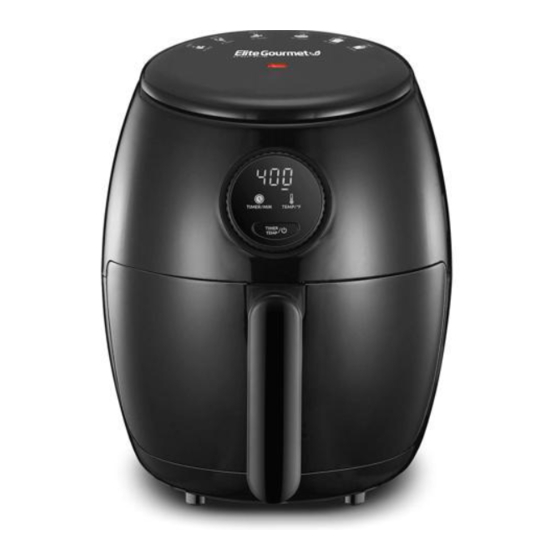
2QT. OIL-FREE AIR FRYER
MODEL: EAF2612D
INSTRUCTION MANUAL
Before operating your new appliance, please read all instructions carefully and keep for
future reference.
Questions? Elite's customer service team is ready to help.
For more Elite products, visit us at shopelitegourmet.com.
Recipes are included in this manual.
Advertisement
Table of Contents

Related Manuals for Elite Gourmet EAF2612D


Summary of Contents for Elite Gourmet EAF2612D
- Page 1 2QT. OIL-FREE AIR FRYER MODEL: EAF2612D INSTRUCTION MANUAL Before operating your new appliance, please read all instructions carefully and keep for future reference. Questions? Elite's customer service team is ready to help. For more Elite products, visit us at shopelitegourmet.com.
-
Page 3: Table Of Contents
TABLE OF CONTENTS IMPORTANT SAFEGUARDS SHORT CORD PURPOSE POLARIZED PLUG INTRODUCTION PARTS IDENTIFICATION CONTROL PANEL BEFORE FIRST USE HOW TO USE CLEANING AND MAINTENANCE COOKING TIME CHART HINTS AND TIPS AIR FRYER RECIPES TROUBLESHOOTING GUIDE WARRANTY POLICY RETURN INSTRUCTIONS... -
Page 4: Important Safeguards
IMPORTANT SAFEGUARDS The Elite Brand takes consumer safety very seriously. Products are designed and manufactured with our valued consumers’ safety in mind. Additionally, we ask that you exercise a level of caution when using any electrical appliance by following all instructions and important safeguards. - Page 5 IMPORTANT SAFEGUARDS (cont.) 22. The appliance should be placed on a 29. Unplug the appliance from outlet horizontal and stable surface when when it is not in use or before using. Do not place on plastics, cleaning. Allow it to cool down first board or any other easy-wear before cleaning.
-
Page 6: Short Cord Purpose
SHORT CORD PURPOSE NOTE: Longer power-supply cords or extension cords may be used if care is exercised in their use. A short power cord is provided to reduce If an extension cord is used: (1) the marked electrical rating of the risk of personal the extension cord should be at least as great as the electrical injury resulting from... -
Page 7: Parts Identification
PARTS IDENTIFICATION A. Time/Temperature Knob B. Frying Rack C. Handle NOTE: D. Pull-Out Drawer Pan The Frying Rack E. Air Inlet consists of a non-stick F. Air Outlet surface. To avoid G. Power Cord scratching the non- stick surface, please use wooden or heat- proof silicone utensils. -
Page 8: Control Panel
CONTROL PANEL Timer/Temperature Knob Turn clockwise to increase the temperature setting by 10°F increments to a maximum of 400°F. Turn counter-clockwise to decrease the temperature setting by 10°F increments to a minimum of 170°F. Turn clockwise to increase cooking time by one minute up to a maximum of 60-minutes. -
Page 9: How To Use
HOW TO USE CAUTION: Carefully pull out the Drawer Pan from the Main Fryer Body by pulling forward on the Handle. Never place anything TIP: Never place food directly into the Drawer Pan without on top of the Main Body, for this will block the Frying Rack inside. -
Page 10: Cleaning And Maintenance
HOW TO USE (cont.) CAUTION: DURING THE COOKING/FRYING PROCESS: Some recipes require stirring/mixing the contents During cooking, the mid-way through cooking (see Cooking Time Chart on Drawer Pan and Frying page 9). You can do this in the middle of the cooking Rack will be very hot, only use the Drawer process by pulling the Drawer Pan out from the Main... -
Page 11: Cooking Time Chart
CLEANING & MAINTENANCE (cont.) Lift the Frying Rack upwards out of the Drawer Pan (Figure 2) and clean both with hot water, dishwashing soap and a non-abrasive sponge. You can use a degreaser to remove any stuck-on residue. TIP: If food residue is stuck to the Frying Rack or the bottom of the Drawer Pan, place the Frying Rack into the Drawer Pan and fill with dishwashing soap and water and let soak for 10 minutes. - Page 12 INGREDIENTS AMOUNT TIME TEMP. STIR NOTES (ounces) (minutes) (°F) MEAT NOTE: Steaks 6 ~ 18 13-16 All information is for reference only Porkchops 6 ~ 18 14-18 and can be adjusted Hamburgers 6 ~ 18 10-16 according to the user’s preference.
-
Page 13: Hints And Tips
HINTS & TIPS • Smaller cuts of food usually require a slightly shorter cooking time than larger foods. NOTE: • A larger amount of food only requires a slightly longer cooking time and a smaller amount of food only requires a Add 3 minutes to the slightly shorter cooking time. -
Page 14: Air Fryer Recipes
AIR FRYER RECIPES GOLDEN FRIED ONION RINGS 6 med. mild white onions 1/4 cup olive oil 1 1/8 cup sifted flour 1 cup milk 1/2 tsp. salt 1 egg, slightly beaten Slice onion 1/4 inch thick and separate into rings. Preheat air fryer to 400°F for 3 minutes. - Page 15 HOMEMADE BLACK PEPPER POTATO CHIPS 6 Yukon gold potatoes, unpeeled 2 tbsp. canola or vegetable oil Kosher salt and black pepper Preheat air fryer to 400°F. Wash and clean the potatoes in cold running water. Using a mandoline, or vegetable peeler, finely slice the potatoes into chips.
- Page 16 CORN DOGS 1/2 c. yellow cornmeal 6 skewers or sticks 1/2 c. flour 1 tbsp. sugar 1/4 tsp. dry mustard 1 tsp. baking powder 1/2 tsp. salt 1/2 c. milk 1 egg, lightly beaten 1 tbsp. melted shortening 6-8 hot dogs / frankfurter 2 tbsp.
- Page 17 FISH STICKS WITH YOGURT DIP 8 oz. center-cut salmon fillet, skinned 1 cup seasoned bread crumbs 1/2 cup flour olive oil, for drizzling 1/2 tsp. fine sea salt 1/3 cup lowfat mayonnaise 1/4 tsp. freshly ground black pepper 1/3 cup lowfat plain yogurt 3 egg whites 1 tbsp.
- Page 18 SWEET & SOUR CHICKEN 4 cornish game hens 24 cloves garlic salt and pepper to taste 1/3 cup white wine 1 lemon, quartered 1/3 cup low-sodium chicken broth 4 sprigs fresh rosemary 4 sprigs fresh rosemary for garnish 3 tbsp. olive oil Combine marinade ingredients in a small bowl.
- Page 19 CHURROS 1 cup water 1 cup flour 1/2 cup margarine or butter 3 eggs 1/4 tsp. salt 1/4 cup sugar 1/4 tsp. ground cinnamon Preheat air fryer to 360°F for 3 minutes. To make churro dough, heat water, margarine and salt to a rolling boil in sauce-pan; stir in flour.
-
Page 20: Troubleshooting Guide
TROUBLESHOOTING GUIDE PROBLEM POSSIBLE CAUSE SOLUTION The airfryer does not The appliance is not Plug the Power Cord into an electrical work. plugged in. outlet. You have failed to set the Turn the timer knob to set the right time needed timer. -
Page 21: Warranty Policy
LIMITED WARRANTY* ONE (1) YEAR WARRANTY IS ONLY VALID WITH A DATED PROOF OF PURCHASE PLEASE DO NOT RETURN TO STORE OF PURCHASE. If you have any problems with this unit, contact Customer Service for support. Your small kitchen appliance is warranted to the original purchaser to be free from any manufacturing defects under normal use and conditions for one (1) year, cord excluded. -
Page 22: Return Instructions
RETURN INSTRUCTIONS RETURNS: A. Any return of defective merchandise to the manufacturer must be processed accordingly by first contacting customer service (support@ maxi-matic.com) to obtain an RA # (Return Authorization Number). We will not accept any returns of merchandise without an applicable RA #. B. - Page 24 & Contact Us Form Register your product online We take pride in the fact that Elite Gourmet products are continuously improving. To keep you well informed of these changes and to reduce paper consumption, we’ve included this QR code for you to scan and easily download the most recent updates to your product to your mobile device.
Need help?
Do you have a question about the EAF2612D and is the answer not in the manual?
Questions and answers