
Subscribe to Our Youtube Channel
Related Manuals for Berthold LB 4700


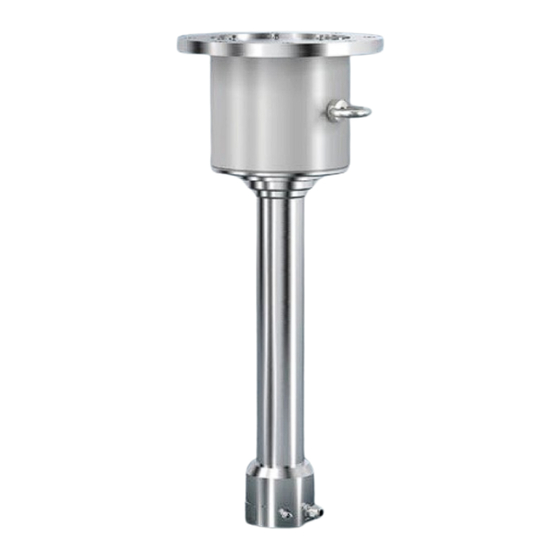
Summary of Contents for Berthold LB 4700
- Page 1 DuoSeries Detectors LB 4700 Operating Manual 56926BA2 Rev.04 08/2023 Embedded Software as of Version 12.00.00...
- Page 2 BERTHOLD TECHNOLOGIES GmbH & Co. KG Calmbacher Str. 22 75323 Bad Wildbad, Germany www.berthold.com Telephone +49 7081 177-0 Fax +49 7081 177-100 industry@Berthold.com...
-
Page 3: Table Of Contents
Reuse of Detectors ...................... 43 Operation......................44 Operating Concept ..................... 44 PC Software ......................... 45 Operating the PC Software ..................48 The PC Software Menu....................49 Monitor ........................50 Identification ......................52 © Berthold Technologies • 56926BA2 • Rev.04, 08/2023... - Page 4 Conversion Kit for Extended Temperature Range ........... 91 Collimator ........................92 Collimator Assembly with Water Cooling System ............ 93 Collimator Assembly without Water Cooling System ..........94 Decommissioning ....................95 10.1 Disposal ........................96 © Berthold Technologies • 56926BA2 • Rev.04, 08/2023...
-
Page 5: General Information
Technical Information, Id. No. 56926-5TI Conformity The company Berthold Technologies GmbH & Co. KG hereby declares in its sole responsibility that the design of this product in the distributed form complies with relevant EU directives stated in the original declaration of conformity. - Page 6 At this position, connect the protective earth conductor (PE). Equipotential bonding connection At this position, connect the equipotential bonding conductor. No domestic waste The electric product must not be disposed of in domestic waste. © Berthold Technologies • 56926BA2 • Rev.04, 08/2023...
-
Page 7: About This Operating Manual
Store the instructions where they are accessible for all users at all times. Validity of the Operating Manual The operating manual is valid from the delivery of the Berthold product to the user until its disposal. Version and release date of this operating manual can be found in the bottom of each page. - Page 8 Copyright This operating manual contains copyright-protected information. None of the chapters may be copied or reproduced in any other form without prior authorisa- tion from the manufacturer. © Berthold Technologies • 56926BA2 • Rev.04, 08/2023...
-
Page 9: Structure Of The Operating Manual
Sections marked with this symbol point out important information on the product or on handling the product. Provides tips on application and other useful information. General warning symbol Warning symbol electrical shock Warning symbol Danger of crushing Warning symbol heavy loads © Berthold Technologies • 56926BA2 • Rev.04, 08/2023... - Page 10 1 General Information DuoSeries Detectors LB 4700 Warning symbol suspended load Warning symbol explosion hazard Wear protective helmet Wear safety shoes © Berthold Technologies • 56926BA2 • Rev.04, 08/2023...
-
Page 11: Structure Of Warnings
Indicates a potential hazard, which can result in serious injuries or even death if the hazard is not avoided. CAUTION Refers to a potentially dangerous situation, which can result in medium or minor physical injuries or damages to property, if it is not avoided. © Berthold Technologies • 56926BA2 • Rev.04, 08/2023... -
Page 12: Safety
• Store the instructions where they are accessible for all users at all times. Proper Use The detectors are used along with an appropriate evaluation unit of Berthold and an appropriate radiation source to measure the radiation intensity as part of a ra- diometric measurement. -
Page 13: Qualification Of The Personnel
Authorised Persons Authorised persons are those who are either designated for the corresponding task due to legal regulations or those who have been authorised by Berthold for par- ticular tasks. When dealing with radioactive materials, a radiation safety officer must also be consulted. -
Page 14: Operator's Obligations
• Observation and use of the operating manual and the legal provisions. • Intended operation of the product. • Observation of the plant security instructions and the operating instructions of the operator. • Regular monitoring/maintenance of the product. © Berthold Technologies • 56926BA2 • Rev.04, 08/2023... -
Page 15: System Description
Master EVU Product Fig. 1 Exemplary measuring arrangement Storage Keep devices in a dry (no condensation), dark (no direct sunlight), clean and locka- ble room. Stay within the temperature range for storage. © Berthold Technologies • 56926BA2 • Rev.04, 08/2023... -
Page 16: System Components
Socket unit with detector electronics tube) Fig. 2 View of DuoSeries detector (ATEX / IECEx variant) CrystalSENS point de- tector Not visible on the view are the optional water cooling system and collimator. © Berthold Technologies • 56926BA2 • Rev.04, 08/2023... -
Page 17: Overview Xp Variant (Class/Division)
Stainless steel housing (housing tube) Fig. 3 View of the DuoSeries detector XP variant (Class / Division) CrystalSENS point detector Not visible on the view are the optional water cooling system and collimator. © Berthold Technologies • 56926BA2 • Rev.04, 08/2023... -
Page 18: Rod And Point Detector
The size of the scintillator determines the size of the sensitive area (the area that is used for the measurement and which is sensitive to gamma radiation). Marking grooves (Fig. 3) on the detector housing mark size and position of the sensitive area. © Berthold Technologies • 56926BA2 • Rev.04, 08/2023... -
Page 19: Software
LB 471 12.06.12 08/2019 1.16 More detector codes 12.06.14 07/2022 1.17 Detector codes for TowerSENS Accessories and Options For accessories and options for the DuoSeries detectors, see chapter 9 in these in- structions. © Berthold Technologies • 56926BA2 • Rev.04, 08/2023... -
Page 20: Installation
The applicable national regulations of the country of use have to be observed! Repair and maintenance on the devices may only be performed by experts (see chapter 2.3). In case of doubt, the complete device must be returned to Berthold for repair. -
Page 21: General Notes
During installation, also observe the instructions in the safety manual / ex- plosion protection manual, see 1.1 Applicable Documents. NOTICE Only clamping devices approved by Berthold should be used to install the device. The device may only be operated if permanently installed. -
Page 22: Unpacking / Scope Of Delivery
Take care not to damage the cable glands and the type plates during cleaning. The detector may be cleaned with water or gasoline. Grinding, filing or chipping away at deposits with the hammer is not permitted. © Berthold Technologies • 56926BA2 • Rev.04, 08/2023... -
Page 23: Application-Specific Assembly
Unscrew the fastening screw on top of the mounting clamp. Slide the clamp from over the detector housing. Tighten the screw sufficiently so that the mounting clamp cannot slip on the detector. The assembly is complete © Berthold Technologies • 56926BA2 • Rev.04, 08/2023... -
Page 24: Installation On A Vessel
The distance from the middle of the detector to the vessel surface or surface of heat insulation should be approx. 100 mm. Care should be taken during mounting to avoid as far as possible heat transfer from the vessel via the clamps to the detector. © Berthold Technologies • 56926BA2 • Rev.04, 08/2023... - Page 25 Marking groove on the detector Level Rod detector Lower mounting clamp Fig. 8 Fastening of Rod Detector Holder Radiation beam Rod source shielding Point detector Mounting base Mounting base Level Fig. 9 Fastening of Point Detector © Berthold Technologies • 56926BA2 • Rev.04, 08/2023...
-
Page 26: Installation On A Pipeline
Clamping device for a radiation angle of 30° S-shaped density measuring path Fig. 10 Overview - Pipeline Installation IMPORTANT On thick-walled pipelines, the SuperSENS detector can be installed directly on the pipe. © Berthold Technologies • 56926BA2 • Rev.04, 08/2023... -
Page 27: Installation On A Conveyor Belt
4.5. Measuring frame for one point detector Measuring frame for two point detectors Measuring frame for one rod detector Measuring frame for two rod detectors Fig. 11 Overview Mounting on Conveyor Belt © Berthold Technologies • 56926BA2 • Rev.04, 08/2023... -
Page 28: Installation Rod Detectors On A Vessel
An overview of the clamp positions can be found in the "Technical Information" document in chapter 4.1 Clamping Positions for UniSENS Rod Detectors. The instal- lation of the water cooling is described in chapter 9.1. © Berthold Technologies • 56926BA2 • Rev.04, 08/2023... -
Page 29: Mounting The Towersens Rod Detector
(away from the ground), thus the preferred orientation of the extension modules is considered. The clamping locations and mounting base location are shown in Fig. 14. Infor- mation on water cooling is described in chapter 9.1. © Berthold Technologies • 56926BA2 • Rev.04, 08/2023... - Page 30 “Technical Information”. Fasten the mounting clamps for the TowerSENS detector on the vessel in the specified distances. Pay attention to the correct diameter of the clamps (detectors with © Berthold Technologies • 56926BA2 • Rev.04, 08/2023...
- Page 31 Remove the closure cap (Fig. 15, item 3) with spring and cylindrical block (Fig. 15, item 2) from basic module (Fig. 15, item 1): Press slightly from top against the closure cap (Fig. 15, item 3) while opening the connection clamp (Fig. 15, item 4). © Berthold Technologies • 56926BA2 • Rev.04, 08/2023...
- Page 32 Slightly open the mounting clamp (Fig. 16, item 2), move the extension module up by approximately 20 cm (Fig. 16, item 4) and secure it in this position by fastening the mounting clamp again (Fig. 16, item 2). © Berthold Technologies • 56926BA2 • Rev.04, 08/2023...
- Page 33 If this procedure is possible without difficulties, continue with the assembly step "Connecting Modules". Move up the extension module and secure it by closing its mounting clamp (Fig. 17, item 3). Remove centering sleeve (Fig. 17, item 1) again. © Berthold Technologies • 56926BA2 • Rev.04, 08/2023...
- Page 34 When no gap is visible between the two modules, fastening the clamp by another 2 to 3 turns is sufficient. Attention: Do not overtighten the screw. Close the mounting clamp (Fig. 18, item 3) again. The modules are correctly connected. © Berthold Technologies • 56926BA2 • Rev.04, 08/2023...
- Page 35 The TowerSENS detector is installed correctly and the electrical installation can be carried out. IMPORTANT After the installation, wait at least 3 hours before powering the detector. Read the chapter 6 Operation for pre-setting and calibration the measurement. © Berthold Technologies • 56926BA2 • Rev.04, 08/2023...
-
Page 36: Multi-Detector Arrangement
"Technical Information" document in chapter 4.1 Clamping Positions for UniSENS Rod Detectors. In the case of TowerSENS detectors, the clamping locations and mounting base location are shown in Fig. 14. © Berthold Technologies • 56926BA2 • Rev.04, 08/2023... -
Page 37: Assembly Of The Detector Shield For Unisens Detectors
Alternative to the stabilizer against tilting, you can use a one- sided mounted angle bracket as a stabilizer too. For installation or deinstallation, space for swiveling the collimator is recom- mended. © Berthold Technologies • 56926BA2 • Rev.04, 08/2023... -
Page 38: Installation Point Detectors On A Vessel
The technical drawings for CrystalSENS and its accessories can be found in the document "Technical Information". Information on water cool- ing can be found in chapter 9.1. © Berthold Technologies • 56926BA2 • Rev.04, 08/2023... -
Page 39: Mounting Of The Supersens Point Detector
Mounting of SuperSENS detector SuperSENS detectors are installed on both thick-walled pipes and large vessels. The installation is carried out according to project-specific specifications. Information on water cooling can be found in chapter 9.1 © Berthold Technologies • 56926BA2 • Rev.04, 08/2023... -
Page 40: Electric Installation
(spanner size SW 19) with a torque of 15 Nm. Unused entries must be closed with the plugs listed (1/2 "NPT fitting) A tight- ening torque of 20 Nm is recommended. © Berthold Technologies • 56926BA2 • Rev.04, 08/2023... - Page 41 DuoSeries Detectors LB 4700 5 Electric Installation The electrical installation is complete. © Berthold Technologies • 56926BA2 • Rev.04, 08/2023...
- Page 42 Signal and supply circuit + Cable glands Signal and supply circuit - Sealing Pt100 + Cover Pt100 - Spring washers Potential equalization Screws cover Potential equalization Fig. 25 Terminal compartment ATEX/IECEx variant © Berthold Technologies • 56926BA2 • Rev.04, 08/2023...
-
Page 43: Reuse Of Detectors
If an intrinsically safe detector was previously used, then please observe the following: If intrinsically safe signals were connected to non-intrinsically safe circuits, these may no longer be connected to intrinsically safe circuits. © Berthold Technologies • 56926BA2 • Rev.04, 08/2023... -
Page 44: Operation
The operation and parameterisation is described solely by the example of the PC software. For information on the operation of the detector with the transmitters LB 47x and LB 44x, please refer to the respective operating manual of the transmit- ters. © Berthold Technologies • 56926BA2 • Rev.04, 08/2023... -
Page 45: Pc Software
Execute the installation file "Setup.exe" in order to install the operating soft- ware "LB 4700 PC". Access to the detector is possible with the operating software "LB 4700 PC". Connect the detector to the 2-pin FSK connector of the detector service mo- dem (Fig. - Page 46 Click on <Connect> (Fig. 29, item 3). Die Startseite des Programms LB-4700 PC öffnet sich. USB tab Selection of baud rate Connect button Fig. 27 Connection Window, Operating Software "LB-4700 PC" © Berthold Technologies • 56926BA2 • Rev.04, 08/2023...
- Page 47 DuoSeries Detectors LB 4700 6 Operation Fig. 28 Home Page, Operating Software "LB-4700 PC" In order to return to the start screen from another menu, click on the tab <Monitor>. © Berthold Technologies • 56926BA2 • Rev.04, 08/2023...
-
Page 48: Operating The Pc Software
Open selection lists by clicking on the arrow button on the right side of the list field (Fig. 31, item 3). Click in the input field to enter the desired values (Fig. 31, item 4). A red out- line indicates the clicked box. © Berthold Technologies • 56926BA2 • Rev.04, 08/2023... -
Page 49: The Pc Software Menu
• In the Device Setup menu, you can read and set all system and measurement parameters, as well as perform the plateau recording. • The Diagnostics menu provides information about the event history and data log. Fig. 30 System Menu, LB-4700 PC PC-Software © Berthold Technologies • 56926BA2 • Rev.04, 08/2023... -
Page 50: Monitor
Meas. Display Ch [cps] (count rate in the measuring channel) Actual HV Display (current high voltage) Date and Time Setting Temperature Display Pt 100 [°C] Display Date and Time Display Fig. 31 Process | Monitor © Berthold Technologies • 56926BA2 • Rev.04, 08/2023... - Page 51 Fig. 32 Window to Set the Date/Time Click on the button <Set …>. (Fig. 33, item 4), to make changes to the date and time. A window opens. Make the changes. Confirm with <OK>. © Berthold Technologies • 56926BA2 • Rev.04, 08/2023...
-
Page 52: Identification
PC program as well as the device ID. Open the Identification submenu in the menu group Device Setup of the navigator by double-clicking on <Identification> (Fig. 35). Fig. 33 Device Setup | Identification © Berthold Technologies • 56926BA2 • Rev.04, 08/2023... -
Page 53: Reset
<Reset>. Button <Software Reset> performs a restart of the detector. Button <Factory-Reset> resets the detector to the factory settings and performs a restart. Fig. 34 Device Setup | Reset © Berthold Technologies • 56926BA2 • Rev.04, 08/2023... - Page 54 During the restart, the PC-program loses the connection to the detector for a few seconds. The connection is automatically restored after the restart. After restart, the detector is ready to measure again. © Berthold Technologies • 56926BA2 • Rev.04, 08/2023...
-
Page 55: Overview
Display count rate in the auxiliary channel Display count rate in the RID channel Display current high voltage Manual high voltage Default HV (starting value of the high voltage control) Fig. 36 Device Setup | Sensor | Overview © Berthold Technologies • 56926BA2 • Rev.04, 08/2023... - Page 56 TowerSENS Polymer 7000 mm (Soft Vers. ≥12.06.14) TowerSENS Polymer 8000 mm (Soft Vers. ≥12.06.14) NOTICE An incorrect setting may have a negative impact on the long-term stability of the device or may lead to other forms of malfunction. © Berthold Technologies • 56926BA2 • Rev.04, 08/2023...
- Page 57 Setting the Detector Code (continued) Click on the arrow button (Fig. 38, item 1) in order to set the desired detector code. Fig. 37 Device Setup | Sensor | Overview | Detector Code © Berthold Technologies • 56926BA2 • Rev.04, 08/2023...
- Page 58 Device Setup | Sensor | Overview | HV Control Mode NOTICE Default HV is preset by BERTHOLD. A subsequent change is not usually neces- sary. The default value HV = 0 may only be set for testing purposes. An incorrect setting may cause malfunction.
-
Page 59: Plateau
Display of the plateau curve Display of the high-voltage values and the corresponding measured values of the count rate. Button Start Plateau Button Plateau Setup Fig. 39 Device Setup | Sensor | Plateau © Berthold Technologies • 56926BA2 • Rev.04, 08/2023... - Page 60 Start value of the high voltage for a plateau measurement Stop HV End value of the high voltage for a plateau measurement Step HV Step size between two points during plateau measurement Meas. Time Measurement time for each plateau measurement point © Berthold Technologies • 56926BA2 • Rev.04, 08/2023...
- Page 61 The current temperature of the thermometer is displayed for the associated Pt 100 thermometer in this submenu. You can also calibrate the temperature measure- ment. Adjustment button Temperature display Fig. 41 Device Setup | Sensor | Pt 100 © Berthold Technologies • 56926BA2 • Rev.04, 08/2023...
- Page 62 Fig. 43 Step 1 of the Pt100 Wizard Click on <Next> in order to proceed to the next step. Connect a defined resistance (> 100 ohms) to terminals 3 and 4 in the terminal © Berthold Technologies • 56926BA2 • Rev.04, 08/2023...
- Page 63 <Accept>. The measured product temperature should now roughly match the entered value. Click on <Next>, in order to proceed to the next step. Fig. 44 Step 2 of the Pt100 Wizard © Berthold Technologies • 56926BA2 • Rev.04, 08/2023...
- Page 64 DuoSeries Detectors LB 4700 Click on <Finish> in order to complete the process or, if necessary, end the process with <Cancel> in order to cancel the calibration. Fig. 45 Last Step of the Pt100 Wizard © Berthold Technologies • 56926BA2 • Rev.04, 08/2023...
-
Page 65: Event Log
PDF. Click <Refresh> (Fig. 48, item 5), in order to load the list of events from the detector. Click <Acknowledge> (Fig. 48, item 6), when an event requires an acknowl- edgement. © Berthold Technologies • 56926BA2 • Rev.04, 08/2023... -
Page 66: Event Counter
This will open the "Print Preview" window. Printing the event list via the "Print Preview" generates a PDF. Click <Refresh> (Fig. 49, item 4) in order to load the list of events from the detector. © Berthold Technologies • 56926BA2 • Rev.04, 08/2023... -
Page 67: Data Log
Page Setup: Page settings for printing function. Print: Prints the current chart view. Show Point Values: Enables/disables the display of measurement points on the chart when they are highlighted with the cursor. Un-Zoom: Undoes the last zoom operation. © Berthold Technologies • 56926BA2 • Rev.04, 08/2023... - Page 68 In order to stop the recording, click on <Record-Stop> (Fig. 50, item 3). Click on the selection arrows or click in the field <Sample Rate> (Fig. 50, item 8) in order to select or enter the log interval. © Berthold Technologies • 56926BA2 • Rev.04, 08/2023...
-
Page 69: Troubleshooting
The detector, one of its components or the environmental conditions are not within the normal specifications. The measurement is continued. Function Check (Namur107: C) Indicates that entries are made at the detector or a function check/simulation is being performed. © Berthold Technologies • 56926BA2 • Rev.04, 08/2023... - Page 70 If the event occurs frequently, contact Berthold. The event must be confirmed manually. D302 Hardware error Restart the device. calibration If the event occurs frequently, contact Berthold. The event must be confirmed manually. © Berthold Technologies • 56926BA2 • Rev.04, 08/2023...
- Page 71 Lower Avg. The average HV is Check Default HV for plausibility HV limit more than 20% and change if necessary. lower than the Check detector electronics and Default-HV. photomultiplier. If necessary, contact Berthold. © Berthold Technologies • 56926BA2 • Rev.04, 08/2023...
- Page 72 D321 HV too low The actual HV has Contact BERTHOLD. reached the lower Detector must be checked and HV limit replaced if necessary. (HV < 303V, bzw. HV < 300V + 1%) © Berthold Technologies • 56926BA2 • Rev.04, 08/2023...
-
Page 73: Maintenance And Repair
Berthold recommends that detectors are only repaired by the Service of Berthold Technologies GmbH & Co. KG or by persons authorised to do so by Berthold Tech- nologies GmbH & Co. KG. Only original spare parts from Berthold may be used. -
Page 74: Software Update
The program opens. Click on the tab <USB> (Fig. 51, item 1). Select a baud rate of 1200 in the selection menu (Fig. 51, item 2). Click on <Connect> (Fig. 51, item 3). © Berthold Technologies • 56926BA2 • Rev.04, 08/2023... - Page 75 DuoSeries Detectors LB 4700 8 Maintenance and Repair USB tab Selection of baud rate Connect button Fig. 49 Connection Window "Flash Loader" © Berthold Technologies • 56926BA2 • Rev.04, 08/2023...
- Page 76 In the menu "Settings", set the value "Timeout" to 1200 and the value "Syn- chronisation" to 3. Button <detect device> Fig. 51 Flash Loader Main Screen Click on the button <detect device> (Fig. 53, item1). The program establishes a connection to the detector. © Berthold Technologies • 56926BA2 • Rev.04, 08/2023...
- Page 77 Click on the button <Program Flash> (Fig. 55, item 1). A dialogue window is opened. Select the corresponding file for the software update The detector is programmed with the respective software. © Berthold Technologies • 56926BA2 • Rev.04, 08/2023...
- Page 78 Reset the detector to the factory default settings if the first or second digit of the software version has changed. Make a note of the settings before the fac- tory reset and enter them again after the reset is completed. © Berthold Technologies • 56926BA2 • Rev.04, 08/2023...
-
Page 79: Visual Inspection Of Scintillator And Photomultiplier
8 Maintenance and Repair Visual Inspection of Scintillator and Photomultiplier j DANGER Danger to life from electric shock! The installation may only be carried out by persons authorized by Berthold. Please adhere to the relevant safety regulations. Installation/maintenance may only be carried out if the device has been de- ... -
Page 80: Replacing The Entire Detector
Intrinsically safe detectors whose intrinsically safe signals were connected to non-intrinsically safe circuits must not be connected to intrinsically safe circuits. © Berthold Technologies • 56926BA2 • Rev.04, 08/2023... -
Page 81: Replacing The Electronics Module
8 Maintenance and Repair Replacing the Electronics Module j DANGER Danger to life from electric shock! The installation may only be carried out by persons authorized by Berthold. Please adhere to the relevant safety regulations. Installation/maintenance may only be carried out if the device has been de- ... -
Page 82: Disassembling The Electronics Module
Loosen the four screws of the housing cover and remove the cover (Fig. 57, item 2). Loosen the six screws that hold the detector housing to the socket. Carefully pull out the electronics module and the scintillator/multiplier combi- nation on the socket. © Berthold Technologies • 56926BA2 • Rev.04, 08/2023... -
Page 83: Installing The Electronics Module
Remove the adhesive label with the Dev. ID and attach the supplied new adhesive label. • Reconnect the supply voltage to the detector. • Now set the software parameters based on the list that you noted at the beginning. © Berthold Technologies • 56926BA2 • Rev.04, 08/2023... -
Page 84: Replacing The Scintillator
Clean the optical contact surfaces with a soft cloth from silicon oil residues. Installing the Scintillator Before assembly, apply a drop pure silicon oil (BERTHOLD ID no. 18844) be- tween the scintillator and the multiplier and slightly distribute it by rubbing to ensure a good optical connection between the two components. -
Page 85: Replacing The Scintillator/Multiplier Combination
8 Maintenance and Repair Replacing the Scintillator/Multiplier Combination j DANGER Danger to life from electric shock! The installation may only be carried out by persons authorized by Berthold. Please adhere to the relevant safety regulations. Installation/maintenance may only be carried out if the device has been de- ... -
Page 86: Accessories
NOTICE A failure of the cooling water system or an insufficient flow can overheat the detector and thereby cause damage. For cooling, exclusively use water of drink- ing water quality. © Berthold Technologies • 56926BA2 • Rev.04, 08/2023... - Page 87 • Polluted cooling water may clog the water cooling system, which may result in the detector getting overheated and destroyed. It is therefore essential to use clean cooling water. • The water pressure in the cooling jacket must not exceed 6 bar. © Berthold Technologies • 56926BA2 • Rev.04, 08/2023...
- Page 88 In order to fill the entire water cooling jacket, incoming water must enter from the bottom. TowerSENS: Installation with Water Cooling Installation connection head below (regular installation) Installation connection head above Fig. 58 Installation with water cooling © Berthold Technologies • 56926BA2 • Rev.04, 08/2023...
- Page 89 The required amount of cooling water is dependent on the possible heat transmis- sion, the cooling water temperature and the detector type. You find the cooling water curves and further information in the document “Technical Information” in chapter 13 Cooling Water Demand. © Berthold Technologies • 56926BA2 • Rev.04, 08/2023...
-
Page 90: Installation And Connection Of The Water Cooling System
If the detector is mounted vertically, the terminal compartment must be oriented upward, so that the connections are located at the upper end of the water cooling system. © Berthold Technologies • 56926BA2 • Rev.04, 08/2023... -
Page 91: Conversion Kit For Extended Temperature Range
NOTICE When operating in areas with danger of explosion, observe the specific ambient temperature limits, which are specified in the safety manual / explosion protec- tion manual, and in the technical information. © Berthold Technologies • 56926BA2 • Rev.04, 08/2023... -
Page 92: Collimator
For collimators with frontal irradiation and perpendicular detector mounting, the collimator must be aligned upwards. If the collimator is aligned downwards, there is a risk of incorrect readings due accumulation of water. © Berthold Technologies • 56926BA2 • Rev.04, 08/2023... -
Page 93: Collimator Assembly With Water Cooling System
Make sure that the position of the connection nozzles does not obstruct later installation of the water supply. © Berthold Technologies • 56926BA2 • Rev.04, 08/2023... -
Page 94: Collimator Assembly Without Water Cooling System
Slide the collimator over the detector housing so that the radiation window is po- sitioned in the direction of the source. To do so, position the collimator so that the pattern of its fastening holes matches the one of the detector. © Berthold Technologies • 56926BA2 • Rev.04, 08/2023... -
Page 95: Decommissioning
Follow this sequence for decommissioning: Remove all cables from the detector. Remove the detector with/without water cooling system out of its holder. Remove the detector from the water cooling system if necessary. © Berthold Technologies • 56926BA2 • Rev.04, 08/2023... -
Page 96: Disposal
The device is to be disposed of according to applicable legal regulations by a specialised waste management company. If the product has been used, you can dispose of it through a waste management company in accordance with the statutory provisions. © Berthold Technologies • 56926BA2 • Rev.04, 08/2023... - Page 97 Modifications due to technical advancement reserved. © BERTHOLD TECHNOLOGIES GmbH & Co. KG Language: English Printed in Germany 08/2023 Rev.-No.: 04 BERTHOLD TECHNOLOGIES GmbH & Co. KG Calmbacher Str. 22 75323 Bad Wildbad Germany www.berthold.com Id.-No. 56926BA2...
- Page 98 LB 4700-..-1B (ATEX / IECEx / UKCA / NEC / CEC) LB 4700-..-IB (ATEX / IECEx / UKCA / NEC / CEC) LB 4700-..-FA (NEC / CEC) Safety Manual / Explosion Protection Manual 56926BA26 Rev.08 03/2023...
- Page 99 BERTHOLD TECHNOLOGIES GmbH & Co. KG Calmbacher Str. 22 75323 Bad Wildbad, Germany www.Berthold.com Telephone +49 7081 177-0 Fax +49 7081 177-100 industry@Berthold.com...
- Page 100 Plan for Visual Inspection of the Detector ............30 Plan for the Control of the Connection ............32 ATEX Certificate ....................33 IECEx Certificate ....................36 UKCA Certificate ....................40 NEC/CEC HazLoc Certificate ................45 NEC/CEC OrdLoc Certificate ................52 © Berthold Technologies • 56926BA26 • Rev.08, 03/2023...
- Page 101 Comunidad Europea. (sv) Säkerhetshänvisningar till användning i områden som är utsatt för exlposionsfara. Denna handbok finns även tillgänglig i alla officiella språk av den europäiska gemenskapen. ID. No. 56926BA26 Rev. No.: 08 03/2023 © Berthold Technologies • 56926BA26 • Rev.08, 03/2023...
-
Page 102: Declaration Of Conformity
Safety Manual / Explosion Protection Manual 1 Declaration of Conformity Declaration of Conformity © Berthold Technologies • 56926BA26 • Rev.08, 03/2023... - Page 103 Safety Manual / Explosion Protection Manual © Berthold Technologies • 56926BA26 • Rev.08, 03/2023...
-
Page 104: General Instructions
Code (CEC) and the regulations for Great Britain arising from the UKCA ap- proval. National responsible authorities can claim additional requests. Observe the safety manual unconditionally to avoid personal injury and property damage and to ensure safe operation. © Berthold Technologies • 56926BA26 • Rev.08, 03/2023... -
Page 105: Proper Use
Safety Manual / Explosion Protection Manual Proper Use The detectors are used along with an appropriate evaluation unit of Berthold Tech- nologies GmbH & Co. KG and an appropriate radiation source to measure the radi- ation intensity as part of a radiometric measurement. -
Page 106: Qualification Of The Personnel
Authorised Persons Authorised persons are those who are either designated for the corresponding task due to legal regulations or those who have been authorised by Berthold Technol- ogies GmbH & Co. KG for particular tasks. When dealing with radioactive materials, a radiation safety officer must also be consulted. -
Page 107: Operator's Obligations
• Observation and use of the manual and the legal provisions. • Intended operation of the product. • Observation of the plant security instructions and the operating instructions of the operator. © Berthold Technologies • 56926BA26 • Rev.08, 03/2023... -
Page 108: Safety Instructions
Spare parts may only be fitted by the service of Berthold Technologies GmbH & Co. KG or by persons authorised by Berthold. If this is not possible, you must replace the entire detector or send it in for repair to the manufac- turer. - Page 109 Make sure that the maximum permissible surface temperature is not exceeded. The versions of the InlineSENS LB 4700 5x-1x and LB 4700 5x-Ix are not ap- proved for the use of media with explosive substances in the pipe.
-
Page 110: Marking
Ambient temperature range for safe operation in an explosive atmosphere (depending on the temperature class) and other ratings Marking for type of protection for NEC / CEC Additional installation instructions / Warnings © Berthold Technologies • 56926BA26 • Rev.08, 03/2023... - Page 111 Safety Manual / Explosion Protection Manual Typeplate other information, including functional LB 4700-xx-xx-xx-xx-xxx temperature range ID: 56926-xxx V.: xx S.: xxxx Variants Certification Openings Berthold Technologies 75323 Bad Wildbad Germany Calmbacher Str. 22 © Berthold Technologies • 56926BA26 • Rev.08, 03/2023...
-
Page 112: Overview Of Explosion Protection Concepts
Protection Principle Ex "d"/"e"/"t" 1) Temperature Class: Equipment Temperature Class and Installation Temperature Class. 2) Higher temperatures possible, see nameplate. 3) Must not be used for highly charge-generating processes in Zone 21 installations. © Berthold Technologies • 56926BA26 • Rev.08, 03/2023... - Page 113 Protection Principle Ex "d"/"i"/"t" 1) Temperature Class: Equipment Temperature Class and Installation Temperature Class. 2) Higher temperatures possible, see nameplate. 3) Must not be used for highly charge-generating processes in Zone 21 installations. © Berthold Technologies • 56926BA26 • Rev.08, 03/2023...
- Page 114 2) Higher temperatures possible, see nameplate. NOTICE Please note that the detector can be damaged in case of failure of the water- cooling system at an ambient temperature greater than 60 °C. © Berthold Technologies • 56926BA26 • Rev.08, 03/2023...
- Page 115 ) must be accordingly reduced in order to make sure that the maximum surface temperature is not exceeded. IMPORTANT See chapter 7 for the “Control Drawing” and details on the explosion concept. © Berthold Technologies • 56926BA26 • Rev.08, 03/2023...
-
Page 116: Installation
(hereafter referred as terminal compartment) in the groove on the front surface of the socket. • The cover screws (cylinder screw ISO 4762 - M5x16-A2-70) of the LB 4700-xx-1x / LB 4700-xx-Ix must be underlaid with self-locking lock washers (NL5 SS of Nord- lock ®... - Page 117 • Devices with intrinsically safe circuits may no longer be connected to intrinsically safe circuits if they were not previously used in an intrinsically safe manner. © Berthold Technologies • 56926BA26 • Rev.08, 03/2023...
-
Page 118: Terminal Compartment
≤ +60 °C, only such screw connections should be permitted that at least technically meet the standard level listed on the cover page of LB 4700 EC-type examination certificate. For outside of this temperature range, only use screw connections that are approved by Berthold Technologies GmbH &... -
Page 119: Operation
• If an explosive atmosphere is present: Waiting time before opening the elec- tronics compartment after turning off the supply: 2 minutes. Protection principle Ex-d/-i/-t • The housing cover may be opened for a short time for repair and maintenance purposes. © Berthold Technologies • 56926BA26 • Rev.08, 03/2023... -
Page 120: Control Drawing
To maintain ingress protection install with IP66 / IP68. • Install acc. valid local rules (directive 2014/34/EU, NEC or CEC, national authorities). • Warning; Repair only by persons authorized by Berthold Technologies. • Connection cable must be suitable for a continous operating temperatue ≥ T + 15 K •... -
Page 121: Explosion Protection Design
Equipotential bonding O-ring (silicone) Terminal compartment Ex-e or Ex-i Entry Ignition gap Housing cover Fig. 2 Explosion Protection Design LB 4700-xx-1x / LB 4700-xx-Ix Electronics compartment Ex-d Equipotential bonding O-ring (silicone) Terminal compartment Ex-e or Ex-i Entry Ignition gap Housing cover Fig. -
Page 122: Terminal Compartment
Pt100 - Signal and power supply circuit - Equipotential bonding Pt100 + Equipotential bonding Fig. 4 Terminal Compartment LB 4700-xx-1x / LB 4700-xx-Ix Signal and power supply circuit + Pt100 - Signal and power supply circuit - Equipotential bonding Pt100 + Equipotential bonding Fig. -
Page 123: Cable Entries Into The Terminal Compartment
The cable glands may only be used for connection of permanently laid lines. IMPORTANT If cable glands or cables that were not tested by Berthold Technologies GmbH & Co. KG are used, the torques for fixing may need to be redefined. -
Page 124: Stopping (Blanking) Plugs
• Unused entries must be closed with listed stopping plugs with an appropriate protection (at least IP66 / IP68 or type 4X). • For 1/2" NPT threading, a tightening torque of 20 Nm is recommended. © Berthold Technologies • 56926BA26 • Rev.08, 03/2023... -
Page 125: Maintenance And Visual Inspection
For detectors that are used in areas of explosion risk, the six screws that connect the detector housing with the socket may only be opened by the service of Berthold Technologies GmbH & Co. KG or by persons authorised by Berthold. Detector housing... - Page 126 If the cover or the housing is opened, the corresponding seals should be examined and replaced if necessary. NOTICE Do not install other seals. If seals need to be replaced, contact Berthold for re- placement, otherwise the approval for Explosions Protection is void. Cleaning Make sure that the cable glands and the name plates are not damaged during cleaning.
-
Page 127: Plan For Visual Inspection Of The Detector
Is the surface of the detector free from con- tact with other, non-alloy steel parts? Are the connected cables mounted strain-re- lieved? Is a circuit break installed? Is the circuit break easily accessible by maintenance personnel? © Berthold Technologies • 56926BA26 • Rev.08, 03/2023... - Page 128 Are you confident about the sealing of the screw connections? Are the cables firmly fixed in the cable glands? Are the screw connections tight? Are all unused entries closed? Are the screw connections suitable for the required explosion group? © Berthold Technologies • 56926BA26 • Rev.08, 03/2023...
-
Page 129: Plan For The Control Of The Connection
Is the equipotential bonding properly connected? Is the screen properly isolated electrically (e.g. with shrink tubing)? Checking Sealing Is the sealing for the cover in the terminal compartment undamaged and free of cracks and subsidence? © Berthold Technologies • 56926BA26 • Rev.08, 03/2023... -
Page 130: Atex Certificate
Safety Manual / Explosion Protection Manual 12 ATEX Certificate ATEX Certificate © Berthold Technologies • 56926BA26 • Rev.08, 03/2023... - Page 131 12 ATEX Certificate Safety Manual / Explosion Protection Manual © Berthold Technologies • 56926BA26 • Rev.08, 03/2023...
- Page 132 Safety Manual / Explosion Protection Manual 12 ATEX Certificate © Berthold Technologies • 56926BA26 • Rev.08, 03/2023...
-
Page 133: Iecex Certificate
13 IECEx Certificate Safety Manual / Explosion Protection Manual IECEx Certificate © Berthold Technologies • 56926BA26 • Rev.08, 03/2023... - Page 134 Safety Manual / Explosion Protection Manual 13 IECEx Certificate © Berthold Technologies • 56926BA26 • Rev.08, 03/2023...
- Page 135 13 IECEx Certificate Safety Manual / Explosion Protection Manual © Berthold Technologies • 56926BA26 • Rev.08, 03/2023...
- Page 136 Safety Manual / Explosion Protection Manual 13 IECEx Certificate © Berthold Technologies • 56926BA26 • Rev.08, 03/2023...
-
Page 137: Ukca Certificate
14 UKCA Certificate Safety Manual / Explosion Protection Manual UKCA Certificate © Berthold Technologies • 56926BA26 • Rev.08, 03/2023... - Page 138 Safety Manual / Explosion Protection Manual 14 UKCA Certificate © Berthold Technologies • 56926BA26 • Rev.08, 03/2023...
- Page 139 14 UKCA Certificate Safety Manual / Explosion Protection Manual © Berthold Technologies • 56926BA26 • Rev.08, 03/2023...
- Page 140 Safety Manual / Explosion Protection Manual 14 UKCA Certificate © Berthold Technologies • 56926BA26 • Rev.08, 03/2023...
- Page 141 14 UKCA Certificate Safety Manual / Explosion Protection Manual © Berthold Technologies • 56926BA26 • Rev.08, 03/2023...
-
Page 142: Nec/Cec Hazloc Certificate
Safety Manual / Explosion Protection Manual 15 NEC/CEC HazLoc Certificate NEC/CEC HazLoc Certificate © Berthold Technologies • 56926BA26 • Rev.08, 03/2023... - Page 143 15 NEC/CEC HazLoc Certificate Safety Manual / Explosion Protection Manual © Berthold Technologies • 56926BA26 • Rev.08, 03/2023...
- Page 144 Safety Manual / Explosion Protection Manual 15 NEC/CEC HazLoc Certificate © Berthold Technologies • 56926BA26 • Rev.08, 03/2023...
- Page 145 15 NEC/CEC HazLoc Certificate Safety Manual / Explosion Protection Manual © Berthold Technologies • 56926BA26 • Rev.08, 03/2023...
- Page 146 Safety Manual / Explosion Protection Manual 15 NEC/CEC HazLoc Certificate © Berthold Technologies • 56926BA26 • Rev.08, 03/2023...
- Page 147 15 NEC/CEC HazLoc Certificate Safety Manual / Explosion Protection Manual © Berthold Technologies • 56926BA26 • Rev.08, 03/2023...
- Page 148 Safety Manual / Explosion Protection Manual 15 NEC/CEC HazLoc Certificate © Berthold Technologies • 56926BA26 • Rev.08, 03/2023...
-
Page 149: Nec/Cec Ordloc Certificate
16 NEC/CEC OrdLoc Certificate Safety Manual / Explosion Protection Manual NEC/CEC OrdLoc Certificate © Berthold Technologies • 56926BA26 • Rev.08, 03/2023... - Page 150 Safety Manual / Explosion Protection Manual 16 NEC/CEC OrdLoc Certificate © Berthold Technologies • 56926BA26 • Rev.08, 03/2023...
- Page 151 16 NEC/CEC OrdLoc Certificate Safety Manual / Explosion Protection Manual © Berthold Technologies • 56926BA26 • Rev.08, 03/2023...
- Page 152 Modifications due to technical advancement reserved. © BERTHOLD TECHNOLOGIES GmbH & Co. KG Language: English Printed in Germany 03/2023 Rev.-No.: 08, 03/2023 BERTHOLD TECHNOLOGIES GmbH & Co. KG Calmbacher Str. 22 75323 Bad Wildbad Germany www.Berthold.com Id.-No. 56926BA26...
- Page 153 Unité d'évaluation Détecteurs DuoSeries DuoSeries LB 47x LB 4700 Informations sur la sécurité 56925BA59 Rev.05 08/2023...
- Page 154 Indique un danger potentiel qui peut entraîner des blessures sérieuses ou la mort s’il n’est pas évité. PRUDENCE Se réfère à une situation potentiellement dangereuse qui peut entraîner des blessures physiques mineures ou graves, ou des dégâts matériels si elle n’est pas évitée. © Berthold Technologies • 56925BA59 • Rev.05, 08/2023...
- Page 155 Tension alternative L’appareil fonctionne en tension alternative et ne doit être raccordé qu’à une source de tension alternative. Déchet non domestique Cet appareil électrique ne doit pas être éliminé avec les déchets domestiques © Berthold Technologies • 56925BA59 • Rev.05, 08/2023...
- Page 156 Informations sur la sécurité Conformité La société Berthold déclare par la présente, sous son entière responsabilité, que la conception de ce produit mis sur le marché par Berthold est conforme aux directives EU indiquées dans la déclaration de conformité originale.
- Page 157 • Effectuer les opérations de maintenance prescrites ou les faire réaliser pour vous ! • Utiliser uniquement les accessoires et pièces de rechange Berthold. Utilisation inappropriée à éviter: • Ne pas suivre les instructions de sécurité et les instructions pour l’utilisation, la maintenance et la mise au déchet indiquées dans le...
- Page 158 2 Sécurité Informations sur la sécurité Berthold assume la responsabilité de la garantie seulement dans le cadre de ses spécifications publiées. Si le produit est utilisé dans des conditions autres que celles décrites dans le présent manuel, la sécurité du produit est compromise et la garantie devient nulle.
- Page 159 Connaissance et utilisation du manuel d’utilisation et des clauses légales. • Utilisation prévue de l’appareil. • Respect des instructions de sécurité du site et des conditions d’utilisation de l’opérateur. • Gestion régulière de la maintenance du produit. © Berthold Technologies • 56925BA59 • Rev.05, 08/2023...
- Page 160 Sous réserve de modifications dans le cadre du progrès technique. © BERTHOLD TECHNOLOGIES GmbH & Co. KG langue: Français Imprimé en Allemagne 08/2023 Rev.-Nr.: 05 BERTHOLD TECHNOLOGIES GmbH & Co. KG Calmbacher Str. 22 75323 Bad Wildbad Germany www.Berthold.com Id.-Nr. 56925BA59...
- Page 161 DuoSeries Detectors LB 4700 Technical Information 56926TI2 Rev.03 08/2023 Embedded Software as of Version 12.00.00...
- Page 162 6.5. TowerSENS: 1 m Extension Module without water-cooling ........19 6.6. TowerSENS: 1 m Extension Module with water-cooling ......... 19 Versions for Class, Divisions: “DIP” / “XP” LB 4700-xx-Fx ........ 20 Mounting Clamps ..................... 21 8.1. Standard Design ......................21 8.2.
- Page 163 Cooling Water Demand Rod Detector 1500mm ............42 13.5. Cooling Water Demand Rod Detector 2000mm ............43 Number Key LB 4700 Detectors ................ 44 Parts Overview ....................45 EU Declaration of Conformity ................47 © Berthold Technologies • 56926TI2 • Rev.03, 08/2023...
-
Page 164: Information On 2-Wire Technology
• Easy to use touch screen panel for local display and operation • Integrated gas density compensation feature • Direct replacement of predecessor model LB 440 • Interfaces with all 2-wire detectors LB 44xx, LB 54xx and LB 47xx © Berthold Technologies • 56926TI2 • Rev.03, 08/2023... -
Page 165: Crystalsens Lb-4700-1X
Dimensions CrystalSENS LB-4700-1x without water cooling (Dimensions in mm) Water cooling Collimator Total Length (approx.) Weight (approx.) 452 mm 9.4 kg Front irradiation 491 mm 21.1 kg Side irradiation 471 mm 19.2 kg © Berthold Technologies • 56926TI2 • Rev.03, 08/2023... - Page 166 Dimensions CrystalSENS LB-4700-1x with water cooling (Dimensions in mm) Water cooling Collimator Total Length (approx.) Weight (approx.) 467 mm 12.3 kg Front irradiation 496 mm 23.0 kg Side irradiation 475 mm 21.7 kg © Berthold Technologies • 56926TI2 • Rev.03, 08/2023...
-
Page 167: Unisens Lb 4700-2X
1675 mm 19.3 kg 1250 mm 1684 mm 31.5 kg 1925 mm 22.7 kg 1500 mm 1934 mm 35.7 kg 2425 mm 26.5 kg 2000 mm 2434 mm 42.8 kg © Berthold Technologies • 56926TI2 • Rev.03, 08/2023... -
Page 168: Clamping Positions For Unisens Rod Detectors
DuoSeries Detectors LB 4700 Technical Information 3.1. Clamping Positions for UniSENS Rod Detectors Clamping Position for Multi Detector Arrangement TI-Fig. 4 Clamping Positions for UniSENS Rod Detectors © Berthold Technologies • 56926TI2 • Rev.03, 08/2023... -
Page 169: Supersens
Technical Information DuoSeries Detectors LB 4700 4. SuperSENS 4.1. SuperSENS: without water-cooling (side irradiation) TI-Fig. 5 Dimensions SuperSENS without water-cooling (side irradiation) © Berthold Technologies • 56926TI2 • Rev.03, 08/2023... -
Page 170: Supersens: Without Water-Cooling (Frontal Irradiation)
DuoSeries Detectors LB 4700 Technical Information 4.2. SuperSENS: without water-cooling (frontal irradiation) TI-Fig. 6 Dimensions SuperSENS without water-cooling (frontal irradiation) © Berthold Technologies • 56926TI2 • Rev.03, 08/2023... -
Page 171: Supersens: With Water-Cooling (Side Irradiation)
Technical Information DuoSeries Detectors LB 4700 4.3. SuperSENS: with water-cooling (side irradiation) TI-Fig. 7 Dimensions SuperSENS with water-cooling (side irradiation) © Berthold Technologies • 56926TI2 • Rev.03, 08/2023... -
Page 172: Supersens: With Water-Cooling (Frontal Irradiation)
DuoSeries Detectors LB 4700 Technical Information 4.4. SuperSENS: with water-cooling (frontal irradiation) TI-Fig. 8 Dimensions SuperSENS with water-cooling (frontal irradiation) © Berthold Technologies • 56926TI2 • Rev.03, 08/2023... -
Page 173: Supersens: For Dip Pipe
Technical Information DuoSeries Detectors LB 4700 4.5. SuperSENS: for Dip Pipe LB 4700-31-00-80-01-100 56926-101 Gewicht ca. 21 kg TI-Fig. 9 SuperSENS Detector for Dip Pipe (Dimensions in mm) © Berthold Technologies • 56926TI2 • Rev.03, 08/2023... -
Page 174: Supersens: For Dip Pipe With Water-Cooling
DuoSeries Detectors LB 4700 Technical Information 4.6. SuperSENS: for Dip Pipe with Water-Cooling LB 4700-31-IB-80-01-100 56926-113 TI-Fig. 10 SuperSENS Detector for Dip Pipe with water-cooling (Dimensions in mm) © Berthold Technologies • 56926TI2 • Rev.03, 08/2023... -
Page 175: Detector For Low Energy Isotopes (Like Am-241 / Cm-244)
Technical Information DuoSeries Detectors LB 4700 5. Detector for Low Energy Isotopes (like Am-241 / Cm-244) TI-Fig. 11 Detector for Low Energy Isotopes (Dimensions in mm) © Berthold Technologies • 56926TI2 • Rev.03, 08/2023... -
Page 176: Towersens
Basic Module without water-cooling (Dimensions in mm) Type Sensitive Length Length L Weight Basic Module 2 m Zones Variant 1988 mm 2532 mm 26 kg Basic Module 2 m Divisions Variant 1988 mm 2563 mm 27 kg © Berthold Technologies • 56926TI2 • Rev.03, 08/2023... -
Page 177: Towersens: With Water-Cooling
Basic Module with water-cooling (Dimensions in mm) Type Sensitive Length Length L Weight Basic Module 2 m Zones Variant 1988 mm 2532 mm 41 kg Basic Module 2 m Divisions Variant 1988 mm 2563 mm 42 kg © Berthold Technologies • 56926TI2 • Rev.03, 08/2023... -
Page 178: Towersens: 2 M Extension Module Without Water-Cooling
Water In / Out Sensitive length Window Clamping Position Housing made of stainless steel 1.4301 or 316L Weight: 32 kg TI-Fig. 15 TowerSENS: 2 m Extension Module with water-cooling (Dimensions in mm) © Berthold Technologies • 56926TI2 • Rev.03, 08/2023... -
Page 179: Towersens: 1 M Extension Module Without Water-Cooling
6.6. TowerSENS: 1 m Extension Module with water-cooling Sealing Water In / Out Sensitive length Housing made of 316L Clamping Position Window Weight: 15 kg TI-Fig. 17 TowerSENS: 1 m extension module with water-cooling (Dimensions in mm) © Berthold Technologies • 56926TI2 • Rev.03, 08/2023... -
Page 180: Versions For Class, Divisions: "Dip" / "Xp" Lb 4700-Xx-Fx
TI-Fig. 18 Versions for Class, Divisions: “DIP” / “XP” LB 4700-xx-Fx (Dimensions in mm) The detector version for divisions (NEC/CEC) differs only in the terminal housing, compared to the standard version illustrated above. The dimensions of this terminal housing are illustrated in this drawing. -
Page 181: Mounting Clamps
Mat. No. 31347 (1 Satz = 2 Schellen) Mat. No. 31345 (single clamp) Mat. Nr. 31344 (single clamp) Position for the clamps, see detector drawing TI-Fig. 19 Mounting clamps for detectors (Dimensions in mm) © Berthold Technologies • 56926TI2 • Rev.03, 08/2023... -
Page 182: Heavy Duty Detector Holder
For detectors without water cooling For detectors with water cooling Mat. No. 39246 Mat. No. 39247 Material: stainless steel Remove the plastic ring for detectors with water cooling. TI-Fig. 20 Heavy duty version (Dimensions in mm) © Berthold Technologies • 56926TI2 • Rev.03, 08/2023... -
Page 183: Mounting Clamps For Towersens
For detectors without water cooling For detectors without water cooling Material 316Ti 1.4571 Mat. No. 43756 Mat. No. 52688 Position for the clamps, see detector drawing TI-Fig. 21 Mounting Clamps for TowerSENS (Dimensions in mm) © Berthold Technologies • 56926TI2 • Rev.03, 08/2023... -
Page 184: Mounting Bracket
DuoSeries Detectors LB 4700 Technical Information 8.4. Mounting Bracket TI-Fig. 22 Mounting Bracket © Berthold Technologies • 56926TI2 • Rev.03, 08/2023... -
Page 185: Mounting Point Detector Crystalsens
50°C, a suitable sun roof must be installed. The heating of the detector by thermal radiation from the vessel can also be moderated by a thermal sheet, e.g. by a thin metal plate. For each detector a water cooling (option) is available! © Berthold Technologies • 56926TI2 • Rev.03, 08/2023... -
Page 186: Potassium Measurement
150/150 Polymer Dip Pipe from the top Dip Pipe from the side 1...4 CrystalSENS CrystalSENS 125/50 NaI 50/50 NaI 78...85 1...4 TI-Fig. 24 Examples for Arrangements inside the Vessel (Dimensions in mm) © Berthold Technologies • 56926TI2 • Rev.03, 08/2023... -
Page 187: Potassium, Examples For Surface Measuring Arrangements
Suitable mounting frames can be or- dered from Berthold. Measurement at Pipe Measurement at Conveyor CrystalSE NS 125/50 Ø > 500 mm CrystalSE NS 125/50 TI-Fig. 25 Examples for Arrangements Surface Measurement (Dimensions in mm) © Berthold Technologies • 56926TI2 • Rev.03, 08/2023... -
Page 188: Crystalsens 125/50
DuoSeries Detectors LB 4700 Technical Information 9.3. CrystalSENS 125/50 LB 4700-38-00-80-01-100 Mat.-No. 56926-199 Shield Effect: approx. 55 mm lead TI-Fig. 26 CrystalSENS 125/50 for potassium measurement (Dimensions in mm) © Berthold Technologies • 56926TI2 • Rev.03, 08/2023... -
Page 189: Crystalsens 125/50 Installed In Shield
Devide the top flange ring into two half shells. Unscrew the eybolts and use the threated hole to fix the flange. TI-Fig. 27 CrystalSENS 125/50 installed in shield (Dimensions in mm) © Berthold Technologies • 56926TI2 • Rev.03, 08/2023... -
Page 190: Collimators And Extension Shields
Collimator for CrystalSENS Detectors (Dimensions in mm) 10.2. Reinforced Collimator for CrystalSENS Detectors Collimator for frontal irradation Collimator for side irradation Mat.-No. 48254 Mat.-No. 48925 TI-Fig. 29 Reinforced collimator for CrystalSENS (Dimensions in mm) © Berthold Technologies • 56926TI2 • Rev.03, 08/2023... -
Page 191: Extension Shield Für Supersens With Frontal Irradiation
Shield effect: approx. 45 mm lead Weight approx. 114 kg Extension shield installed on SuperSENS Gesamte Abschirmungswirkung: ca. 70 mm Blei Gewicht ca. 124 kg TI-Fig. 30 Extension Shield für SuperSENS (Dimensions in mm) © Berthold Technologies • 56926TI2 • Rev.03, 08/2023... -
Page 192: Collimator For Unisens Detectors Without Water-Cooling
Collimator for UniSENS without Water-Cooling (Dimensions in mm) Mat.-No. L1 sensitive length Weight (kg) 59957-050 59957-100 1000 1120 1155 1090 1460 59957-150 1500 1620 1655 1590 1960 59957-200 2000 2120 2155 2090 2460 © Berthold Technologies • 56926TI2 • Rev.03, 08/2023... -
Page 193: Collimator For Unisens Detectors With Water-Cooling
Collimator for UniSENS with water-cooling (Dimensions in mm) Mat.-No. L1 sensitive length Weight (kg) 60085-050 60085-100 1000 1120 1155 1090 1460 60085-150 1500 1620 1655 1590 1960 60085-200 2000 2120 2155 2090 2460 © Berthold Technologies • 56926TI2 • Rev.03, 08/2023... -
Page 194: Mounting Parts Unisens Collimator
DuoSeries Detectors LB 4700 Technical Information 10.6. Mounting Parts UniSENS Collimator material thickness 8 - 10mm TI-Fig. 33 Mounting parts collimator (Dimensions in mm) © Berthold Technologies • 56926TI2 • Rev.03, 08/2023... -
Page 195: Mounting Points For Unisens Shieldings
Technical Information DuoSeries Detectors LB 4700 10.7. Mounting Points for UniSENS Shieldings Mounting Position for Rod Detector Shieldings Multi Detector Arrangement TI-Fig. 34 Mounting positions for UniSENS rod detector shieldings © Berthold Technologies • 56926TI2 • Rev.03, 08/2023... -
Page 196: Water Cooling Jacket And Adaptor Fittings
ID 10 mm fitting adaptor ½" NPT female 47189 (304/1.4301) fitting adaptor ¼" NPT female 46743 (304/1.4301) fitting adaptor ½" NPT male 6352 (304/1.4301) fitting adaptor ¼" NPT male 6349 (304/1.4301) © Berthold Technologies • 56926TI2 • Rev.03, 08/2023... -
Page 197: Technical Data
Line resistance less than 20 ohms/km Count rate max. 1,000,000 CPS Temperature stability ≤ 0.01%/°C (-40 ...+60 °C) for rod detectors ≤ 0.002%/°C (-40 ...+60 °C) for point detectors Pt100 input -40°C to 200°C, 0.24°C accuracy © Berthold Technologies • 56926TI2 • Rev.03, 08/2023... -
Page 198: Point Detectors Crystalsens
SuperSENS with frontal irradiation: approx. 60 kg with water cooling (optional): additional approx. 7 kg Installation lengths SuperSENS with side irradiation: approx. 639 mm SuperSENS with frontal irradiation: approx. 619 mm © Berthold Technologies • 56926TI2 • Rev.03, 08/2023... -
Page 199: Rod Detectors Towersens
6530 mm TowerSENS, 50 x 7000 (polymer) without and with wa- ter cooling: approx. 7530 mm TowerSENS, 50 x 8000 (polymer) without and with wa- ter cooling: approx. 8530 mm © Berthold Technologies • 56926TI2 • Rev.03, 08/2023... -
Page 200: Scintillator
UniSENS, 50 x 1000 (polymer): ≥11,000 cps / μSv/h UniSENS, 50 x 1500 (polymer): ≥17,000 cps / μSv/h UniSENS, 50 x 2000 (polymer): ≥25,000 cps / μSv/h TowerSENS, up to 50 x 8000 (polymer): ≥8000 cps / μSv/h per m © Berthold Technologies • 56926TI2 • Rev.03, 08/2023... -
Page 201: Cooling Water Demand
Technical Information DuoSeries Detectors LB 4700 13. Cooling Water Demand 13.1. Cooling Water Demand Point Detector 13.2. Cooling Water Demand Rod Detector 500mm © Berthold Technologies • 56926TI2 • Rev.03, 08/2023... -
Page 202: Cooling Water Demand Rod Detector 1000Mm
DuoSeries Detectors LB 4700 Technical Information 13.3. Cooling Water Demand Rod Detector 1000mm 13.4. Cooling Water Demand Rod Detector 1500mm © Berthold Technologies • 56926TI2 • Rev.03, 08/2023... -
Page 203: Cooling Water Demand Rod Detector 2000Mm
Technical Information DuoSeries Detectors LB 4700 13.5. Cooling Water Demand Rod Detector 2000mm © Berthold Technologies • 56926TI2 • Rev.03, 08/2023... -
Page 204: Number Key Lb 4700 Detectors
DuoSeries Detectors LB 4700 Technical Information 14. Number Key LB 4700 Detectors WC = Water cooling Only by the LB Number Key, the detector can be uniquely identified (Scintillator, size, certification, ect.). © Berthold Technologies • 56926TI2 • Rev.03, 08/2023... -
Page 205: Parts Overview
Material: 1.4301 (304) TowerSENS shield L=2000 applicable for basic module and extension module 70518 applicable for TowerSENS with and without water cooling Material: 1.4301 (304) 68188 Lid with axial cable entry for non-Ex detectors © Berthold Technologies • 56926TI2 • Rev.03, 08/2023... - Page 206 TowerSENS extension module 2000 mm, 1.4301 52434 TowerSENS extension module 2000 mm, 1.4301 with water cooling 67502 TowerSENS extension module 2000 mm, 316L 67464 TowerSENS extension module 2000 mm, 316L with water cooling L = scintillator length © Berthold Technologies • 56926TI2 • Rev.03, 08/2023...
-
Page 207: Eu Declaration Of Conformity
Technical Information DuoSeries Detectors LB 4700 16. EU Declaration of Conformity © Berthold Technologies • 56926TI2 • Rev.03, 08/2023...
Need help?
Do you have a question about the LB 4700 and is the answer not in the manual?
Questions and answers