Table of Contents
Advertisement
Quick Links
INSTRUCTION MANUAL
Electric Wall Mounted Fire
This product is only suitable for well insulated
spaces or occasional use.
IMPORTANT
The fan will run for approximately 30 seconds after the heater is
turned off. This is to remove any residual heat from the fire to
prevent any potential overheating.
www.firedupcorporation.com/manual
Advertisement
Table of Contents

Related Manuals for Fired Up Corporation Sureflame WM-9332


Summary of Contents for Fired Up Corporation Sureflame WM-9332
- Page 1 INSTRUCTION MANUAL Electric Wall Mounted Fire This product is only suitable for well insulated spaces or occasional use. IMPORTANT The fan will run for approximately 30 seconds after the heater is turned off. This is to remove any residual heat from the fire to prevent any potential overheating.
-
Page 2: Table Of Contents
Read ALL the instructions before use. These instructions are for your safety. Please read through them thoroughly before use and retain for future reference. Failure to follow them could cause injury and/or property damage. CONTENTS SECTION 01 Cautions 03-06 Introduction Handling SECTION 02 Unpacking &... -
Page 3: Cautions
CAUTIONS DO’S • Read ALL the instructions before using this product. • Only use this product for its intended use as described in this manual. • Always use the product in accordance with this guide. If in doubt obtain expert advice. •... - Page 4 • Never use aerosols or steam cleaners on or around the fire. • Never route the supply cord under carpeting and never cover the cord with throw rugs, runners, etc. Arrange the cord away from traffic areas and where it will not be tripped over.
- Page 5 IMPORTANT! • This appliance can be used by children aged from 8 years and above and persons with reduced physical, sensory or mental capabilities or lack of experience and knowledge if they have been given supervision or instruction concerning use of the appliance in a safe way and understand the hazards involved.
- Page 6 • CAUTION — Some parts of this product can become very hot and cause burns. Particular attention has to be given where children and vulnerable people are present. • This heater is hot when in use. To avoid burns, do not touch hot surfaces such as surfaces around the grille in front of the heater.
-
Page 7: Introduction
INTRODUCTION Thank you for choosing this product. It is designed to meet the most stringent quality, performance, and safety requirements. This guide aims to improve your understand- ing and appreciation of your new product by providing simple and informative instructions. HANDLING Before continuing any further with the installation of this product please read the following:... -
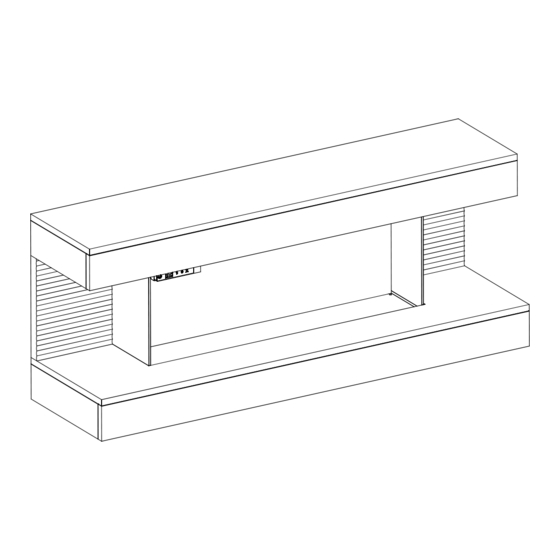
Page 8: Installing The Fire
MOUNTING ON TO A WALL The fire can be mounted to a wall. The following procedure and dimensions are important. WALL FIXING KIT Top Wall Bracket Bottom Wall Bracket Short Screw Long Screw Wall Plug Note: Wall plugs supplied are for a solid wall. If screwing in to plaster board or wood, please use correct fixings. TOOLS REQUIRED - Crosshead Screwdriver - Pencil... - Page 9 Cont... 6. Carefully lift fire and align slots with top bracket racket 7. Slot fire onto top bracket 8. Align holes on bottom bracket to bottom of fire and mark the holes required on the wall 9. Drill 6mm diameter holes approximately 35mm deep 10.
-
Page 10: Fuel Bed
Fuel Bed Arrange the fuel bed using the logs and pebbles provided... -
Page 11: Remote Control & Control Panel
Remote control Temperature Up Power Temperature Down Flame Effect Heater Brightness Timer Mode Time Setting Control panel The control panel can be located as shown. Temp. Down Flame Colour Heater On/Off Switch Power Temp. Up Day Indicator Digital Display Heater Indicator IR Sensor On/Off... -
Page 12: Operation
OPERATION - Manual On/Off switch must be switched on for the fire to work. The switch is in the ON position when the side with the ‘I’ marking is ‘pressed in’ Brightness setting cannot be changed without the remote control OPERATION - Remote control Insert 2 x AAA batteries to the back of the remote control. - Page 13 Flame effect & colour Eight themes can be selected using the flame effect button , the corresponding theme number will be shown on the display. 1 - OFF 2 - Red 3 - Sky Blue 4. Orange 5 - Blue 6 - Purple 7 - Green 8.
- Page 14 Set day & time To show the day and time, press and hold the time setting button for 2 secs. Press the time setting button again to set the DAY. The DAY will flash on the display. Select the day using the + or - buttons. Press the time setting button again and the HOUR will flash.
- Page 15 Set timers The timer setting allows for two ON/OFF periods (M1 and M2) to be set for each day of the week. Press and hold the timer mode button for 2 secs. to begin setting the timer. The setting for the 1st period ON time (M1) for Monday will be shown.
-
Page 16: Reset Settings & Additional Features
ADDIONAL FEATURES Open Window/Door Detection - If the heater is turned on and the ambient room temperature drops, the heater automatically turns off (and ECO is shown on the display). The heater can be turned back on using the heater button PLUG REPLACEMENT (for products fitted with BS plug) This appliance is supplied with a BS1363 3 pin plug fitted with a 13 Amp fuse. -
Page 17: Technical Parameters
TECHNICAL PARAMETERS L 193/88 Official Journal of the European Union 21.7.2015 Table 2 Information requirements for electric local space heaters Model identifier(s): EFS0043 Item Symbol Value Unit Item Unit Heat output Type of heat input, for electric storage local space heaters only (select one) Nominal heat out... -
Page 18: Troubleshooting
TROUBLESHOOTING Display shows ‘E1’ The thermostat sensor may be broken or disconnected. If E1 is shown, please contact customer support. Display shows ‘E2’ The thermostat may be broken. If E2 is shown, please contact customer support. Display shows ‘E3’ Manual reset overheat protection has been triggered. Check the air inlets or outlets are not blocked or obstructed and unplug the fire for 30 minutes to allow it to cool down. -
Page 19: Specification, Conformity & Environment
SPECIFICATION Supply Voltage 220-240V~50-60Hz Rated Power 1700-2000W Fuse Rating 13 Amp Lighting 5W LED Array (non serviceable) Class CONFORMITY WITH DIRECTIVES Conforms with relevant European Directives ENVIRONMENTAL PROTECTION • (WEEE) Waste Electrical and Electronic Equipment Waste electrical products should not be disposed of with household waste. Please recycle where facilities exist. -
Page 20: Guarantee & Contacts
This product guarantee does not affect your statutory rights. CUSTOMER HELPLINE 03300 882 069 customer.support@firedupcorporation.com Fired Up Corporation Ltd. Fired Up Buildings St Thomas Road www.firedupcorporation.com Huddersfield HD1 3LF...
Need help?
Do you have a question about the Sureflame WM-9332 and is the answer not in the manual?
Questions and answers