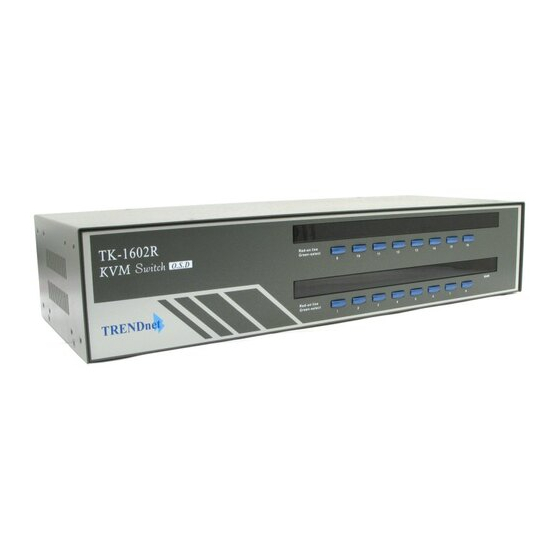
TRENDnet TK-1602R User Manual
8-/16-port cascadable ps/2 type kvm switch with osd control
Hide thumbs
Also See for TK-1602R:
- Quick installation manual (14 pages) ,
- Specifications (2 pages) ,
- User manual (13 pages)
Table of Contents
Advertisement
Quick Links
Advertisement
Table of Contents

Related Manuals for TRENDnet TK-1602R


Summary of Contents for TRENDnet TK-1602R
- Page 2 All trademarks in this manual are the property of their respective trademark owners. Disclaimer This User Guide fully explains the installation and use of TK-802R/TK-1602R Rack Mount KVM Switch. Since every precaution has been taken to prepare and write this manual, we assumes no responsibility for errors or omissions contained therein, nor any liability for damages resulting from the use of the information in it.
-
Page 3: Table Of Contents
TABLE OF CONTENTS TABLE OF CONTENTS ...3 LIST OF FIGURES ...5 LIST OF TABLES ...5 1. FEATURES AND FUNCTIONS ...6 1.1. F ...7 EATURES General features...7 Connector Interface ...7 LED display for status monitoring...7 Control features ...7 Security...7 Cascaded Application ...7 Hardware/Software Support ...8 Power interface ...8 Cabling requirements...8... - Page 4 <Next Lower Bank> (when daisy-chained)...22 <Next Higher Bank> (when daisy-chained)...23 <Autoscan Beep Sound On/Off> ...23 <Reflash EEPROM> ...23 <Find PC by Name> ...24 <Change PC Name> ...25 <Reset KVM> ...25 <Show OSD Menu>...25 <Autoscan> ...25 <Autoscan Delay Time>...26 <OSD Remain Time> ...26 <Password Configuration>...26 <Password Change>...
-
Page 5: List Of Figures
LIST OF FIGURES Figure 1-1a TK-802R...8 Figure 1-1b TK-1602R...8 Figure 1-2a TK-802R Front Panel ...9 Figure 1-2b TK-1602R Front Panel ...9 Figure 1-3a TK-802R Rear Panel...10 Figure 1-3b TK-1602R Rear Panel...10 Figure 2-1 The 3-1 combo KVM cable is highly recommended ...12 Figure 2-2 Daisy-chaining multiple KVM switches in a cascaded application ...14... -
Page 6: Features And Functions
16 units of the KVM Switches together. For example, with 16 units of the TK-1602R KVM Switches cascaded together, the total port capacity could easily be scaled up to 256 computers. -
Page 7: Features
TK-802R_TK-1602R Rack Mount KVM Switch 1.1. Features General features ▪ 8-/16-port cascadable PS/2 type electronic KVM switch with OSD Menu control ▪ Robust metal case design ensures best EMI shielding and super video quality ▪ Standard 19” rack mount size ▪... -
Page 8: Hardware/Software Support
Compatible with standard individual keyboard, video, and mouse cable ▪ Highly recommended: the 3-in-1 combination KVM cable 1.2. Package Contents The TK-802R/TK-1602R KVM Switch Package should contain the following items: ▪ The TK-802R/TK-1602R KVM Switch ▪ Daisy Chain Cable (3-in-1 KVM combo cable) ▪... -
Page 9: External Views
TK-802R_TK-1602R Rack Mount KVM Switch 1.3. External Views The following sections will give detailed descriptions of the front-panel and rear panel of the TK-802R/TK-1602R KVM Switch. 1.3.1. Front View 1.3.1.1. Front-panel Buttons Use these front-panel buttons to directly select channels as well as to perform specific function such as reset or autoscan. -
Page 10: Rear View
1.3.2. Rear View Figure 1-3a TK-802R Rear Panel Figure 1-3b TK-1602R Rear Panel 1.3.2.1. Power Jack The power jack is a receptacle for the 9V 1A DC power adapter cord. Its center pin is of a positive polarity. -
Page 11: Pc Port
Therefore, the KVM Switch solution is better in this “transparent” sense for server/computer remote control. On the other hand, a KVM Switch also offers a complete and more flexile control than other software/hardware solutions: a KVM Switch offers a total control from BIOS level such as CMOS setting up to GUI application as well as and other maintenance routines. -
Page 12: Installation
TK-802R_TK-1602R Rack Mount KVM Switch Before installing the KVM switch, you should run through the following peripheral checklist to ensure a proper setup of your KVM Switch…. 2.1. Checklist before Installation Suitable cables to connect the KVM Switch to the keyboard, video and mouse ports of each of your PC. -
Page 13: Mounting The Kvm Switch
KVM switch later on. On the other hand, your KVM Switch also has to be present to keep track of all the modes and parameters requested by the OS running on each connected PC. -
Page 14: Connect Your Pcs And Peripherals To Multiple Daisy-Chained Kvm Switches
To add port capacity, multiple TK-802R/TK-1602R KVM Switches can be cascaded in a daisy-chain configuration to maximize the number of connected computers up to a total of 256 computers (with 16 units of TK-1602R KVM Switches). This cascaded application is obviously advantageous when groups of computers are dispersed and with some considerable distance from each other. - Page 15 KVM switch later on. On the other hand, your KVM Switch also has to be present to keep track of all the modes and parameters requested by the OS running on each connected PC.
-
Page 16: Initialize Your Kvm Switch
2.5.1. Reset without disconnecting or powering down your computers The KVM Switch can be reset without disconnecting or powering down your computers either by (1) pressing down Button 1 on the front panel for 2 seconds, or by (2) the hotkey sequence ScrLk + ScrLk + End. Note that each keystroke should be followed by its next keystroke within a delay of no more than 2 seconds. -
Page 17: Operation
KVM switch, it is strongly recommended that you read this chapter in advance. 3.1. Control Interfaces There are three ways to operate your TK-802R/TK-1602R KVM Switch: Front- panel buttons, keyboard hotkeys and OSD Menu options. The operation details of these three control methods are detailed as follows: 3.1.1. -
Page 18: Table 3-1 Summary For Hotkey Sequences
TK-802R_TK-1602R Rack Mount KVM Switch All the available hotkey commands are summarized in the following table for your convenience. For hotkey command, you should use the number keys on the upper row of the keyboard instead of the number pad, which is invalid for hotkey commands. -
Page 19: On Screen Display
TK-802R_TK-1602R Rack Mount KVM Switch 3.1.3. On Screen Display Note that while OSD is activated, all the front-panel buttons will be inactive. To activate the OSD Menu, use the hotkey sequence Show OSD Menu OSD (On Screen Display) is a menu that is superimposed on your screen. On the OSD Menu, you will have a listing of the available banks and channels for selection and the currently online status of each channel. -
Page 20: Osd Navigation
, indicates that it is currently connected to the KVM Switch and thus feeding power through its PS/2 interface to the KVM Switch. Others that are not seen with a little solar symbol after them are currently not connected. -
Page 21: Operate The Switch
01 and then the port number 07: Select PC = Since the single KVM Switch bank number is default to 01 (i.e. itself a master KVM Switch on its own), therefore you should always specified its bank number by “01”. -
Page 22: Next Lower Channel
Insert key to select. In a daisy-chained configuration, you may want to select specific channel on a specific bank (when you have daisy-chained multiple KVM switch units), just use the Page up/Page Down key for bank selection and navigate the OSD Menu by cursors key to the channel you want to select and hit Enter to make it your active channel. -
Page 23: Next Higher Bank> (When Daisy-Chained)
TK-802R_TK-1602R Rack Mount KVM Switch <Next Higher Bank> (when daisy-chained) Front Panel Button Press the corresponding button. Hotkeys Next bank While the OSD is activated on the console screen, press the Page Down key to rotate through the bank selection incrementally. -
Page 24: Find Pc By Name
Find PC by name = With the number of connected computers grow to a large pool, it might be very convenient for you to specify the computer name and let the KVM Switch find it for you in an instant. -
Page 25: Change Pc Name
<Autoscan> Front-panel button Press and hold down the last button for at least 2 seconds. The last button could be button 4/8/16 specifically for TK-802R/TK-1602R. Hotkey Autoscan The autoscan function automatically scans through each connected channel and stay for a specific time period that is programmable by user (5 ~ 99 seconds). -
Page 26: Autoscan Delay Time
On the other hand, if the password protection is enabled, it means every time when the KVM Switch is reset, it will prompt the next user for password input. This feature will ensure further security over local console to ward off the possibility of any band-intention or accidental tempering of your server management by other unauthorized persons. -
Page 27: Password Change
ScrLk + ScrLk + End (or by pressing the last button for over 2 seconds). Then the KVM Switch will go reset and next user will be asked for correct password to gain access to KVM operation, thus your local console security cannot be compromised anymore even when you are not present. -
Page 28: Appendix A Technical Specifications
MAX PC Connection Housing Power Adapter Operation Temperature User’s Guide 8 PCs max. (TK-802R) 16 PCs max. (TK-1602R) 1 console (TK-802R) 1 console (TK-1602R) PS/2 keyboard Mini Din 6 pin PS/2 Mouse Mini Din 6 pin VGA HDB 15 pin... - Page 29 User’s Guide -20 ~ 60°C 0 ~ 90% RH, non-condensing 19” Rack Mount / 1 RU (TK-802R) 19” Rack Mount / 2 RU (TK-1602R) 2.2 kg (TK-802R) 3.5 kg (TK-1602R) 410 × 165 × 44.5 (L × W × H) (TK-802R) 410 ×...
-
Page 30: Appendix B System & Cable Requirements
TK-802R_TK-1602R Rack Mount KVM Switch APPENDIX B SYSTEM & CABLE REQUIREMENTS Model No. UKV-048OSD Console side ▪ One VGA Monitor ▪ One PS/2 Keyboard ▪ One PS/2 Mouse Computer ▪ 4 × HDB 15 pin male-to- male VGA cable side ▪... -
Page 31: Appendix C Troubleshooting
Solution: Check the following points to troubleshoot your keyboard/mouse problem: (1) Connect your keyboard and mouse to the KVM Switch only when the PCs are in powered-off state. Otherwise, you have to reboot your PCs. (2) Verify that your keyboard/mouse and the computer are all properly connected to the KVM Switch. - Page 32 (2) Check that the video setting of the computer does not exceed the highest resolution support of the KVM Switch. If you choose a resolution that is beyond the video support of the KVM, the screen on your local console might show up as blank or striped screen due to out-of-range or out-of-sync.
-
Page 33: Limited Warranty
TRENDware warrants its products against defects in material and workmanship, under normal use and service, for the following lengths of time from the date of purchase. KVM Switch – 2 Years Warranty If a product does not operate as warranted above during the applicable warranty period,... -
Page 34: Technical Support
Monday ~ Friday, 7:30AM ~ 6:00PM Pacific Standard Time User’s Guide SALE, INSTALLATION, Technical Support TRENDware Technical Support Tel: +1-310-891-1100 Fax: +1-310-8911111 E-mail: support@trendware.com www.TRENDnet.com (Except holidays) Page 34 July,2004 MAINTENANCE, USE, Appendix C Troubleshooting... - Page 35 TK-802R_TK-1602R Rack Mount KVM Switch User’s Guide July,2004 Page 35 Appendix C Troubleshooting...
Need help?
Do you have a question about the TK-1602R and is the answer not in the manual?
Questions and answers