Table of Contents
Advertisement
Quick Links
Advertisement
Table of Contents

Related Manuals for Grundig Cosmopolit 4 WEB DAB+


Summary of Contents for Grundig Cosmopolit 4 WEB DAB+
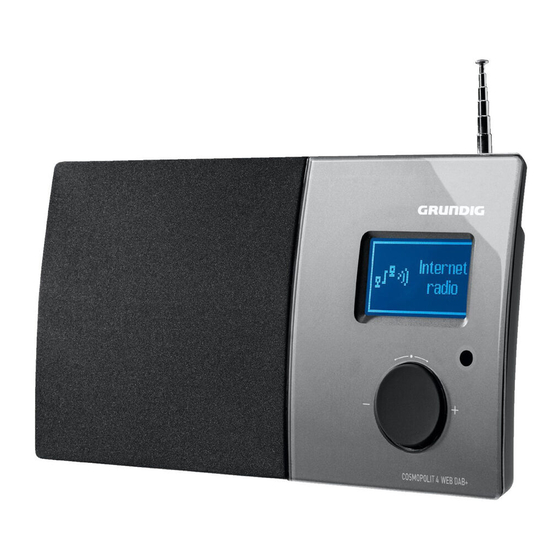
- Page 1 INTERNET RADIO Cosmopolit 4 WEB DAB+...
-
Page 2: Table Of Contents
The device controls Opening preset Internet stations The remote control O pening the most recently selected Inter- The display net stations D isplaying information about Internet 12 CONNECTIONANDPREPARATION radio stations Connecting external devices Listening to a Podcast Connecting the headphones C onnecting an MP3 player or a USB 28 INTERNETRADIOTUNINGSERVICE memory stick Registering on the GRUNDIG homepage LAN connection to the internet Creating lists of favourites WLAN connection to the internet Connecting to the mains supply 31 SHAREDMEDIAMODE Putting battery in the remote control Shared media server (audio streaming) Selecting the shared media input source 15 JOG-SHUTTLE Other playback functions F unctions and operation using the Jog- Playlist Shuttle on the device P layback of media and "remote control" The functions of Cosmopolit via the PC E xample – Setting the time and date... - Page 3 CONTENTS ---------------------------------------------------------------------------------------------------------------------------------- 37 FMMODE Selecting the tuner input source Selecting stations – from presets S electing stations – from the list Recall Preset Stereo and mono reception Displaying RDS station information 38 SPOTIFYMODE Selecting and playing back music tracks Additional functions 39 AUXMODE Listening to an external source 40 TIMERMODE Switch-on timer Sleep timer 43 SPECIALSETTINGS Displaying Software and ID information Displaying information and network status Installing an additional network 44 Setting the WLAN region 44 D eleting servers which cannot be ac- cessed R egistering the device with the WLAN router with individual network settings S etting the time, time zone and date automatically S etting the time, time zone and date manually...
-
Page 4: Cosmopolit4Webdab
COSMOPOLIT4WEBDAB+ -------------------------------------------------------------------- Packingcontents Cosmopolit 4 WEB DAB+ Remote control 2 batteries (Micro, R 03 /UM 4/AAA, 2x1,5V) Operating manual Mains adapter (6 V 1,8 A) > Specialfeatures Your device provides access to numerous inter- net radio stations via a router. You can connect the device to the internet using a LAN cable or WLAN. For Internet operation, a DSL connection and DSL flat rate are recommended. Music titles archived on a PC or hard drive (NAS - Network Attached Storage) can be played on the device using a UPnP server or enabled fold- ers via LAN or WLAN (audio streaming). The cosmopolit supports the industry standard DLNA (Digital Living Network Alliance) 1.5 digi- tal media renderer. This allows you to "Play To" other devices around your home and combine media streaming with controlling a connected media receiver while streaming content to it from another Windows 8 PC on a home network. -
Page 5: Set-Upandsafety
SET-UPANDSAFETY ----------------------------------------------------------------------------------------------- Please note the following instructions when set- If malfunctions occur due to static electricity ting up the system: charges or brief mains voltage surges, reset the device. To do this, pull out the mains adapt- The device is designed for the playback of er and connect it again after a few seconds. audio signals. Any other use is expressly pro- hibited. Continuous use at high volume level can cause damage to the If you want to set up the device on wall shelves user’s hearing. -
Page 6: Overview
OVERVIEW - --------------------------------------------------------------------------------------------------------------------------------- Thedevicecontrols Thefrontofthedevice LCDDisplay IRSensor Jog-Shuttle Jog-Shuttle + T urn left or right to select menu options or to adjust the volume. P ress to activate and confirm the functions and the menus. F or more details, please see “Jog-Shuttle” section. LCDDisplay D isplay of the device, for more details, please see “The device displays” section. I nfrared sensor for remote con- trol signals. 6 ENGLISH... - Page 7 OVERVIEW - --------------------------------------------------------------------------------------------------------------------------------- Thetopofthedevice Antenna MENU MODE ON/OFF MENU O pens the main menu (depen- ding on the operating mode selected) and switches back to the display for the time, date and other information. S witches back to the previous menu option in the menu. FAV O pens the favorite list. MODE S elects the different audio sources for Internet radio, Spotify, Music player, DAB radio, FM radio and Aux In modes. ON/OFF S witches the device to and from standby mode. Antenna elescopic antenna for DAB and FM reception. 7 ENGLISH...
- Page 8 OVERVIEW - --------------------------------------------------------------------------------------------------------------------------------- Thebackofthedevice WiFi-Antenna LINEOUT AUXIN DCIN Wi-Fi USB Antenna for wireless U SB port type A. For con- necting MP3 player, a USB Antenna internetreception. memory stick or a card- LINEOUT A udio signal output for reading device. connecting to an external LAN L AN socket for connecting source. to internet. AUXIN A udio signal input for LED (green/yellow) N etwork status display. connecting an external source. DCIN F or connecting the power H eadphone socket for supply unit.
-
Page 9: The Remote Control
OVERVIEW - --------------------------------------------------------------------------------------------------------------------------------- Theremotecontrol S witches the device to standby mode and from standby mode to the last input source selected. S elects the audio sources for Inter- net radio, Spotify, Music player, DAB radio, FM radio and Aux In modes. 1-0 N umber buttons, stores and selects presets for Internet, DAB and FM stations (in Internet and tuner mode). FAV S tores a station as a preset and opens the preset menu. S witches the loudspeaker of the device to mute and back on again. İ D isplays information on the Internet, DAB and FM radio stations as well as when using the music archive. C hanges the brightness of display. O pens the sound setting options (such as: »Normal«, »Flat«, etc.). MENU O pens the main menu (depending on the operating mode selected) and switches back to the display for the time, date and other informa-... - Page 10 OVERVIEW - --------------------------------------------------------------------------------------------------------------------------------- / M oves the cursor in the menu up or down. In radio mode: Press to start the FM station search, it stops when a station is found; press briefly to change the fre- quency backwards or forwards in 50 kHz steps. S witches in the menu one step for- wards. S witches in the menu one step back- wards. Confirms selected option. + Sets the volume. S tarts and pauses playback. I nterrupts the playback (in USB mode). / I n USB mode: Briefly press to search backwards or forwards for files or tracks; press and hold to search back- wards and forwards for a certain passage of a track. I n USB mode: Repeats all files or tracks in the current list. AL1AL2 O pens Alarm 1 or Alarm 2 menu; terminated the alarm.
-
Page 11: The Display
OVERVIEW - --------------------------------------------------------------------------------------------------------------------------------- Thedisplay Time/Date 11:25 ANTENNE BAYERN Playing The dot-matrix display provides information T he switch-on timer is active. required during operation. The sleep timer is active. In standby: Displays the time. ANTENNE BAYERN Mute function is active. A ctive: Displays the input source (e.g. DAB Radio) and the time. I n USB mode: All files in the Displays the various menus and current album are repeated. information about the radio I n Internet mode: Wi-Fi signal stations and playing times in strength. USB mode. Pause. 11 ENGLISH... -
Page 12: Connecting External Devices
CONNECTIONANDPREPARATION --------------------------------------- Connectingexternaldevices ConnectinganMP3playerora USBmemorystick The device supports most MP3 Players or USB memory sticks. Note: The device must be switched off while the USB connection is being made. If it is not switched off, data could be lost. Note: Switch the device off before you connect ex- ternal devices. 1 Use a standard audio cable to connect the au- dio output of the external device to the socket »AUXIN« on the back of the device. Connectingtheheadphones 1 Connect the USB interface of the MP3 player to the »USB« socket on the device (on the back) using a standard USB cable;... -
Page 13: Lan Connection To The Internet
CONNECTIONANDPREPARATION --------------------------------------- LANconnectiontotheinternet Telephone socket Splitter Modem/Router Media servers on the computer Cosmopolit 4 WEB DAB+ Note: Notes: Switch the device off before you connect it The lines represent the function. to the internet. Internet radio 1Connect the Ethernet socket of the modem/ M edia servers (audio router to the »LAN« socket of the device us- streaming) ing a standard network cable (Twisted pair, The data throughput level is 10/100 Mbit. RJ45 plug). WLANconnectiontotheinternet Telephone socket Splitter Modem/Router Laptop Media servers on hard drive (NAS- Network Attached Storage) Cosmopolit 4 WEB DAB+ Notes: Note: The quality of the radio signal depends on The lines represent the function. the distance between the device and your Internet radio modem/router. Music archive (audio streaming) The substance of the building at the installa- WLAN... -
Page 14: Connecting To The Mains Supply
CONNECTIONANDPREPARATION --------------------------------------- Connectingtothemainssupply Puttingbatteryintheremote control Notes: Check that the mains voltage on the type plate (on the back of the power adapter) corresponds to your local mains supply. If this is not the case, contact your specialist dealer. Before connecting the power adapter plug to the wall socket, ensure that all other con- nections have been made. -
Page 15: 15 Jog-Shuttle
JOG-SHUTTLE ------------------------------------------------------------------------------------------------------------------------ Functionsandoperationusing Example–Settingthetimeand theJog-Shuttleonthedevice dateautomatically As an alternative to using the remote control, you 1 Press »MENU« to open the menu. can also select and confirm the selected opera- – T he menu appears; the content depends on tions and functions using the Jog-Shuttle. the the current operating mode. 2 Select »Main menu« by turning the Jog-Shuttle Thefunctions and confirm by pressing the Jog-Shuttle. If no menu is selected, you can adjust the volume – The »Main menu« appears. with the Jog-Shuttle. Time/Date Main menu If a menu is activated, by turning the Jog-Shuttle Internet radio you can select several menu options or enter dig- Spotify its/characters. Music player Confirm the selection by pressing the Jog-Shuttle. You can activate the main menu by pressing the »MENU« button, after finishing the settings, 3 Select the option »System settings« by turning switch back to the previous menu by pressing the... -
Page 16: Menu Navigation
SETTINGS - -------------------------------------------------------------------------------------------------------------------------------------- Menunavigation StartFirstInstallation 1 First switch on the device by pressing » « on the Press »MENU« on the device or on the remote control, select »Main menu« using » « or » « or remote control or »ON/OFF« on the device. by turning the Jog-Shuttle, and confirm by press- – Display: »Setup wizard« menu opens. ing the Jog-Shuttle or »OK« on the remote con- Setup wizard Time/Date trol. In the main menu, you can select several sources Start now? Internet radio, Music player, DAB radio, FM ra- dio, Auxiliary Input and the »Sleep«, »Alarms« and »System settings« menus. Select the sources or submenus by pressing 2 Select the push button »YES« by pressing » « » « or » « or by turning the Jog-Shuttle and confirm by pressing the Jog-Shuttle or »OK« on or » « or by turning the Jog-Shuttle and con- the remote control. - Page 17 SETTINGS - -------------------------------------------------------------------------------------------------------------------------------------- 5 Select the input source from which the automat- 8If the device is to be switched on via the network, ic time synchronisation should be performed. select the »YES« button with » « or » « or by Selection options: turning the jog shuttle and confirm with »OK«. – »Update from DAB«; If the device is not to be switched on (low – »Update from FM«; stand-by power), select the »NO« button with – »Update from Network« (from an Internet » « or » « or by turning the jog shuttle and station); confirm with »OK«. – »No update« (no automatic time synchroni- – The menu »Wlan region« appears. sation). Wlan region Time/Date Select one of the options by pressing »...
- Page 18 SETTINGS - -------------------------------------------------------------------------------------------------------------------------------------- If the network name (SSID) is suppressed Key: Time/Date on the WLAN router for security reasons, the network cannot be found. It must then 0123456789 BKSP be entered manually. Select the option abcdefghijklmn »[Manual config]« with » « or » « or by Λ...
-
Page 19: Setting Dab Stations
SETTINGS - -------------------------------------------------------------------------------------------------------------------------------------- SettingDABstations Manualstationsearch If you know the frequencies or the transmission Your device has a DAB/ DAB+ (Digital Audio channels of the ensembles (multiplexes), you can Broadcasting) receiver unit which enables crys- also search for DAB stations manually. tal-clear radio reception in CD quality, i.e. with- out hissing or crackling. 1 Press »MENU« to open the DAB menu. DAB stations are combined into ensembles (mul- 2 Select the option »Manual tune« by pressing tiplexes) at regional and national levels. An en- » « or » « or by turning the Jog-Shuttle and semble contains several stations broadcast on confirm by pressing »OK«. the same frequency. One individual station can – Display: »5A 174.928MHz«. -
Page 20: Setting Fm Stations
SETTINGS - -------------------------------------------------------------------------------------------------------------------------------------- Deletnotavailablestationsfrom SettingDynamicRangeControl thestationlist (DRC)forDABstations The names of the DAB stations remain in the When you activate Dynamic Range Control station list even after a new automatic search. (DRC), you can hear quiet sounds better in a However, these DAB stations can no longer be loud environment. -
Page 21: Installing Spotify
SETTINGS - -------------------------------------------------------------------------------------------------------------------------------------- Automaticstationsearch InstallingSpotify 1 Press and hold » « or » « or press the Jog- If you wish to play back the wide selection of music available from “Spotify”, you need to load Shuttle. When you release the button, the auto- the application onto your mobile phone or tablet matic search stops at the next station. PC, install it and purchase the premium version. – I f RDS information is transmitted by the The mobile phone/tablet PC must be registered broadcaster, then the device saves the sta- in the same WLAN network as your Cosmopolit 4. tion name. If station and title information is transmitted, it will appear as ticker text after 1Download the “Spotify” application to your a short time. mobile phone/tablet PC and install it. 2Set up and account. Tuningstationsmanually 3Select premium version. 1 Move the frequency forward in brief steps by repeatedly pressing »... -
Page 22: Setting The Sound Effect "My Eq
SETTINGS - -------------------------------------------------------------------------------------------------------------------------------------- Settingthesoundeffect“MyEQ” 1 Press »EQ« on the remote control to open the »Equaliser« menu. 2 Select the option »My EQ profile setup« by pressing » « or » « or by turning the Jog- Shuttle and confirm by pressing »OK«. Time/Date Equaliser Normal Flat Jazz Rock Movie 3 Select the option »Bass« by pressing » « or »... -
Page 23: Switching On And Off
GENERALFUNCTIONS --------------------------------------------------------------------------------------- Switchingonandoff Byusingthemenu 1 Press »MENU« to open the menu. 1 Switch on the device from standby mode by pressing » « on the remote control or 2 Select the »Main menu« by pressing » « or »ON/OFF« on the device. » « or by turning the Jog-Shuttle and confirm – D isplay: The system switches to the last by pressing »OK«. -
Page 24: Listening To An Internet Radio Station
INTERNETRADIOMODE - ------------------------------------------------------------------------------- ListeningtoanInternetradio SearchingforInternetradiosta- station tionsin»Location«category 1 In the »Stations« menu, select the option »Loca- You can browse the catalogue of Internet radio stations and classify them by genre (style of mu- tion« by pressing » « or » « or by turning the sic), by country or by popularity. Jog-Shuttle and confirm by pressing »OK. The stations are organized in a hierarchical Time/Date Location menu in the same way files are organized in di- Africa > rectories on a computer. Asia > After successfully connecting to the Internet, select Caribbean > the »Internet radio« menu in the »Main menu« Central >... - Page 25 INTERNETRADIOMODE - ------------------------------------------------------------------------------- SearchingforInternetradio SearchingforInternetradiosta- stationsinthe»Genre«category tionsbyname 1 In the »Stations« menu, select the »Genre« op- 1 In the »Stations« menu, select »Search stations« tion by pressing » « or » « or by turning the option by pressing » « or » « or by turning Jog-Shuttle and confirm by pressing »OK«. the Jog-Shuttle and confirm by pressing »OK«. Stations Time/Date Time/Date Genre Alternative > Ambient > 0123456789 ABCD BKSP Big Band > EFGHIJKLMNOPQR Bluegrass > STUVWXYZ CANCEL Blues > 2 Press »...
-
Page 26: Storing Internet Radio Stations On Presets
INTERNETRADIOMODE - ------------------------------------------------------------------------------- SelectingthemostpopularInternet StoringInternetradiostations radiostations onpresets You can use this function to select radio stations You can use the remote control to fill 10 presets that are most frequently listened to. with the Internet radio stations of your choice. If you assign the presets again, the previously 1 In the »Stations« menu, select the »Popular sta- saved stations are overwritten. tions« option by pressing » « or » « or by 1 Search for the Internet radio station as de- turning the Jog-Shuttle and confirm by pressing scribed. -
Page 27: Listening To A Podcast
INTERNETRADIOMODE - ------------------------------------------------------------------------------- Openingthemostrecentlyse- ListeningtoaPodcast lectedInternetstations Unlike a radio station that is broadcast live, a podcast can contain several programs which are The device saves the 10 most recently selected updated regularly and automatically. The pod- radio stations in a folder which you can open at cast and associated programs can be played at the same time as the station list. any time. 1 In the »Station list« menu, select the »Last lis- These programs may date back several weeks or tened« option by pressing » « or » « or by they may have just appeared. turning the Jog-Shuttle and confirm by pressing 1 Press »MENU« to open the menu. »OK«. 2 Select the radio station by pressing »... -
Page 28: Registering On The Grundig Homepage
INTERNETRADIOTUNINGSERVICE -------------------------------------- RegisteringontheGRUNDIG Creatinglistsoffavourites homepage You can sort radio stations which the V-Tuner In- ternet service provides to GRUNDIG customers You need to complete a one-time registration of into a favourites list. This gives you swift access your device on the GRUNDIG page “GRUN- to your favourite radio stations. DIG INTERNET RADIO TUNING SERVICE” stat- ing the MAC address of your device. You can only conduct this process on a PC. The current list is loaded when the device is You can search for stations on this web page switched on. and listen to them. When logging on, the device... - Page 29 To check the radio stations, select the start 3 Enter the name of a new favourites group in page and click on the favourites group. You the entry field and confirm by pressing the » « will see the new radio stations. button; 6 Exit the “GRUNDIG INTERNET RADIO TUN- ING SERVICE” Internet page using the »Log- open the name field, select a favourites group out« button. and confirm by pressing the » «button. Note: – T he radio station is stored in the favourites Radio stations that are no longer required group.
- Page 30 You cannot play back every radio station on list«, »My Added Stations«. your device that you can listen to on your com- puter. These radio stations require a special me- dia player that can only be installed on a PC. 1 Start the Internet browser on your PC. 2 Enter the address “www.grundig.radiosetup. com”. – T he “GRUNDIG INTERNET RADIO TUN- ING SERVICE” page appears. 3 Enter your e-mail address and password and confirm. 4 Click the “My added radio stations” line; if radio stations are already available, click the » « button after the line “Add Another Station”.
-
Page 31: Shared Media Server (Audio Streaming)
SHAREDMEDIAMODE - ------------------------------------------------------------------------------------- Sharedmediaserver(audio 3 Select the required option by pressing » « or » « or by turning the Jog-Shuttle and confirm streaming) by pressing »OK«. This function allows you to make a selection by – T he selection list appears in the display. artist and track, as well as by album, genre, etc.; this selection depends on the structure of the 4 Select the required track by pressing » « or music archive and on the UPnP server software » « or by turning the Jog-Shuttle and confirm in use (e.g. Nero Media Home, Windows Me- by pressing »OK«. dia Player 12). Access times may be prolonged – I f a title is selected, playback of the track depending on the size of the music archive, and starts. - Page 32 SHAREDMEDIAMODE - ------------------------------------------------------------------------------------- Playingplaylists Playbackofmediaand"remote control"ofCosmopolitviathePC 1 Select the input source »Music player« by pressing »M« on the remote control or using With a PC running on Windows 8 operating sys- »MODE« on the device. tem and the DLNA 1.5 industry standard (Digi- tal Living Network Alliance), you can play back 2 Select the option »My playlist« by pressing media stored on the PC using the Cosmopolit. » « or » « or by turning the Jog-Shuttle on Windows 8 provides the function "Play to..." for the device, and confirm by pressing »OK«.
- Page 33 SHAREDMEDIAMODE - ------------------------------------------------------------------------------------- 4 Click the »Play to...« button, then click on the name or symbol for Cosmopolit 4. – P laying starts. Note: Operation via the Cosmopolit 4 is no longer possible. 5 The following functions are available in the Windows Media Player for operating the Cos- mopolit 4: – Adjust volume; – P ause, continue, and stop play; – S elect next or previous title; – Select the Repeat function. Playusingthe"Playto..."function withouttheWindowsMediaPlayer You can also play albums or songs from the PC on the Cosmopolit 4 without using the Windows Media Player. 1 Click on the required album/song. 2 Press the right mouse button and click on the "Play to..." menu option. – P laying starts. 3 The following functions are available for oper- ating the Cosmopolit 4: – Adjust volume;...
-
Page 34: Laying The Contents Of A Usb Memory Stick
USBMODE - --------------------------------------------------------------------------------------------------------------------------------- PlayingthecontentsofaUSB 7 Press »OK« to start playback. – D isplay: Playback starts, elapsed playing memorystick time, total playing time and file information 1 Switch off the device from standby mode appears in the display. by pressing » « on the remote control or 8 Press » « on the remote control to stop play- »ON/OFF« on the device. -
Page 35: Repeating All Files Or Tracks (Repeat All)
USBMODE - --------------------------------------------------------------------------------------------------------------------------------- Repeatingallfilesortracks Never remove USB devices during opera- tion. This could damage the USB device and (RepeatAll) the device. Any such damage will invalidate 1 During playback press » « once on the re- your warranty. mote control. – Display: » «. – A ll the tracks or files are played back repeat- edly. 2 To quit this function, press » « on the remote control. – Display: » « disappears from the display. Playingtracksinrandomorder 1 Open the »Music player« menu by pressing »MENU«. -
Page 36: Selecting The Dab Input Source
DABMODE --------------------------------------------------------------------------------------------------------------------------------- SelectingtheDABinputsource DisplayingDABstation information 1 Press »M« repeatedly on the remote control or »MODE« on the device until »DAB radio« ap- 1 To display information on the current DAB sta- pears on display. tion, press »i« repeatedly. – The following displays appear in succession: SelectingaDABstation–from The location and the frequency; thestationlist reference to signal interference, e.g. The available DAB stations are stored in a »Sta- »Signal error 10« (at optimum signal tion list«. »Signal error 0«); Bit rate, broadcasting format and the 1 Open the DAB menu using »MENU«. channel; 2 Select the option »Station list« by pressing the current date; » « or » « or by turning the Jog-Shuttle, and radio text as ticker text open by pressing »OK«. Note: Time/Date Station list The information is displayed continuously Bayern 1 Nord until »i« is pressed again. -
Page 37: Selecting The Tuner Input Source
FMMODE -------------------------------------------------------------------------------------------------------------------------------------- Selectingthetunerinputsource DisplayingRDSstationinforma- tion 1 Press »M« repeatedly on the remote control or »MODE« on the device until »FM radio« ap- If the device is receiving a RDS station, the sta- tion name and »R.D.S« appear in the display pears on the display. (if no information is available, the reception fre- Selectingstations–frompresets quency appears in the display). 1 In the »FM radio« mode, press »1« to »0« on Station and track information appear as ticker text (radio text). If radio text is not available, the remote control to select the presets from 1 other information can be displayed as an alter- to 10; native. – T he frequency of the station and the preset number appear in the display and the sta- 1 To display information on the current RDS sta- tion is then played. -
Page 38: Selecting And Playing Back Music Tracks
SPOTIFYMODE ----------------------------------------------------------------------------------------------------------------- The Spotify software is subject to third party li- censes found here: www.spotify.com/connect/ third-party-licenses For descriptive Spotify service copy, feel free to use approved copy found on www.spotify.com For instructions on how to set up Spotify users should be guided to the main Spotify Connect page: www.spotify.com/connect where up to date set up instructions are kept. Note: The mobile phone or tablet PC must be reg- istered in the same WLAN network as your Cosmopolit 4. Selectingandplayingbackmusic tracks 1 Switch on the device from stand-by with » « on the remote control or »ON/OFF« on the device. -
Page 39: Listening To An External Source
AUXMODE -------------------------------------------------------------------------------------------------------------------------------- Listeningtoanexternalsource You can listen to the audio signal from the ex- ternal device connected through your system’s speakers. 1 Switch on the device from standby mode by pressing » « on the remote control or »ON/OFF« on the device. 2Use a standard audio cable (not supplied) to connect »AUXIN« on the back of the de- vice to an AUDIO OUT socket on the external equipment. 3 Press »M« repeatedly on the remote control or »MODE« on the device until »Aux in« appears in the display. 4 Start playback on the external device. 39 ENGLISH... -
Page 40: Switch-On Timer
TIMERMODE -------------------------------------------------------------------------------------------------------------------------- Your device has 2 timer modes: 7 Select the option »Time« by pressing » « or – T wo switch-on timer, which switches the de- » « or by turning the Jog-Shuttle and confirm vice on at the set time and wakes you with by pressing »OK«. the input source you selected. – Display: The clock digits for the hours flash. – T he sleep timer, which switches the device Press » « or » « or turn the Jog-Shuttle to set off at a preset time. the alarm hour and confirm by pressing »OK«. – D isplay: The clock digits for the minutes Switch-ontimer flash. - Page 41 TIMERMODE -------------------------------------------------------------------------------------------------------------------------- Activatinganddeactivatingthe Notes: timer To set the second alarm time (»Alarm 2«) repeat steps 5 to 10. 1 Open the option »Alarm« using »AL1« and The setting for the alarm times 1 and 2 can »AL2« on the remote control. also be opened directly using the buttons – The »Alarm« menu appears. »AL1« and »AL2« on the remote control. 2 Select the option »Enable« by pressing » « or If no button is pressed for 10 seconds while » « or by turning the Jog-Shuttle and confirm setting, the system will quit the process auto- by pressing »OK«. matically, and you have to start again. 3 To deactivate »Alarm 1« or »Alarm 2«, select 11 S witch the device to standby by pressing »...
-
Page 42: Sleep Timer
TIMERMODE -------------------------------------------------------------------------------------------------------------------------- Sleeptimer Cancellingthesleeptimer 1 To switch off the sleep timer before the set Settingthesleeptimer switch-off time, refer to previous section and By using the button »S« select »Sleep off« at step 3; 1 Switch on the device by pressing » « on the or remote control or »ON/OFF« on the device- and select the preferred sound source. switch the device to standby mode by pressing » « on the remote control or »ON/OFF« on 2 Open the sleep menu by pressing »S« on the the device. remote control. 3 To set the switch-off time from »15«, »30«, »45«, »60«, press »S« repeatedly on the re- mote control or turn the Jog-Shuttle and con- firm by pressing the Jog-Shuttle or »OK« on... -
Page 43: Displaying Software And Id Information
SPECIALSETTINGS ----------------------------------------------------------------------------------------------------- DisplayingSoftwareandID »IP address:« (e.g. 192.168.99.131); »Subnet mask:« (e.g. 255.255.255.0); information »Gateway address:« (e.g. 192.168.2.1); 1 Press »MENU« to open the menu. »Primary DNS:« (e.g. 192.168.2.1) 2 Select the option »System settings« by pressing »Secondary DNS:« (e.g. 0.0.0.0). » « or » « or by turning the Jog-Shuttle and 6 Press »MENU« to end the display. confirm by pressing »OK«. Installinganadditionalnetwork 3 Select the option »Info« by pressing » « or » « or by turning the Jog-Shuttle and confirm Use this function when you wish to operate your by pressing »OK«. device at a different location using a different network. Time/Date Info The first network (home network) is retained. -
Page 44: Setting The Wlan Region
SPECIALSETTINGS ----------------------------------------------------------------------------------------------------- encrypted), and the cursor is positioned at SettingtheWLANregion the first input field. You must set the WLAN region in accordance with the location of the device. Note: If the network is encrypted, the network key 1 Press »MENU« to open the menu. (security code WEP or WPA) must be en- 2 Select the option »System settings« by pressing tered. » « or » « or by turning the Jog-Shuttle and 6 Enter network key: open using »OK«. Enter the first character by pressing » «, » «, 3 Select the option »Network« by pressing » « » « or » « or by turning the Jog-Shuttle and or »... - Page 45 SPECIALSETTINGS ----------------------------------------------------------------------------------------------------- Registeringthedevicewiththe 7 Enter the IP address. Select the first number by pressing » « or WLANrouterwithindividual » « or by turning the Jog-Shuttle. networksettings Select the next digit position by pressing » « or These settings require advanced knowledge of by turning the Jog-Shuttle (you can switch back network configuration. by pressing » « on the remote control). 1 Press »MENU« to open the menu. Repeat the procedure for all characters. Confirm the IP address by pressing »OK«. 2 Select the option »System settings« by pressing » « or » « or by turning the Jog-Shuttle and Time/Date IP settings confirm by pressing »OK«. IP adress 3 Select the option »Network« by pressing » « 10 . 134 . 10 . 254 or »...
- Page 46 SPECIALSETTINGS ----------------------------------------------------------------------------------------------------- 11 Enter the Secondary DNS. Note: S elect the first number by pressing » « or You can select different encryption levels: » « or by turning the Jog-Shuttle. »Open« – Choose between »Disabled« and S elect the next digit position by pressing » « »WEP«. or by turning the Jog-Shuttle (you can switch »Pre-Shared Key« – Choose between »Disa- back by pressing » « on the remote control). bled« and »WEP«. Repeat the procedure for all characters. »WPA« – Choose between »TKIP« and »AES«. Confirm the number by pressing »OK«. »WPA2«: highest security level – Choose between »TKIP« and »AES«. Note: The SSID (Service Set Identifier) is the 14 Enter encryption level.
- Page 47 SPECIALSETTINGS ----------------------------------------------------------------------------------------------------- Settingthetime,timezoneand Settingthetime,timezoneand dateautomatically datemanually 1 Press »MENU« to open the menu. 1 Press »MENU« to open the menu. 2 Select the option »System settings« by pressing 2 Select the option »System settings« by pressing » « or » « or by turning the Jog-Shuttle and » « or » « or by turning the Jog-Shuttle and confirm by pressing »OK«. confirm by pressing »OK«. 3 Select the option »Time/Date« by pressing 3 Select the option »Time/Date« by pressing » « or » « or by turning the Jog-Shuttle and » « or » « or by turning the Jog-Shuttle and confirm by pressing »OK«. confirm by pressing »OK«. 4 Select the option »Auto update« by pressing 4 Select the option »Set format« by pressing »...
-
Page 48: Updating The Device Software
SPECIALSETTINGS ----------------------------------------------------------------------------------------------------- Updatingthedevicesoftware 5 Press »MENU« to end the setting. This function enables you to use the device with Restoringthedefaultsettings the latest software. (reset) 1 Press »MENU« on the device or on the remote This function enables you to reset all the custom control, and select the »Main menu« by press- settings back to the default settings (Internet, ing » « or » « or by turning the Jog-Shuttle DAB and FM stations, time, alarm times and net- and confirm by pressing »OK«. work access data are deleted). 2 In the »Main menu«, select the option »System 1 Press »MENU« to open the menu. settings« by pressing » « or » « or by turning the Jog-Shuttle and confirm by pressing »OK«. 2 Select the option »System settings« by pressing » « or » « or by turning the Jog-Shuttle and 3 Select the option »Software update« by press- confirm by pressing »OK«. ing » « or » « or by turning the Jog-Shuttle and confirm by pressing »OK. 3 Select the option »Factory Reset« by pressing – T he »Software update« menu appears, two »... -
Page 49: Glossary
INFORMATION - ----------------------------------------------------------------------------------------------------------------- Glossary NAS(networkaccessstorage) The abbreviation NAS is used for devices that Bootloaderversion provide data from a hard drive to a network. Boot loader is a software application that is loaded by the device firmware from a boot- Networkname(SSID) capable medium and then executed. The boot The network name (SSID – service set identifier) loader then loads further parts of the operating is the term used for the identification of a wireless system. network that is based on IEEE 802.11. Every wireless LAN has a configurable SSID, Domainnamesystem which uniquely identifies the wireless network. - Page 50 INFORMATION - ----------------------------------------------------------------------------------------------------------------- Protected Access (WPA) – a part of the (then) Proxyserver forthcoming IEEE standard 802.11i which would A proxy or proxy server is a service program for replace the WEP encryption procedure, which computer networks that administers data trans- was already regarded as insecure before the fer. It makes data transfer faster, and can also new standard came into force. After 802.11i increase security by implementing access control came into force, the Wi-Fi group coined the term mechanisms. WPA2. The transfer is conducted between computers or IEEE 802.11e is an industrial standard issued programs in computer networks. On the server by the Institute of Electrical and Electronics En- side, the proxy acts as a client; on the client side, gineers (IEEE) and a supplement to the wireless it acts as a server.
-
Page 51: Licence Conditions
INFORMATION - ----------------------------------------------------------------------------------------------------------------- Licenceconditions c. Have to confirm that “this product is protected for Microsoft by intellectual property rights. This product is protected by the intellectual prop- The use or distribution of this technology out- erty rights of the Microsoft Corporation. The use side of this product is prohibited unless under or distribution of such technology outside of this licence from Microsoft or an authorised sub- product is prohibited unless under licence from sidiary”. Microsoft or an authorised subsidiary. Content providers use the digital rights manage- Venice6.5licenceconditionsfor ment technology for Windows Media contained endusers in this device (“WM-DRM”) to protect the integ- rity of their content (“Secure Content”) so that By using this product user agrees to the following their intellectual property, including copyright, in End User License conditions: such content is not misappropriated. This device 1 R efrain from modifying, translating, reverse en- uses WM-DRM software to play Secure Content gineering, decompiling, disassembling or us- (“WM-DRM Software”). If the security of the... - Page 52 INFORMATION - ----------------------------------------------------------------------------------------------------------------- USBwarefromJungoLtd. 1. R edistributions of source code must retain the above copyright notice, this list of conditions Notice required: and the following disclaimer. “Copyright 1994-2005 The FreeBSD Project All 2. R edistributions in binary form must reproduce rights reserved. the above copyright notice, this list of condi- Redistribution and use in source and binary tions and the following disclaimer in the docu- forms, with or without modification, are permit- mentation and/or other materials provided ted provided that the following conditions are with the distribution.
- Page 53 INFORMATION - ----------------------------------------------------------------------------------------------------------------- Redistribution and use in source and binary – R edistributions in binary form must repro- forms, with or without modification, are permit- duce the above copyright notice, this list of ted provided that the following conditions are conditions and the following disclaimer in met: the documentation and/or other materials 1. R edistributions of source code must retain the provided with the distribution.
- Page 54 INFORMATION - ----------------------------------------------------------------------------------------------------------------- 3. A ll advertising materials mentioning features 1. R edistributions of source code must retain the or use of this software must display the follow- copyright notice, this list of conditions and the ing acknowledgment: following disclaimer. "This product includes software developed by 2. R edistributions in binary form must reproduce the OpenSSL Project for use in the OpenSSL the above copyright notice, this list of condi- Toolkit. (http://www.openssl.org/)" tions and the following disclaimer in the docu- mentation and/or other materials provided 4. T he names "OpenSSL Toolkit" and "OpenSSL with the distribution.
-
Page 55: Cleaning The Device
INFORMATION - ----------------------------------------------------------------------------------------------------------------- Cleaningthedevice System Operating voltage: 1 00 – 240 V ~ , 50/60 Hz Pull out the power cord from the wall socket. with adapter Clean the device by using a soft cloth slightly Input: 1 00 – 240V ~ 50/60Hz moistened with a mild detergent solution. Do not 650mA use a solution containing alcohol, spirits, ammo- nia or abrasives. 1.8 A Output: 6 V... -
Page 56: General Faults
Cables that have accidentally been disconnected and flat bat- teries for the remote control will impair func- tioning. If the following measures do not re- solve the problem satisfactorily, please visit www.grundig.com, product range:audio, inter- net radios or contact your specialist dealer. GeneralFaults Problem Possiblecause/remedy No sound. -
Page 57: Internet Faults
INFORMATION - ----------------------------------------------------------------------------------------------------------------- Internetfaults Problem Possiblecause/remedy Desired WLAN network – WLAN network is deactivated, switch on the WLAN network. not found. – SSID is suppressed on the router; display SSID on the router. – D istance to router is too large; reduce distance to router. Connection to router not – M AC address of the device is not enabled on the router; established. enable MAC address (see menu item »Info«) on the router. – D ata transfer from the router is encrypted; Enter the network key (WEP or WPA) on the device. If this does not help, check the entire router configuration. Music playback is briefly High network usage on the radio station server. interrupted. Messagesfromthedevice Message Possiblecause/remedy Connection failed – WLAN network is deactivated; switch on the WLAN network – R ange Problem: move the device closer to the router or install an external repeater. – O ther networks are transmitting on the same channel; change channel settings on the router, then repeat the registration procedure Please wait – I ndicates a search in the netwotk for the selected radio station. - Page 58 Grundig Intermedia GmbH Beuthener Strasse 41 D–90471 Nürnberg www.grundig.com 72011 412 5500 14/45...
Need help?
Do you have a question about the Cosmopolit 4 WEB DAB+ and is the answer not in the manual?
Questions and answers