
Related Manuals for Daikin D2CND024A1AA


Summary of Contents for Daikin D2CND024A1AA
- Page 1 Servicing manual Wall-mounted condensing boiler D2CND024A1AA D2CND024A4AA D2TND012A4AA Servicing manual D2TND018A4AA English Wall-mounted condensing boiler D2TND024A4AA...
- Page 2 Version Code Description Date ESIE17-09 Document release 1.11.2017 D2CND024A1AA + D2CND024A4AA + D2TND012A4AA + Servicing manual D2TND018A4AA + D2TND024A4AA Wall-mounted condensing boiler ESIE17-09 / 2017.11...
-
Page 3: Table Of Contents
9.1.4 Error during Parameter-transfer ......7.1.2 LCD screen ............9.1.5 Re-installing an already installed BCC ....7.1.3 Status icons ............TROUBLESHOOTING 7.1.4 Daikin Eye ............. 7.1.5 Stand-by ............... 7.1.6 Flame ..............D2CND024A1AA + D2CND024A4AA + D2TND012A4AA + Servicing manual D2TND018A4AA + D2TND024A4AA Wall-mounted condensing boiler ESIE17-09 / 2017.11... -
Page 4: General Informations Symbols On The Package
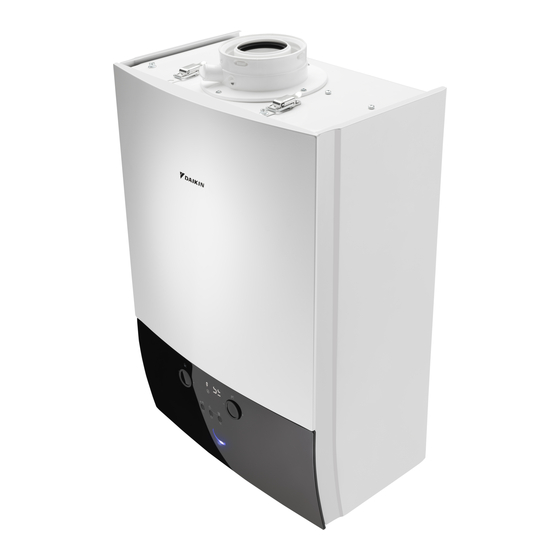
Indicates a situation that could result in death or APPLIANCE INFORMATIONS serious injury. This Daikin product is a wall-mounted gas-fired condensing combi boiler that can supply heat to central heating systems, CAUTION as well as supply domestic hot water. Depending on settings,... -
Page 5: Dimensions
Bottom view of models D2TND012A4AA, D2TND018A4AA and er. This system is also supported with a special by-pass func- D2TND024A4AA D2CND024A1AA + D2CND024A4AA + D2TND012A4AA + Servicing manual D2TND018A4AA + D2TND024A4AA Wall-mounted condensing boiler... -
Page 6: Appliance Structure And Components
Structure and components of models D2TND024A4AA, D2TND018A4AA and D2TND012A4AA Structure and components of models D2CND024A1AA, D2CND024A4AA figure-6a, Structure and components of models D2CND024A1AA and figure-6b, Structure and components of models D2TND024A4AA, D2CND024A4AA D2TND018A4AA and D2TND012A4AA Automatic air vent (heat exchanger) -
Page 7: Technical Specification
High-temperature regime means 60°C return temperature at heater inlet and 80°C flow temperature at heater outlet. b Low temperature means for condensing boilers 30°C, for low-temperature boilers 37°C and for other heaters 50°C return temperature (at heater inlet). D2CND024A1AA + D2CND024A4AA + D2TND012A4AA + Servicing manual... -
Page 8: Wiring Diagram
2 Appliance information 2.5 Wiring diagram figure-28a, Electrical wiring diagram (D2CND024A1AA,D2CND024A4AA) figure-28b, Electrical wiring diagram (D2TND024A4AA,D2TND018A4AA,D2TND012A4AA) D2CND024A1AA + D2CND024A4AA + D2TND012A4AA + Servicing manual D2TND018A4AA + D2TND024A4AA Wall-mounted condensing boiler ESIE17-09 / 2017.11... -
Page 9: Maintenance
After the maintenance and servicing operation;ensure that a Gasket b Condensate Tank all screws are tightened and all the gaskets or O-rings are c Condensate Trap Cap (1) placed. D2CND024A1AA + D2CND024A4AA + D2TND012A4AA + Servicing manual D2TND018A4AA + D2TND024A4AA Wall-mounted condensing boiler ESIE17-09 / 2017.11... -
Page 10: Minimum Installation Clearances
The water inside the plated heat exchanger will flow from the water tap. Note that a small amount of water may dwell in heat exchanger. D2CND024A1AA + D2CND024A4AA + D2TND012A4AA + Servicing manual D2TND018A4AA + D2TND024A4AA Wall-mounted condensing boiler... -
Page 11: Opening The Appliance
Shift the control panel downwards (~20 mm) and then pull it forwards (5,6). a Control panel Unscrewing the control panel a Front cover Removing the front cover D2CND024A1AA + D2CND024A4AA + D2TND012A4AA + Servicing manual D2TND018A4AA + D2TND024A4AA Wall-mounted condensing boiler ESIE17-09 / 2017.11... -
Page 12: Cable Group Removal
(8). • Dismantle wire connector of gas valve (9). • Dismantle wire connector of ionization electrode (10). (10) refer to 4.6.1 D2CND024A1AA + D2CND024A4AA + D2TND012A4AA + Servicing manual D2TND018A4AA + D2TND024A4AA Wall-mounted condensing boiler ESIE17-09 / 2017.11... - Page 13 Power supply cable (230 VAC) is connection to the wire harness. Therefore, all electrical leads connection must be taken out so that disconnect the power supply cable. D2CND024A1AA + D2CND024A4AA + D2TND012A4AA + Servicing manual D2TND018A4AA + D2TND024A4AA Wall-mounted condensing boiler...
-
Page 14: Fan Group Removal
(6). • Re-assemble in reverse order. • Ensure the non-return flab mounted correctly (between gas manifold and fan ) (7). D2CND024A1AA + D2CND024A4AA + D2TND012A4AA + Servicing manual D2TND018A4AA + D2TND024A4AA Wall-mounted condensing boiler ESIE17-09 / 2017.11... -
Page 15: Heat Exchanger And Burner Removal
Take out the pump pipe from the heat exchanger by manouevring (6). • Remove the fan group from the burner hood (refer to Section 4.4). D2CND024A1AA + D2CND024A4AA + D2TND012A4AA + Servicing manual D2TND018A4AA + D2TND024A4AA Wall-mounted condensing boiler ESIE17-09 / 2017.11... - Page 16 Detach the main heat exchanger by pushing upwards main heat exchanger (M5 allen) (9). from the hanger sheet that on the hermetic cabinet (10). (10) (10) D2CND024A1AA + D2CND024A4AA + D2TND012A4AA + Servicing manual D2TND018A4AA + D2TND024A4AA Wall-mounted condensing boiler ESIE17-09 / 2017.11...
-
Page 17: Heat Exchanger Cleaning
(1). (16) Note: There must be liquid gasket before plastic union joint gasket mounted. • Re-assemble in reverse order. D2CND024A1AA + D2CND024A4AA + D2TND012A4AA + Servicing manual D2TND018A4AA + D2TND024A4AA Wall-mounted condensing boiler ESIE17-09 / 2017.11... -
Page 18: Way Valve Motor (Stepper Motor) Removal
(4) for T-models. When pump stucks, the screw is pushed which locate at the figure by help of the screwdriver. • Re-assemble in reverse order. D2CND024A1AA + D2CND024A4AA + D2TND012A4AA + Servicing manual D2TND018A4AA + D2TND024A4AA Wall-mounted condensing boiler ESIE17-09 / 2017.11... -
Page 19: Flow Limiter Removal (Only Combi Models)
Remove the fastening clips (refer to Section 4.5). • seal on the sensor threads (7). Remove the safety pin (refer to Section 4.5). D2CND024A1AA + D2CND024A4AA + D2TND012A4AA + Servicing manual D2TND018A4AA + D2TND024A4AA Wall-mounted condensing boiler ESIE17-09 / 2017.11... -
Page 20: Plate Heat Exchanger Removal (Only Combi Models)
Undo the screw that between return group and plate heat exchanger (1). • Re-assemble in reverse order. INFORMATION Ensure the syphon part’s o-ring and gaskets mounted correctly. D2CND024A1AA + D2CND024A4AA + D2TND012A4AA + Servicing manual D2TND018A4AA + D2TND024A4AA Wall-mounted condensing boiler ESIE17-09 / 2017.11... -
Page 21: Expansion Vessel Removal
Undo the screws which connect expansion vessel and flow hydroblock (2). • Disconnect the expansion vessel hose by using wrench (3). • Re-assemble in reverse order. D2CND024A1AA + D2CND024A4AA + D2TND012A4AA + Servicing manual D2TND018A4AA + D2TND024A4AA Wall-mounted condensing boiler ESIE17-09 / 2017.11... -
Page 22: Pcb Removal
Undo the screws that connect the terminal (X1M) and control panel (10). (11) (10) • Ensure the control panel gasket mounted correctly (11). • Re-assemble in reverse order. D2CND024A1AA + D2CND024A4AA + D2TND012A4AA + Servicing manual D2TND018A4AA + D2TND024A4AA Wall-mounted condensing boiler ESIE17-09 / 2017.11... -
Page 23: Installation Informations Filling The System With Water
Filling operation should be done slowly. When pressure exceeds 0.8 bar, the error code will dis- Open the front cover of the appliance as described in this appear and Daikin Eye light will turn to blue. Turn off the manual. filling valve. -
Page 24: Combining The Boiler With Options
Fill the condensate trap by pouring 0.2 litres of water from the boiler flue outlet. DANGER X2M terminal is a high voltage terminal. Make sure that optionalsare connected to correct connector. D2CND024A1AA + D2CND024A4AA + D2TND012A4AA + Servicing manual D2TND018A4AA + D2TND024A4AA Wall-mounted condensing boiler ESIE17-09 / 2017.11... -
Page 25: Gas-Air Ratio: No Need To Adjust
Press “Cancel” and “Menu” buttons together 5 seconds to activate the sweeper mode. With sweeper mode, boi- ler can be operated at maximum and minimum capacity D2CND024A1AA + D2CND024A4AA + D2TND012A4AA + Servicing manual D2TND018A4AA + D2TND024A4AA Wall-mounted condensing boiler... -
Page 26: Operation User Interface
7.1.5 Stand-by Central heating temperature setpoint. This is either the CH flow When there is no heat demand, the Daikin eye shows this User temperature, the room temperature, with a kind of breathing pulsation of the blue and white LED. -
Page 27: Operating The Appliance
Summer mode if mode button is pressed for 5 seconds while boiler is in any d Winter mode mode. e Full-off mode D2CND024A1AA + D2CND024A4AA + D2TND012A4AA + Servicing manual D2TND018A4AA + D2TND024A4AA Wall-mounted condensing boiler ESIE17-09 / 2017.11... -
Page 28: Changing Temperature Setpoints
Room temperature setpoint is displayed. The room temperature setpoint can be adjusted from the user in- terface by means of left dial or from the Daikin room thermo- stat. icon is shown on the screen instead of the icon when central heating operation mode is enabled. -
Page 29: Central Heating (Ch) Eco Mode
When an error occurs, the normal behavior of the user inter- 7.7.1 Domestic Hot Water (DHW) Comfort Mode face is interrupted, and the status of the Daikin Eye is affect- ed. However, be aware that not all errors have the same effect Domestic hot water Comfort mode includes a domestic hot on the user interface and the Daikin Eye. -
Page 30: Menu Functions
Select an index between 00 and 14 with the right dial. Press the Back button to return to menu level 1 screen. a Change index with right dial D2CND024A1AA + D2CND024A4AA + D2TND012A4AA + Servicing manual D2TND018A4AA + D2TND024A4AA Wall-mounted condensing boiler... -
Page 31: 7.10.2 User Settings Menu
10 - 30 Opentherm RT U10: Room temperature setpoint used by Daikin Opentherm during night. RT during “Night mode”. Only visible in case Daikin Open- therm room thermostat is connected. 7.10.2.1 Detailed Explanations of User Parameters To go into the User Settings menu, press the Enter Button when the icon is displayed on the menu level 1 screen. -
Page 32: 7.10.3 Installer Settings Menu
P09: Capacity of the pump during central heating operation ºC 10 - 30 setpoint burner off, pump post run or frost protection functions. D2CND024A1AA + D2CND024A4AA + D2TND012A4AA + Servicing manual D2TND018A4AA + D2TND024A4AA Wall-mounted condensing boiler ESIE17-09 / 2017.11... -
Page 33: Entering Service Parameters (P)
The info menu icon appears on the screen. After changing parameter value; Turn left Push to apply change dial Push to cancel change D2CND024A1AA + D2CND024A4AA + D2TND012A4AA + Servicing manual D2TND018A4AA + D2TND024A4AA Wall-mounted condensing boiler ESIE17-09 / 2017.11... -
Page 34: Dhw Solar Function
2. The outdoor sensor value is out of converting range, most burner operation. P12 parameter must be chosen according probably due to sensor error. to customer preference. D2CND024A1AA + D2CND024A4AA + D2TND012A4AA + Servicing manual D2TND018A4AA + D2TND024A4AA Wall-mounted condensing boiler... -
Page 35: 7.10.6.1 Weather Compensation Calculation
PCB at the level of µA. D2CND024A1AA + D2CND024A4AA + D2TND012A4AA + Servicing manual D2TND018A4AA + D2TND024A4AA Wall-mounted condensing boiler... -
Page 36: 7.10.7.2 Entering Scot Parameters
Push b Push In this step, C parameters can not be changed. You can only monitor the values of C parameters. D2CND024A1AA + D2CND024A4AA + D2TND012A4AA + Servicing manual D2TND018A4AA + D2TND024A4AA Wall-mounted condensing boiler ESIE17-09 / 2017.11... -
Page 37: 7.10.8 Manual Scot Calibration
(about 3 - 4 sec- onds). Therefore, ensure that flue gas analyzer is not mounted to measurement point on the flue duct during the calibration. D2CND024A1AA + D2CND024A4AA + D2TND012A4AA + Servicing manual D2TND018A4AA + D2TND024A4AA Wall-mounted condensing boiler... -
Page 38: 7.10.10 Sweeper Mode
To quit the sweeper mode, press ‘Menu/Enter’ and ‘Cancel/ Back’ buttons at the same time for 5 seconds.Sweeper mode will be deactivated and boiler will turn to normal operation mode. D2CND024A1AA + D2CND024A4AA + D2TND012A4AA + Servicing manual D2TND018A4AA + D2TND024A4AA Wall-mounted condensing boiler... -
Page 39: Pump Control For By-Pass Opeariton
The function is activated every 7 x 24 hours = 1 week. Op- eration is finalized if the cylinder temperature is higher than 70oC. First Anti-Legionella-time-span after Power-On is 15 hours later. D2CND024A1AA + D2CND024A4AA + D2TND012A4AA + Servicing manual D2TND018A4AA + D2TND024A4AA Wall-mounted condensing boiler... -
Page 40: Plugging Wrong Bcc
8. After “Fin“ the boiler restarts immediately like Power On and 6. Apply the steps described described in “BCC installation procedure”. it works with the new Parameters from the BCC. D2CND024A1AA + D2CND024A4AA + D2TND012A4AA + Servicing manual D2TND018A4AA + D2TND024A4AA Wall-mounted condensing boiler... -
Page 41: Troubleshooting
D2CND024A1AA + D2CND024A4AA + D2TND012A4AA + Servicing manual D2TND018A4AA + D2TND024A4AA Wall-mounted condensing boiler ESIE17-09 / 2017.11... - Page 42 Reset the boiler. Make a manual Parameter E1-69 calibration. If problem repeats, CRC error replace the PCB. D2CND024A1AA + D2CND024A4AA + D2TND012A4AA + Servicing manual D2TND018A4AA + D2TND024A4AA Wall-mounted condensing boiler ESIE17-09 / 2017.11...
- Page 43 BCC update Re-update the BCC. BCC-ID of internal UA-66 Be sure correct BCC is plugged. EEPROM is inconsistent D2CND024A1AA + D2CND024A4AA + D2TND012A4AA + Servicing manual D2TND018A4AA + D2TND024A4AA Wall-mounted condensing boiler ESIE17-09 / 2017.11...
- Page 44 DAIKIN ISITMA VE SOĞUTMA SİSTEMLERİ SAN.TİC. A.Ş. Küçükbakkalköy Mah. Kayışdağı Cad. No: 1 Kat: 21-22 34750 Ataşehir İSTANBUL / TÜRKİYE Tel: 0216 453 27 00 Faks: 0216 671 06 00 Çağrı Merkezi: 444 999 0 Web: www.daikin.com.tr ESIE17-09 / 2017.11...
Need help?
Do you have a question about the D2CND024A1AA and is the answer not in the manual?
Questions and answers