
Subscribe to Our Youtube Channel
Related Manuals for ASTA ASTA-AS-MFP1030DNW


Summary of Contents for ASTA ASTA-AS-MFP1030DNW
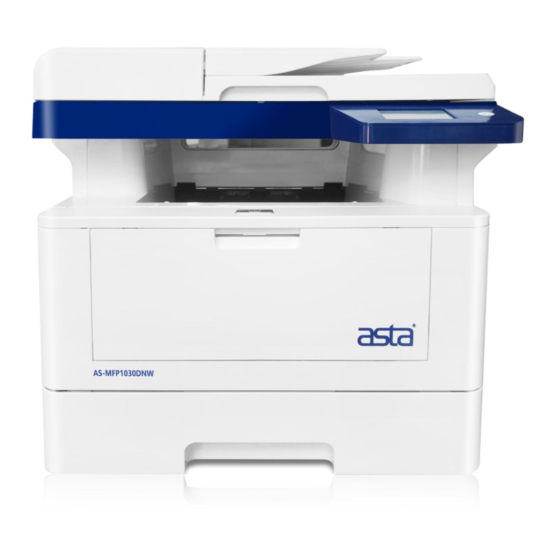
- Page 1 Operation Manual of ASTA-AS-MFP1030DNW Automatic Double-sided Laser Printing Multi-function Printer Please read this manual carefully before installing and using this product.
-
Page 2: Table Of Contents
MENU 一、Product Safety Instructions 1.1 Electrical Satety ............3 1.2 Installation Safety ............6 1.3 Operation Safety ............8 1.4 Consumable Safety ............. 11 1.5 Name And Content Of Harmful Substances In Products ...................13 1.6 Chinese Environmental Labeling Reminder ....15 1.7 Legal Restrictions ............16 二、Quick Installation Instructions .......... - Page 3 四、General Information ............79 4.1 Operation Panel Overview .......... 79 4.2 Touch LCD Overview ..........80 4.3 Function introduction of touch LCD screen ....81 4.3.1 General Setting ..........81 4.3.2 Device Information .......... 83 4.3.3 Default Setting ..........84 五、Paper Handling ..............86 5.1 Load Paper ..............
- Page 4 7.1.1 Scan to File .............126 7.1.2 Scan to Image ..........129 7.1.3 Scan to OCR ...........133 7.2 Windows Scan Job ............ 137 7.2.1 Scan Using Standard Mode ......138 7.2.2View Scan Logs ..........147 7.2.3Troubleshooting And Support ......148 7.3 LinuxScan Job ............149 7.3.1 Scan Using Standard Mode ......150 7.3.2 View Scan Logs ..........
- Page 5 9.2.4 Paper Jam In Double-sided Unit ....191 十、Routine Maintenance ............195 10.1 Replace Toner ............195 10.2 Replace Drum Unit ..........198 10.3 Cleaning Equipmen ..........201 10.3.1 Clean The Toner Drum Unit ......204 10.3.2 Cleaning The Take-Up Roller ......208...
-
Page 6: 一、Product Safety Instructions
Failure to follow these instructions may increase the risk of fire, electric shock, burn or suffocation. ASTA will not be responsible for any damage caused by the user's failure to follow the instructions in this manual. - Page 7 Warn users that if they ignore this Caution information and wrong operation, it may cause human injury or damage to the machine.
-
Page 8: Electrical Satety
(grounding) prong. This plug is only suitable for grounding type power outlets, which is a safety measure. If you cannot fit the plug into the outlet, please contact your local ASTA representative and have the outlet replaced. Never defeat the function of the grounding-type plug. - Page 9 Do not damage or change the power cord. If the power line is damaged or the insulated wire is exposed, please contact ASTA sales representative for replacement. Before cleaning this product, please turn off the machine power and unplug the power plug.
- Page 10 If any abnormality is found, first turn off the power supply of this product and unplug the power plug, and then contact the local ASTA representative. After the power switch of this product is turned off, zero energy consumption can be achieved only when...
-
Page 11: Installation Safety
Installation Safety Do not place this product in a place where the power cord may be trampled or crossed by people. Friction and excessive pressure may cause heat and eventually lead to electric shock or fire. 1. Do not place this product in the following places: (1)Near radiator or other heat sources (2)Near the place where the curtain and other inflammable... - Page 12 injury. In order to maintain the good performance of the product, the product should be used under the following environmental conditions: Temperature 10-32℃ : Humidity 20-80% : When the product is placed in a low temperature room and the room temperature rises rapidly through the heater, water droplets will form in the product and cause partial loss of printed data.
-
Page 13: Operation Safety
Operation Safety This product has safety design, and operators are not allowed to touch dangerous parts. The dangerous parts are equipped with covers or baffles that can be removed only with tools to limit the access of operators. To avoid electric shock and personal injury, do not remove these covers or baffles. - Page 14 (2) Small metal parts, such as staples or clips (3) Heavy weight If liquid seeps or metal parts slide into the product, electric shock or fire may be caused. Do not use conductive paper, such as origami paper, carbon paper or coated paper with conductive layer. In case of paper jam, these papers may cause short circuit and eventually lead to fire.
- Page 15 Please turn off the power of this product immediately, and then contact the ASTA sales representative for treatment. Please keep good ventilation when operating for a long ...
-
Page 16: Consumable Safety
remaining toner in the toner cartridge may catch fire, causing burns or explosions. If there is any toner cartridge that is no longer used, please contact ASTA sales representative for treatment. The toner drum unit and toner cartridge should be kept away from children. - Page 17 and other parts, and do not inhale the toner powder. If toner powder is attached to the skin or clothes, please clean it with soapy water. If toner particles enter the eyes, flush with plenty of water for at least 15 minutes until the pain disappears. If necessary, consult with doctor.
-
Page 18: Name And Content Of Harmful Substances In Products
Name And Content Of Harmful Substances In Products Hazardous Substances Poly Poly Merc cadmi Hexavalent brominated Part Name Lead brominated chromium diphenyl (Pb) biphenyls (Hg) (Cd) (Cr(VI)) ether (PBB) (PBDE) Left support unit × ○ ○ ○ ○ ○ Right support unit ×... - Page 19 board High-voltage power circuit × ○ ○ ○ ○ ○ board Adapter board × ○ ○ ○ ○ ○ circuit board Printed matter ○ ○ ○ ○ ○ ○ Packaging ○ ○ ○ ○ ○ ○ This form is prepared in accordance with SJ/T 11364. ○:It means that the content of the hazardous substance in all homogeneous materials of the component is below the limit specified in GB/T 26572.
-
Page 20: Chinese Environmental Labeling Reminder
Chinese Environmental Labeling Reminder 1. It is recommended to place equipment with noise greater than 63dB in a relatively independent area. 2. Recycled paper can be used. 3. When using or printing a large number of documents for a long time in a room with poor ventilation, ventilation should be timely. -
Page 21: Legal Restrictions
1.7 Legal Restrictions Copy, scan, print or use reproductions of the following documents are illegal behavior: Banknotes Draft Deposit Slip Postage stamps (stamped or unstamped) Identification Badge or Certificate Stamp Military Service or Conscription Documents ... -
Page 22: 二、Quick Installation Instructions
Quick Installation Instructions Machine Installation Instructions 1、Remove the packaging material and install the drum unit. ① Open the front cover and take out the toner drum pad and desiccant ②Take out the drum unit ③ ④ Remove the cartridge package Put back the toner drum When removing the toner cartridge package, follow the prompts on the marking strip: first take out the toner... - Page 23 put the drum unit and toner cartridge back into the printer. 2、Load the paper into the paper tray. ② 1 Unpack the paper box Adjust the bin adjustment baffle ③ ④ Insert paper Push back the tray 3、Connect the power cord and press the device power key.
-
Page 25: Windows Driver Installation Instruction
Windows Driver Installation Instruction This printer is suitable for most of the Windows operating systems on the market, such as Windows XP, Windows 7, Windows 8, Windows Server 2012, Windows 10, Windows 11 and other operating systems. This section takes the Windows 7 (Enterprise Edition) operating system as an example to introduce installation... -
Page 26: Install Local Printer Driver
2.2.1 Install Local Printer Driver The installation of drivers requires administrator privileges. Please log on to the computer using the administrator account. Close all running applications. Before installation, use the matching USB cable to connect the printer and the computer, and then turn on the printer power. During installation, if the "Find New Hardware Wizard"... - Page 27 (3) Wait for the installation progress bar to complete (4) Successfully install the local print driver, click "Next".
- Page 28 (5) Prompted to restart the computer. Checked by default, click "Finish" to complete the installation.
-
Page 29: Install Network Printer Driver
If it is disabled, please manually turn on it. Click (Seeting) > Device Information > Network > Network Setting > UDP(ON) 1 、 ASTA-AS-MFP1030DNW multi-function printer Device setting IP address information: (Refer to the network settings in section 4.3.2.3), the default... - Page 30 IP 192.167.17.100 Subnet Mask 255.255.255.0 Gateway 192.167.17.1 2、Set the IP address information of the computer Windows side. Open the computer's Network and Sharing Center Click "Local Area Connection" Click Properties to find and double-click to open ipv4...
- Page 31 Select "Use the following IP address" to set the network IP information of the computer. The default IP information is as shown in the figure below. The printer IP address and the computer network IP address must be set to the same network segment, and the IP of other PCs in the LAN should not conflict with the printer IP.
- Page 32 Start driver installation program 、 "AS-MFP1030DNW_setup.exe", select Add, and click "Next". 4、Select "Install Network Print Driver", click "Next"。 5、 During the driver installation process, the printer IP address is automatically obtained, and after confirmation, click "OK".
- Page 33 Failed to obtain printer IP address! Please check your network connection, or consult your network administrator. If you know the network IP address, you can enter it manually. 6、After successfully installing the network printer driver, click "Next".
- Page 34 7、 Prompted to restart the computer. You can leave it unchecked to restart the computer by default. Click "Finish". If the driver installation fails, please check whether the network cable is connected normally, or try to replace it with a new network cable. After installing the printer driver, try not to change the ...
- Page 35 Set the computer’s network to "obtain address automatically".
-
Page 36: Uninstall Printer Driver
2.2.3 Uninstall Printer Driver Uninstalling the driver requires administrator privileges. Please log on to the computer using the administrator account. Close all running applications. 1、Read the files in the U disk, double-click the“AS_MFP1030DNW Setup.exe”driver, and click "Next". 2、Select the print driver you want to delete and click Next. - Page 37 3、Wait for the uninstall to complete 4、Wait for the driver to be uninstalled successfully, and click "Next". 5、Prompt to restart the computer, by default select "Restart the computer now"...
-
Page 39: Troubleshooting And Support
2.2.4 Troubleshooting and Support 2.2.4.1 Installing the network printing driver can not automatically obtain the IP problem Some versions of the Windows system may have the problem that the network printer cannot automatically obtain the printer IP address when setting up the network printer driver. This problem may be caused by the following aspects: ... - Page 40 Windows 8 when setting the computer network IP, but the customized IP addresses are defined in the network property IPV4. If you have any questions during the use, please contact the system provider or the sales or after-sales personnel of ASTA.
-
Page 41: Linux Driver Installation Instructions
2.3 Linux Driver Installation Instructions This type of printer is compatible with most domestic Linux operating systems on the market, such as Tongxin UOS, Kirin V10, Kirin V10SP1 and other operating systems. This section takes Tongxin UOS (1050) and Kirin V10SP1 (2203) operating systems as examples to introduce the installation and uninstallation of the AS-MFP1030DNW automatic double-sided laser printer driver. -
Page 42: Determine Printer Driver
2.3.1 Confirm the Printer Driver Due to different domestic operating systems and CPU architectures, the driver versions used are also different. This section introduces the scope of adaptation of this model of printer and how to determine the printer driver. 2.3.1.1 Query System Information The user can find the "My Computer"... - Page 43 If the user cannot find the "My Computer" or "Computer" icon on the desktop, right-click the blank space on the desktop or use the shortcut key "Ctrl+Alt+T" to start the terminal, enter "uname -a" in the terminal, and press Back Press the Enter key to view the CUP information, enter "cat /etc/issue"...
- Page 44 2.3.1.2 Select driver package Copy the driver package from the random driver CD to the local disk, decompress it and enter the main folder. The main folder contains three folders: Union Tech UOS, Kirin V10, and Kirin SP1, which respectively represent the three domestic operating systems that are adapted.
- Page 45 UOS > amd64 signed_com.toec.toeca4series_2.6-0_amd64.deb Kirin V10 > amd64 toec.toeca4series_2.6-0_amd64.deb Kirin V10 SP1> amd64 toec.toeca4series_2.6-0_V10SP1_amd64. Among,“ ”、“ ”represents the com.toec.toeca4series toec.toeca4series driver name, "2.6-0" represents the driver version, and "amd64" represents the adapted CPU architecture. The "V10SP1" part in the Kirin V10SP1 driver name is only used as an identification to distinguish the Kirin V10 system.
-
Page 46: Install Driver
2.3.2 Driver Installation The driver installation methods mainly include double-click driver installation and terminal command installation. Next, the two installation methods will be described in turn. 2.3.2.1 Double-click the driver to install Take Union Tech 64-bit (amd64) driver of UOS system as an example. - Page 47 during the installation process, please enter the password of the computer system (usually the power-on password), click "OK" and click "Install" again to proceed to the next step. 3. After the progress bar is completed, the interface prompts "Installation successful", click "Finish" to complete the printer driver installation successfully.
- Page 49 2.3.2.2 Terminal Command Installation 1. Start the Terminal Right-click the blank space of the folder where the driver is located to open the terminal. Use the shortcut key "Ctrl+Alt+T" to open the terminal and enter the path of the folder where the driver is located.
- Page 50 When entering the password, the terminal will not give any prompt. 3. Install the driver using the command "dpkg -i [driver n ame]". Enter "dpkg -i com.toec.toeca4series_2.6-0_amd64.deb" i n the terminal, and press Enter to wait for the driver instal lation.
-
Page 51: Add Printer
2.3.3 Add Printer There are two ways to add a printer: "Add a local printer" and "Add a network printer", which respectively represent the two transmission methods of usb and network net. Next, the printer addition of the two transmission methods will be described in turn. - Page 52 (2) Click the button to enter the Add Printer dialog box. The system will automatically find and list the currently connected AS-MFP1030DNW printers. If the AS-MFP1030DNW printer is not listed in the current dialog box, you need to manually click the button on the right to search manually.
- Page 53 If the above methods cannot solve the problem, please contact the sales or after-sales personnel of ASTA. (3) Select "TOEC AS-MFP1030DNW (use usb protocol)". this time, "TOEC...
- Page 54 The printer starts to work and prints out the "Print Test Page". (5) If the printer prints a test page normally, select “Yes”. If the printer does not print a test page normally, select “No”. ...
- Page 55 "Reinstall" to install the driver again. If the above methods cannot solve the problem, please contact the sales or after-sales personnel of ASTA. (6) After adding successfully, the "Printer Device" list will display the currently added printer device.
- Page 56 2. Kirin V10 (SP1) System (1) Start “Print Manager”. Click Setting > Device > Printer (2) Click “Add”. Enter the management interface of adding a new printer. Select “TOEC AS-MFP1030DNW” in the device list, and click “Forward”.
- Page 57 AS-MFP1030DNW If there is no option in the list, please check whether the usb is connected normally. (3) Click "Forward" to proceed to the next step.
- Page 58 (4) Click “Apply ”to proceed to the next step. (5) Click "Print Test Page". And then the printer starts to work and prints out a "print test page". (6) Click“OK” to close the submitted dialog.
- Page 59 (7) Click "OK" to close the printer properties dialog box. (8) After adding successfully, the printer device list will display the currently added printer device.
- Page 61 2.3.3.2 Add Network Printer 1. Union Tech UOS System (1) AS-MFP1030DNW printer set IP address information. (Refer to the network settings in section 4.3.2.3), the default setting information is as follows: IP 192.167.17.100 Subnet Mask 255.255.255.0 Gateway 192.167.17.1 (2) Add “wired network” on the computer side. ...
- Page 62 (3) Click button. Set the “Method” of IPV4 to “Manual”, and fill in the three IP address information of “IP Address”, “Subnet Mask” and “Gateway”. The currently filled IP address information defaults as shown in the figure below. The computer setting network IP address should belong to the same network segment as the printer IP address, and the IP of other devices in the LAN should not conflict with the printer IP.
- Page 63 (5) Start the "Print Manager". Click (Start) > Print Manager. (6) Click button. Enter the Add Printer dialog box, the system will automatically search for network printers and list the currently connected AS-MFP1030DNW printers.
- Page 64 If the network printer cannot be found in the "Select Printer" list, click "Manual Search" and enter the IP address of the printer in the address bar on the right (default IP: 192.167.17.100). Select the network printer. "AS-MFP1030DNW (192.167.17.100) (using socket protocol)"...
- Page 65 (8) Click "Next". (9) Select Manufacturer and Device Information. According to the prompts, select the manufacturer "Toec", the model "AS-MFP1030DNW", and the driver "TOEC AS-MFP1030DNW, 1.0". Click "Install Driver" when finished.
- Page 66 (10)Click "Print Test Page". At this time, the printer starts to work and prints out a "print test page".
- Page 67 (11)If the printer prints a test page normally, please select "Yes". If the printer does not print a test page normally,please select “No”. Users can click "Troubleshooting" to view the problem, and reinstall the driver after solving the problem, or click "Reinstall"...
- Page 68 ASTA. (12)After adding successfully, the "Printer Device" list will display the currently added printer device. 2. Kirin V10(SP1)System (1) AS-MFP1030DNW printer set IP address information. (Refer to the network settings in section 4.3.2.3), the default setting information is as follows:...
- Page 69 Click (Start) > (Setting) > Net work > Wired Network。 (3) Click "Add Wired Network". Set the wired network parameters, the default parameters are shown in the figure below.
- Page 70 The computer setting network IP address should belong to the same network segment as the printer IP address, and the IP of other devices in the LAN should not conflict with the printer IP. (4) Click "Confirm" and click to connect to the current network.
- Page 71 (6) Click open "Network Printer" select "AS-MFP1030DNW” (192.167.17.100)". Click "Forward". If the network printer cannot be found in the device list, click "Find Network Printer", enter the IP address of the printer (default printer IP: 192.167.17.100) in the host address bar on the right, and click "Search"...
- Page 72 (7) If an authentication dialog box pops up, click Cancel or Close. (8) Select "TOEC" and click "Forward".
- Page 73 (9) Select“AS-MFP1030DNW”and click "Forward".
- Page 74 (10)Click "Forward" to proceed to the next step. (11)Click "Apply" to proceed to the next step.
- Page 75 (12)Click "Print Test Page". And then, the printer starts to work and prints out a "print test page". (13)Click OK to close the “Submitted dialog”.
- Page 76 (14)Click "OK" ,close the printer properties dialog box. (15)After adding successfully, the printer device list will display the currently added printer device.
-
Page 77: Uninstall Driver
2.3.4 Uninstall the Driver There are two common ways to uninstall the driver, and the two uninstalling methods will be described in turn. Remove from start menu Find "TOEC A4 All-in-One Startup Tool" in the start menu, click the right mouse button and select "Uninstall", and select "OK"... - Page 78 3.Uninstall the driver. Use the terminal command "dpkg --purge [driver name]". Enter "dpkg --purge com.toec.toeca4series" in the terminal, press Enter and wait for the uninstall to complete. If "TOEC A4 Series driver remove ok" appears in the uninstall details and no error is reported, it means that the driver uninstall is complete.
-
Page 79: Troubleshooting And Support
The systems involved in this section are Union Tech UOS "Professional Edition (1050)" and Kirin SP1 "2203 (V10SP1)". If you have any questions, please contact the system provider or the sales or after-sales personnel of ASTA. 2.3.5.2 The system automatically adds a local printer problem... - Page 80 When the driver is not installed on the computer, relevant printers (including local printers and network printers) can be found in the print manager. This phenomenon is related to the operating mechanism of the computer operating system and is a normal situation of the system.
-
Page 81: 三、Product Specification
Product Specification General Specifications AS-MFP1030DNW Printer Model Printing Method Laser Printing Memory 256MB AC 220 ( 1±10% ) V , Power Supply 50Hz±1HZ Power Consumption Rated Power About 950W Size Unit: mm * 415 ** 400 *** 385 Weight(Including Consumables) About 14.5kg Noise Work... -
Page 82: Print Media Specifications
Print media specification Paper Plain paper Type A4、A5、A6、B5(JIS)、B6(JIS)、 Paper Size 16K、Letter、32K Carton Paper (Standard) 70 ~ 90 g/m Weight Maximum Up to 250 sheets of 70 g/m plain Paper paper Capacity Paper Input Paper Plain paper, thin paper, thick paper Type A4、A5、A6、B5(JIS)、B6(JIS)、... -
Page 83: Print Specifications
Print specification Automatic Duplex Printing Simulation Language Resolving Power Up to 600 dpi Single-Sided 30 ppm Printing Printing Speed Duplex Printing 15 ipm First Page Printing Time Up to 8 seconds... -
Page 84: 四、General Information
4.General Information This chapter will introduce the status information of the operation panel and LCD of the product. 4.1 Operation Panel Overview 1. Touch type (LCD) Access the menus and options displayed on the touchscreen by pressing them. -
Page 85: Touch Lcd Overview
2. Power switch Press to power on the device. Press and hold to power off the device. 4.2 Touch LCD Overview Function Screen The Functions screen is used to access various functions such as copying and scanning. 1. Model [Copy] ... -
Page 86: Function Introduction Of Touch Lcd Screen
(Toner) Displays the remaining life of the toner cartridge. Press to access the [Toner] menu. (Setting) Press to access the [Setting] menu. 4.3 Function Introduction of Touch LCD Screen Important Matters Never press the LCD screen with a sharp object such as the tip of a pen or a stylus, as this may damage the device. - Page 87 2. There are [Paper Type] and [Paper Size] options, select the desired option. 3. Press to return to the previous level or press to return to the home page. 4.3.1.2 Volume 1. Press [Settings]>[General Settings]>[Volume]. 2. Select [ON], [OFF] to set whether to enable the sound effect.
-
Page 88: Device Information
2. Press [Settings] > [General Settings] > [Ecological Energy Saving] > [Automatic Shutdown] to select the automatic shutdown time. 3. Press to return to the previous level or press to return to the home page. 4.3.2 Device Information 4.3.2.1 Serial Number 1. -
Page 89: Default Setting
2. Press [Settings]>[Device Information]>[Network], select [Network Information], you can view the device network information, and you can also change the IP, subnet mask, and gateway of the device. After the network information is changed, it is recommended to restart the device to make the changes take effect. - Page 90 2. Select [All Settings], prompt "The device will restart after reset, press OK for 2 seconds to confirm", select [OK] or [Cancel]. 3. Press to return to the previous level or press to return to the home page. 4.3.3.2 Restore Factory Settings 1.
-
Page 91: 五、Paper Handling
Paper Handling This chapter will introduce a series of settings such as paper type and paper loading method supported by this product. Load Paper 5.1.1 Load Trays When loading paper of other sizes in the paper tray, you must also change the paper size settings in the device or on the computer. - Page 92 Press and slide the bin adjustment baffle to adjust to the size of the paper used. 3. Fully unfold the stacked paper. 4. Load the paper into the tray with the printing side down. When using letterhead paper or preprinted paper, load the paper in the correct direction as shown in the illustration.
- Page 93 Face down, top facing the Face up, bottom toward the front of the carton front of the carton Do not place paper of different sizes in the paper tray at the same time, otherwise it may cause paper jam or paper feeding error.
- Page 94 Send the print job to the device.
-
Page 95: Loading The Manual Feed Tray
5.1.2 Loading The Manual Feed Tray When loading other sizes and types of paper in the manual feed tray, you must also change the paper size and paper type settings in the device or on the computer. 1. Open the manual feed tray and gently lower it. Slide the guide of the manual feed tray to adjust the width of the paper used. - Page 96 Load the paper into the manual feed tray with the printing side up. When using letterhead paper or pre-printed paper, load the paper in the correct direction as shown in the illustration. Single-sided printing Duplex printing Face up, top first Face down, bottom first 4.
-
Page 97: Paper Setting
Paper Setting 5.2.1 Change Paper Size and Paper Type When loading other sizes and types of paper in the paper tray or manual feed tray, you must change the paper size and paper type settings on the LCD screen at the same time. ... -
Page 98: Use Special Paper
4.Press to return to the previous level or press return to the home page. 5.2.2 Use special paper The sample paper must be tested before purchase to ensure the ideal printing effect. • Do not use inkjet paper, as this paper may cause paper jam or damage the equipment. - Page 99 • Letterhead paper with low-temperature dyeing or hot-melt printing • Multi-layer paper or carbonless paper • Inkjet printing paper If any of the above types of paper is used, the equipment may be damaged. The resulting damage is not within the scope of warranty service of ASTA.
-
Page 100: 六、Print Job
6.Print Job 6.1 Windows Print Job Before printing documents, read the first five chapters and install the printer driver. Take Microsoft 2007 Word under Windows 7 operating system as an example to introduce how to use a printer to print documents. -
Page 101: Print A Document
the printer. If the computer does not recognize the printer, please restart the printer or plug the USB cable again. 6.1.2 Print Document 1. Select the Print option from the File menu. 2. In the “Print” dialog box, click the “Name” drop-down list box and select AS-MFP1030DNW. - Page 102 3. Make sure you have the correct size of paper in the tray. 4. Select the desired print page in the page range. 5. Enter the required number of copies (1~999) in the number field. 6. Select the scaling scale, version number, etc. in the scaling selection.
- Page 103 8. Select the source and type of paper in Properties - Paper/Quality.
- Page 104 9.Select the paper size, print resolution and other information in Properties - Advanced 10.Change other printer settings if necessary. 11.Click OK. 12.Complete the print operation.
-
Page 105: Print Setting
6.1.3 Print Settings 6.1.3.1 Basic Option 1. Name Select the printer driver used to distribute the print job to the specified printer according to customer requirements. 2. Page Range All: print the entire document (including blank pages). Current page: print the page displayed on the screen. Page range: enter the required number of pages to be printed in the blank space, and issue the specified page number printing job. - Page 106 3.Print Content Classify and print out the different information of this document. 4.Print Print the page numbers of the entire document according to all pages, odd pages, and even pages in the range. 5.Number of Copies Enter the number of copies you want to print (1~999) in this field.
- Page 107 of copies you selected. If this option is not selected, each page will be printed repeatedly according to the set number of copies. 7.Zoom Select these options to reduce the page size of the document. 8.Number of pages per page Scale and print according to version 1, 2, 4, 6, 8 and 16 of each paper.
- Page 108 6.1.3.2 Properties Layout 1. Orientation Select the direction of the printout (portrait or landscape). 2. Print on Both Sides Select whether to print on both sides, and select whether to flip the printed paper from the long side or from the short side.
- Page 109 6.1.3.3 Properties - Paper/Quality 1. Paper source Select the paper source setting according to the printing conditions or intention. 2. Media Select the type of media you want to use. For best printing results, the device automatically adjusts the print settings based on the selected media type.
- Page 110 6.1.3.4 Properties - Other Settings 1. Zoom options Adjust the page size by adjusting the zoom ratio. 2. Watermark Watermark printing can be set here.
- Page 111 6.1.3.5 Advanced Document Settings 1. Paper size Select the paper type. 2. Copies Set the number of printed copies. 3. Image processing High quality printing can be started here. 4. Rotate 180 degrees Select this function to rotate the printed content by 180 degrees.
-
Page 112: Check Printing Status
6.1.4 Check printing status During the printing process, there are two ways to check the printing status: check the real-time printing status through the print monitoring that comes with the print driver, or enter the system's printer queue service to check. 1.View print monitoring AS-MFP1030DNW printer has its own print monitoring function, which can monitor the printing status in real time and... - Page 113 2.View printer queue Click (Start) > Printers > Printer Properties. Some systems do not have a [Printer] option in the [Start] menu. You need to enter the system's [Control Panel] in the [Start] menu, and then click [Printers] to enter the printer property management interface.
-
Page 114: Cancel The Print Job
6.1.5 Cancel The Print Job Press "Clear" to cancel the current print job. 6.2 Linux Print Job Before using the automatic double-sided laser printer to print documents, please read the first five chapters and install the printer driver. The following takes the Kirin V10SP1 operating system platform as an example to introduce how to use the printer to print documents. -
Page 115: Print A Documen
Please make sure to start the computer before starting the printer, otherwise the computer may not recognize the printer. If the computer does not recognize the printer, please restart the printer or plug the USB cable again. Print A Document 6.2.2 Since the print setting interfaces of different documents may be different under the Linux system, two common... - Page 116 6.2.2.1 Word Document Printing This type is suitable for printing word, ppt, and excel documents. Since different systems may open these three types of software differently, in order to have a better user experience and better printing results, please use WPS to open these three types of software.
- Page 117 "AS-MFP1030DNW". The "Status", "Type", "Position" and "Remarks" on the lower side reflect some information parameters of this printer. Click [Properties] to set the printing properties. The specific settings will be described in detail below. [Properties] The "Double-sided Printing", "Reverse Printing" and "Print to File"...
- Page 118 2.[Properties] Settings Click the [Properties] option in the upper right corner to enter the printer property settings. [Paper Size], double-click the menu on the right side of the paper size, a drop-down menu of paper size will appear, and you can modify the paper size according to your printing needs.
- Page 119 [Image Zoom], double-click the right menu, and a drop-down menu will appear. You can select the scaling percentage according to your printing needs. [Image Adjustment], double-click the right menu, and a drop-down menu will appear. You can adjust the image color depth according to printing needs, including no processing, light, lighter, normal, darker, and darker.
- Page 120 6.2.2.2 PDF Document Printing This type is suitable for printing PDF, txt, web pages and image files in different formats. Open this PDF document with a document viewer and choose the "Print" option from the "File" menu. Or use the printing shortcut key "Ctrl+P"...
- Page 121 In the [Copy] column, you can adjust the number of copies of the print job and set collated and non-collated. Click [Print Preview] to preview the document to be printed. 2. Page Setting: Click the [Page Setting] tab to enter the printer page setting.
- Page 122 Click the menu on the right of the [Pages per side] option, and a drop-down menu for setting the number of pages per side will appear. You can select it according to your printing needs. Click the right menu of the [Print] option, and a drop-down menu of print settings will appear.
- Page 123 3.Page Handling: Click the [Page Handling] tab to enter this page. There are no special requirements on this page, and generally no modification is required. Note: For a better printing experience, please ensure that the "Page Zoom" option is selected to "Reduce to printable area". 4.Task: Click the [Task] tab to enter this page.
- Page 124 5.Image Quality: Click the [Image Quality] tab to enter this page. This item mainly makes simple settings for image printing quality. The higher the resolution, the better the printing effect; the lower the resolution, the higher the printing speed.
- Page 125 6.Advanced: Click the [Advanced] tab to enter this page. This interface is mainly for some settings of the printer device. [Image Zoom], double-click the right menu, and a drop-down menu will appear. You can select the scaling percentage according to your printing needs. [Image Adjustment], double-click the right menu, and a drop-down menu will appear.
-
Page 126: Check Printing Status
6.2.3 Check Printing Status During the printing process, there are two ways to check the printing status: check the real-time printing status through the print monitoring that comes with the print driver, or enter the system's printer queue service to check. 1.View Print Monitoring AS-MFP1030DNW printer has its own print monitoring function, which can monitor the printing status in real time... - Page 127 simple coping methods. The color of the printer in the upper left corner will also change accordingly to remind users more eye-catching. 2.Check the Printer Queue Union UOS system Click (Start) > Print Manager > AS-MFP1030DNW > Print Queue. The printer queue will list the jobs printed by this printer, and also reflect some basic information of the print job: task number, document name, printer used, document size,...
-
Page 128: Cancel The Print Job
drop-down box to view the print queue. The printer queue will list the jobs printed by this printer, and also reflect some basic information of the print job: task number, document name, printer used, document size, submission time and printing status. Cancel The Print Job 6.2.4 On the [Start] menu, click [Printer] to enter the printer... - Page 129 Click to select the print job you want to cancel, right-click and select "Cancel" to cancel the print job in progress or in queue. When canceled, the job's status changes to "Cancel" In addition, for the job that has been canceled, you can also reprint it.
-
Page 130: 七、Scan Job
7.Scan Job This chapter will introduce the instructions for using this product to scan documents. Before using the automatic double-sided laser printer to scan documents, please read the first six chapters and install the printer driver. 7.1 Scan using the scan key on your TOEC device Send scanned documents, images or OCR documents directly to your computer. -
Page 131: Scan To File
7.1.1 Scan to File Scan documents and save them in file formats such as PDF/OFD to the scan folder on your computer. (1) Load Originals (2) Select Scan to File Click [Scan] > [To File] (1)Select Communication Method To File > USB/NET... - Page 132 (1) If you have specific parameter requirements for the generated file, you can set the scanning file parameters in advance through the computer scanning tool. Windows Scanning Tool 1) [Scan Type] 2) [Image Splitting] 3) [Generate PDF page by page] 4) [Scan mode] 5) [Resolution] 6) [Paper size]...
- Page 133 3) [Paper Size] 4) [Contrast] 5) [Brightness] 6) [Contrast] 7) [Gamma] 8) [Noise Optimization] 9) [Split] 10) [Rotate] 11) [Automatic Correction] 12) [Fill Inward] 13) [Export Multiple Pictures] 14) [Delete Blank Pages] 15) [Background Removed] 16) [Save Directory] 17) [File Name] 18) [Compressed] 19) [Save Format] Click [Apply] to save the parameters.
-
Page 134: Scan To Image
When choosing NET: Windows side computer must keep AS-MFP1030DNW Network Scanning Tool] always in the starting state. On the Linux side of the computer, keep the "TOEC-A4 scanner program" always in the starting state. If the scanning tool is not started, the control panel of the TOEC device will prompt "The scanning tool is not opened". - Page 135 (1) Load originals (2) Select Scan to Image Click [Scan] > [To Image] (1) Select Communication Method To Image > USB/NET (1) If you have specific parameter requirements for the generated file, you can set the scanning file parameters in advance through the computer scanning tool.
- Page 136 Windows Scanning Tool 1) [Scan Type] 2) [Image Splitting] 3) [Scan mode] 4) [Resolution] 5) [Paper size] 6) [Brightness] 7) [Contrast] 8) [Gamma] 9) [File Format] 10) [Image Rotation] 11) [Automatic Cutting] 12) [Export Multiple Images] 13) [Automatic Correction] 14) [Delete Blank Pages] 15) [Save Setting] 16) [Overall Setting] Linux Scanning Tool...
- Page 137 7) [Gamma] 8) [Noise Optimization] 9) [Split] 10) [Rotate] 11) [Automatic Correction] 12) [Fill Inward] 13) [Export Multiple Pictures] 14) [Delete Blank Pages] 15) [Background Removed] 16) [Save Directory] 17) [File Name] 18) [Compressed] 19) [Save Format] Click [Apply] to save the parameters When selecting USB: ...
-
Page 138: Scan To Ocr
If the scanning tool is not started, the control panel of the TOEC device will prompt "The scanning tool is not opened". (1) Click [Start] The device starts to scan, and the scanned image will be saved to the target folder of the scanning tool on the computer. 7.1.3 Scanning to OCR Convert characters in scanned documents to text, generate searchable document formats such as txt/PDF and save them to... - Page 139 (1) Select communication method To OCR > USB/NET (1) If you have specific parameter requirements for the generated file, you can set the scanning file parameters in advance through the computer scanning tool. Windows scanning tool 1) [Function] Specify OCR...
- Page 140 2) [File Format] 3) [Scan Type] 4) [Brightness] 5) [Contrast] 6) [Gamma] 7) [Save Settings] 8) [Auto-correction] 9) [Background Removed] Linux scanning tool 1) [Scan Type] 2)[Contrast] 3)[Brightness] 4)[Gamma] 5)[Save Directory] 6)[file Name] 7) [Save Format] Specify OCR Click [Apply] to save the parameters.
- Page 141 When selecting USB: Windows side computer must keep AS-MFP1030DNW Local Scanning Tool] always on. On the Linux side of the computer, keep the "TOEC-A4 scanner program" always in the starting state. When choosing NET: Windows side computer must keep AS-MFP1030DNW Network Scanning Tool] started.
-
Page 142: Windows Scan Job
7.2 Windows Scanning Job Taking the Windows 7 system as an example, click (Start) > All Programs > AS-MFP1030DNW (Folder) > AS-MFP1030DNW Local Scan (or AS-MFP1030DN_NET network scan), start the scanner. Next, the standard mode scanning method will be described. -
Page 143: Scan Using Standard Mode
7.2.1 Scan using standard mode The following example describes how to use standard mode for a scan job. 7.2.1.1 Scan settings for standard mode (1) Function "Function" has the following three methods to choose from: When [Scan to Image] is selected: Scan the original document into a picture. - Page 144 Check [Open the save path after scanning] on the main interface, and the system will automatically pop up the save path after the scan is completed. 【Folder】File naming method settings Users can define the naming method of scanned file names according to actual needs.
- Page 145 Flat Plate The device scans general manuscripts and manuscripts Reflection of non-transparent materials from the scanner glass Draft platform. ADF(Single The device scans one side of the document from the Sided) ADF. (5)Image Splitting This function is only used when the scanning type is "Flatbed Reflective Draft"...
- Page 146 (8) Scan Mode "Scan Mode" has the following three methods to choose from: Scan files in 24-bit RGB color. This mode uses more Color storage space. Scan documents in 256 different shades of gray to give Gray Scale black and white gradation and depth. Black and Scan documents in black and white.
- Page 147 details, you still have to increase the resolution. When you scan a large-sized color picture at a higher resolution (600 dpi), it will significantly increase the scanning time, increase the file size, and consume a lot of system resources. Therefore, when you need to scan in both color mode and higher resolution, it is recommended that you scan a small portion.
- Page 148 curves. You can change the tonal range of the selected color channel by adjusting the Gamma value. Gamma value is mainly used to measure the brightness of color. The larger the Gamma value, the brighter the color. Drag the slider left or right to decrease or increase the Gamma value.
- Page 149 white When [Split] is selected: Provides setting of "equal split" number of parts, the minimum is 2 and the maximum is 10. (14)A utomatic cropping This function is only available in tablet mode. In tablet mode, multiple small-sized documents are scanned at one time and multiple images are automatically cropped and output.
- Page 150 This function supports scanning in image formats and outputs black and white, grayscale, color images or grayscale, black and white images at the same time (black and white mode is not available). (18)Delete background This function supports processing the original background color to white or a similar solid color.
- Page 151 Click (Start) > All Programs > AS-MFP1030DNW (folder) > MP3050 Local Scan. Network scanning tool Click (Start) > All Programs > AS-MFP1030DNW (folder) >AS-MFP1030DNW_NET Network Scanner. (3) Set standard mode scanning parameters (4) Click Scan The device starts scanning, and the scanned images will be saved in the destination folder.
-
Page 152: 2View Scan Logs
7.2.2 Check Scan Logs After the scan is completed, you can view the scan records according to the scan log. (1) Start the [View Log] tool Click (Start) > All Programs > AS-MFP1030DNW (Folder) > View Log. (1) Enter account and password The initial user name is "admin"... -
Page 153: 3Troubleshooting And Support
Network scan log 7.2.3 Troubleshooting and Support 7.2.3.1 Find Scanner Exceptions Refresh the device list and the scanner cannot be found. Please check the following items: Whether all equipment protection parts have been removed. Whether the interface cable is correctly connected to the device and computer. -
Page 154: Linuxscan Job
For wired network connections, replace the LAN interface cable with a new one. Use other LAN ports on the hub. Uninstall and reinstall the printer driver Linux Scanning Job Taking the Union Tech UOS system as an example, click "TOEC A4 All-in-One Startup Tool" in the start menu. Start the "TOEC-A4 Scanner Program". -
Page 155: Scan Using Standard Mode
7.3.1 Using Standard Scan Mode The following example describes how to use standard mode for a scan job. 7.3.1.1 Scan Settings in Standard Mode Basic Settings (1) Find the Scanner This function can find the currently connected printer device, and the found device will be loaded into the scanner drop-down list on the left. - Page 156 (2) Add Manually This function is mainly used to connect network scanners across network segments. If the printer device and the connected computer do not belong to the same network segment, you can use this function to easily connect devices on different network segments.
- Page 157 (3)Scan type There are three options for "Scan Type": The device automatically detects the scan source. When Automatic there are documents to be scanned on both the ADF and Detection the scanner glass platform, selecting this option will give priority to scanning the documents in the ADF. Flat Plate The device scans general manuscripts and manuscripts Reflection...
- Page 158 black and white gradation and depth. Black and Scan documents in black and white. It is recommended to White use this mode to scan text documents. (5)Resolution "Resolution" has the following four ways to choose from: 200dpi Suitable for data such as common text or tables 300dpi Suitable for data such as common text or tables and OCR recognition...
- Page 159 mode and higher resolution, it is recommended that you scan a small portion. (6) Paper Size The following four sizes are available for "Paper Size". A4 纵向 A5(5.83×8.27’’)纵向 B5(JIS) 182×257mm 纵向 信纸 信纸(8.5×11’’)纵向 (7) Contrast The higher the contrast, the sharper the image; the lower the contrast, the blurrier the image.
- Page 160 Image gamma values are used to adjust the color of scanned to computer images. Gamma values are expressed as smooth curves. You can change the tonal range of the selected color channel by adjusting the Gamma value. Gamma value is mainly used to measure the brightness of color.
- Page 161 (3) Merger and Split This function supports splitting pictures and documents, and users can choose vertical splitting or horizontal splitting according to actual needs. (4)Rotation This function supports rotating pictures, and can rotate 0 degrees, 90 degrees, 180 degrees, and 270 degrees counterclockwise.
- Page 162 black and white images at the same time (black and white mode is not available). (9) Multi-edge Cutting This function is only available in tablet mode. In tablet mode, multiple small-sized documents are scanned at one time and multiple images are automatically cropped and output. Generally used for scanning multiple business cards and ID cards.
- Page 163 Generally select the default template (default), the "New" button on the right can add a template, and the "Delete" button can delete the selected template. (2) Save Directory The default save path is /home/【current user name】 /Scanner/MP3050DN/. The "Add" button on the right can add a new path, and the "Delete"...
- Page 164 10001, 10002 2-digit display, fill in the front with 0: 01, 02, 10, 99, 100, 1-digit display, automatically add 1: 1, 2, 10, 99, 100 This function is very convenient for users to scan unused files, for example: test file @0001.jpg. (4)Save format ...
- Page 165 High-definition Original image quality compressed to 70% Higher quality Original image quality compressed to 80% Super high quality Original image quality compressed to 90% Highest quality Original picture quality is not compressed (6) Organize Manually This feature is available when the save format is Document type.
- Page 166 Scan status (1)Scan status This window can display scanner status, exception information, information prompts, etc. during the scanning process. 7.3.1.2 Execute scan tasks Before scanning, please ensure that the connection between the scanner and the PC is smooth, click the [Find Scanner] button, and start scanning after finding the MP3050DN scanner.
-
Page 167: View Scan Logs
The device starts scanning. [Scan Status] will display the scanner status, exception information, prompts and other information during the scanning process. The scanned images will be saved to the target folder. 7.3.2 Check scan logs After the scan is completed, you can view the scan records according to the scan log. - Page 168 (3)Check log...
-
Page 169: Troubleshooting And Support
7.3.3 Troubleshooting and support 7.3.3.1 Check the scanner exceptions If the scanner cannot be located, check the following items: Whether all equipment protection parts have been removed. Whether the interface cable is correctly connected to the device and computer. ... - Page 170 Replace with a new USB cable. Use another USB port. For wired network connections, replace the LAN interface cable with a new one. Use other LAN ports on the hub.
-
Page 171: 八、Copy
8.Copy 8.1 General copying 1. Make sure you have the correct size of paper loaded in the paper tray. 2. Do one of the following: Place the original face up in the ADF. (If copying multiple pages, it is recommended to use the ADF.) Place the original face down on the scanner glass. - Page 172 3. Click [Copy], the LCD will display: 4.Change the copy settings if necessary. (Number of copies) You can enter the required number of copies in any of the following ways: – Press on the LCD screen. – Press the numbers on the control panel. [Options] ...
-
Page 173: Enlarge Or Reduce Copy
5. Press [Start] To stop copying, press cancel 8.2 Enlarge or Reduce Copy Select an enlargement or reduction ratio to adjust the size of copied data 1. Load originals. 2. Click [Copy]. 3. Enter the required number of copies. 4. Press [Options] > [Zoom in/out]. -
Page 174: Sort Copy
5. Swipe the screen up or down to display the available options and press the desired option. 6. Do one of the following: 7. If you select [Enlarge] or [Reduce], press the enlargement or reduction ratio you want to use. 8. -
Page 175: N-In-1 Copy With
If the original is placed in the ADF, the machine scans all pages before printing. 7. If you are using a scanner glass, repeat the following steps to scan each page of the original: Place the next page on the scanner glass and press [Continue] to scan the page. -
Page 176: Duplex Copy
1. Press [Start]. If the original is placed in the ADF, the machine scans all pages before printing. 2. If you are using the flatbed scanner, repeat the following steps to scan each page of the original: Place the next page on the scanner glass and press [Continue] to scan the page. -
Page 177: Change The Copy Quality
•When making manual duplex copies of two-sided documents, use the scanner glass. Portrait Single-sided to double-sided (long edge flip) Single sided to double sided (short edge page turning) 8.6 Change copy quality Choose the copy quality according to the type of document you are copying. -
Page 178: Change The Copy Density
4. Press [Options]>[Duplex Copy]. 5. Select long edge flipping/short edge flipping as needed. 6. After completion, press to return to the previous menu. 7. Press [Start]. If the original is placed in the ADF, the machine scans all pages and then starts duplex printing. 8. -
Page 179: Change The Copy Contrast
If the original is placed in the ADF, the machine scans all pages and then starts duplex printing. 8. If you are using a scanner glass, repeat the following steps to scan each page of the original: Place the next page on the scanner glass and press [Continue] to scan the page. -
Page 180: Copy Of Id Card (2 In 1)
After scanning all the pages, press [Finish]. 8.9 Copy of ID card (2 in 1) Use the [2 in 1 ID card copy] function to copy both sides of an ID card onto the same page in the original size. 1. -
Page 181: Copy Options
2. Click [2-in-1 ID card copy]. 3. Enter the required number of copies. 4. Press [Start]. The device will scan one side of the ID card. 5. After the device scans the first side, turn over the ID card and place it in the upper left corner of the flatbed scanner as well. - Page 182 Photo Bill 100% 200% 141% A5→A4 97% LTR→A4 [zoom 94% A4→LTR in/zoom out] 91% full page 70% A4→A5 Customize(25-400%) Increasing the density makes the text darker. [Density] Decreasing the Density makes the text lighter. Increase the contrast to make the image clearer.
- Page 183 2 in 1 (Horizontal) Single-sided to double-sided (long edge flip) [Duplex copy] Single sided to double sided (short edge page turning)
-
Page 184: 九、Troubleshooting
9.Tr ooting oublesh According to this section, solve the problems you may encounter when using this device. According to the fault information displayed on the LCD or status monitor of the device, you can quickly find the problem and solve most of the problems by yourself. -
Page 185: Identify Problems
3. Whether the paper is correctly placed in the paper tray. 4. Check whether the interface cable is properly connected to the device and computer. 5. Check the device status displayed on the LCD screen or the ASTA status monitor on the computer. -
Page 186: Paper Jam Handling
Paper Jam Handling If the device has paper feeding problems during printing, scanning, or copying, please follow the fault messages displayed on the device's LCD screen or status monitor to solve the relevant problems by yourself. Fault Reason Measures Information When printing on the paper fed from the Check Paper... - Page 187 has passed, although the specified time after front cover, the print sensor detects that the paper has take out the passed, the print sensor is still in the state of toner paper passing cartridge unit completely, and take out the paper jam After the paper output sensor detects that the Open the back paper has passed, although the specified time...
- Page 188 state of paper passing the paper jam At the end of the feed scanning process, the Open the top ADF sensor still does not detect the cover, remove document leaving jammed Document manuscript, feeder jam and reload the manuscript At the end of the feed scanning process, the Open the top ADF sensor still does not detect the cover, remove...
-
Page 189: Paper Jam In The Paper Box
9.2.1 Paper Jam In The Paper Box 1. Pull the tray completely out of the device. 2. Slowly pull out the jammed paper. Pull the jammed paper down with both hands to easily remove the jammed paper. 3. Replace the tray into the device. -
Page 190: Paper Jam At The Rear Of The Device
9.2.2 Paper Jam At The Rear Of The Device If the LCD or status monitor of the device shows that the paper jam is at the rear of the device, perform the following steps: 1. Keep the equipment on and wait for about 10 minutes to allow the internal fan to cool the hot parts in the equipment. - Page 191 The temperature of parts inside the equipment will be very high. Please wait for the equipment to cool before touching the internal parts. 4. Gently pull the jammed paper out of the fixing unit with both hands.
- Page 192 5. Close the rear cover of the fuser unit. 6. Close the rear cover until it locks in the closed position.
-
Page 193: Paper Jam Inside The Device
9.2.3 Paper Jam Inside The Device If the LCD display or status monitor of the device shows that the paper jam position is inside the device, perform the following steps: 1. Open the front cover. 2. Remove the toner cartridge. - Page 194 3. Slowly pull out the jammed paper. 4. Install the toner cartridge into the device.
- Page 195 5. Close the front cover.
-
Page 196: Paper Jam In Double-Sided Unit
9.2.4 Paper Jam In Double-sided Unit If the LCD display or status monitor of the device shows that the paper jam position is in the double-sided unit, perform the following steps: 1. Pull the tray completely out of the device. 2. - Page 197 3. If there is no paper jam in the duplex unit, open the back cover.
- Page 198 4. Gently pull the jammed paper out of the back of the device with both hands. 5. Close the rear cover until it locks in the closed position. 6. Close the duplex unit. Replace the tray into the device.
- Page 199 9.2.5 Scanning and copying jammed documents If the machine's LCD or status monitor shows a scan/copy jam or scan/copy rejection failure, open the top cover and remove the jam.
-
Page 200: 十、Routine Maintenance
10.Routine Maintenance This chapter solves your daily maintenance problems during use and helps to extend the service life of the printer. 10.1 Replace Toner 1. Make sure the device is powered on. 2. Open the front cover. 3. Remove the toner cartridge from the device. - Page 201 4. Remove the toner cartridge from the drum unit. 5. Unpack the new toner cartridge. 6. Remove the protective cover.
- Page 202 7. Pull out sealing strip. 8. Install the new toner cartridge into the drum frame until it locks into place and clicks. Make sure the toner cartridge is properly loaded, otherwise it may deviate from the drum. 9. Replace the toner cartridge unit into the device.
-
Page 203: Replace Drum Unit
10. Close the front cover of the equipment. 10.2 Replace Drum unit 1.Make sure the device is powered on. 2.Open the front cover. - Page 204 3.Remove the toner cartridges from the device. 4.Remove the toner cartridge from the drum unit. 5.Unpack the new drum unit. 6.Remove the protective cover and then the isolation paper.
- Page 205 7.Install the toner cartridge into the new drum unit until it locks into place and clicks. Make sure the toner cartridge is properly loaded, otherwise it may deviate from the drum. 8.Put the toner cartridge back to the device.
-
Page 206: Cleaning Equipmen
9.Close the front cover of the equipment. 10.3 Cleaning Equipment Please use a soft, lint-free dry cloth to clean the outside and inside of the equipment regularly. When you replace the toner cartridge or drum unit, make sure to clean the inside of the device. If the printed page is stained by toner, please use a soft, lint-free dry cloth to clean the inside of the device. - Page 207 Do not use isopropyl alcohol to wipe the dust on the operation panel, otherwise the panel may break. To avoid printing quality problems, do not touch the shaded part shown in the figure below. Toner cartridge: Drum unit:...
-
Page 209: Clean The Toner Drum Unit
10.3.1 Clean The Toner Drum Unit 1. Power off the device. 2. Open the front cover. 3. Remove the toner cartridge from the device. 4. Remove the toner cartridge from the toner drum unit. - Page 210 5. Turn the drum frame to the other side as shown in the figure below. Make sure that the gear of the toner drum unit is on the left. 6. Please gently wipe the toner drum surface with a dry cotton swab until the mark is completely removed.
- Page 211 Do not use sharp objects or any liquid to clean the surface of the toner drum. 7. Install the toner cartridge into the drum frame until it locks into place and clicks. Make sure the toner cartridge is properly loaded, otherwise it may deviate from the drum.
- Page 212 9.Close the front cover of the equipment. 10.Press to turn on the device.
-
Page 213: Cleaning The Take-Up Roller
10.3.2 Cleaning The Take-Up Roller 1.Press and hold to power off the device. 2.Pull the tray completely out of the device. 3.If there is paper or object stuck in the paper box, please take it out. 4.Screw out the lint-free cloth soaked in warm water, and then use this cloth to wipe the dust on the separation pad in the paper box. - Page 214 5.Wipe the dust on the take-up roller inside the equipment. 6.Reload the paper, and then close the paper tray back into the device. 7.Press to turn on the device.
Need help?
Do you have a question about the ASTA-AS-MFP1030DNW and is the answer not in the manual?
Questions and answers