
Subscribe to Our Youtube Channel
Related Manuals for ASTA ASTA-AS-P1030DN


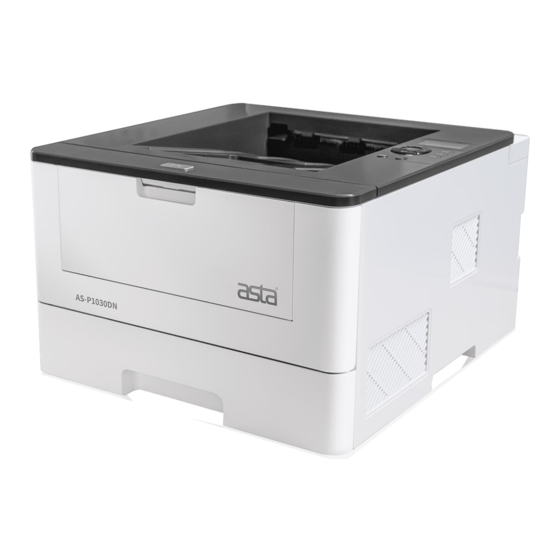
Summary of Contents for ASTA ASTA-AS-P1030DN
- Page 1 Operation Manual of ASTA-AS-P1030DN Laser Printer Special Black and White Double-sided Please read this manual carefully before installing and using this product.
-
Page 2: Table Of Contents
MENU 1.Product Safety Instructions ............1 1.1 Electrical Satety .............2 1.2 Installation Safety ............4 1.3 Operation Safety ............6 1.4 Consumable Safety ............8 1.5 Name And Content Of Harmful Substances In Products10 1.6 Chinese Environmental Labeling Reminder ....12 2.Quick Installation Instructions ..........12 2.1 Machine Installation Instructions ........ - Page 3 5.1.1 Load Trays ............40 5.1.2 Loading The Manual Feed Tray .......43 5.2 Paper Setting ............... 45 5.2.1 Change Paper size and paper type ....45 5.2.2 Use special paper ..........45 6.Windows Print Job ..............46 6.1 Enable Printer .............. 47 6.2 Print A Document ............47 6.3 Print Settings ...............
-
Page 4: Product Safety Instructions
Failure to follow these instructions may increase the risk of fire, electric shock, burn or suffocation. ASTA will not be responsible for any damage caused by the user's failure to follow the instructions in this manual. -
Page 5: Electrical Satety
Warn users that if they ignore this Caution information and wrong operation, it may cause human injury or damage to the machine. 1.1 Electrical Safety Warning 1. This product shall be connected to the AC power supply within the range specified on the nameplate. Please check the nameplate of this product to confirm the rated current and voltage. - Page 6 If the power line is damaged or the insulated wire is exposed, please contact ASTA sales representative for replacement. Warning 1. Before cleaning this product, please turn off the machine power and unplug the power plug. Working with the machine power on may cause electric shock.
-
Page 7: Installation Safety
If any abnormality is found, first turn off the power supply of this product and unplug the power plug, and then contact the local ASTA representative. 6. After the power switch of this product is turned off, zero energy consumption can be achieved only when the power plug is unplugged. - Page 8 Where the sun shines Near cookers or humidifiers 2. Place the product in a well-ventilated place. Do not block the vent of the product to avoid fire due to overheating. Please make sure to leave room for ventilation and plugging in and out the power plug.
-
Page 9: Operation Safety
1.3 Operation Safety Warning 1. This product has safety design, and operators are not allowed to touch dangerous parts. The dangerous parts are equipped with covers or baffles that can be removed only with tools to limit the access of operators. To avoid electric shock and personal injury, do not remove these covers or baffles. - Page 10 Heavy weight If liquid seeps or metal parts slide into the product, electric shock or fire may be caused. 4. Do not use conductive paper, such as origami paper, carbon paper or coated paper with conductive layer. In case of paper jam, these papers may cause short circuit and eventually lead to fire.
-
Page 11: Consumable Safety
Please turn off the power of this product immediately, and then contact the ASTA sales representative for treatment. 4. Please keep good ventilation when operating for a long time or printing in large quantities. In a poorly ventilated room, unpleasant smell will be produced and the air quality in the office will be affected. - Page 12 Caution 1. The toner drum unit and toner cartridge should be kept away from children. If children swallow toner powder by mistake, they should immediately spit out the toner powder, rinse with water, and drink more water, and contact a doctor as soon as possible.
-
Page 13: Name And Content Of Harmful Substances In Products10
1.5 Name And Content Of Harmful Substances In Products Hazardous Substances Polybromi Polybromina Merc cadmiu Hexavalent Part Name Lead nated ted diphenyl chromium (Pb) biphenyls ether (Hg) (Cd) (Cr(VI)) (PBB) (PBDE) Left support × ○ ○ ○ ○ ○ unit Right support ×... - Page 14 Low-voltage power circuit × ○ ○ ○ ○ ○ board High-voltage power circuit × ○ ○ ○ ○ ○ board Adapter board × ○ ○ ○ ○ ○ circuit board Printed matter ○ ○ ○ ○ ○ ○ Packaging ○ ○...
-
Page 15: Chinese Environmental Labeling Reminder
1.6 Chinese Environmental Labeling Reminder 1. It is recommended to place equipment with noise greater than 63dB in a relatively independent area. 2. Recycled paper can be used. 3. When using or printing a large number of documents for a long time in a room with poor ventilation, ventilation should be timely. - Page 16 !Caution: ☆ When removing the toner cartridge package, follow the prompts on the marking strip: first take out the toner cartridge; then remove the marking strip, sealing strip, and small release paper from the toner cartridge in sequence; then remove the large release paper; finally put the drum unit and toner cartridge back into the printer.
-
Page 17: Windows Driver Installation Instruction
This section takes the Windows 10 (Enterprise Edition) operating system as an example to introduce the installation and uninstall of the printer driver (ASTA-AS-P1030DN). 2.2.1 Install Local Printer Driver The installation of drivers requires administrator privileges. - Page 18 During installation, if the "Find New Hardware Wizard" dialog box automatically pops up, click "Cancel". Turn off the prompt "There was a problem during hardware installation. Your new hardware may not work properly". (1) Read the files in the U disk, double-click the "AS-P10130DN_setup.exe"...
- Page 19 (2) Select "Install the local print driver" and click "Next". (3) Successfully install the local print driver, click "Next".
-
Page 20: Install Network Printer Driver
(4) Prompt to restart the computer. It can be unchecked, and the computer will not be restarted by default. Click "Finish" to complete the installation. 2.2.2 Install Network Printer Driver Before installing the driver, connect the computer to the network interface of the printer with a network cable, connect the computer to the USB interface of the printer with a USB cable, power on the printer and turn on the power switch. - Page 21 Please install the local driver according to "2.2.1 Install local printer driver" (if the local printer driver is installed, you can skip this step). Turn off the prompt "There was a problem during hardware installation. Your new hardware may not work properly".
- Page 22 (2) Select "Use the IP address below" to set the static IP. The default static IP address is "192.167.100", the default subnet mask is "255.255.255.0", and the default gateway is "192.167.17.1". Click "Save network parameter settings" to save and write the current static IP of the printer. [Special Prompt] The user can customize the IP and other information.
- Page 23 (3) Click "Close" to exit the current interface. (4) Open your computer's Network and Sharing Center. (5) Click "YT2".
- Page 24 (6) Click Properties to find and double-click to open ipv4. (7) Select "Use the following IP address" to set the network IP information of the computer. The default IP information is as shown below.
- Page 25 [Special prompt] The printer IP address and the computer network IP address should be set to the same network segment, and the IP of other PCs in the LAN should not conflict with the printer IP. (8) After input, click "Confirm" to close all dialog boxes and connect to the currently set network.
- Page 26 (10) Select "Install network print driver". Click "Next". (11) Enter the printer IP address (192.167.100) set in step (2) in the dialog box of setting network printer, and click "OK".
- Page 27 (12) Successfully install the network print driver, click "Next". (13) Prompt to restart the computer. It can be unchecked, and the computer will not be restarted by default. Click Finish.
- Page 28 ! Caution: ☆ After installing the printer driver, try not to change the name of the printer, otherwise it will easily lead to problems with driver uninstallation and reinstallation.
- Page 29 2.2.3 Uninstall Printer Driver Uninstalling the driver requires administrator privileges. Please log on to the computer using the administrator account. Close all running applications. 1. Read the files in the U disk, double-click the "Setup.exe" driver, and click "Next".
- Page 30 2. Select the print driver you want to delete and click Next. 3. Wait for the driver to be uninstalled successfully, and click "Next".
- Page 31 4. Prompt to restart the computer after uninstallation. "Restart the computer now" is selected by default.
-
Page 32: Tool
2.2.4 AS-P1030DN_Instructions for the IP Settings Tool The "AS-P1030DN laser printer parameter setting" tool (referred to as the IP setting tool for short) can set two IP address states, namely, automatically obtaining the IP address (i.e. turning on the printer DHCP function) and static IP address (i.e. - Page 33 2) Select "Obtain IP address automatically" and click "Save network parameter settings". 3) Wait a few seconds and click "Find Device". At this time, the IP address status has been changed to "Obtain IP address automatically", and the printer DHCP status has been set to on. (2) When selecting a static IP address, the specific operation process is as follows: 1) Click "Find Device"...
- Page 34 3) Wait a few seconds and click "Find Device". At this time, the IP address status has been changed to "Use the IP address below", and the static IP information has been changed to the latest information. At this time, the printer DHCP status has been set to off.
-
Page 35: Troubleshooting And Support
2.2.5 Troubleshooting and Support 2.2.5.1 Failed To Get IP Automatically After Installing Network Print Driver Some versions of Windows system may have the problem that the network printer cannot automatically obtain the printer IP address when setting up the network printer driver. This problem may be caused by the following aspects: The network connection between the printer and the computer is abnormal. - Page 36 Windows 8 and the versions below Windows 8 when setting the computer network IP, but the customized IP addresses are defined in the network property IPV4. If you have any questions during the use, please contact the system provider or the sales or after-sales personnel of ASTA.
-
Page 37: Product Specification
3.Product Specification 3.1 General Specifications Printer Model AS-P1030DN Printing Method Laser Printing Memory 256MB AC 220(1±10%)V,50Hz Power Supply ±1HZ Power Consumption Rated Power About 900W Size Unit: mm * 375 ** 246.8 *** 375.6 Weight(Including Consumables) About 10.0kg Noise Work ≤58dB(A)... -
Page 38: Print Media Specifications
3.2 Print media specification Paper Plain paper, recycled paper Type Paper Size A4、A5、B5、16K、Letter、32K Carton Paper 70 ~ 90 g/m2 (Standard) Weight Maximum Up to 250 sheets of 70 g/m2 plain Paper paper Capacity Paper Paper Plain paper, recycled paper, thin Input Type paper, thick paper... -
Page 39: Print Specifications
3.3 Print specifications Automatic Duplex Printing Simulation Language Resolving Power Up to 600 dpi Single-Sided 30 ppm Printing Printing Speed Duplex Printing 15 ipm First Page Printing Time Up to 8 seconds 4.General Information This chapter will introduce the status information of the operation panel and LCD of the product. -
Page 40: Operation Panel Overview
4.1 Operation Panel Overview 1. LCD display Display relevant information to help you set up and use this product. 2. Data indicator When the data indicator flashes, it indicates that the device is receiving data or printing. - Page 41 3. Power indicator When the power indicator is always on, it means that the device is in standby or working state; when the power indicator is flashing, it means that the device is in sleep state; When the power indicator is off, it means that the device is not started and is turned off.
-
Page 42: Status Information
(2) Press this key to enter a number, or to increase or decrease the number. Press OK when the desired number appears. 10. Menu Press this key to open the device menu for corresponding print settings and device settings. Prompt: After the device enters hibernation, short press any key to end hibernation. -
Page 43: Paper Handling
5.Paper Handling This chapter will introduce a series of settings such as paper type and paper loading method supported by this product. 5.1 Load Paper 5.1.1 Load Trays When loading paper of other sizes in the paper tray, you must also change the paper size settings in the device or on the computer. - Page 44 3. Fully unfold the stacked paper. 4. Load the paper into the tray with the printing side down. When using letterhead paper or preprinted paper, load the paper in the correct direction as shown in the illustration. Single-sided printing Duplex printing Face down, top facing the Face up, bottom toward the front of the carton...
- Page 45 Do not place paper of different sizes in the paper tray at the same time, otherwise it may cause paper jam or paper feeding error. 5. Make sure that the paper is under the maximum paper capacity mark (▼). Paper jam will occur if the paper tray is too full.。...
-
Page 46: Loading The Manual Feed Tray
8. Send the print job to the device. 5.1.2 Loading The Manual Feed Tray When loading other sizes and types of paper in the manual feed tray, you must also change the paper size and paper type settings in the device or on the computer. 1. - Page 47 3. Load the paper into the manual feed tray with the printing side up. When using letterhead paper or preprinted paper, load the paper in the correct direction as shown in the illustration. Single-sided printing Duplex printing Face up, top first Face down, bottom first 4.
-
Page 48: Paper Setting
5.2 Paper Setting 5.2.1 Change Paper size and paper type When loading other sizes and types of paper in the paper tray or manual feed tray, you must change the paper size and paper type settings on the LCD screen at the same time. 5.2.2 Use special paper The sample paper must be tested before purchase to ensure the ideal printing effect. -
Page 49: Windows Print Job
If any of the above types of paper is used, the equipment may be damaged. The resulting damage is not within the scope of warranty service of ASTA. Windows Print Job Before printing documents, read the first five chapters and install the printer driver. -
Page 50: Enable Printer
6.1 Enable Printer 1. Confirm that the power cable and USB cable are connected correctly. 2. Start the computer. To install the printer driver, see "2.2 Driver Installation Instructions". 3. Turn on the printer power switch. The status indicator and alarm indicator flash once, and the printer enters the standby state. - Page 51 2. In the Print dialog box, click the Name drop-down list box and select AS-P1030DN.
- Page 52 3. Make sure you have the correct size of paper in the tray. 4. Select the desired print page in the page range. 5. Enter the required number of copies (1~999) in the number field. 6. Select the scaling scale, version number, etc. in the scaling selection.
- Page 53 8. Select the source and type of paper in Properties - Paper/Quality.
- Page 54 9. Select the paper size, print resolution and other information in Properties - Advanced. 10. Change other printer settings if necessary. 11. Click OK. 12. Complete the print operation.
-
Page 55: Print Settings
6.3 Print Settings 6.3.1 Basic Option 1. Name Select the printer driver used to distribute the print job to the specified printer according to customer requirements. 2. Page Range All: print the entire document (including blank pages). Current page: print the page displayed on the screen. - Page 56 Page range: enter the required number of pages to be printed in the blank space, and issue the specified page number printing job. 3. Copies Enter the number of copies you want to print (1~999) in this field. 4. Collate Select this option to print multiple multi-page documents in the original page order.
-
Page 57: Properties Layout
6.3.2 Properties - Layout 1. Orientation Select the direction of the printout (portrait or landscape). 2. Print on Both Sides Select whether to print on both sides, and select whether to flip the printed paper from the long side or from the short side. -
Page 58: Properties - Paper/Quality
6.3.3 Properties - Paper/Quality 1. Paper source Select the paper source setting according to the printing conditions or intention. 2. Media Select the type of media you want to use. For best printing results, the device automatically adjusts the print settings based on the selected media type. -
Page 59: Properties - Other Settings
6.3.4 Properties - Other Settings 1. Zoom options Adjust the page size by adjusting the zoom ratio. 2. Watermark... - Page 60 Watermark printing can be set here.
-
Page 61: Advanced Document Settings
6.3.5 Advanced Document Settings 1. Paper size Select the paper type. 2. Copies Set the number of printed copies. 3. Print quality Select the desired print resolution. Because print quality is related to speed, the higher the quality, the longer it takes to print the document. -
Page 62: Cancel The Print Job
4. Image processing High quality printing can be started here. 5. Rotate 180 degrees Select this function to rotate the printed content by 180 degrees.。 6.4 Cancel The Print Job Press "Clear" to cancel the current print job. 7.Tr ooting oublesh According to this section, solve the problems you may encounter when using this device. -
Page 63: Identify Problems
3. Whether the paper is correctly placed in the paper tray. 4. Check whether the interface cable is properly connected to the device and computer. 5. Check the device status displayed on the LCD screen or the ASTA status monitor on the computer. -
Page 64: Paper Jam Handling
7.2 Paper Jam Handling If the device has paper feeding fault during printing, please follow the fault information displayed on the LCD or status monitor of the device to solve the relevant problem by yourself. Fault Reason Measures Information When printing on the paper fed from the Check Paper paper tray, although the paper pickup sensor... - Page 65 the print sensor detects that the paper has take out the passed, the print sensor is still in the state of toner paper passing cartridge unit completely, and take out the paper jam After the paper output sensor detects that the Open the back paper has passed, although the specified time cover,...
-
Page 66: Paper Jam In The Paper Box
7.2.1 Paper Jam In The Paper Box 1. Pull the tray completely out of the device. 2. Slowly pull out the jammed paper. -
Page 67: Paper Jam At The Rear Of The Device
Pull the jammed paper down with both hands to easily remove the jammed paper. 3. Replace the tray into the device. 7.2.2 Paper Jam At The Rear Of The Device If the LCD or status monitor of the device shows that the paper jam is at the rear of the device, perform the following steps: 1. - Page 68 !Caution : The temperature of parts inside the equipment will be very high. Please wait for the equipment to cool before touching the internal parts. 4. Gently pull the jammed paper out of the fixing unit with both hands.
- Page 69 5. Close the rear cover of the fuser unit. 6. Close the rear cover until it locks in the closed position.
-
Page 70: Paper Jam Inside The Device
7.2.3 Paper Jam Inside The Device If the LCD display or status monitor of the device shows that the paper jam position is inside the device, perform the following steps: 1. Open the front cover. 2. Remove the toner cartridge. - Page 71 3. Slowly pull out the jammed paper. 4. Install the toner cartridge into the device.
-
Page 72: Paper Jam In Double-Sided Unit
5. Close the front cover. 7.2.4 Paper Jam In Double-sided Unit If the LCD display or status monitor of the device shows that the paper jam position is in the double-sided unit, perform the following steps: 1. Pull the tray completely out of the device. - Page 73 2. From the front of the device, lift the double-sided unit from the device and take out the jammed paper. 3. If there is no paper jam in the duplex unit, open the back cover.
- Page 74 4. Gently pull the jammed paper out of the back of the device with both hands. 5. Close the rear cover until it locks in the closed position. 6. Close the duplex unit. 7. Replace the tray into the device.
-
Page 75: Routine Maintenance
8. Routine Maintenance This chapter solves your daily maintenance problems during use and helps to extend the service life of the printer. 8.1 Replace Toner 1. Make sure the device is powered on. 2. Open the front cover. 3. Remove the toner cartridge from the device. - Page 76 4. Remove the toner cartridge from the drum unit. 5. Unpack the new toner cartridge. 6. Remove the protective cover.
- Page 77 7. Pull out sealing strip. 8. Install the new toner cartridge into the drum frame until it locks into place and clicks. Make sure the toner cartridge is properly loaded, otherwise it may deviate from the drum. 9. Replace the toner cartridge unit into the device.
- Page 78 10. Close the front cover of the equipment. 8.2 Replace Drum unit 1. Make sure the device is powered on. 2. Open the front cover. 3. Remove the toner cartridges from the device.
- Page 79 4. Remove the toner cartridge from the drum unit. 5. Unpack the new drum unit. 6. Remove the protective cover and then the isolation paper.
- Page 80 7. Install the toner cartridge into the new drum unit until it locks into place and clicks. Make sure the toner cartridge is properly loaded, otherwise it may deviate from the drum. 8. Put the toner cartridge back to the device.
-
Page 81: Replace Drum Unit
9. Close the front cover of the equipment. 8.3 Cleaning Equipment Please use a soft, lint-free dry cloth to clean the outside and inside of the equipment regularly. When you replace the toner cartridge or drum unit, make sure to clean the inside of the device. If the printed page is stained by toner, please use a soft, lint-free dry cloth to clean the inside of the device. - Page 82 !Caution : Do not use isopropyl alcohol to wipe the dust on the operation panel, otherwise the panel may break. To avoid printing quality problems, do not touch the shaded part shown in the figure below. Toner cartridge: Drum unit:...
-
Page 83: Clean The Toner Drum Unit
8.3.1 Clean The Toner Drum Unit 1. Power off the device. 2. Open the front cover. 3. Remove the toner cartridge from the device. - Page 84 4. Remove the toner cartridge from the toner drum unit. 5. Turn the drum frame to the other side as shown in the figure below. Make sure that the gear of the toner drum unit is on the left.
- Page 85 6. Please gently wipe the toner drum surface with a dry cotton swab until the mark is completely removed. !Caution : Do not use sharp objects or any liquid to clean the surface of the toner drum.
- Page 86 7. Install the toner cartridge into the drum frame until it locks into place and clicks. Make sure the toner cartridge is properly loaded, otherwise it may deviate from the drum. 8. Put the toner cartridge back into the device. 9.
-
Page 87: Cleaning The Take-Up Roller
8.3.2 Cleaning The Take-Up Roller 1. Press and hold to power off the device. 2. Pull the tray completely out of the device. 3. If there is paper or object stuck in the paper box, please take it out. 4. Screw out the lint-free cloth soaked in warm water, and then use this cloth to wipe the dust on the separation pad in the paper box. - Page 88 5. Wipe the dust on the take-up roller inside the equipment. 6. Reload the paper, and then close the paper tray back into the device. 7. Press to turn on the device.
Need help?
Do you have a question about the ASTA-AS-P1030DN and is the answer not in the manual?
Questions and answers