
Related Manuals for GV-INDUSTRIES CVU


Summary of Contents for GV-INDUSTRIES CVU
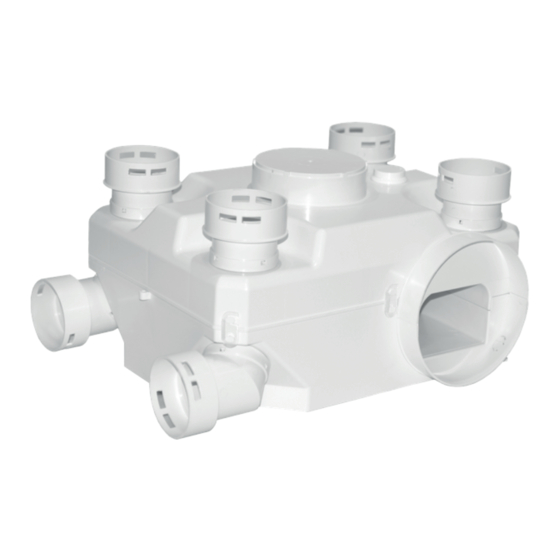
- Page 1 MANUFACTURED BY GV-INDUSTRIES Simples fluxo Single flow MANUAL DE UTILIZAÇÃO USER MANUAL...
-
Page 2: Table Of Contents
PT -ÍNDICE EN -INDEX Important information Informações importantes Scurity precautions Precauções de segurança Application and operating conditions Aplicação e condições de funcionamento Accessories Acessórios Assembly sequence Sequência de montagem Electrical connections Ligações elétricas Maintenance and cleaning Manutenção e limpeza Warranty terms and conditions Termos e condições da garantia Contacts Contatos... -
Page 3: Aplicação E Condições De Funcionamento
Antes de proceder à manutenção do ventilador, isolá-lo da tensão de rede com o disjuntor. Proteger o disjun- tor contra uma operação inadvertida. • A conceção da instalação do ventilador deve impedir a entrada de gás de combustão no compartimento a partir de condutas de exaustão de gás de combustão abertas e de aparelhos que funcionem com as aberturas de gases de combustão e de aparelhos que funcionem com as condutas abertas. -
Page 4: Acessórios
PT - ACESSÓRIOS Acessórios opcionais disponíveis: Bloco de terminais (versão standard). Ligar o ventilador equipado com o bloco de terminais como indicado no diagrama de ligações eléctricas, ver Fig. 2. O ventilador central é ligado e desligado por um interrutor on/off separado instalado na linha de alimentação eléctrica do edifício (e não incluído no produto). -
Page 5: Ligações Elétricas
- Ligue o cabo de alimentação de acordo com o esquema de ligações da respectiva opção de acessórios e fixe-o com as braçadeiras (2) para evitar que seja projetado. - Montar e aparafusar as tampas do sistema eletrónico (1 e 9). - Inserir os anéis (14) e os orifícios de ligação (13) nas aberturas de entrada do ventilador seleccionadas. -
Page 6: Manutenção E Limpeza
PT - MANUTENÇÃO E LIMPEZA ASSISTÊNCIA TÉCNICA E MANUTENÇÃO - Utilizar calçado e luvas de proteção durante a manutenção! - Durante todos os trabalhos de manutenção e conservação, devem ser respeitadas as normas eléctricas e de SST (PN-IEC 60364-3).(PN-IEC 60364-3). - Antes de proceder à... -
Page 7: Important Information
Não eliminar os resíduos de equipamento elétrico juntamente com o lixo doméstico. O símbolo do caixote do lixo barrado com uma cruz neste produto significa que se trata de resíduos de equipa- mentos eléctricos e electrónicos (REEE) no final da sua vida útil e que não deve ser eliminado com o lixo doméstico. -
Page 8: Application And Operating Conditions
The fan may be dangerous if used for purposes other than those intended or if installed by unquali ed personnel or if installed by unquali ed personnel. EN -APPLICATION AND OPERATING CONDITIONS: - The central fan is intended to treat indoor air of normal quality or low dust content (with a particle size < 10 m) with low aggressiveness and humidity. -
Page 9: Assembly Sequence
The operating range of the air humidity sensor is from 0% to 100% relative humidity. The humidity level must be adjusted by means of a knob located on the front of the fan housing. The set includes a two-button switch with a surface mounting box. After turning the left-hand switch to the "ON" position, the fan starts running at 1st speed. -
Page 10: Electrical Connections
FIRST START Starting the central fan can only be carried out with all safety precautions taken and all risks eliminated. Start up the central fan. Check that it works correctly and that the air is treated effectively. Check the operation of the central fan (noise, vibration, energy consumption, possibility to control the rota- tion speed). -
Page 11: Warranty Terms And Conditions
- Clean the impeller and the inside of the fan housing with a damp cloth. - Allow the fan to dry. - Refit the impeller cover and the main fan cover. - Do not use aggressive paint solvents! - Do not clean with a high-pressure cleaner or strong water jets! - Clean carefully to prevent water from entering the motor or terminal box. - Page 12 Fig. 1 CONTROLADOR DE SENSOR DE HUMIDADE SENSOR CONTROLLER HUMIDITY Fig. 2 Baixa velocidade Velocidade média Alta velocidade High speed Low-speed Average speed BRANCO/ white CASTANHO/ brown PRETO/black AZUL/blue AMARELO-VERDE/ yellow-green Fig. 3 Fig. 4 on/off SL IN1 BRANCO / withe CASTANHO/brown SL IN2 impulse...
- Page 13 Ø125 Fig. 5 Ø160 Fig. 6 Empurrar para abrir Push to open...
- Page 14 Fig. 7 conduta flexível Ø 75 Fig. 8 Fig. 9 Opção 1 option 1 GRAMPO DE FIXAÇÃO Fixind Clamp CABO cable...
- Page 15 Opção 1 Fig. 10 option 1 Posição dos furos, para fixação ao teto Position of the holes, for xing to the ceilin Fig. 11 Rodar as saídas conforme a direção da tubagem Rotate the outlets according to the direction of the pipe PT-CONTACTOS | EN-CONTACTS...
-
Page 16: Contatos
PT-CONTACTOS | EN-CONTACTS www.globovac.net Email: comercial@globovac.net Telefone: +351 239 088 948 (Rede Fixa Nacional) Telemóvel: +351 917 239 002 (Rede Móvel Nacional) Morada: Rua da Cerca, Urbanização Madefil, Armazém 10B, Sargento-Mor, 3020-832 Souselas, PORTUGAL www.globovac.com Email: globovac@globovac.com Tel Export: +44 (0) 1823 665 777 Tel UK: +44 (0) 1293 772 165 Mobile: +44 (0) 1293 665 175 Office: Globovac Ltd, 8C Castle Road, Chelston Business Park,...
Need help?
Do you have a question about the CVU and is the answer not in the manual?
Questions and answers